本記事の内容はこの日付時点の情報(ce-2015.11.05-stable)に基づいています。そのため,今後新しいバージョンが提供された場合に,当該記載と矛盾が生じる場合がありますのでご注意ください。また,さわりはじめたばかりで認識誤り等があるかもしれません。おかしい,なんか違う等ありましたらご一報を。
はじめに
Nutanix CEで提供されるハイパーバイザーは,Acropolis Hypervisor(以下,AHV)と呼ばれるKVMをベースとし,Nutanixがカスタマイズしたものです。そこで,KVMがベースならvirshコマンドやVirt-Managerから操作できるのか?どうなるのか?と言うのを簡単に試してみたという話し。
注意事項
Nutanixは,Nutanix CEにおいてvirshでの操作やVirtManagerからの操作は動作保証していません。これらを試す場合は,あくまで自己責任でお願いします。
AHVの概要
AHVは,前述のとおりKVMベースとなっていますが,AHVはにNutanixの手が入っており,KVMにおけるVirt-Managerに相当するPRISMのコンポーネントと合わせて,KVMに比べてかなり豪華なUIと細かな管理機能が提供されています。
また,KVMにおいてたびたび目にするライブマイグレーションの制限(マイグレーション先の名前解決,CPU世代の制限,等)をAHVでは独自に解消しており,KVMに比べるとかなり手軽にライブマイグレーションが可能になっています。
加えて,Virt-Managerと比較すると,Virt-ManagerがVMの作成や変更,起動や停止と言った一部の機能に限定されているのに対して,PRISMは単純なVMの管理の他に,仮想化ホストやゲストVMのログやイベント等を集約し,それらの可視化,リソース管理の可視化等も可能となっていて,より統合的な仮想環境の管理ダッシュボードになっています。
virshとVirt-Managerを試してみる
virsh
結論から言うと,virshでのコマンドは実行できるものの意味をなしません。以下は,お馴染みのvirsh editを実施した様子です。こちらを編集することは可能ですが,Nutanix CEではVMの起動時に,virshで編集対象となるVMの構成が設定されるXMLファイルを必ず決められたテンプレートで上書きし,その上でvirshで操作できない領域からパラメーターを上書き又は加えた上でユーザーVMを起動しているようです。
nutanix@NTNX-4125b3c8-A-CVM:192.168.100.112:~$ virsh edit 31377d91-7b48-493e-9da9-06b28a605f15
<domain type='kvm'>
  <name>31377d91-7b48-493e-9da9-06b28a605f15</name>
  <uuid>31377d91-7b48-493e-9da9-06b28a605f15</uuid>
  <memory unit='KiB'>3145728</memory>
  <currentMemory unit='KiB'>3145728</currentMemory>
  <vcpu placement='static'>2</vcpu>
  <resource>
    <partition>/machine</partition>
  </resource>
  <os>
    <type arch='x86_64' machine='pc-i440fx-rhel7.1.0'>hvm</type>
    <bootmenu enable='no'/>
  </os>
  <features>
    <acpi/>
    <apic eoi='on'/>
  </features>
  <cpu mode='custom' match='exact'>
    <model fallback='forbid'>kvm64</model>
    <topology sockets='1' cores='2' threads='1'/>
    <feature policy='require' name='vme'/>
    <feature policy='require' name='dtes64'/>
    <feature policy='require' name='vmx'/>
    <feature policy='require' name='xtpr'/>
    <feature policy='require' name='ssse3'/>
    <feature policy='require' name='est'/>
    <feature policy='require' name='monitor'/>
    <feature policy='require' name='smx'/>
    <feature policy='require' name='pbe'/>
    <feature policy='require' name='tm'/>
    <feature policy='require' name='sse4.1'/>
    <feature policy='require' name='sse4.2'/>
    <feature policy='require' name='pclmuldq'/>
    <feature policy='require' name='acpi'/>
    <feature policy='require' name='tm2'/>
    <feature policy='require' name='ht'/>
    <feature policy='require' name='dca'/>
    <feature policy='require' name='lahf_lm'/>
    <feature policy='require' name='pdcm'/>
    <feature policy='require' name='pdpe1gb'/>
    <feature policy='require' name='ds'/>
    <feature policy='require' name='aes'/>
    <feature policy='require' name='ss'/>
    <feature policy='require' name='pcid'/>
    <feature policy='require' name='cx16'/>
    <feature policy='require' name='ds_cpl'/>
    <feature policy='require' name='popcnt'/>
    <feature policy='require' name='rdtscp'/>
  </cpu>
  <clock offset='timezone' timezone='UTC'>
    <timer name='pit' tickpolicy='delay'/>
    <timer name='rtc' tickpolicy='catchup' track='guest'/>
  </clock>
  <on_poweroff>destroy</on_poweroff>
  <on_reboot>restart</on_reboot>
  <on_crash>destroy</on_crash>
  <devices>
    <emulator>/usr/libexec/qemu-kvm</emulator>
    <disk type='network' device='lun'>
      <driver name='qemu' type='raw' cache='none' error_policy='stop' io='native'/>
      <source protocol='iscsi' name='iqn.2010-06.com.nutanix:vmdisk-82814bee-81c8-4200-a783-4d1994783098/0'>
        <host name='127.0.0.1' port='3261'/>
      </source>
      <target dev='sda' bus='scsi'/>
      <boot order='2'/>
      <address type='drive' controller='0' bus='0' target='0' unit='0'/>
    </disk>
    <disk type='block' device='cdrom'>
      <driver name='qemu' type='raw' error_policy='stop' io='native'/>
      <target dev='hdb' bus='ide'/>
      <readonly/>
      <boot order='1'/>
      <address type='drive' controller='0' bus='0' target='0' unit='1'/>
    </disk>
    <controller type='usb' index='0'>
      <address type='pci' domain='0x0000' bus='0x00' slot='0x01' function='0x2'/>
    </controller>
    <controller type='scsi' index='0' model='virtio-scsi'>
      <address type='pci' domain='0x0000' bus='0x00' slot='0x04' function='0x0'/>
    </controller>
    <controller type='pci' index='0' model='pci-root'/>
    <controller type='ide' index='0'>
      <address type='pci' domain='0x0000' bus='0x00' slot='0x01' function='0x1'/>
    </controller>
    <interface type='ethernet'>
      <mac address='52:54:00:a8:c3:78'/>
      <script path='no'/>
      <target dev='tap0'/>
      <model type='virtio'/>
      <boot order='3'/>
      <address type='pci' domain='0x0000' bus='0x00' slot='0x03' function='0x0'/>
    </interface>
    <serial type='null'>
      <target port='0'/>
    </serial>
    <console type='null'>
      <target type='serial' port='0'/>
    </console>
    <input type='tablet' bus='usb'/>
    <input type='mouse' bus='ps2'/>
    <input type='keyboard' bus='ps2'/>
    <graphics type='vnc' port='-1' autoport='yes' listen='127.0.0.1'>
      <listen type='address' address='127.0.0.1'/>
    </graphics>
    <video>
      <model type='vga' vram='16384' heads='1'/>
      <address type='pci' domain='0x0000' bus='0x00' slot='0x02' function='0x0'/>
    </video>
    <memballoon model='virtio'>
      <address type='pci' domain='0x0000' bus='0x00' slot='0x05' function='0x0'/>
    </memballoon>
  </devices>
  <seclabel type='dynamic' model='selinux' relabel='yes'>
    <label>system_u:system_r:svirt_t:s0:c30,c122</label>
    <imagelabel>system_u:object_r:svirt_image_t:s0:c30,c122</imagelabel>
  </seclabel>
</domain>
分かる人には分かるけど,分からない人には全然分からない例えで言うと,WindowsのActive Directoryドメインに参加しているPCで,どんなにローカルでレジストリをいじっても,強制的にグループポリシーが降ってきてレジストリが上書きされるイメージでしょうか。至極簡単に言うならば,KVMをラッピングして機能拡張又は現時点においては一部機能限定している(KVMでは触れる部分がAHVでは一部触れないようになっている部分もある)のがAHVと言えるかもしれません。
Nutanix CEのAHVではVMをコマンドから操作や編集する場合は,aCLIを利用します。aCLIで行ったVMへの編集は,virshと異なりしっかり反映されることからも,virshでは操作できなかったAHVにおいて独自にラッピングするVMパラメータ領域を触るにはaCLIを利用する必要があることが分かります。
詳細は後述しますが,AHVはVirt-Managerで見えることから当然のことながらvirshでもVMの一覧等を取得することは可能です。以下の例だとvirshであるノード上のVMの一覧を取得しています。Idの2はCVMになります。
nutanix@NTNX-4125b3c8-A-CVM:192.168.100.112:~$ virsh list
 Id    Name                           State
----------------------------------------------------
 2     NTNX-4125b3c8-A-CVM            running
 3     31377d91-7b48-493e-9da9-06b28a605f15 running
 4     28e67b52-8318-4cad-81ff-757b0d06cbee running
 5     fc38fbd8-5214-48b4-bba1-6f226d3b4523 running
 6     ccbe54b3-834b-4f42-b765-e8b4846ccb0f running
なお,前述のとおり,現時点において,aCLIで編集可能な項目は,基本的にPRISMから編集可能な項目にのみ限られているようです。以下は、aCLIにおけるVM操作に関するコマンドの一覧になります。このうち、VMの作成及び構成変更等に係る主なコマンドは、vm.create,vm.disk_create,vm.disk_delete,vm.disk_update,vm.nic_create,vm.nic_delete,vm.update,vm.update_boot_deviceあたりになります。
<acropolis> vm.
vm.abort_migrate         Aborts an in-progress migration.
vm.clone                 Clones a VM.
vm.create                Creates one or more VMs.
vm.delete                Deletes one or more VMs.
vm.disk_create           Attaches a new disk drive to a VM.
vm.disk_delete           Detaches a disk drive from a VM.
vm.disk_get              Gets details about the disks attached to a VM.
vm.disk_list             Lists the disks attached to a VM.
vm.disk_update           Updates the backing for the specified disk drive.
vm.force_off             Force VM into the powered off state.
vm.get                   Retrieves information about a VM.
vm.list                  Lists all VMs.
vm.migrate               Live migrates a VM to another host.
vm.nic_create            Attaches a network adapter to a VM.
vm.nic_delete            Detaches a NIC from a VM.
vm.nic_get               Gets details about the NICs attached to a VM.
vm.nic_list              Lists the NICs attached to a VM.
vm.off                   Powers off the specified VMs.
vm.on                    Powers on the specified VMs.
vm.pause                 Pauses the specified VMs.
vm.power_cycle           Power cycles the specified VMs.
vm.reboot                Initiates a reboot by issuing an ACPI event.
vm.reset                 Resets the specified VMs.
vm.restore               Restores a VM to a snapshotted state.
vm.resume                Resumes the specified VMs.
vm.resume_all            Resumes all paused VMs.
vm.shutdown              Initiates a shutdown by issuing an ACPI event.
vm.snapshot_create       Creates one or more snapshots in a single consistency group.
vm.snapshot_get_tree     Prints the graph representation of the snapshot history for a VM.
vm.snapshot_list         Gets a list of all snapshots associated with a VM.
vm.update                Updates the specified VMs.
vm.update_boot_device    Updates a VM's boot device.
Virt-Manager
Virt-Managerは,virshとは異なり接続が可能でかつ本当にごく一部ですがAHV上のVMに対する操作が可能です(逆説的に言うとほとんどの操作が不可能)。一部というのは,起動中のVMの一覧が参照可能なことと,起動中のVMにVNCで接続すること,起動中のVMをシャットダウンできることです。
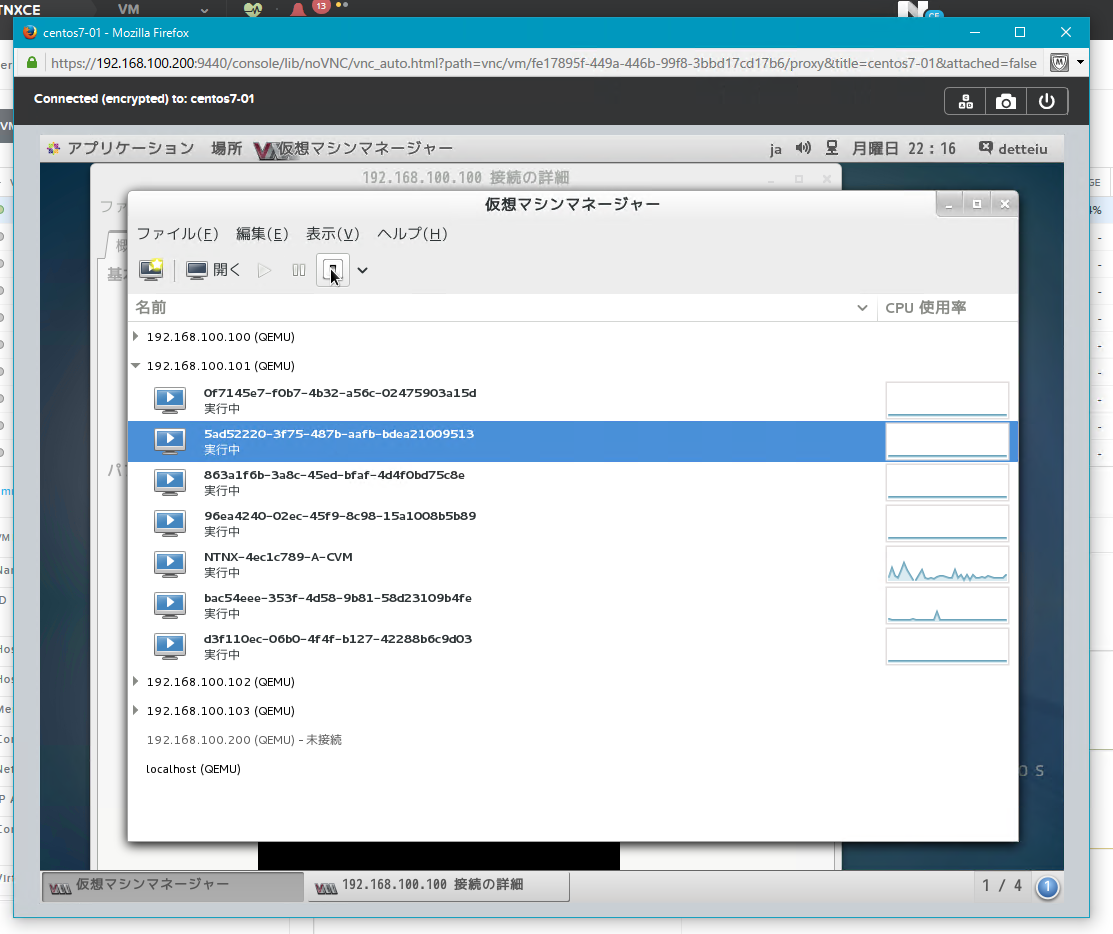
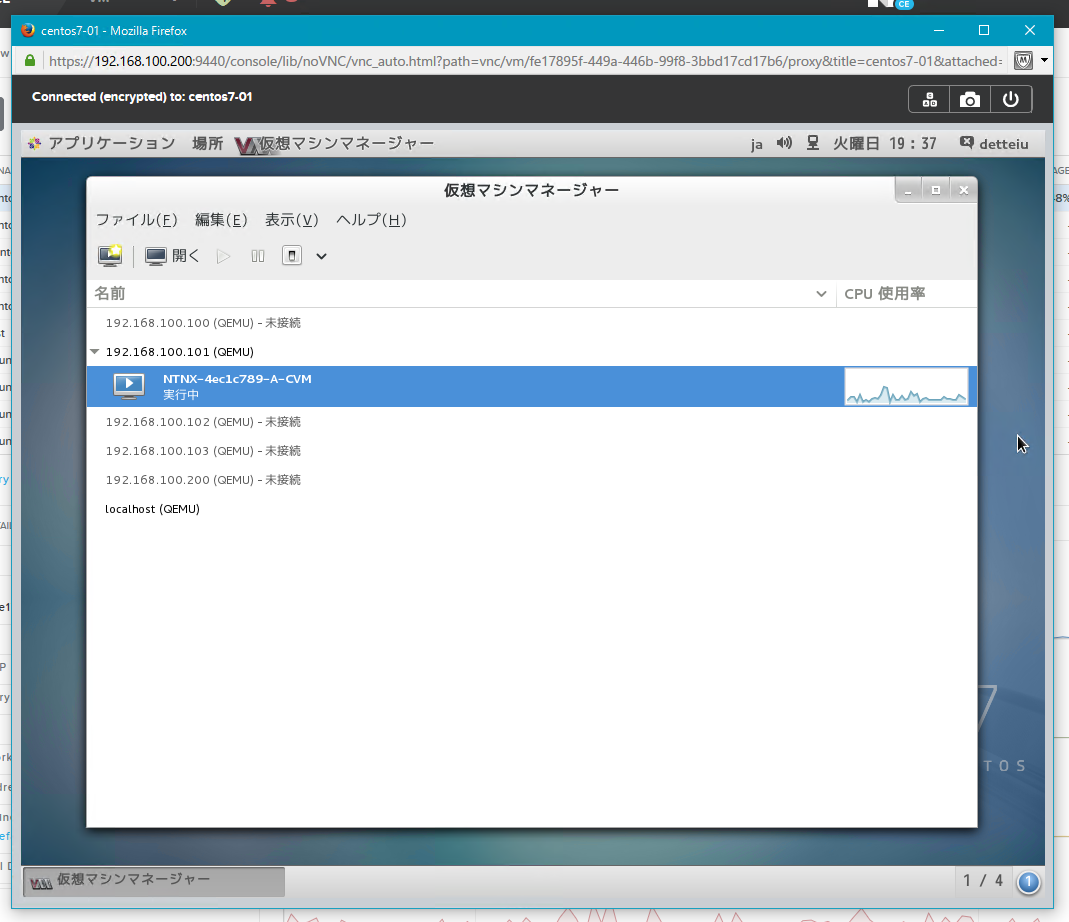
ノードごとの起動中のVMの一覧表示
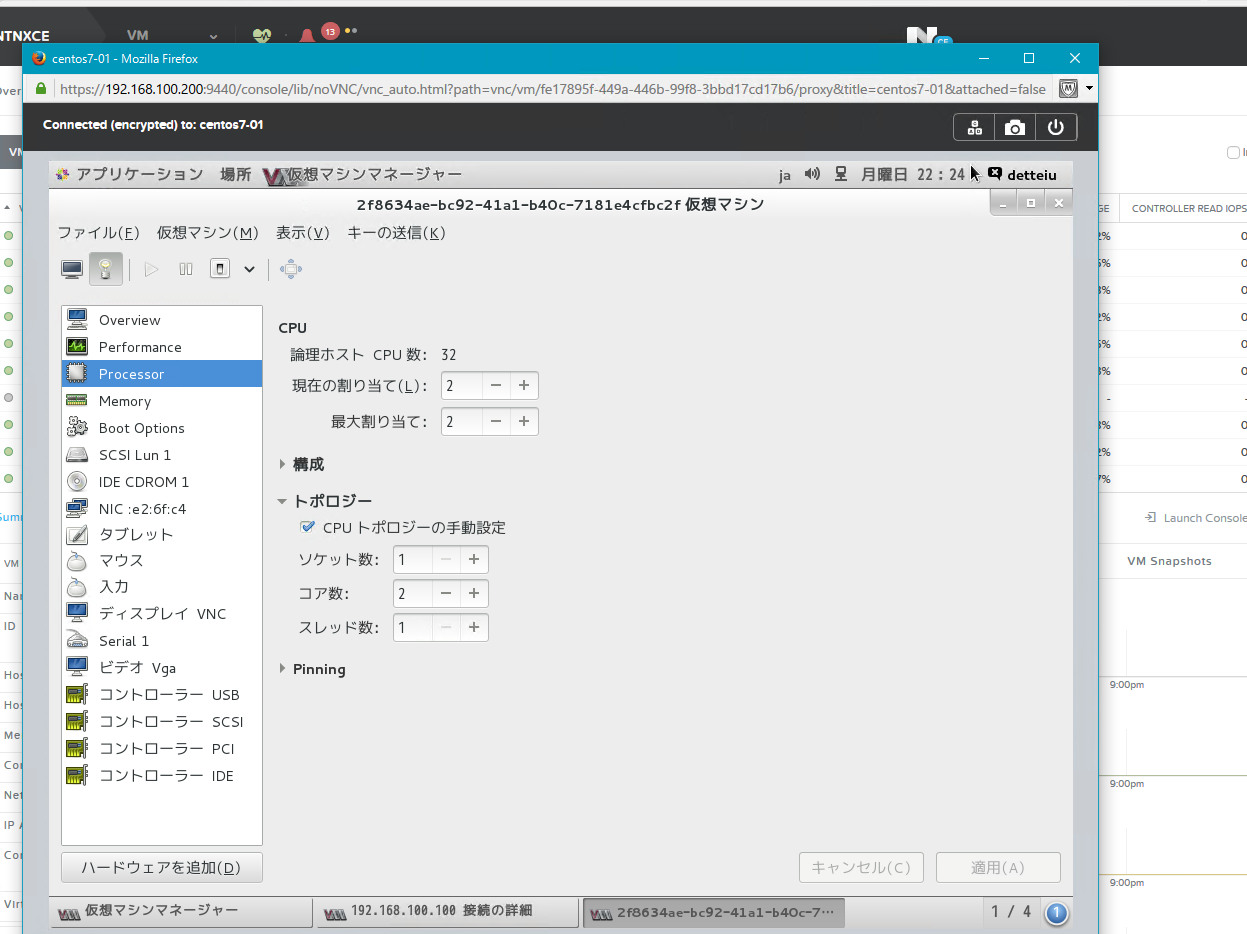
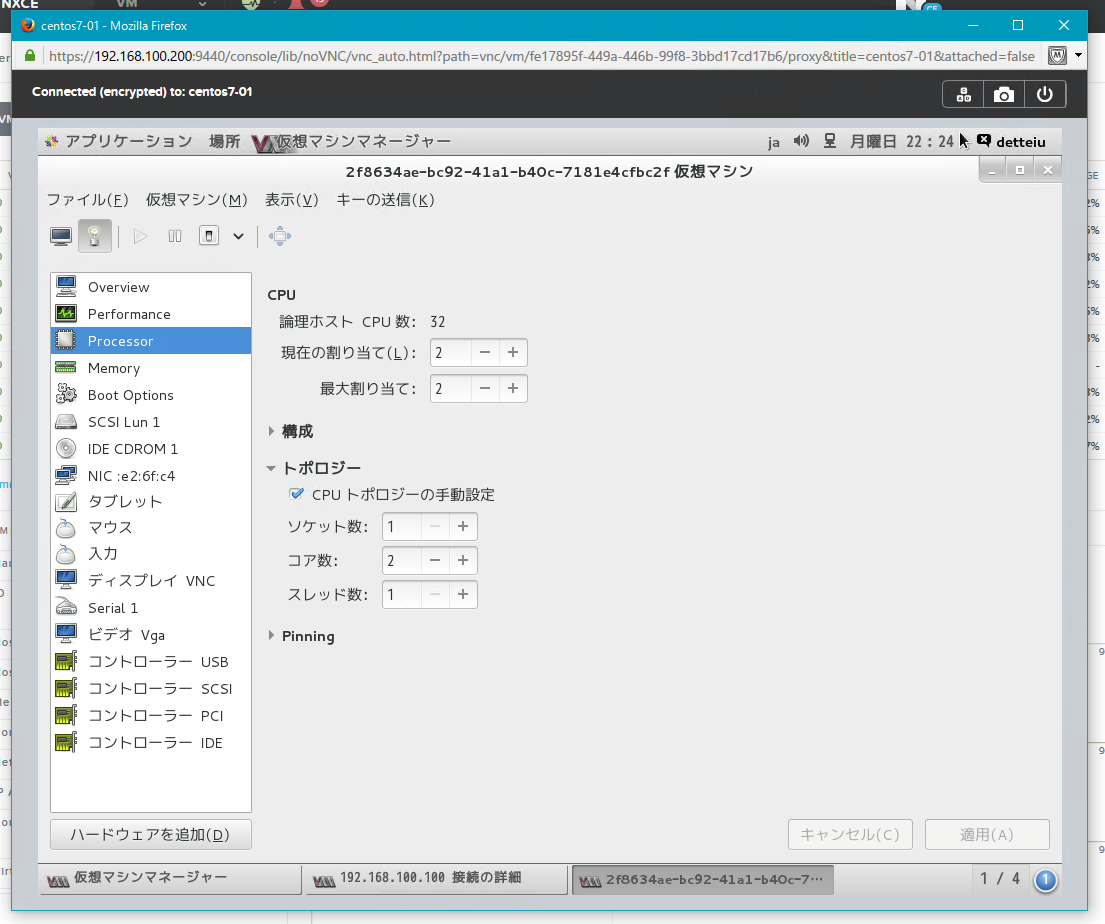
Virt-ManagerからVMを参照した場合,ユーザーが付与したVM名ではなくランダムな文字列で構成されるUUIDでVMが表示されるため,一体どのVMに対して操作を行っているのかは視覚的にすぐわかりませが,とにかく一覧は見えます。
またVMの構成情報も参照可能ですが,前述のとおりAHVにおいて独自に設定されるVMパラメータ等に関連する部分については,Virt-Manager上で情報が取得できないようで,不完全な情報となるようです。
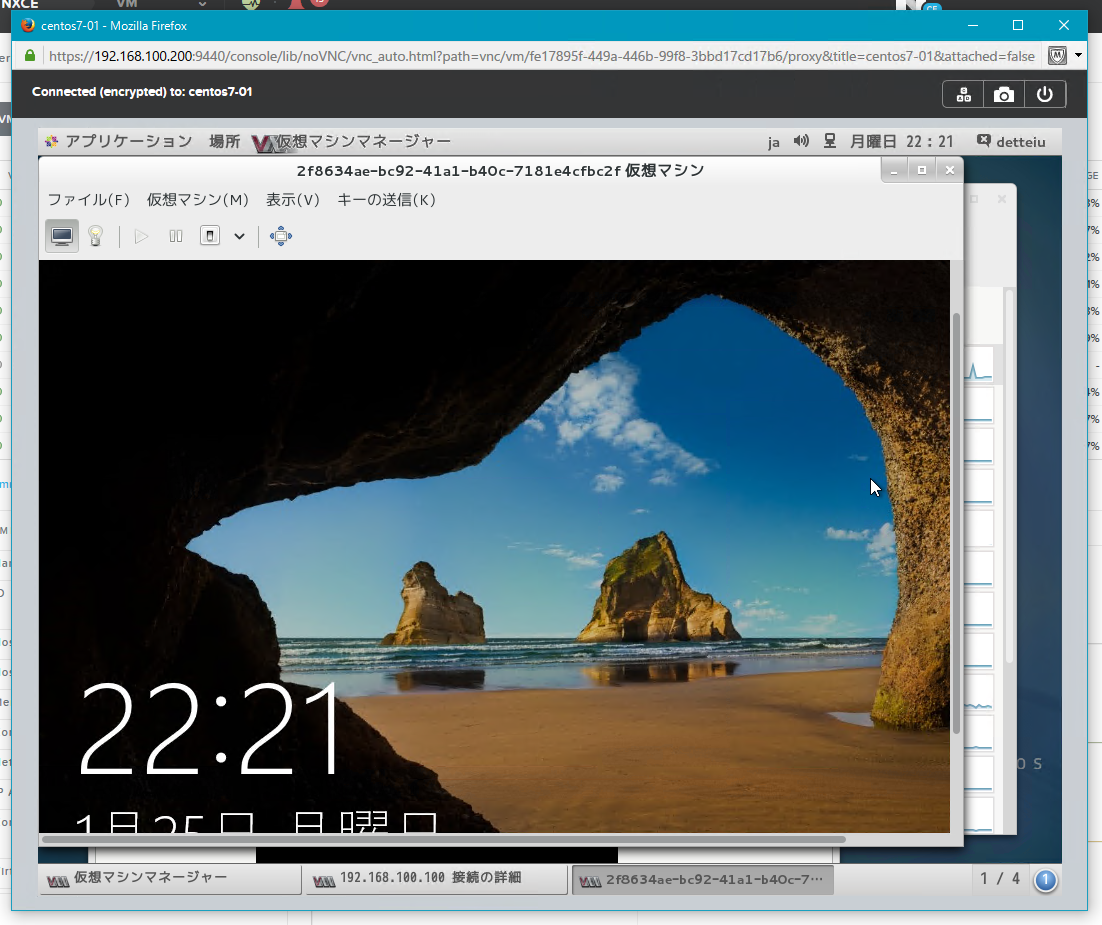
起動中のVMに対するVNCによる接続
起動中のVMについては,VNCの接続については可能でした。VMを停止してしまうとVirt-ManagerからVMが消えてしまうため,VNCからの接続も当然できなくなります。
なお,Virt-Managerから停止を行った場合,Nutanix CE上,AHVではイベント検知がされないためログやイベントのトレースができなくなります。
起動中のVMの停止
以下は,Virt-Manager上から次々VMをシャットダウンした結果の状況です。CVMはシャットダウンしていないので見えていますが,それ以外のVMは全て見えなくなっています。
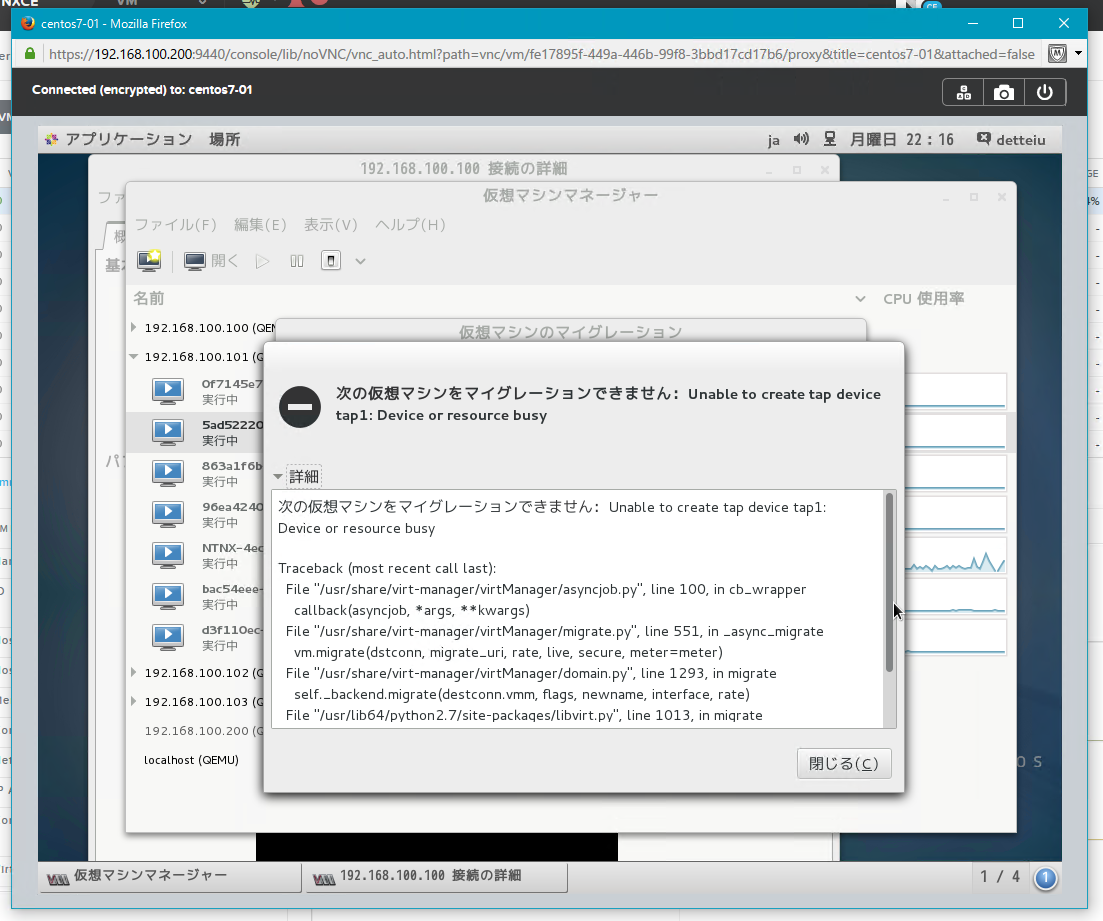
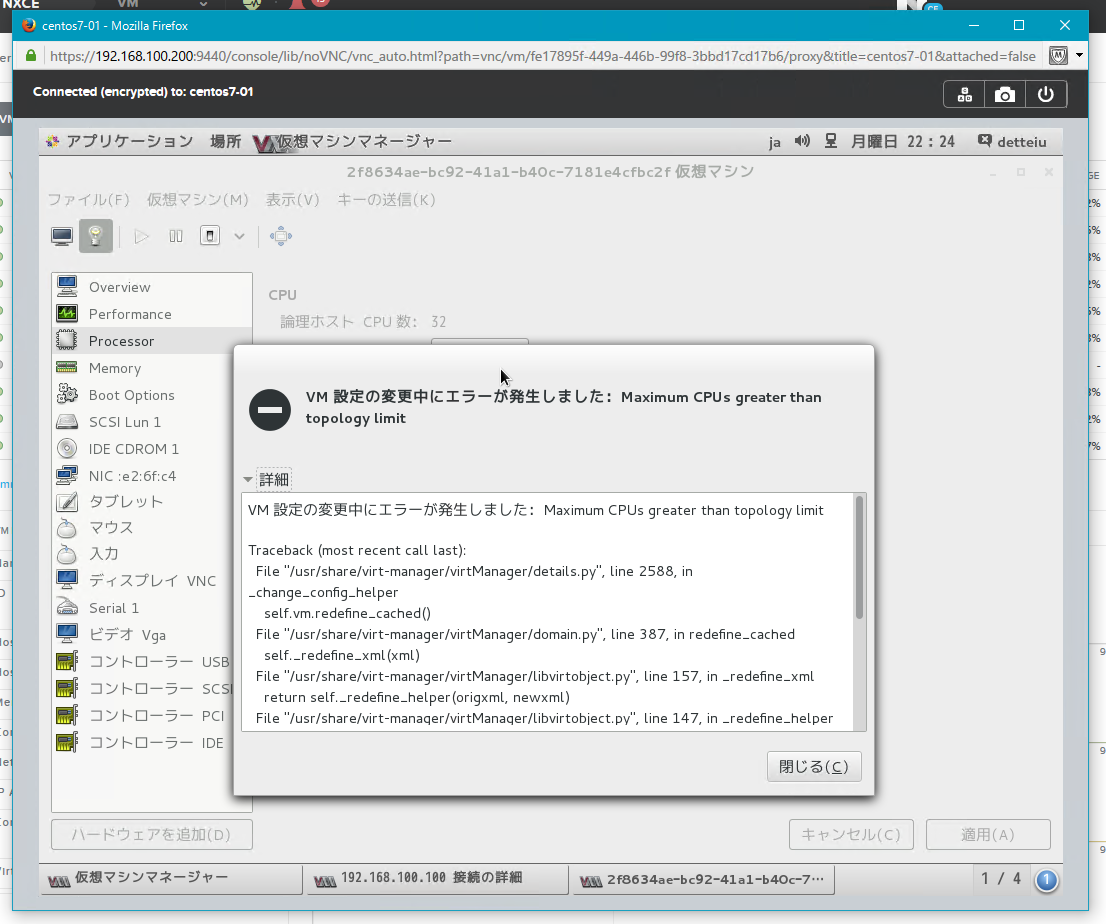
Virt-Managerからできなかった主な操作
以下の操作についてはエラーとなりました。
- VMの構成変更
- マイグレーション
- VMのクローン(ディスクが見えないためクローン不可)
- 新規VMの追加※
※Virt-Managerを起動しているPC上のローカルのディスクにISOを配置する又はNFSを見せる等ができれば途中までの操作は可能になるかも
まとめ
- Nutanix CEのAHVには,virshやVirt-Managerから操作は基本的にムリ
virshやVirt-Managerで接続できることから,AHVは確かにKVMをベースとしていることを確認することはできますが,その実体はNutanixの手がそれなりに入ってるようで,KVMベースでありながらエンタープライズ環境においてVMの作成,運用,変更,削除等がスムースに行えるように独自のカスタマイズが施され,その操作性,視認性,運用性などは,PRISMとのセットによって比較的高い完成度で提供されているのではないでしょうか。
NutanixはAHVの開発にリソースを注いでるとのことなので今後のアップデートでさらに詳細は設定等が可能になるかもと期待しています。