最新版は以下に記載しました。
https://hana-shin.hatenablog.com/entry/2023/02/19/222425
#1 はじめに
PCにXサーバをインストールして、Xクライアント(xeyes)をPC上で実行してみます。
#2 環境
VMware Workstation 14 Player上の仮想マシン、および、PC上で動作するXserverを使いました。
()内の数値は,Windows10のポート番号です。Xserverは、TCPの6000番ポートを使います。
+---------------- PC(Windows10) ------------+
|                                           |
|  +----------------+   +----------------+  |
|  |                |   |                |  |
|  |    Xserver     |   |   CentOS7.4    |  |
|  |   (VcXsrv)     |   |                |  |
|  |                |   |    Xclient     |  |
|  |                |   |    (xeyes)     |  |
|  |                |   |                |  |
|  |                |   |                |  |
|  |                |   |                |  |
|  |     (6000)     |   |  192.168.3.20  |  |
|  +----------------+   +----- eth0 -----+  |
|                       +----------------+  |
|                       |     VMware     |  |
|                       +----------------+  |
|                                           |
+------------------ ethX -------------------+
                 192.168.3.3
#3 インストール方法
##3.1 Xサーバのインストール
Xサーバとして、Xming等がありますが、ここでは、VcXsrvをPCにインストールしました。
インストール方法は、ここを参照してください。
##3.2 Xクライアントソフトのインストール
[root@host ~]# yum -y install xeyes
#4 McAfeeの設定変更
私のPCには、McAfeeがインストールされています。
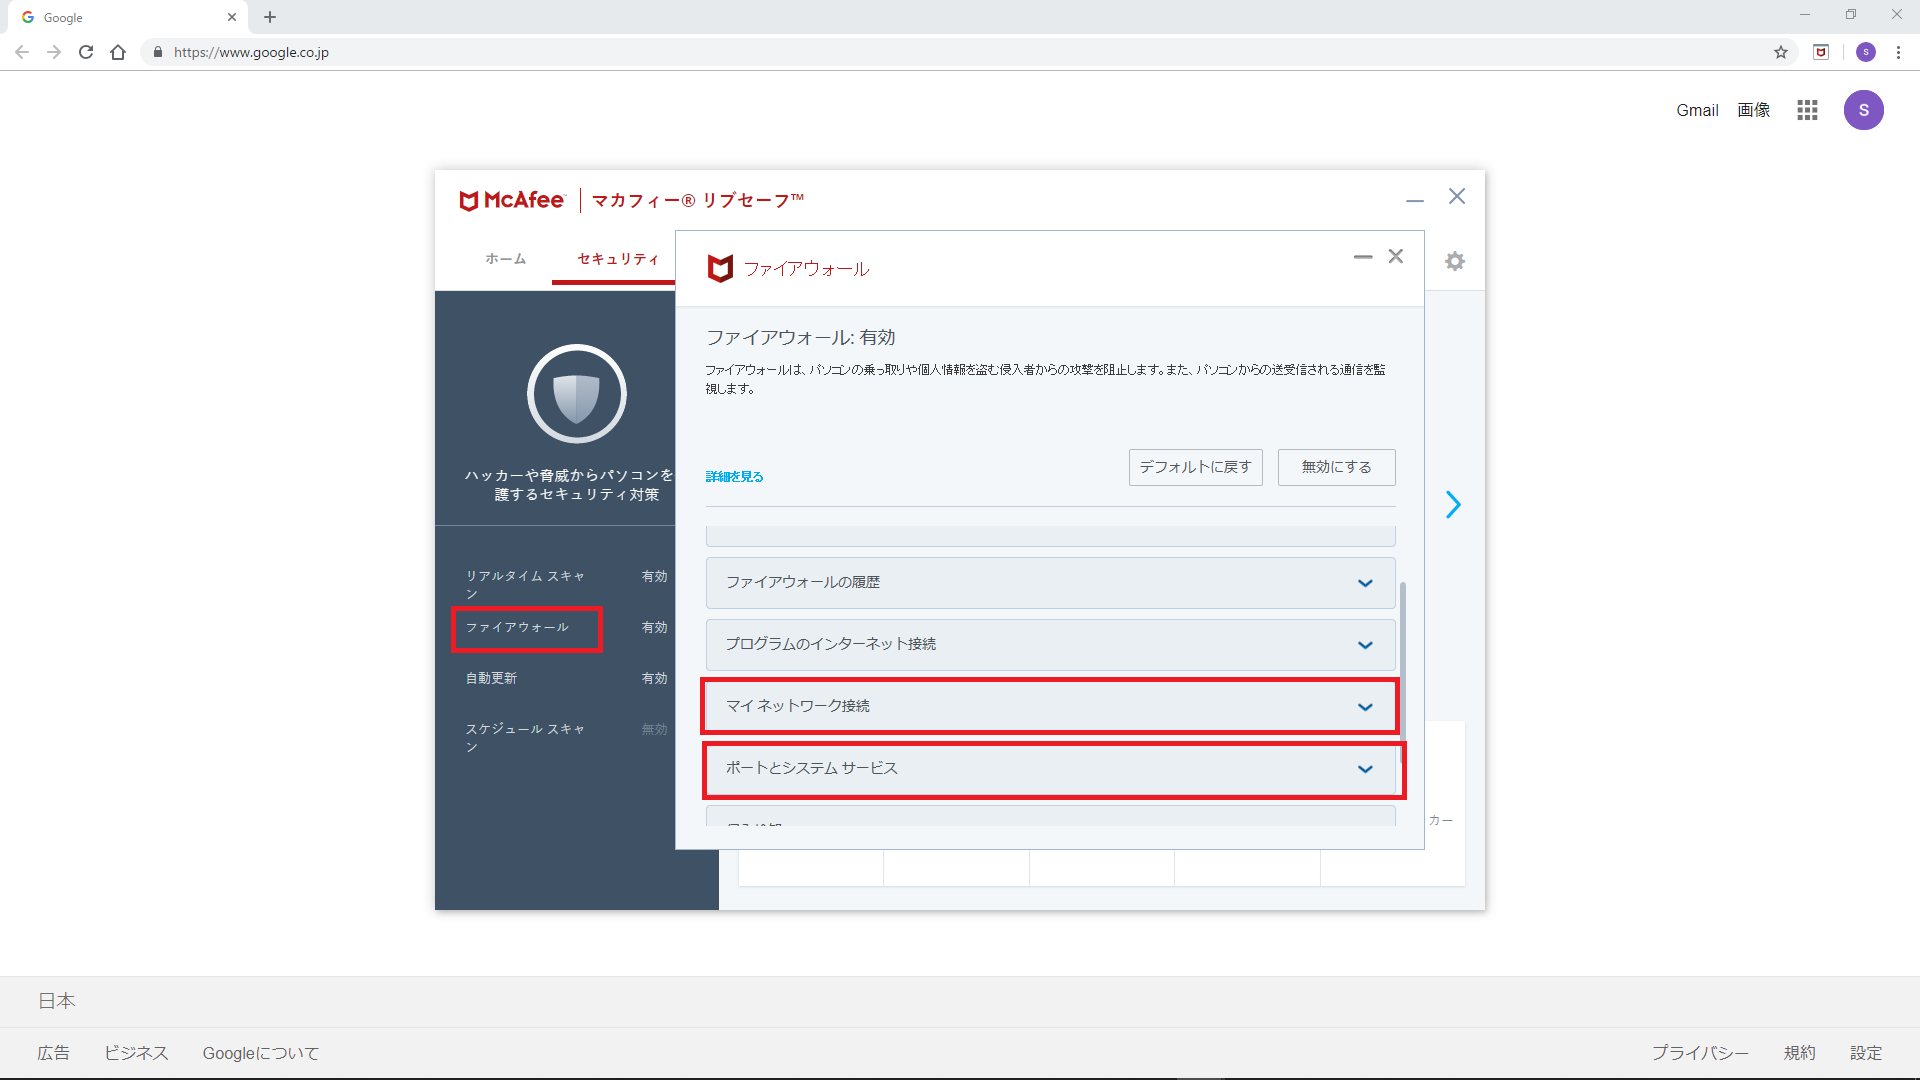
デフォルトのままでは、Xクライアントが起動しないため、下記2点を変更しました、
##4.1 ポートとシステムサービス
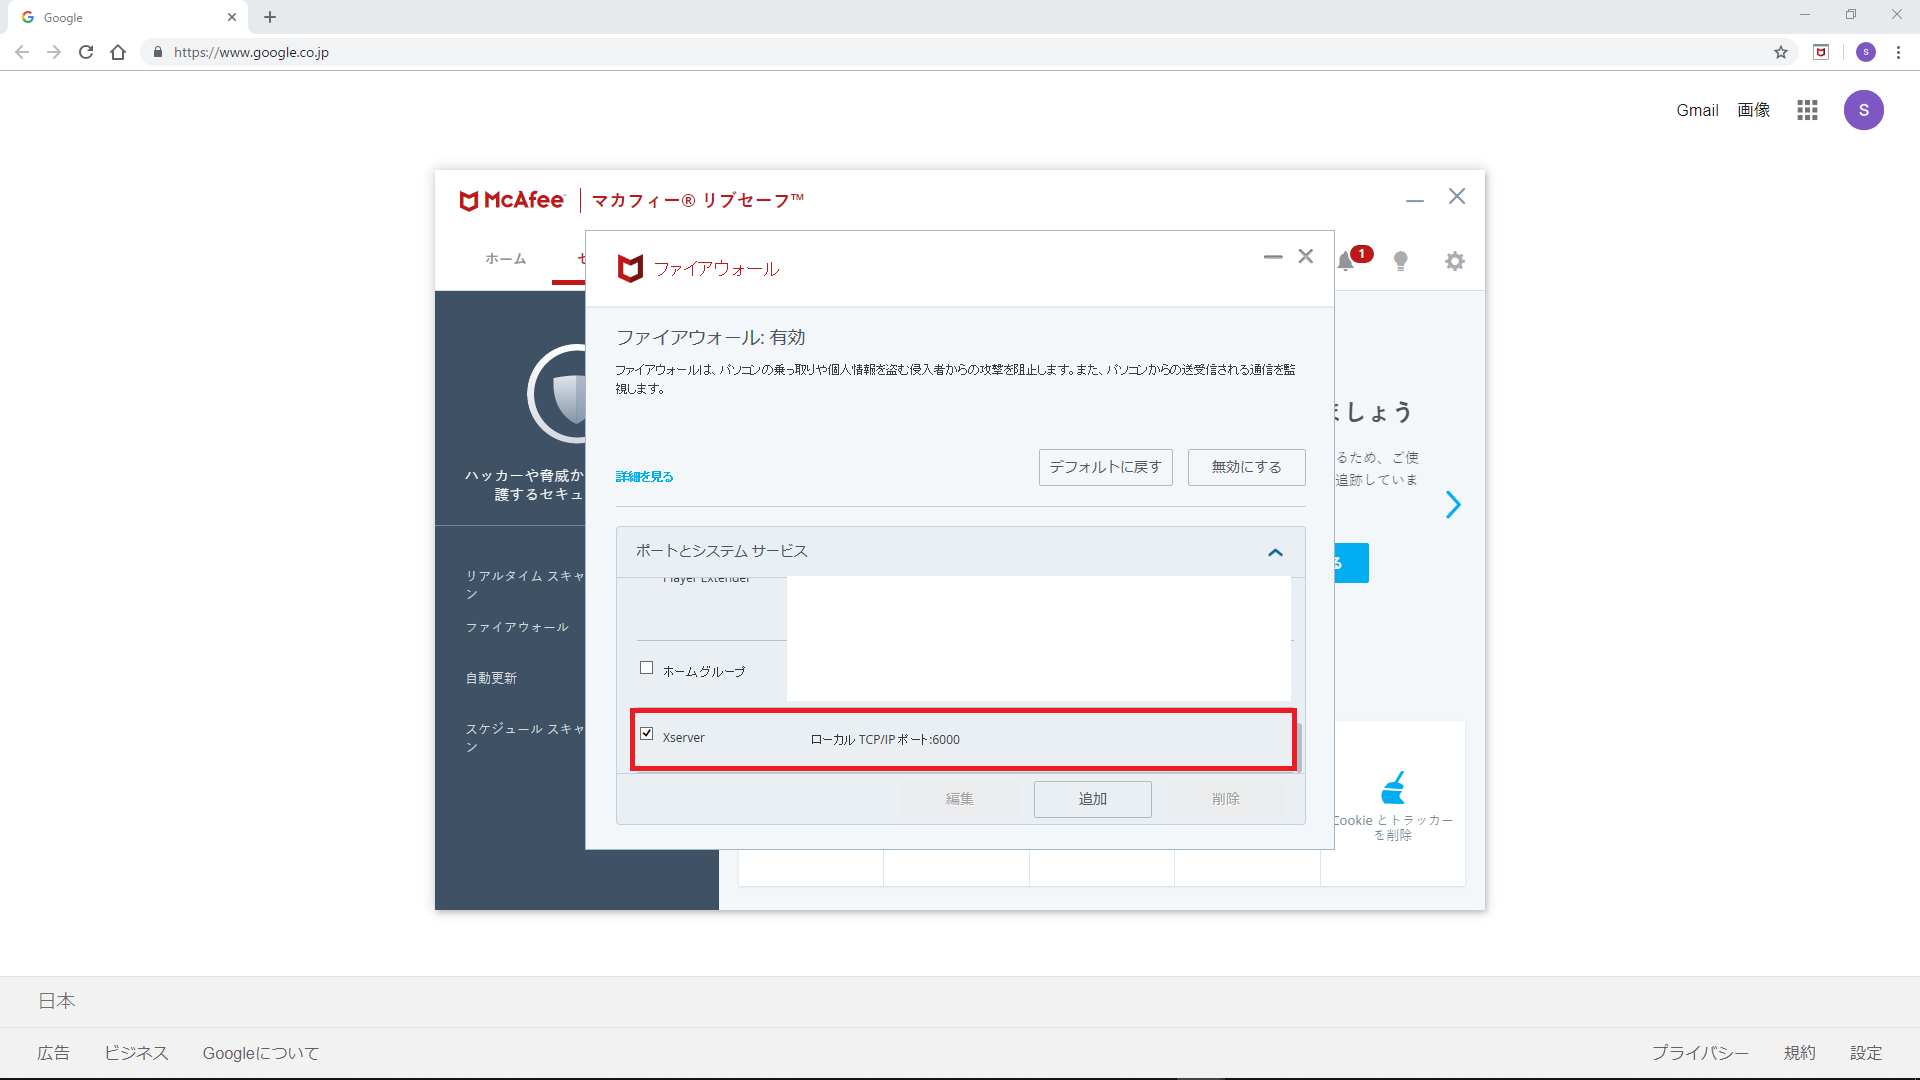
XクライアントからXサーバにTCPパケットを送信するため、
PCのTCP/6000番ポートを開放します。
##4.2 ネットワーク接続
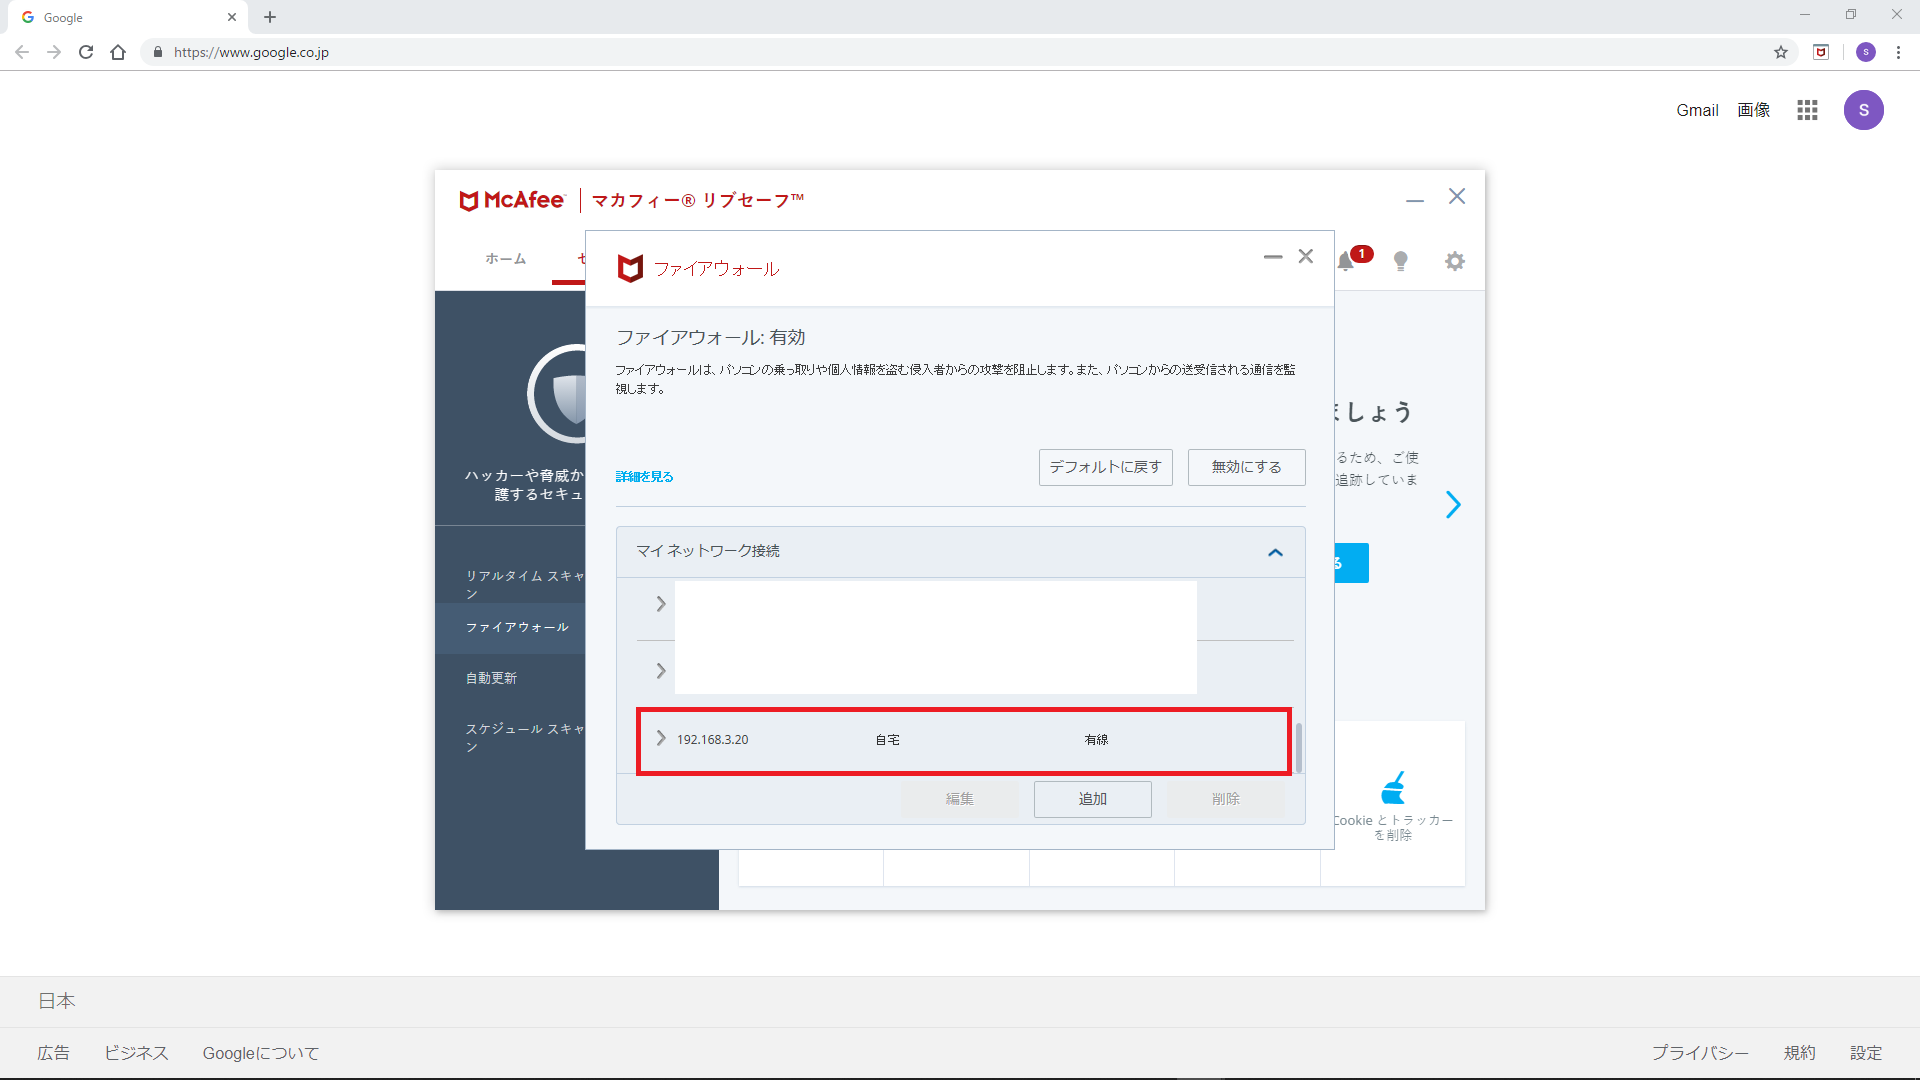
PCにアクセス可能なネットワークを追加します。
ここでは、XクライアントのIPアドレスのみを追加しました。
#5 Xサーバの起動方法
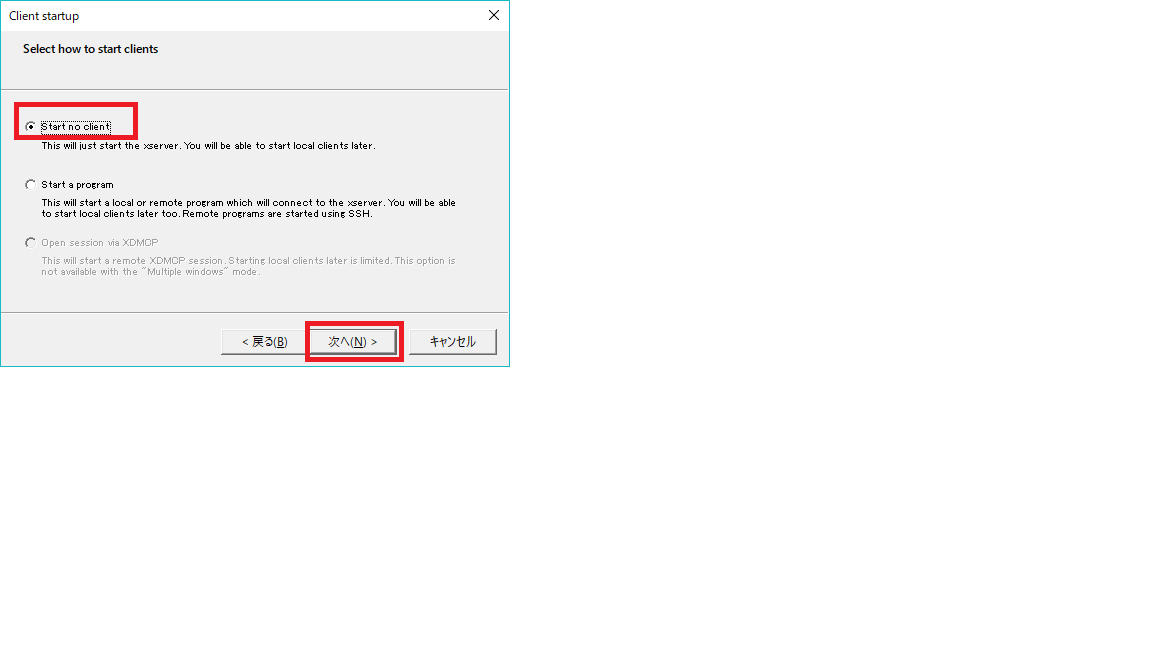
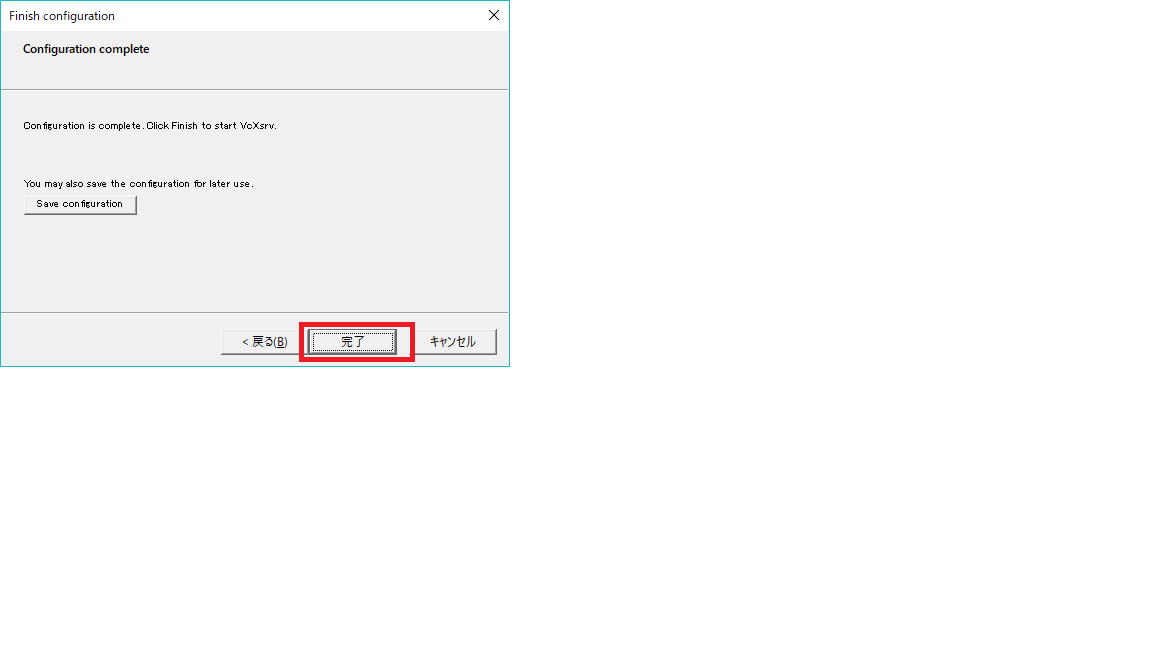
XLaunchをマウスでクリックします。

Display numberはデフォルトの"-1"を使います。
デフォルトの"-1"を選択すると、<ディスプレイ番号>は0になります。

Disable access controlを有効にします。
これを有効にしないと、Xクライアントからのアクセスが拒否されました。

#6 Xクライアントの起動方法
##6.1 環境変数DISPLAYの設定
<IPアドレス>には、Xサーバ動作しているマシンのIPアドレスを設定します。
<ディスプレイ番号>.<スクリーン番号>には0.0を設定します。
DISPLAY=<IPアドレス>:<ディスプレイ番号>.<スクリーン番号>
DISPLAY変数に設定する192.168.3.3は、PCのIPアドレスです。
[root@host ~]# export DISPLAY=192.168.3.3:0.0
[root@host ~]# echo $DISPLAY
192.168.3.3:0.0
##6.2 Xクライアント起動
[root@host ~]# xeyes
#8 その他
XクライアントとXサーバのTCPコネクション確立時の様子をtcpdumpで確認しました。
xeyesコマンドを実行すると、XクライアントからXサーバの6000番ポートに対して
SYNパケットを送信して、TCPコネクションを確立しているのがわかります。
なお、tcpdumpの使い方は、ここ(tcpdumpの使い方)を参照してください。
[root@host ~]# tcpdump -i eth0 port 6000 -n
11:44:16.094423 IP 192.168.3.20.51990 > 192.168.3.3.x11: Flags [S], seq 2889893148, win 29200, options [mss 1460,sackOK,TS val 9543841 ecr 0,nop,wscale 7], length 0
11:44:16.094761 IP 192.168.3.3.x11 > 192.168.3.20.51990: Flags [S.], seq 2646370916, ack 2889893149, win 65535, options [mss 1460,nop,wscale 8,nop,nop,sackOK], length 0
11:44:16.094819 IP 192.168.3.20.51990 > 192.168.3.3.x11: Flags [.], ack 1, win 229, length 0
-以下、略-
tcpdumpの実行結果を以下に図示しました。()内の数値はポート番号です。
Xclient                                   Xserver
(51990)                                    (6000)
   |                                         |
   |------------------ SYN ----------------->|
   |<----------------- SYN+ACK --------------|
   |------------------ ACK ----------------->|
   |                                         |
x11は6000番ポートとして定義されています。
[root@host ~]# cat /etc/services
x11             6000/tcp        X               # the X Window System
#Z 参考情報
WSL上にXサーバをインストールしてGUIを実現する(VcXsrv編)
VcXsrv Windows X Server
X Window System とは
