三行で
json-schemaに従って記述されたAPI仕様からAPI仕様サイトを生成するrails engineを作ってます。
本当は作った!と華々しく記事を公開したかったのですが、全然まだ作り途中なので「作ってます」です。
できること
- 【Viewer機能】json-schemaで記述されたAPI仕様をブラウザで確認することができる
- 【Send機能】パラメータを指定して実際にリクエストを投げることができる
使い方
API仕様の記述
json-schemaでAPI仕様を書きます。現状は、interagent/prmd で紹介されているプラクティスに則っていることを前提としています。json-schemaの仕様から逸脱しているわけではないですが、値のtypeは一つしか取りえなくても常に配列で書く、というのが特徴です。
も参考になります。
gem install
rails engineとして作っています。すでに開発チーム内で使う管理用のrailsアプリなどがあれば、Gemfileに以下を追記してください。もしなければ、この記事を読むのをやめるかこれを機にrailsで管理アプリを作ってください。
gem 'hachi', github: 'hokuma/hachi'
(まだgemとして公開していません ![]() )
)
設定の記述
Hachi::Config.configure do |config|
  config.client_class_name = 'YourApiClient'
  config.endpoint = 'https://your.api.endpoint'
  config.headers = {
    'CUSTOM_HEADER' => 'example value'
  }
  config.schema_path = 'path/to/api_schema.json'
end
client_class_nameは、Send機能実行時に利用されるクライアントクラスの名前です。 interagent/heroics を使って動的に生成しています。
endpointは、Send機能実行時の送信先APIのエンドポイントです。管理アプリと同じホストで送信先APIが動いていれば、http://localhost:3000などを指定しても良いです。
headersは、Send機能実行時に設定可能なカスタムヘッダーです。Oauth認証とBasic認証のためのヘッダーはサポートしていますが、それ以外にヘッダーを指定したい時に使ってください。例えば、X-API-VERSIONをSend機能実行時に送信したい場合は、
{
  'X-API-VERSION' => 1
}
としてください。ヘッダーの値は、Send機能実行時に変更することができます。
schema_pathは、API仕様が記述されたjsonファイルのパスです。相対パスでも絶対パスでもどちらでも良いです。
rails engineのマウント
mount Hachi::Engine, at: '/apis'
画面
試しに、以下のjsonでAPIが定義されているとします。prmdを使うと以下のようなAPI仕様のひな形をコマンドで生成することができるので、0から書くのが面倒な場合は是非使いましょう。
{
  "$schema": "http://interagent.github.io/interagent-hyper-schema",
  "type": [
    "object"
  ],
  "definitions": {
    "post": {
      "$schema": "http://json-schema.org/draft-04/hyper-schema",
      "title": "FIXME - Post",
      "description": "FIXME",
      "stability": "prototype",
      "strictProperties": true,
      "type": [
        "object"
      ],
      "definitions": {
        "id": {
          "description": "unique identifier of post",
          "readOnly": true,
          "format": "uuid",
          "type": [
            "string"
          ],
          "example": "73f57385-7c80-49f2-b636-28b0e7bea67d"
        },
        "identity": {
          "anyOf": [
            {
              "$ref": "#/definitions/post/definitions/id"
            }
          ]
        },
        "body": {
          "description": "post body",
          "type": [
            "string"
          ],
          "example": "Hello World"
        },
        "created_at": {
          "description": "when post was created",
          "format": "date-time",
          "type": [
            "string"
          ],
          "example": "2016-12-22T00:00:00+90:00"
        },
        "updated_at": {
          "description": "when post was updated",
          "format": "date-time",
          "type": [
            "string"
          ],
          "example": "2016-12-22T00:00:00+90:00"
        }
      },
      "links": [
        {
          "description": "Create a new post.",
          "href": "/posts.json",
          "method": "POST",
          "rel": "create",
          "schema": {
            "properties": {
              "body": {
                "type": [
                  "string"
                ],
                "maxLength": 1000
              }
            },
            "required": [
              "body"
            ],
            "type": [
              "object"
            ]
          },
          "title": "Create"
        },
        {
          "description": "Delete an existing post.",
          "href": "/posts/{(%23%2Fdefinitions%2Fpost%2Fdefinitions%2Fidentity)}.json",
          "method": "DELETE",
          "rel": "destroy",
          "title": "Delete"
        },
        {
          "description": "Info for existing post.",
          "href": "/posts/{(%23%2Fdefinitions%2Fpost%2Fdefinitions%2Fidentity)}.json",
          "method": "GET",
          "rel": "self",
          "title": "Info",
          "targetSchema": {
            "$ref": "#/definitions/post"
          }
        },
        {
          "description": "List existing posts.",
          "href": "/posts.json",
          "method": "GET",
          "rel": "instances",
          "title": "List"
        },
        {
          "description": "Update an existing post.",
          "href": "/posts/{(%23%2Fdefinitions%2Fpost%2Fdefinitions%2Fidentity)}.json",
          "method": "PATCH",
          "rel": "update",
          "schema": {
            "properties": {
            },
            "type": [
              "object"
            ]
          },
          "title": "Update"
        }
      ],
      "properties": {
        "created_at": {
          "$ref": "#/definitions/post/definitions/created_at"
        },
        "id": {
          "$ref": "#/definitions/post/definitions/id"
        },
        "updated_at": {
          "$ref": "#/definitions/post/definitions/updated_at"
        }
      }
    }
  },
  "properties": {
    "post": {
      "$ref": "#/definitions/post"
    }
  }
}
Viewer機能
マウントしたengineのルートページに行くと、APIが提供するリソースの一覧が確認できます。そこからpostの詳細に行ってみましょう。
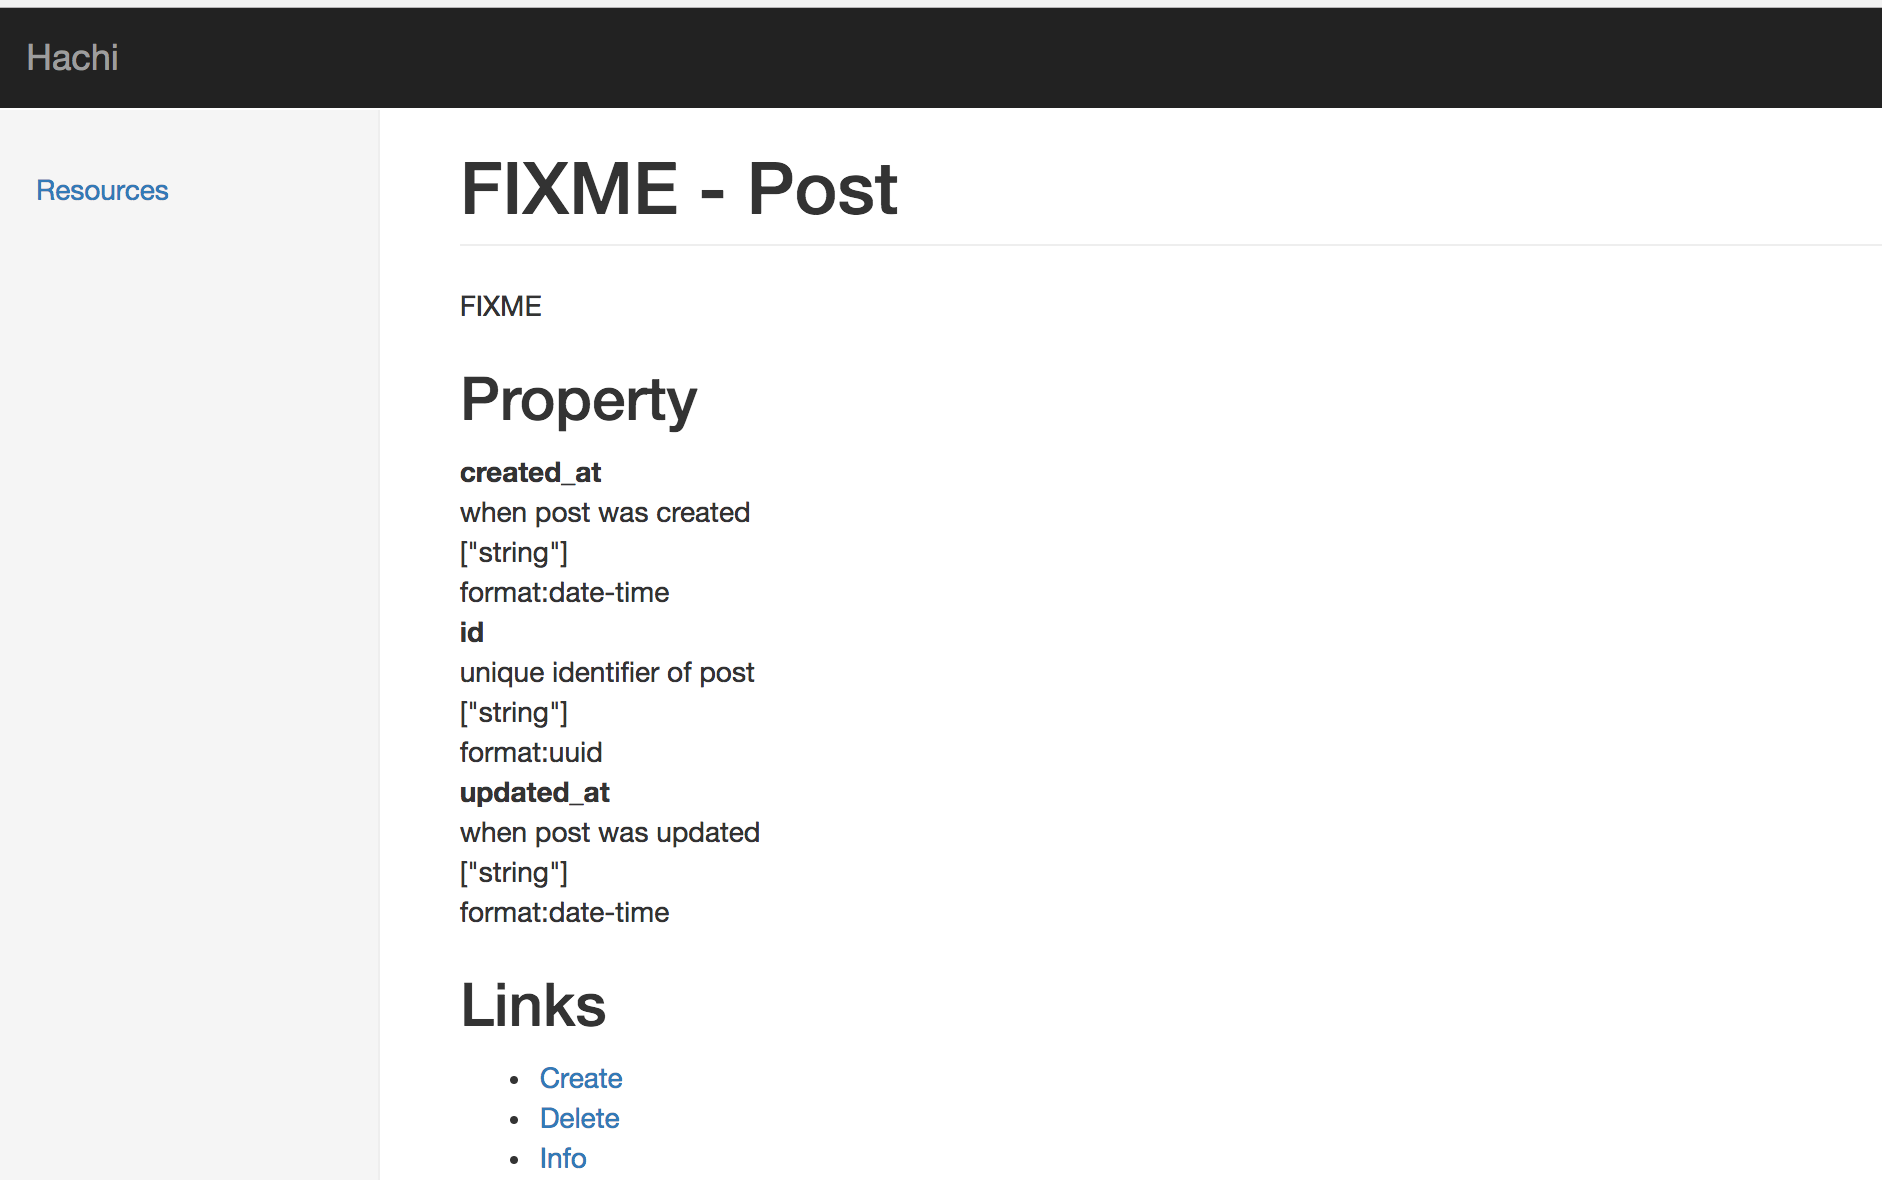
(もっとキレイに表示したい。。。)
各属性の定義を見ることができます。
Links一覧には、リソースに対して実行できる操作、つまり各種API仕様へのリンクが並んでいます。試しにCreateのページに行ってみましょう。post作成用APIの仕様が確認できます。
Sender機能
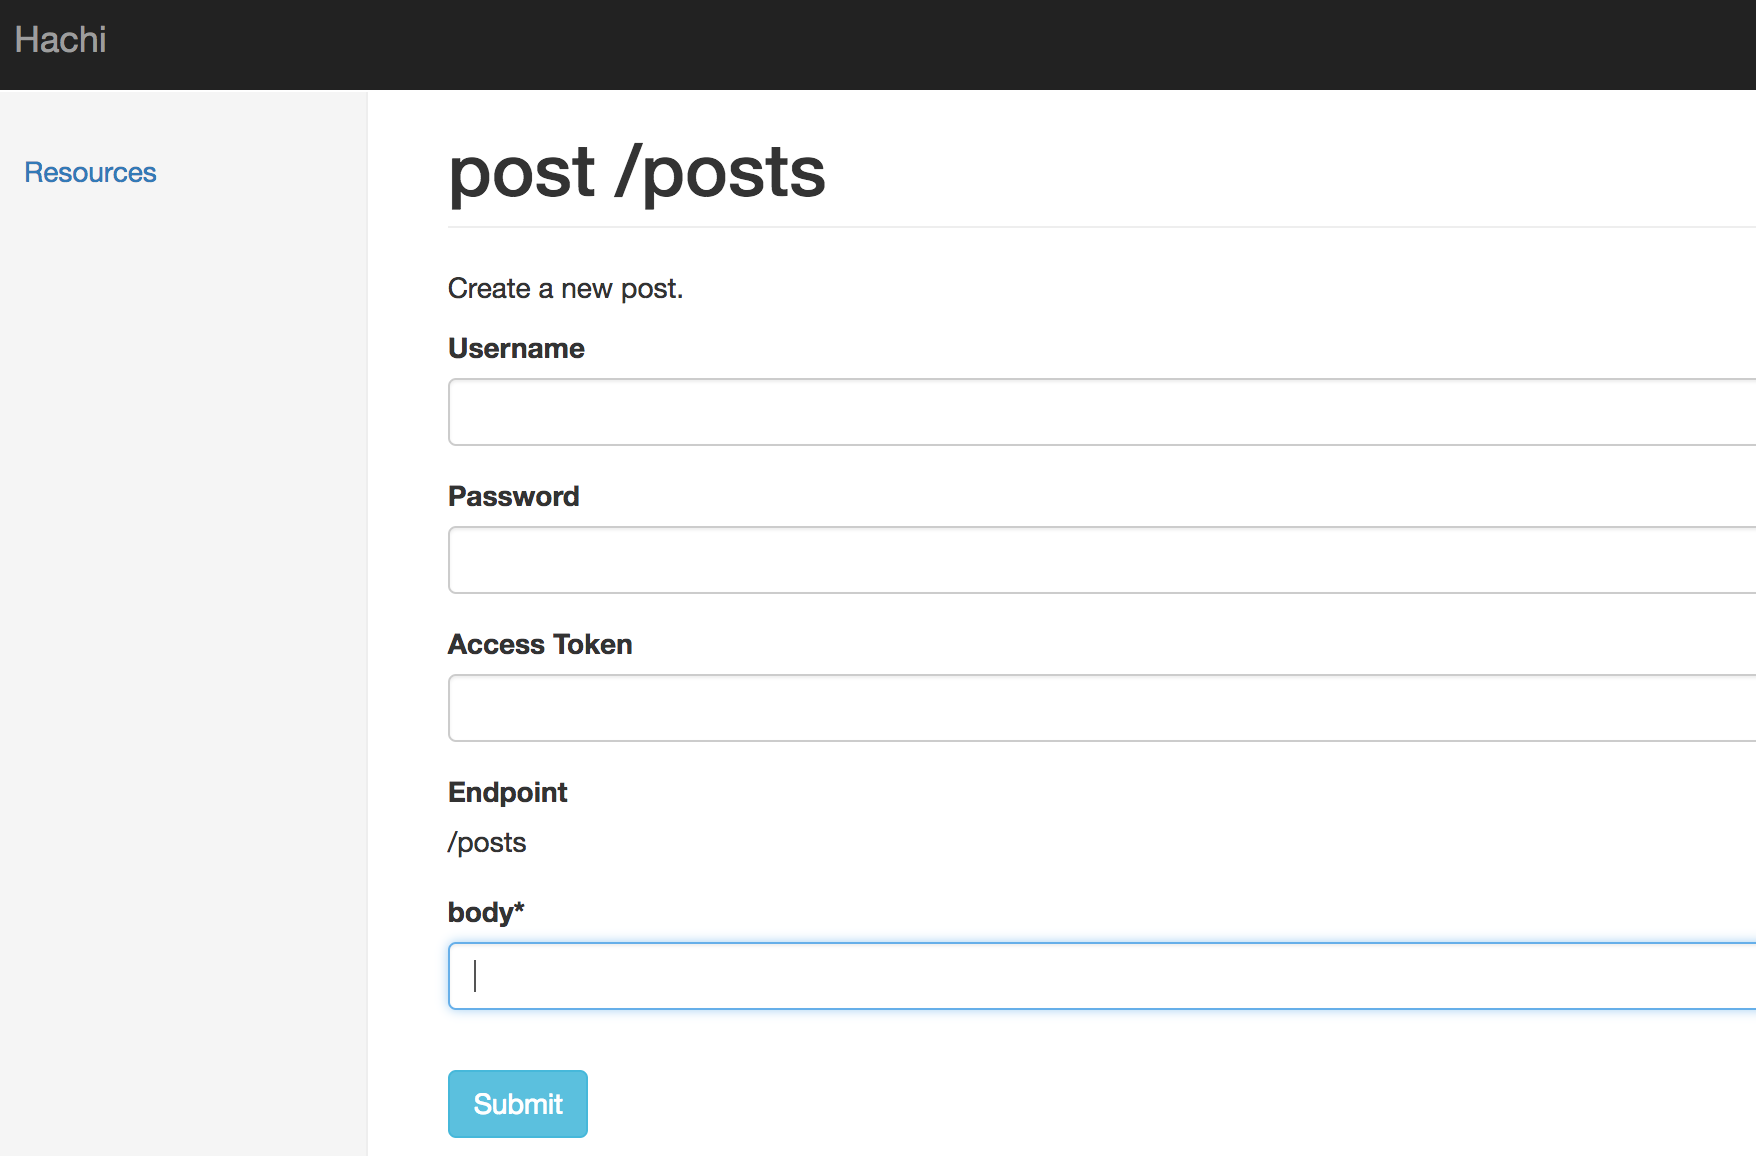
API仕様ページからは、cofig/initializers/hachi.rbで定義したエンドポイントにリクエストを送ることができます。
UsernameとPasswordの両方が入力された時はBasic認証、Access Tokenが入力されている時はoauth認証でリクエストを投げます。
Formの生成は mozilla-services/react-jsonschema-form でやっています。json-schemaを渡すと良い感じのフォームを作ってくれます。
Submitを押すとリクエストが送信され、Submit以下のスペースにレスポンスが表示されます。
公開に向けて
まずは社内実践、ということでチーム内で使えそうか検討してみようという段階です。とりあえず動くっぽい、という品質レベルなので、バグを直しつつ細かい点を改善しつつ、実用に耐えうるめどが立ったらgemとして公開しようと思っています。
なぜ作ろうと思ったか
- チーム内でメンテされているAPI仕様がオレオレフォーマットymlで記述されているため、validationロジックやクライアント生成など何をするにも自前で実装しないといけない
- オレオレフォーマットの自由度が高すぎる分、複数人でメンテしてる中で仕様の一貫性にほころびが出始めた
あたりの理由から、API仕様のメンテをどうにかしたいと思っていたところ json-schema に出会いました。json-schemaを使って validation をかけたりやクライアント生成をするライブラリはすでにあるのですが、それからAPI仕様サイトを生成するような仕組みはないな、と思って作っているところです。