モチベーション
テキストで送られてくる予定表を手を使ってカレンダーに打ち込むのがめんどくさいなぁって思い、やってみました。
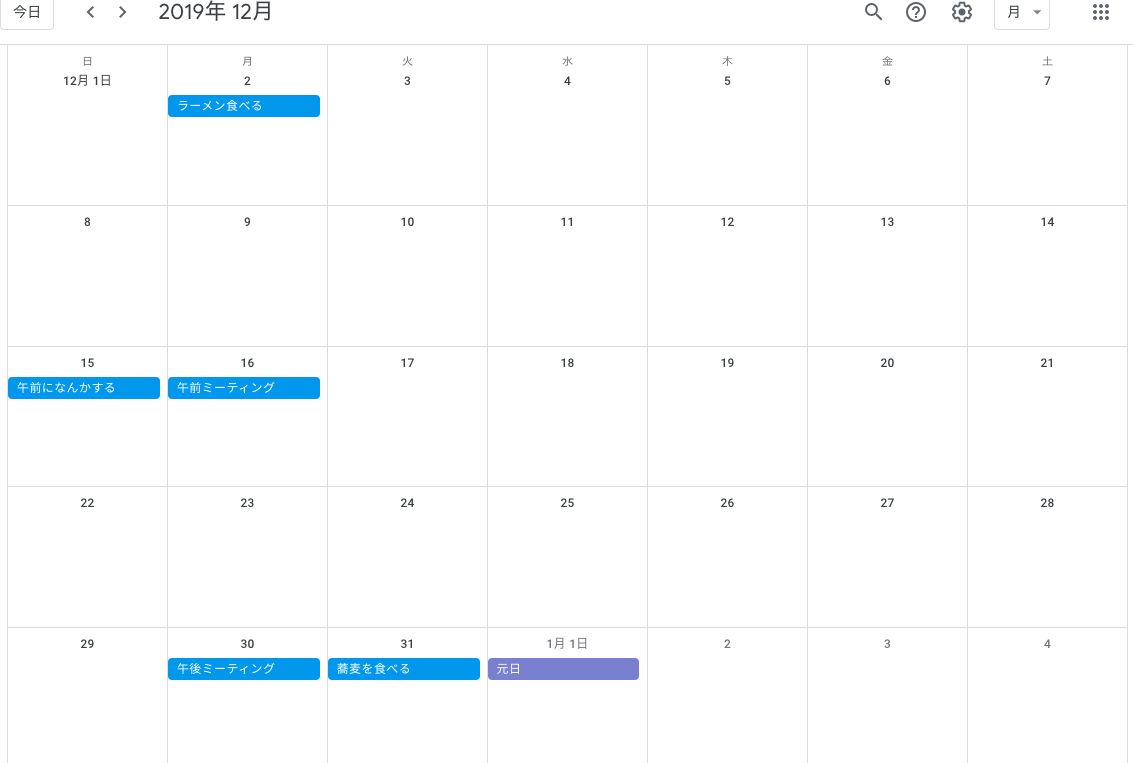
予定表は例えばこんな感じ
2019.12
2 ラーメン食べる
15 午前になんかする
16 午前ミーティング
30 午後ミーティング
31 蕎麦を食べる
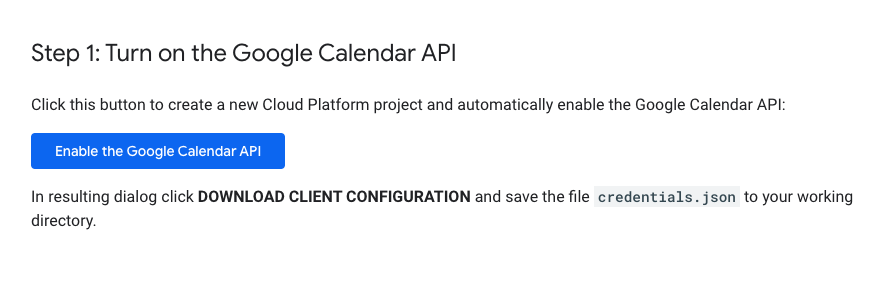
Google calendar APIを使えるようにする
こちらのページに飛んで、Enable the Google Calendar API を押してください。
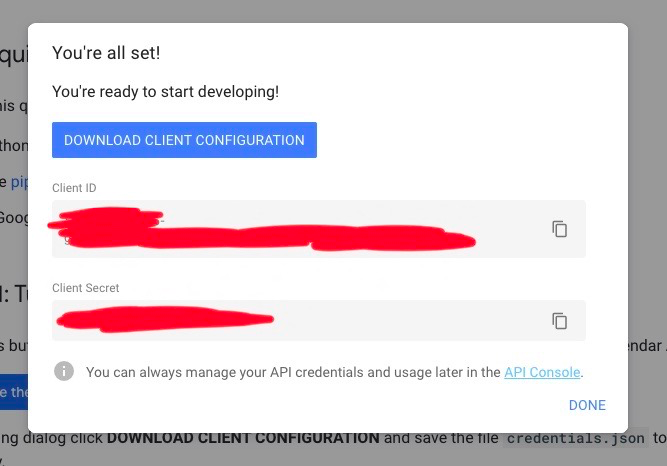
利用規約に同意しますかみたいなことが聞かれるのでyesを押すとこの画面が出てきます。DOWNLOAD CLIENT CONFIGURATIONしてください。すると credentials.json がダウンロードされます。
Google Client Libraryをインストールする
pip install --upgrade google-api-python-client google-auth-httplib2 google-auth-oauthlib
Googleカレンダーへのアクセスを許可する
これが今回使うやつ
from __future__ import print_function
import datetime
import pickle
import os.path
from googleapiclient.discovery import build
from google_auth_oauthlib.flow import InstalledAppFlow
from google.auth.transport.requests import Request

# If modifying these scopes, delete the file token.pickle.
SCOPES = ['https://www.googleapis.com/auth/calendar']

def readschedule():
    f = open('schedule.txt')
    data1 = f.read()
    lines1 = data1.split('\n')
    f.close()
    return lines1

def main():
    creds = None
    # The file token.pickle stores the user's access and refresh tokens, and is
    # created automatically when the authorization flow completes for the first
    # time.
    if os.path.exists('token.pickle'):
        with open('token.pickle', 'rb') as token:
            creds = pickle.load(token)
    # If there are no (valid) credentials available, let the user log in.
    if not creds or not creds.valid:
        if creds and creds.expired and creds.refresh_token:
            creds.refresh(Request())
        else:
            flow = InstalledAppFlow.from_client_secrets_file(
                'credentials.json', SCOPES)
            creds = flow.run_local_server(port=0)
        # Save the credentials for the next run
        with open('token.pickle', 'wb') as token:
            pickle.dump(creds, token)

    service = build('calendar', 'v3', credentials=creds)

    readschedule()
    print(readschedule())

    yearmon = readschedule()[0]
    a = yearmon.split(".")
    year = int(a[0])
    mon = int(a[1])

    if mon == 1 or mon == 3 or mon == 5 or mon == 7 or mon == 8 or mon == 10 or mon == 12:
        num_days = 31
    elif mon == 2:
        num_days = 28
    else :
        num_days = 30

    for i in readschedule():
        s = i.split(' ')
        if(len(s) == 1): continue

        d_s = int(s[0])
        d_e = int(s[0])
        m_s = mon
        m_e = mon
        y_s = year
        y_e = year

        if(mon == 12 and d_e == 31):
            y_e = year + 1

        if(num_days == d_e):
            d_e = 1
            if mon == 12: m_e = 1
            else: m_e = m_e + 1


        event = {
        'summary': '{}'.format(s[1]),
        'location': 'Japan',
        'description': '{}'.format(s[1]),
        'start': {
            'date': '{}-{}-{}'.format(y_s,m_s,d_s),
            'timeZone': 'Japan',
        },
        'end': {
            'date': '{}-{}-{}'.format(y_e,m_e,d_e),
            'timeZone': 'Japan',
        },
        }
        event = service.events().insert(calendarId='自分のカレンダーIDを入力',body=event).execute()
        print (event['id'])

if __name__ == '__main__':
    main()
下から5行目のところを自分のカレンダーIDに書き換えてください。
IDがわからん人はここを参考に
こちらが予定表の例。文法はこんな感じで
{年}.{月}
{日}(半角スペース){予定}(\n)
{日}(半角スペース){予定}(\n)
...
僕の書いたやつは、コンマ、半角スペース、改行文字を目印に処理してるので文法通りにしないと怒られます
2019.12
2 ラーメン食べる
15 午前になんかする
16 午前ミーティング
30 午後ミーティング
31 蕎麦を食べる
当たり前ですがcredentials.json と Addcalendar.py と schedule.txt は同じディレクトリに置いてください。
$ python3 AddCalendar.py
で実行すると、次のような画面がでます。
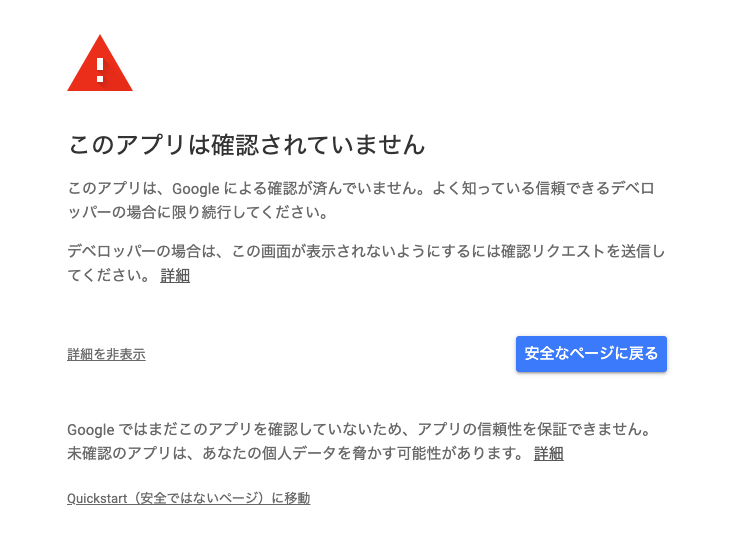
とても危なそうなことが言われますが、Quickstar(安全ではないページ)に移動 を押すと、下のように表示されるので、
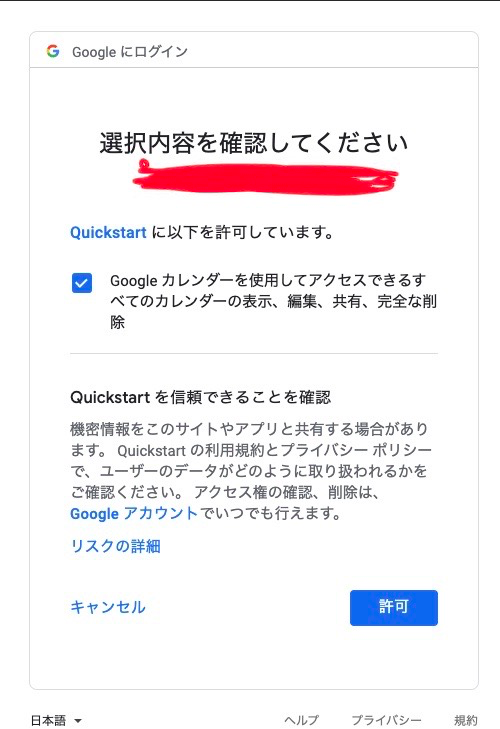
googleカレンダーを..(略)..共有、完全な削除 をチェックをして許可してください。
実際にプログラムを動かして追加する
$ python3 Addcalendar.py
schedule.txt のテキストが読み込まれ、カレンダーに予定が追加されました!
#参考にしました
・【Python】Google Calendar APIを使ってGoogle Calendarの予定を取得・追加する
・Google Calendar APIの公式ページ