ALB認証
メリット
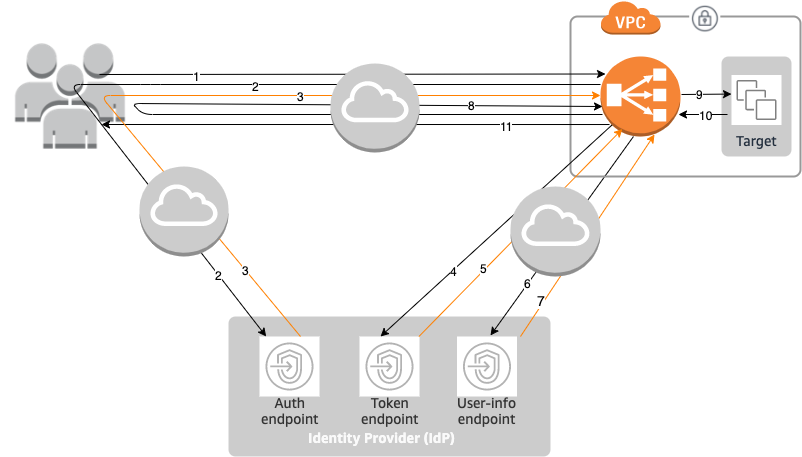
認証処理にてAWS Cognitoを利用する場合、アプリケーションの前にALB(Application Load Balancer)を配置していれば、ALBの認証機能を利用することで、アプリケーション側の実装がシンプルになります。
認証フロー
認証フロー図の右上にある「Target」が示すのはアプリケーションです。
ステップ9及び10でアプリケーションが登場します。その時点で認証が既に完了しています。アプリケーションはRequestのHeader項目「X-AMZN-OIDC-*」(x-amzn-oidc-dataやx-amzn-oidc-accesstokenなど)を取得するだけで済みます。
試し
Cognito設定
User pool、App Clientを作成します。
App Client - Hosted UI - Callback URLに、ALBの「oauth2/idpresponse」エンドポイントを設定しておきます。

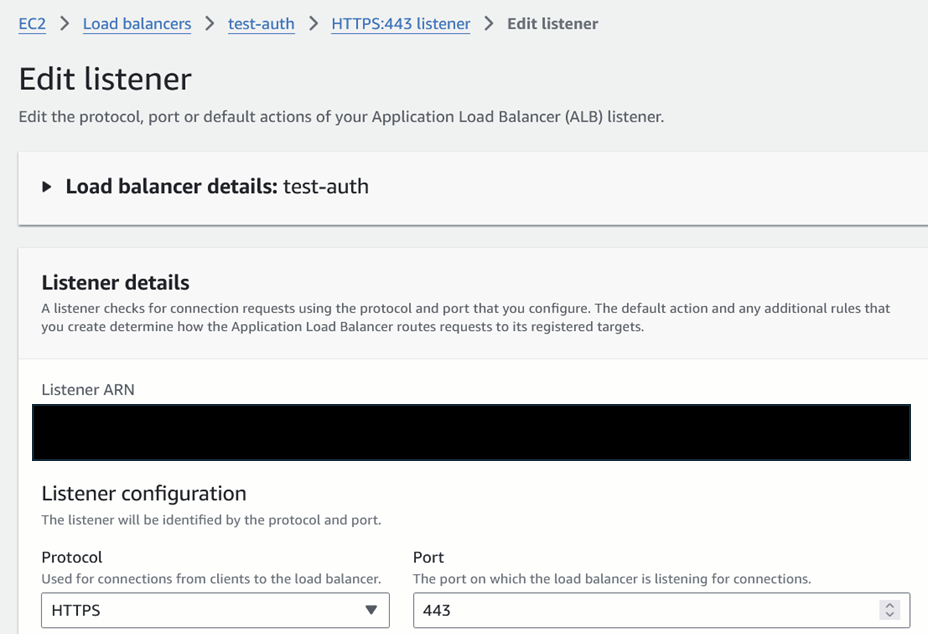
ALB Listener設定
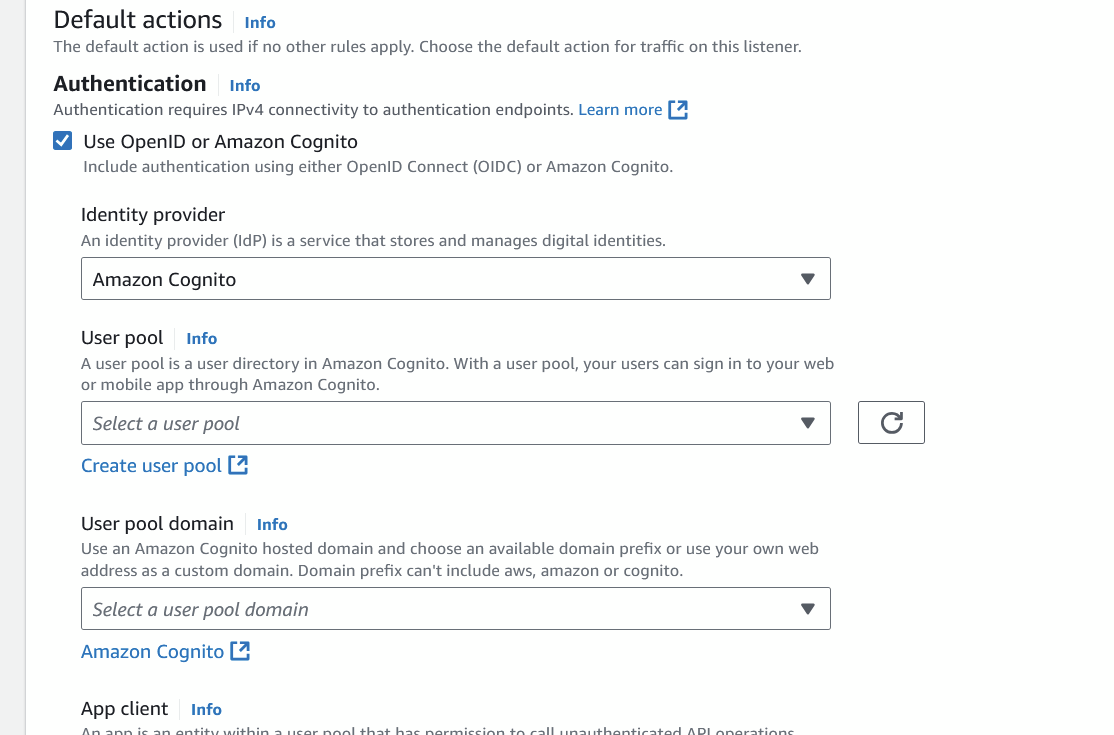
ALB Listener設定画面でCognitoの認証情報を設定
・User Pool
・User pool domain
・App client
Node.js + express
今回はNode.jsのexpress packageで試しました。
const express = require('express')
const app = express()
const port = 3000

app.get('/', (req, res) => {
  console.log(console.log(req));
  res.send('Hello World root!')
})

app.listen(port, () => {
  console.log(`Example app listening on port ${port}`)
})
「x-amzn-oidc-*」項目が3つ出力されました。
・x-amzn-oidc-data
・x-amzn-oidc-identity
・x-amzn-oidc-accesstoken
x-amzn-oidc-dataをpythonのpyjwtでdecodeしてみました。
import jwt
x_amzn_oidc_data='eyJ0eXAiOiJKV1。。。。。'
decoded = jwt.decode(t1, options={"verify_signature": False})
print("\n".join(list(decoded.keys())))
以下の出力ログから、usernameが含まれていることを確認できました。
・sub
・cognito:groups
・iss
・version
・client_id
・origin_jti
・token_use
・scope
・auth_time
・exp
・iat
・jti
・username
ALBまとめ
ALBを利用することで、アプリケーション側がCognitoの存在を意識する必要がなくなり、request headerから必要なユーザ情報などを取得できます。
Tips
上記のALB認証フロー図におけるステップ4-7は、ALBがCognitoと直接通信します。
Cognitoにはprivate endpointが存在しないため、ALBの利用にはがインターネットアクセスが必須条件です。
Internet Gatewayを使用する環境では基本的には問題ないです。
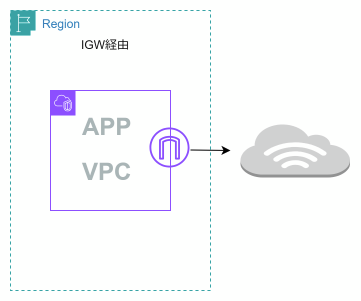
しかし、Proxy経由でインターネットにアクセスする場合は、ALB認証を利用できないと考えております。
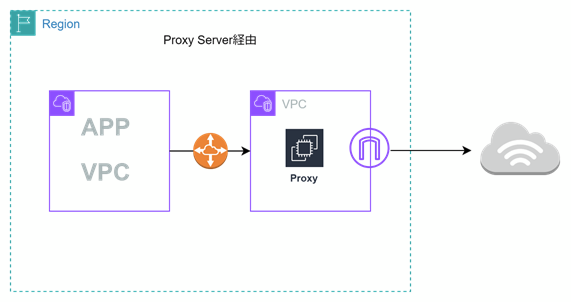
ALB認証利用しない場合
ALB認証を利用しない場合、アプリケーションの中にCognitoとやり取りをするロジックを実装する必要です。
Node.js + express + passport + passport-oauth2の例です。
const express = require('express');
const session = require('express-session');
const cookieParser = require('cookie-parser');
const app = express();
const passport = require('passport');
const OAuth2Strategy = require('passport-oauth2').Strategy;

const MemoryStore = require('memorystore')(session);

app.use(express.json());
app.use(express.urlencoded({ extended: false }));
app.use(cookieParser());
app.use(session({
  name : "xxxx",
  resave: 'true',
  saveUninitialized: 'true',
  secret: 'keyboard cat',
  store: new MemoryStore({
    checkPeriod: 24 * 60 * 60 * 1000 // prune expired entries every 24h
  }),
}));
app.use(passport.initialize());
app.use(passport.session());

passport.serializeUser((user, cb) => cb(null, user));
passport.deserializeUser((user, cb) => cb(null, user));

passport.use(new OAuth2Strategy({
  authorizationURL: AUTHORIZATION_URL, // https://xxx.auth.ap-northeast-1.amazoncognito.com/oauth2/authorize
  tokenURL: TOKEN_URL, // https://xx.auth.ap-northeast-1.amazoncognito.com/oauth2/token
  clientID: COGNITO_ClientId, // app client id
  clientSecret: COGNITO_ClientSecret,  // app client secret
  callbackURL: APP_CALLBACK_FULL_URL // callback url
},
  async function (accessToken, refreshToken, params, profile, done) {
    try {
      // decode token
      ...

      done(null, {
        ...
      })

    } catch(err) {
      ...
    }
  }
));
