はじめに
昨年11月にLiDARセンサーで遊ぶためにiPhone12Proを買ったところ、既成アプリで遊ぶだけでなく自分でも触りたくなってしまったのと、ちょっとお得に買えるツテもあったのでMacBook Air M1を買いました。
iOSビルドするのにMacが必要だったので。
それで、先週末そのMacBookが届いたので、早速ARKit4で遊んでみました。そんな日記です。
自動環境オクルージョンといって、現実の部屋に仮想のオブジェクトを配置した映像を写したときに、現実の部屋の手前にある物体が、仮想オブジェクトよりもちゃんと手前に表示されるという機能ができるようになりました。
詳しい説明はこちら:
AR Foundation support for ARKit 4 DepthAR Foundation が ARKit 4 の深度検出をサポート - Unity Technologies Blog
今回は、これをやっていきたいと思います。
環境
- iPhone 12 Pro
- iOS 14.4
- MacBook Air (M1, 2020)
- macOS Big Sur 11.2.1
- Unity Hub 2.4.2
- Unity 2019.4.20f1
- Xcode 12.4
Unityプロジェクトの準備
Unity Hubでプロジェクトを作成する
- Unity Hubを起動し、「新規作成」をクリック
- テンプレートは「3D」を選択し、プロジェクト名を適当に決めて「作成」をクリック
(今回はARkit4Occlusionとします)(画像のスペルミスは気にしないように)


Unity上でのiOSプロジェクトの初期設定
-
プラットフォームを変更する
-
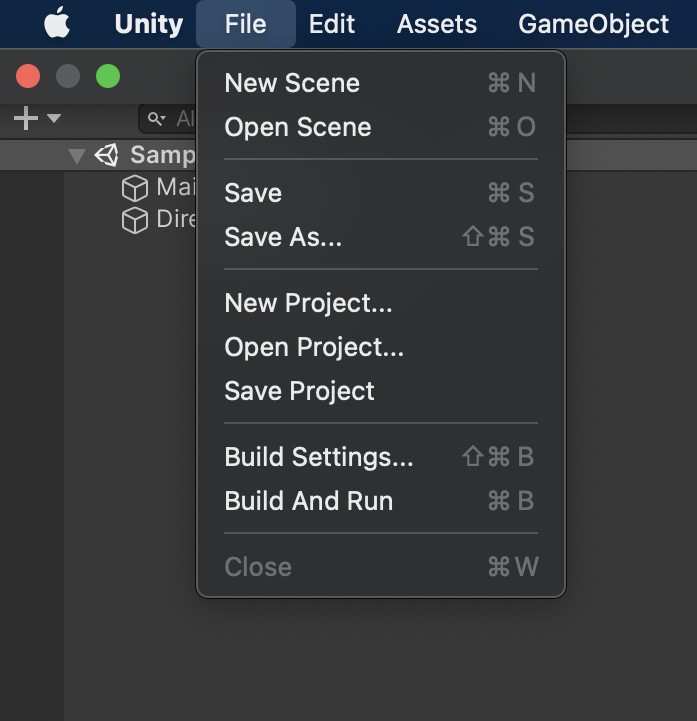
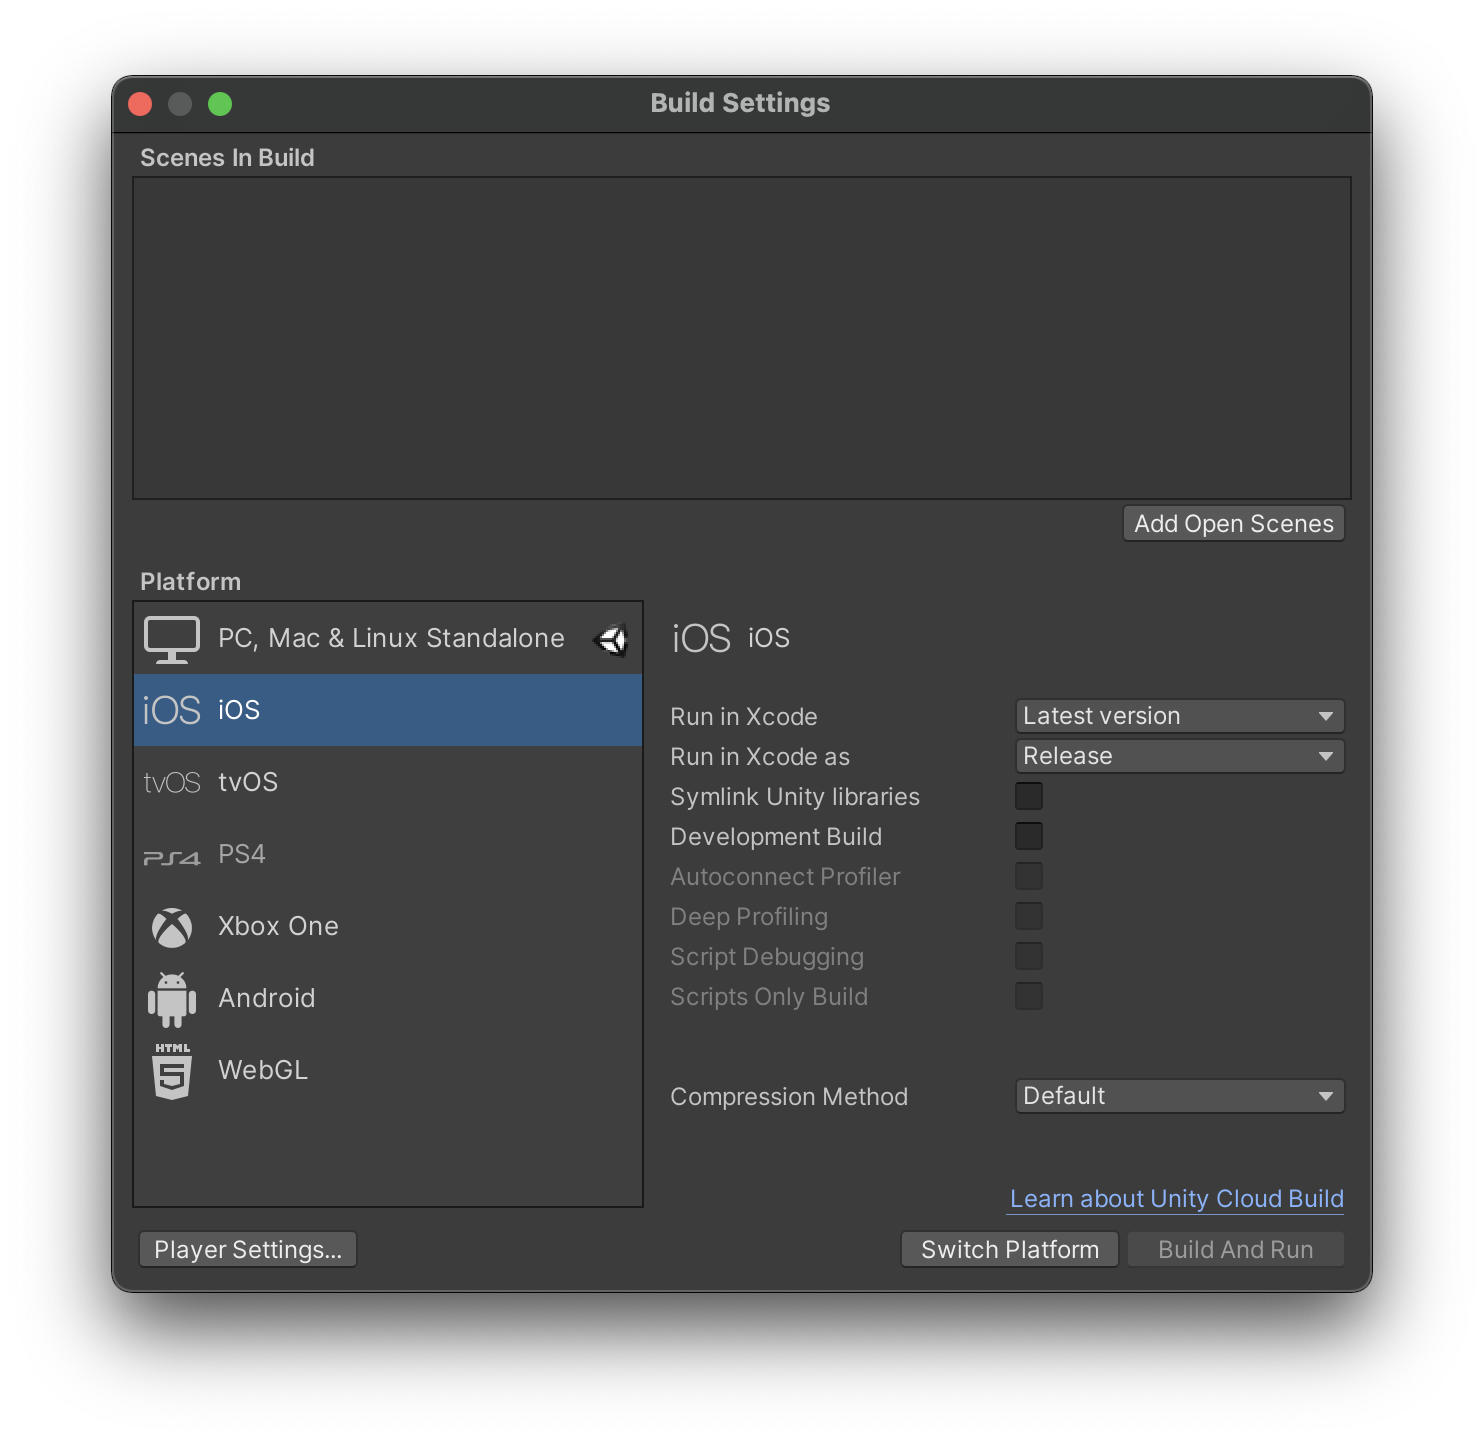
メニューバーから「File」→「Build Settings」→Platformで「iOS」を選択し、「Switch Platform」を押下
-
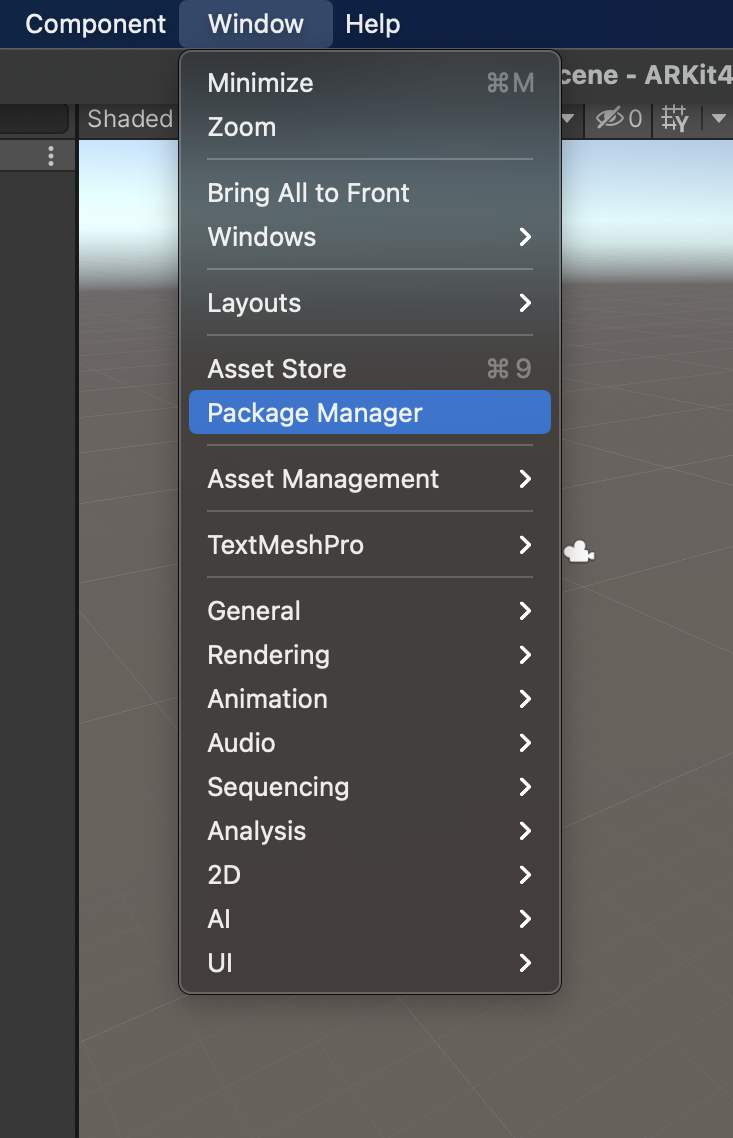
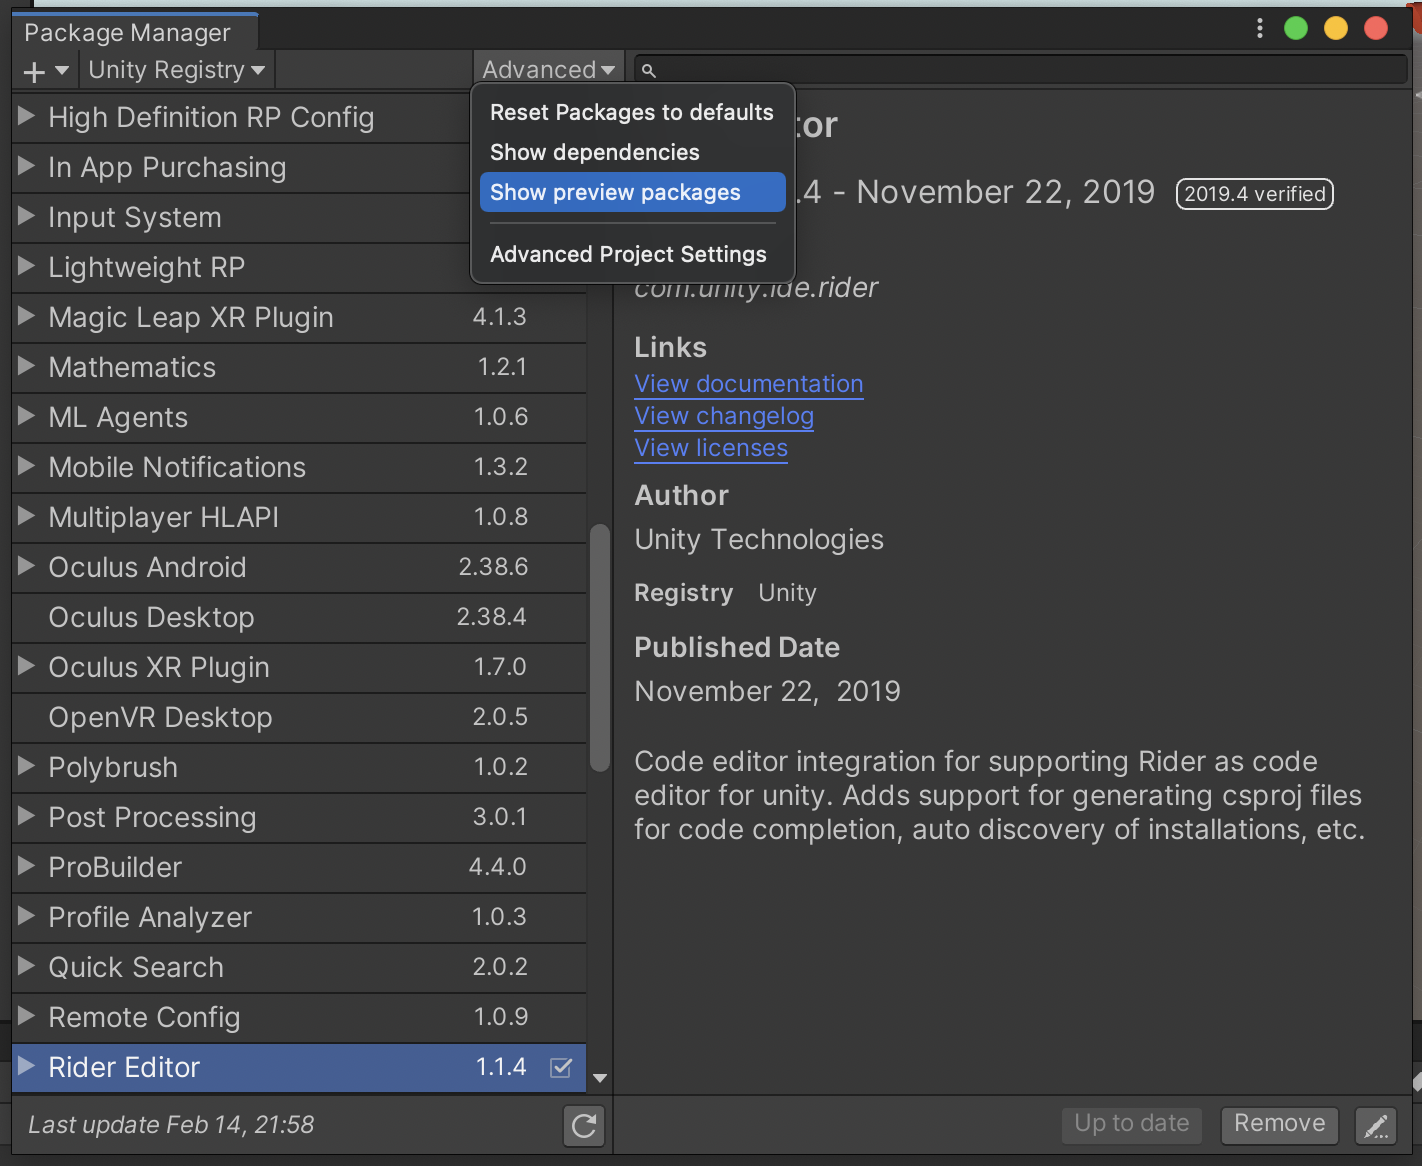
メニューバーから「Window」→「Package Manager」→「Advanced」から「Show preview package」をクリック
-
AR Foundation 4.1.5を選択し、「Install」ボタンをクリック

- ARKit XR Pluginを選択し、「Install」ボタンをクリック

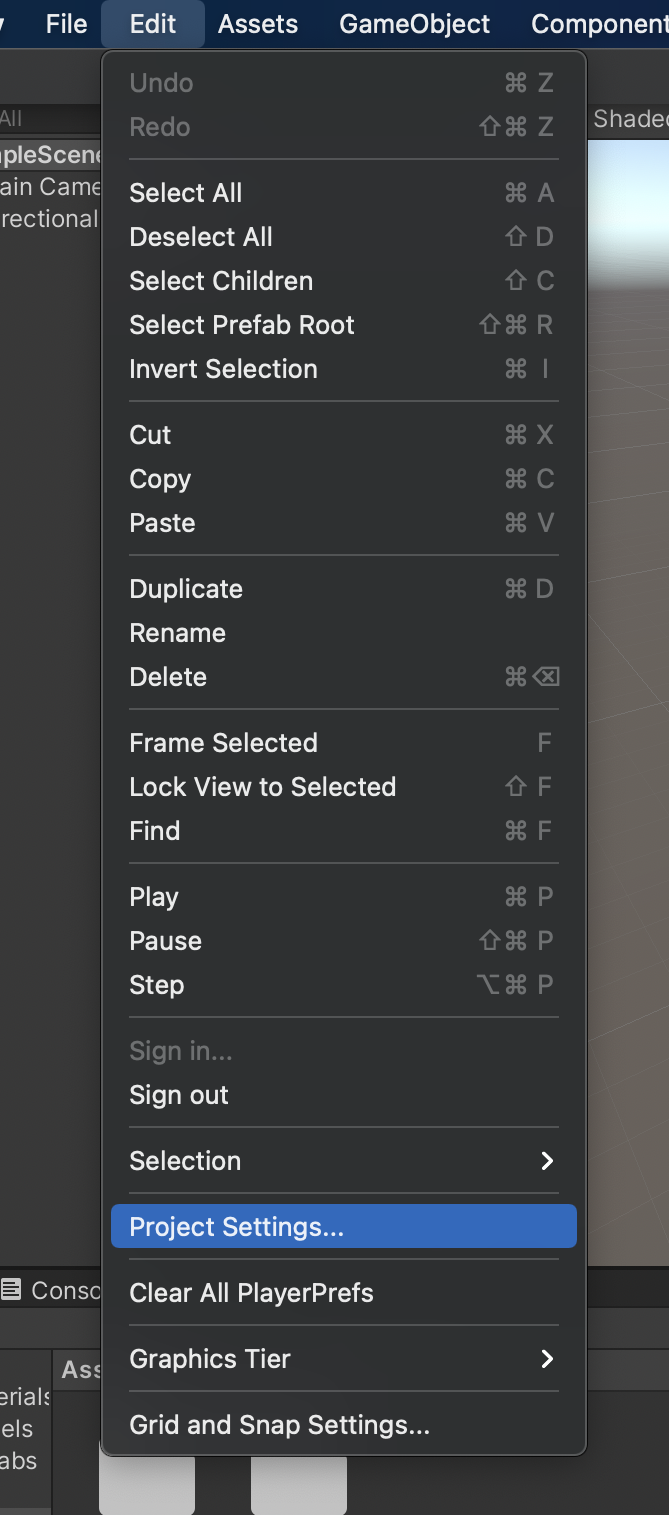
- メニューバーから「File」→「Project Settings」→「Player」→「iOS」→「Other Settings」と選択し、以下の3項目を設定する。
2. Camera Usage Descriptionに、「AR機能にカメラを使用します」(実機でカメラを有効にする際にユーザーに表示されるメッセージです)
3. Target minimumu iOS Versionに、「12.0」と入力
4. Architectureで、「ARM64」を選択


- 同じダイアログの左側のメニューから「XR Plug-in Management」を選択し、「ARKit」をチェック

AR Foundationの基本設定
- Hierarchyから「Main Camera」を削除する

- メニューバーから「GameObject」→「XR」→「AR Session」とクリックして、AR Sessionオブジェクトを追加

- 同様に「GameObject」→「XR」→「AR Session Origin」とクリックして、AR Session Originオブジェクトを追加

- AR Session Originを右クリック→「3D Object」→「Cube」とクリックして、AR Session Originの子としてCubeを追加。
(このCubeがARで映し出され、オクルージョンで隠れるものになります。Cubeじゃなくて好きなオブジェクトでも可。)

- InspectorのTransformのScaleの値をすべて「0.1」にする。(Cubeの大きさで、単位はメートル。お好みで変更可)

環境オクルージョンを使う
ARで表示させた仮想物体より手前にある現実の物体を優先して表示させる設定をします。
AROcclusionManagerコンポーネントの追加
- Hierarchyから、AR Session Originの子にあるAR Cameraをクリック

- Inspectorから、「Add Component」をクリック

- 「AR Occlusion Manager」をクリックして追加する

- 「Environment Depth Mode」、「Human Segmentation Stencil Mode」、「Human Segmantation Depth Mode」をすべて「Best」に変更する

プロジェクトをビルドして実行する
Unity側での作業
- メニューバーから「File」→「Build Settings」

- 「Add Open Scenes」をクリックする。シーンが追加されたことを確認する
- 「Build And Run」ボタンをクリック
 4. ビルドする名称を聞かれるので、わかりやすい名称を入力する

Xcode側での作業
- 左のメニューの「Unity-iPhone」をクリック
- 中央の「Signing & Capabilities」タブをクリック
- 「Automatically manage signing」にチェックを入れる

- 確認ダイアログが表示されるので「Enable Automatic」をクリック

- Team欄で自分のアカウントを選択する。(初めての人は「Add an Account...」から自分のAppleアカウントを追加する)

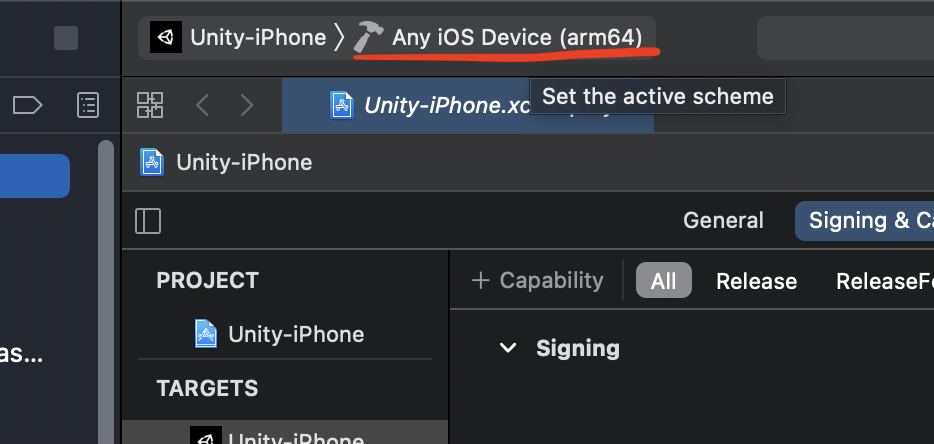
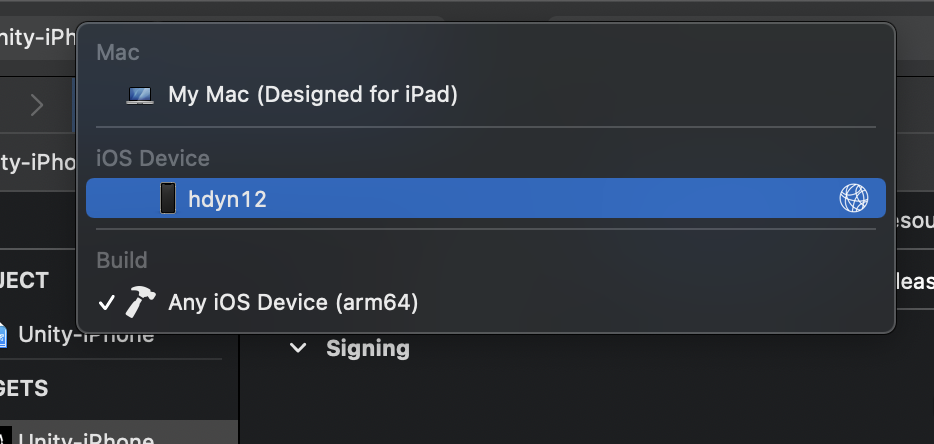
-
上部の「Any iOS Device (arm64)」をクリックし、自分のiPhoneを選択する。
※自分のiPhoneをMacに有線接続しておく。ちなみに、初めに設定をすれば以後は有線接続しておく必要はない(参考リンク)
-
画面左上の実行ボタン▶️をクリック

- iPhoneのロックを解除するメッセージが表示されたら適宜解除する

iPhone実機で動作確認する
正常にビルドされると、自動的にiPhone側でアプリが起動します。
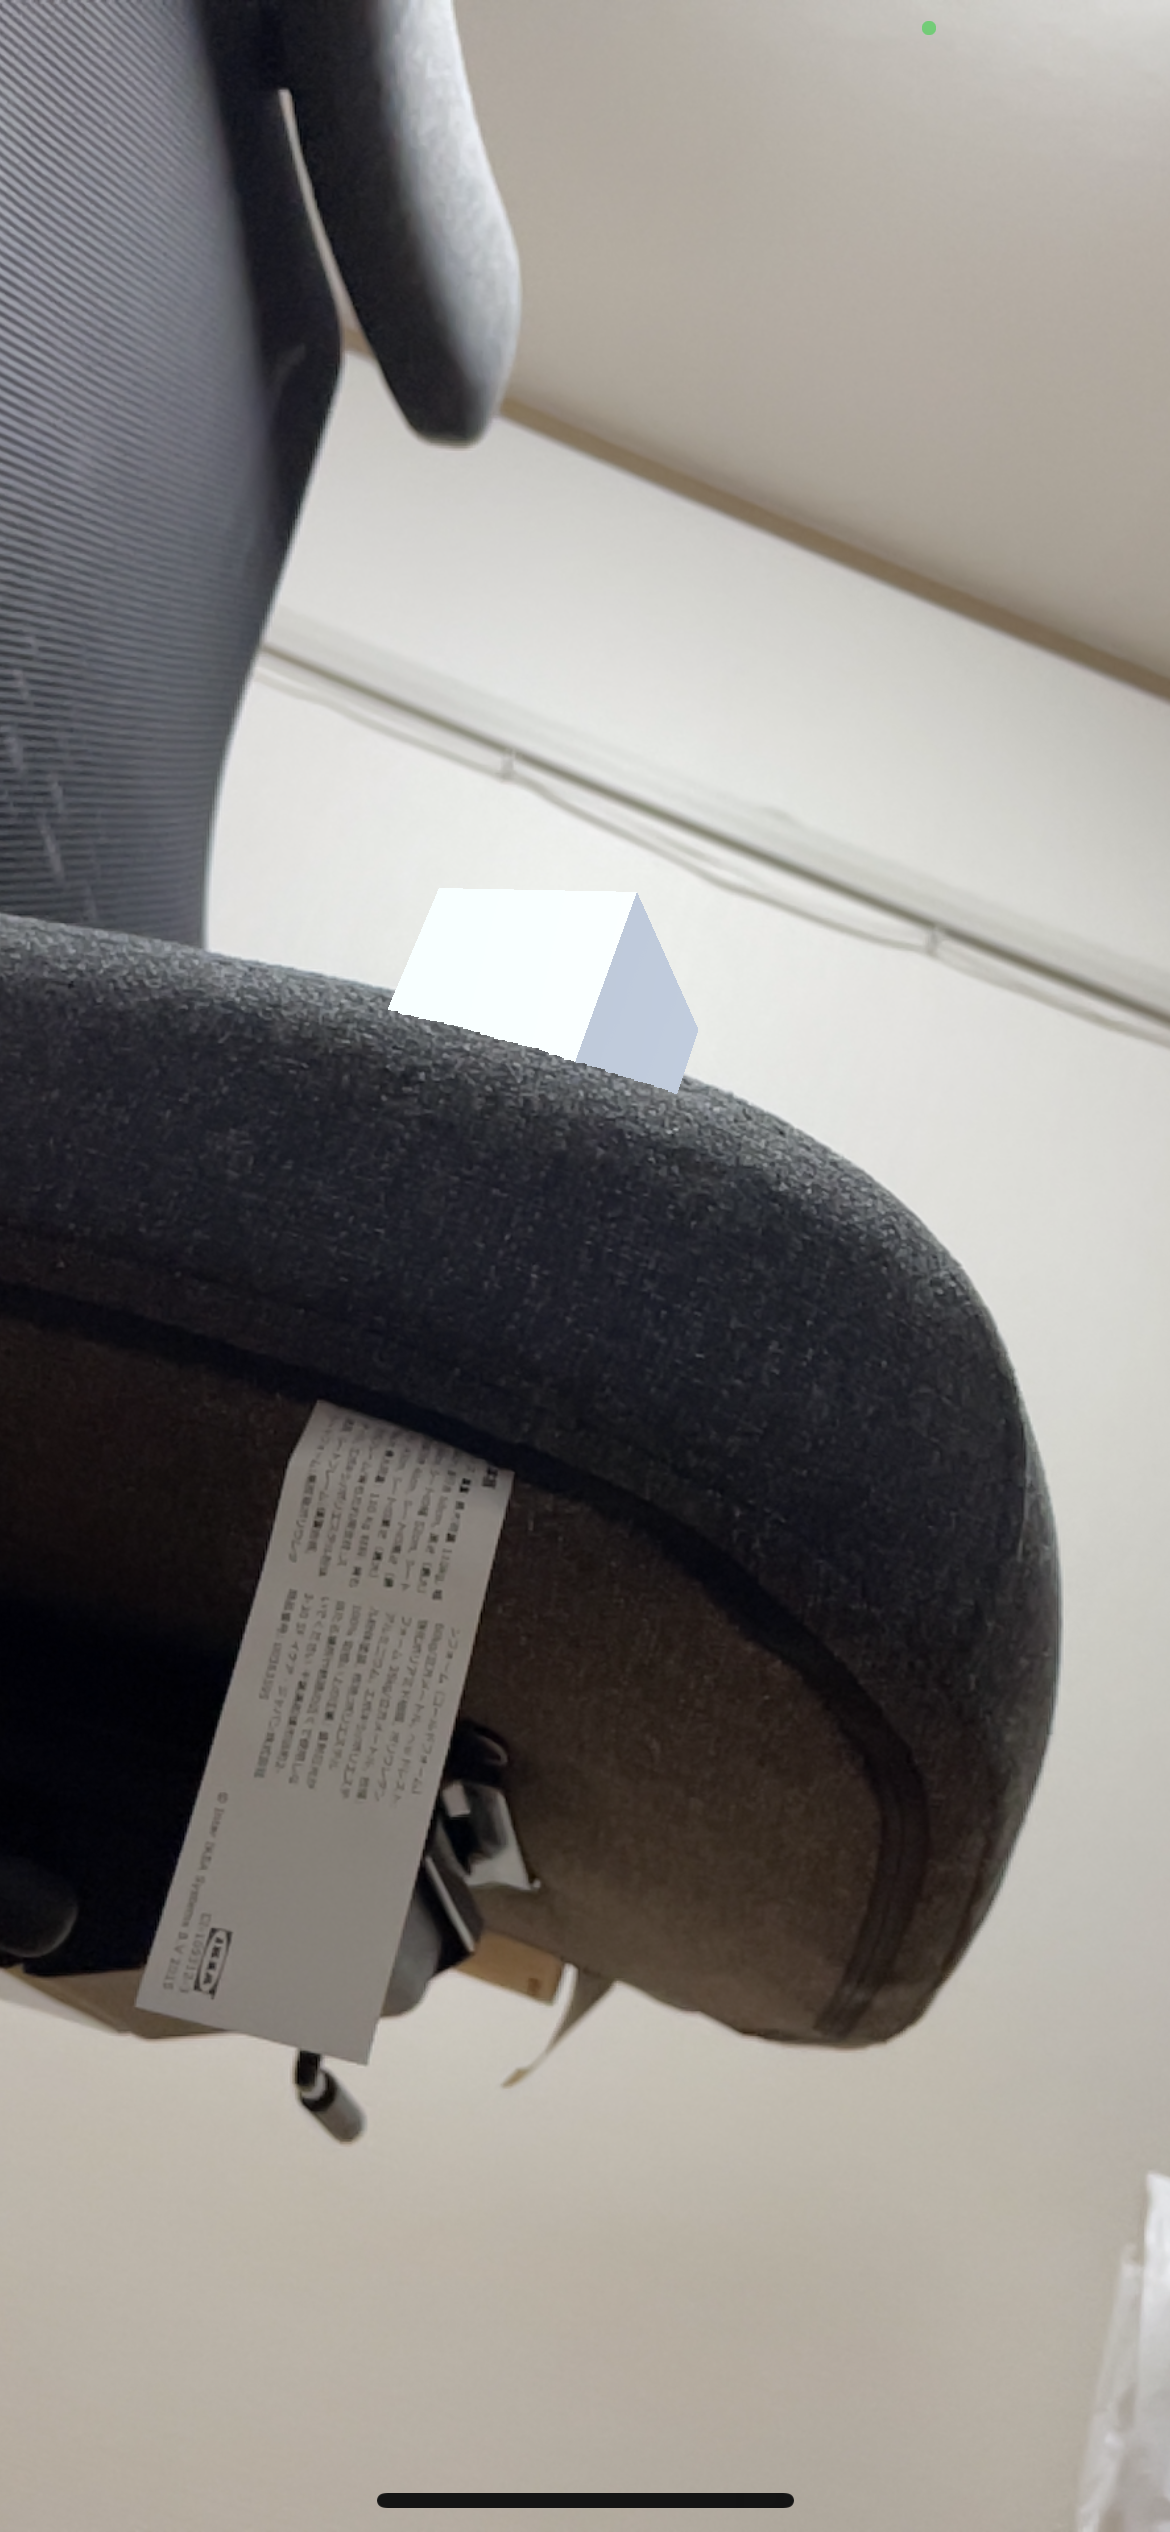
起動時にiPhoneがあった現実空間の座標にCubeが作成されています。
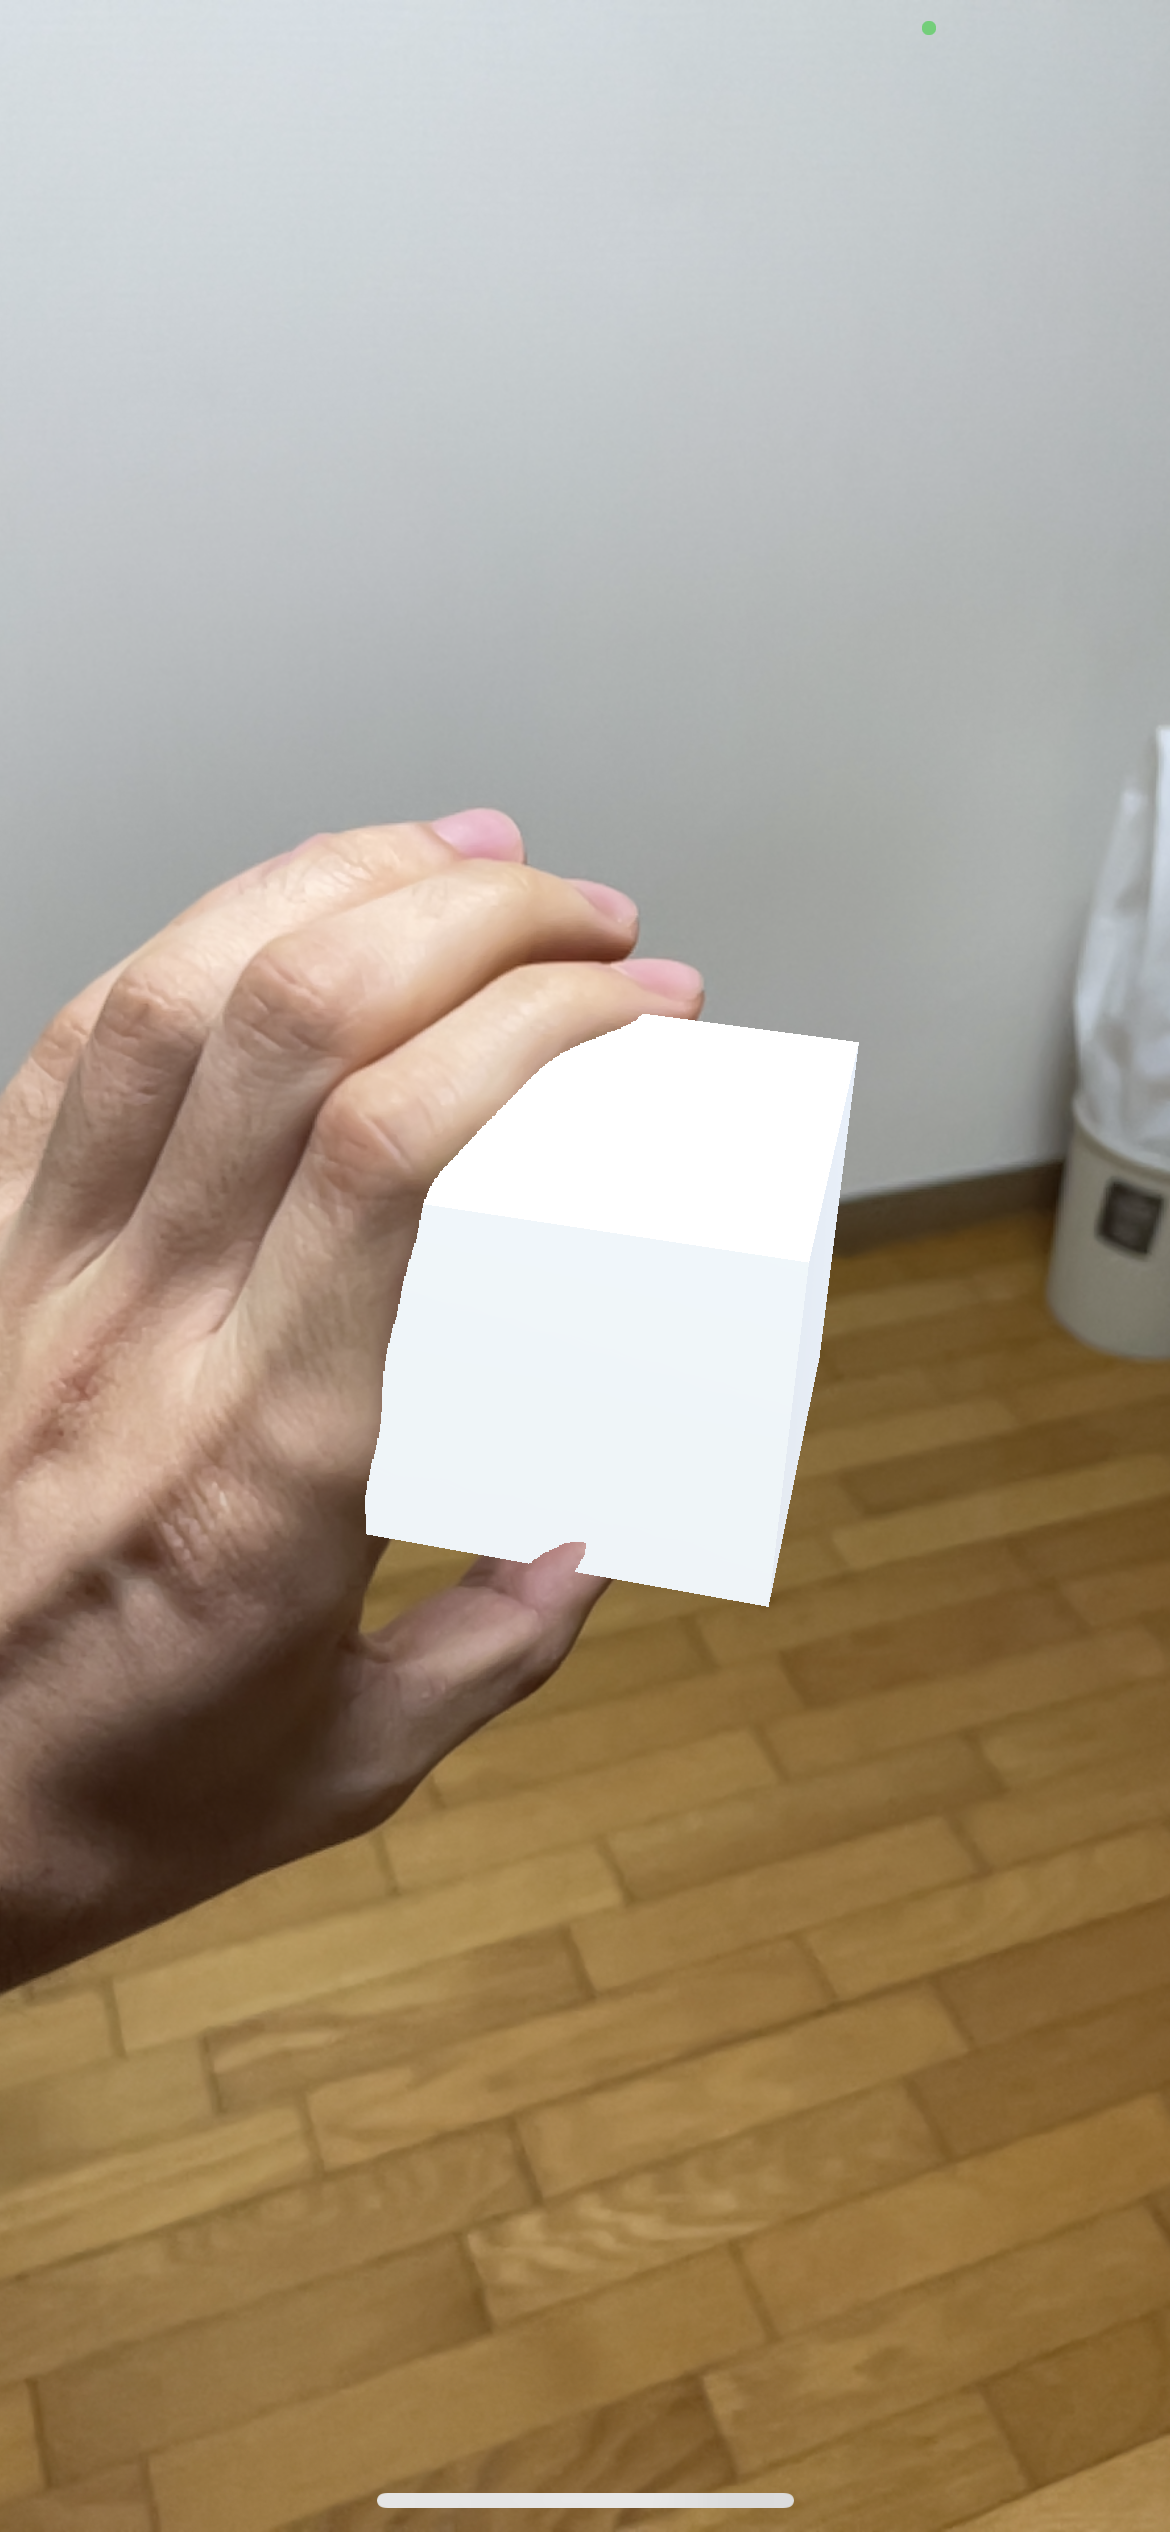
椅子や自分の手にオクルージョンされて、Cubeが隠れて表示されることが確認できます。
楽しい!
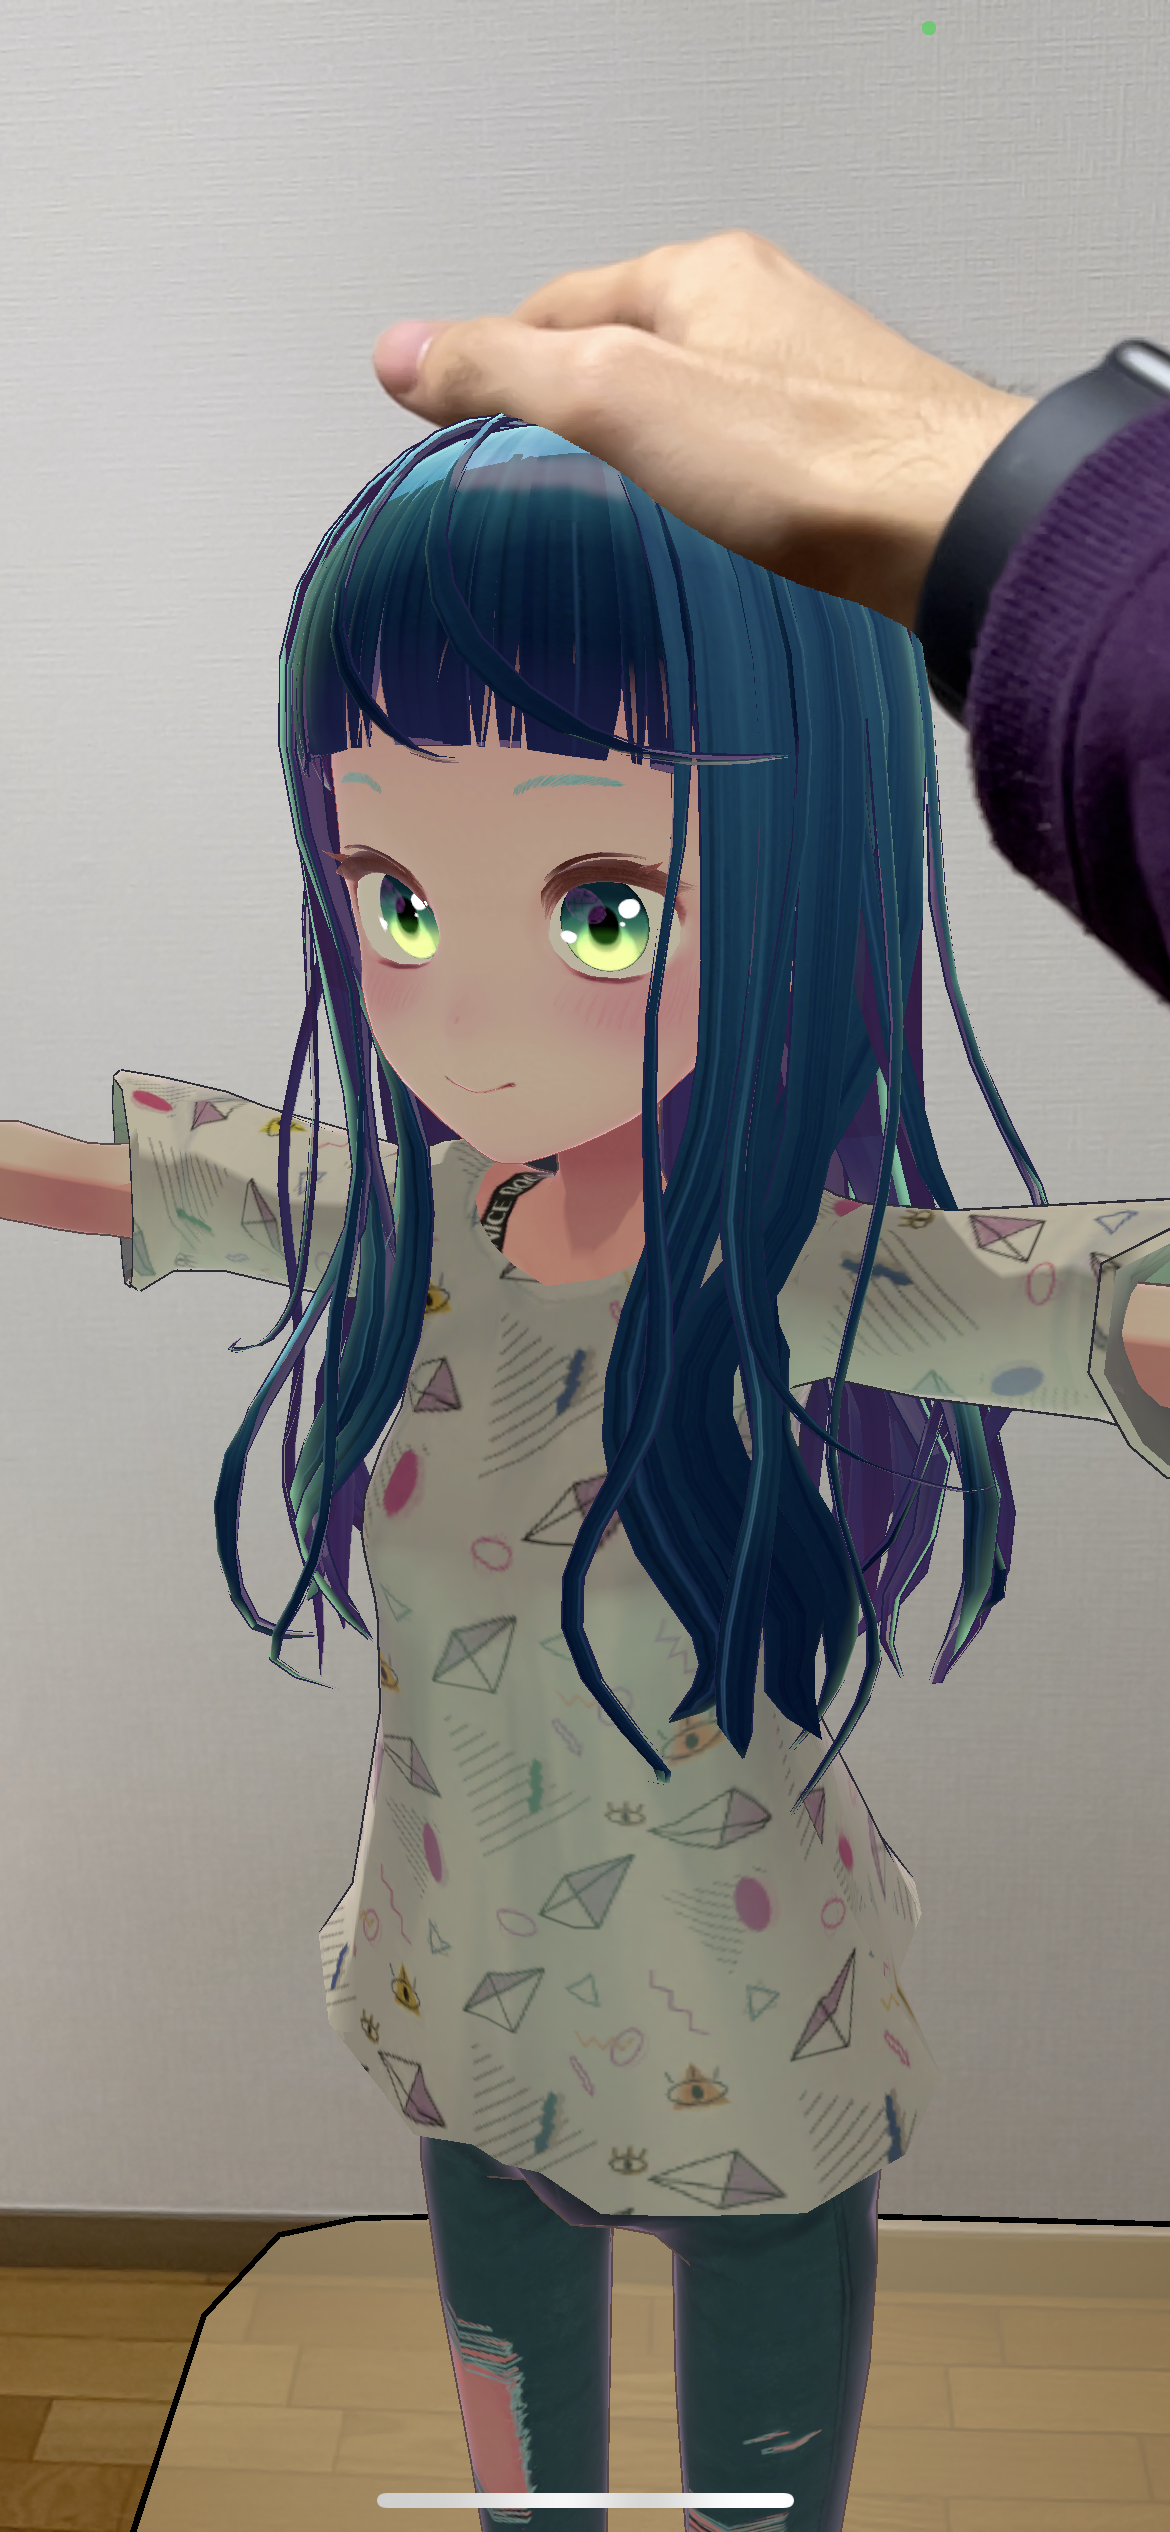
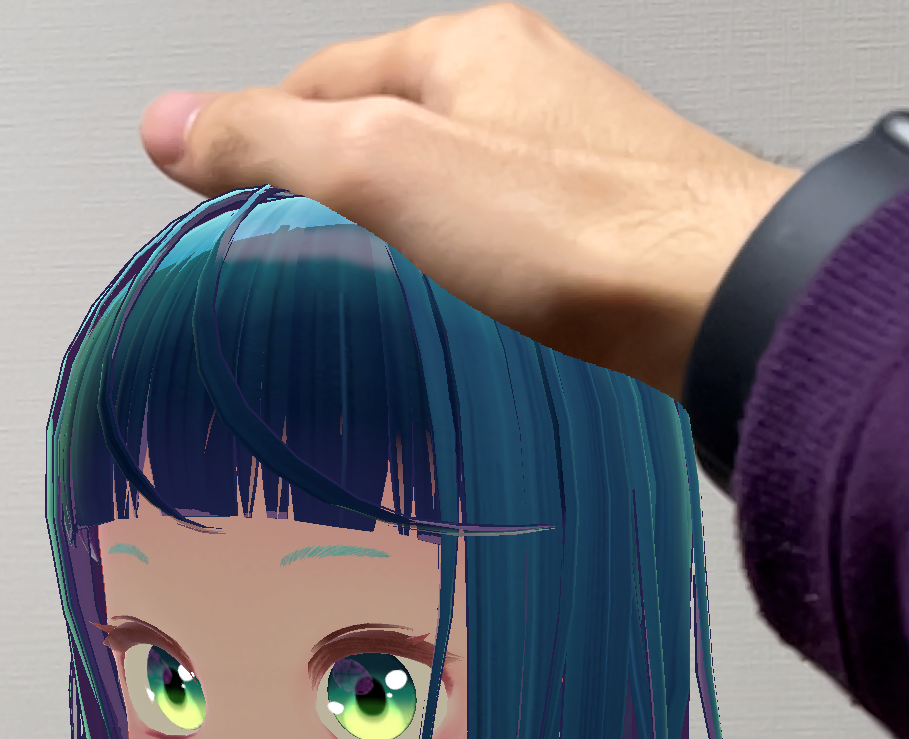
Cubeではなく他のオブジェクトを配置してみる。例えばストカジちゃんを配置することで、ナデナデできてよいです。
所感
AR Occlusion Managerの設定をすべてBestに設定したので、CPUに負荷をかけてでもオクルージョンの精度を優先しているはずなのですが、想像していたよりも精度良くはありませんでした。
角が丸いものに対しては深度が正しく取得しづらいのか、指や椅子のフチよりもCubeが優先して表示されていることがわかります。
かなしい。今後の改善に期待。
VRと違って、好きなアバターを自分の部屋に配置して自分の手で干渉できる!!とも思ったのですが、やはり没入感がないと言うか、スマホの画面越しだと「目の前にいる」感が薄いのも残念。
衝突判定持たせて動かせるようにすればちょっとは変わるかなあ?
それから、実際に動かして初めて気付いたことがひとつ。
部屋の奥行きがあると、カメラの手前に仮想オブジェクトを配置していても、カメラ自体は奥の背景にピントが合っているという状態になります。
もちろん仮想オブジェクトもピンぼけはしないのですが、その状態で例えば自分の手を出したりすると、自分の手だけがピンぼけしてることがあります。
すっごい違和感。
今後のxRでは、アプリで演算した仮想オブジェクトの距離に合わせて、アプリからカメラのピントを調整する仕組みが必要になるのかも。
それと同時に、ARでよくある、ARマーカーを読むと起動する仕組みっていうのはこの問題が発生しづらい、よくできた仕組みだなあと思いました。
さいごに
今回はオクルージョンの機能を触りましたが、ARKit4の目玉のもう一つにボディトラッキング(モーションキャプチャ)があるので、こっちも触ってみようと思います。
トラッカーなしでフルトラを目指して!