Yellowfinには コードモード という機能があり、JavaScriptやCSSを独自に記述することで、Yellowfin単体では困難なUIを実現できます。
今回やることはタイトルそのままです。
コードモードを使って下のイメージのような動作を実現します。

コードモードを有効にする
コードモードを使用するには、システム設定とロール権限が有効になっている必要があります。
YellowfinのWiki(オンラインマニュアル)の記述に従って、コードモードを有効にしてください。
ダッシュボードにオブジェクトを配置する
レポートの配置
ダッシュボードにレポートを配置していきます。
このとき、レポートの名前を半角英数記号のみに変更します。そうしないとJavaScriptから操作することができないからです。

レポート配置の操作を繰り返していくのですが、サイズと位置を同じ値にして重ね合わせます。
また、背景色は白にして、重なった背後にあるレポートが透けて見えないようにします。

今回の例では4つのレポートを重ねました。レポート名は report_1 から report_4 まで連番で振っています。report_1が最前面に、report_4が再背面になるよう配置しました。
ボタンと線の配置
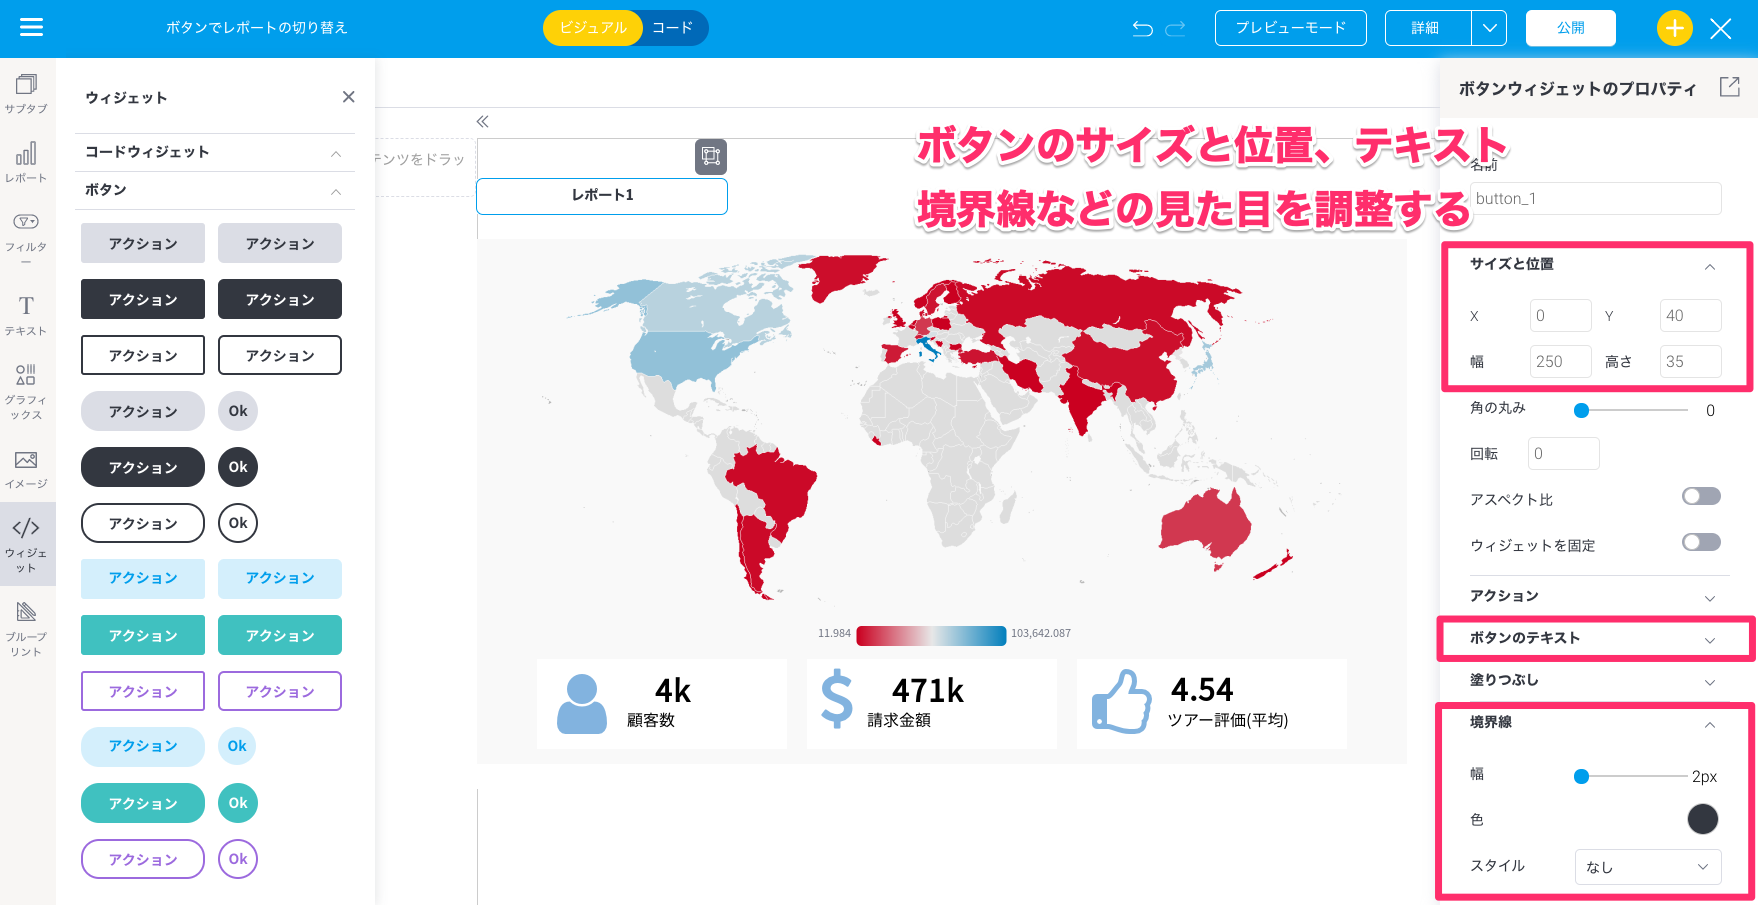
次にボタンを配置します。レポート同様、名前は半角英数記号のみにします。

そしてボタンのサイズと位置やテキスト、境界線のスタイルなどを調整します。
同じようにして、ボタンの下に線を配置します。
最終的には下のイメージのように、button_1からbutton_4とline_1からline_4が並んでいる状態にします。

コードモードにJavaScriptを記述する
画面をコードモードに切り替えて、JavaScriptを記述します。

以下が実際に動作するサンプルコードです。
// ここに変数を宣言したり、コードを記述します

/**
 * キャンバスとそのすべての子要素をページにレンダリングしたりアタッチするときに呼び出されます。
 */
this.onRender = function () {
    // 初期値
    let button1 = this.apis.canvas.select('button_1');
    let button2 = this.apis.canvas.select('button_2');
    let button3 = this.apis.canvas.select('button_3');
    let button4 = this.apis.canvas.select('button_4');
    let report1 = this.apis.canvas.select('report_1');
    let report2 = this.apis.canvas.select('report_2');
    let report3 = this.apis.canvas.select('report_3');
    let report4 = this.apis.canvas.select('report_4');
    let line1 = this.apis.canvas.select('line_1');
    let line2 = this.apis.canvas.select('line_2');
    let line3 = this.apis.canvas.select('line_3');
    let line4 = this.apis.canvas.select('line_4');
    report1.style.display = "";
    report2.style.display = "none";
    report3.style.display = "none";
    report4.style.display = "none";
    line1.style.display = "";
    line2.style.display = "none";
    line3.style.display = "none";
    line4.style.display = "none";

    // レポート切り替えのボタンをクリックしたときの動作
    button1.addEventListener('click', () => {
        report1.style.display = "";
        report1.style = "z-index:0";
        report1.left = 0;
        report1.top = 100;
        report1.width = 1000;
        report1.height = 550;
        report2.style.display = "none";
        report3.style.display = "none";
        report4.style.display = "none";
        line1.style.display = "";
        line2.style.display = "none";
        line3.style.display = "none";
        line4.style.display = "none";
    });

    button2.addEventListener('click', () => {
        report1.style.display = "none";
        report2.style.display = "";
        report2.style = "z-index:0";
        report2.left = 0;
        report2.top = 100;
        report2.width = 1000;
        report2.height = 550;
        report3.style.display = "none";
        report4.style.display = "none";
        line1.style.display = "none";
        line2.style.display = "";
        line3.style.display = "none";
        line4.style.display = "none";
    });

    button3.addEventListener('click', () => {
        report1.style.display = "none";
        report2.style.display = "none";
        report3.style.display = "";
        report3.style = "z-index:0";
        report3.left = 0;
        report3.top = 100;
        report3.width = 1000;
        report3.height = 550;
        report4.style.display = "none";
        line1.style.display = "none";
        line2.style.display = "none";
        line3.style.display = "";
        line4.style.display = "none";
    });

    button4.addEventListener('click', () => {
        report1.style.display = "none";
        report2.style.display = "none";
        report3.style.display = "none";
        report4.style.display = "";
        report4.style = "z-index:0";
        report4.left = 0;
        report4.top = 100;
        report4.width = 1000;
        report4.height = 550;
        line1.style.display = "none";
        line2.style.display = "none";
        line3.style.display = "none";
        line4.style.display = "";
    });
};

/**
 * キャンバスとそのすべての子要素がページから削除されるときに呼び出されます。
 */
this.onRemove = function () {
    // ここにコードを記述します。これは、イベントリスナーを削除するのに理想的な場所です
};
やっていることは非常に単純で、button_1〜4のどれかをクリックしたときに、対応するline_1〜4とreport_1〜4の表示を切り替えています。もう少しスマートな書き方がありそうですが、ひとまず動かすのが目的なのでご容赦ください。
ボタンクリック時に、レポートのz-index(表示順。0は最前面), left(x位置), top(y位置), width(幅), height(高さ)の値を更新しています。わざわざこんなことをしている理由は、こうしておかないとフィルターと連動させた場合にうまく表示できなかったからです。今回の例のようにフィルターを使用していない場合であれば、これらの値更新は行わなくても問題ありません。
あとは保存さえすれば、ボタンでレポート表示切替できるダッシュボードが完成です。
限られたスペースを有効に使用できて、自由度の高いダッシュボードを作ることができますね!