はじめに
執筆者は趣味レベルのAndroidアプリ開発者である為,説明間違いが含まれている可能性があります。お気づきの点がありましたら,是非コメントお願いいたします。また,アップデートにより,機能やコードが記事執筆時点と異なる場合があります。
本記事の内容
ボタンを押すとカウンターが1ずつ増えていくウィジェットを作成し,基本的なウィジェットの作成方法とクリック自動動作の設定方法について解説します。
ウィジェットのクリック時の動作の実装について
ウィジェット上のボタンにクリック時動作を付加したい場合,
Activityと同様に「findViewByIdからのsetOnClickListenerで....」とは出来ません(泣)
ウィジェットの場合,ブロードキャストという仕組みを使用します。
これは,アラームの実装等にも使われる仕組みで,ブロードキャストの為のトリガーを設定し,トリガーが起動したら情報(Intent)を全体に通知し,それをBroadcastReceiverによって受信して処理を行うという流れになります。ちょっと面倒ですが・・・
アプリにウィジェットを追加する方法
アプリにウィジェットを追加するのは簡単です。
Android Studioの上のメニューの[File]->[New]->[Widget]->[AppWidget]でウィジェットのテンプレートを簡単に追加できます。
この際,AppWidgetProviderを継承したクラスが自動で作成されたり,自動的にManifestにBroadcastReceiverが登録されたりします。また,リソースにはレイアウトファイルが追加されたり,ウィジェットの情報を定義したxmlファイルが追加されています。
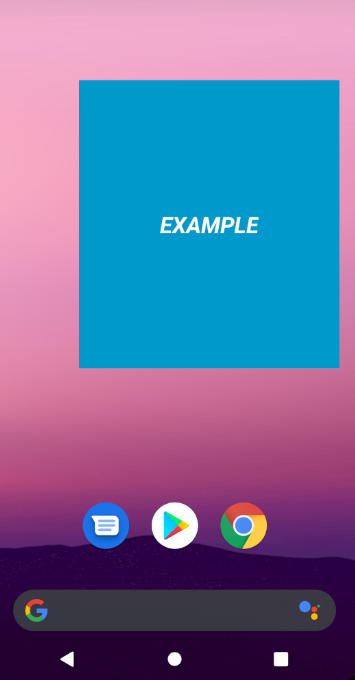
初期状態のウィジェットのデザインは,青い背景の中央にテキストビューが配置されただけのものになります。

ウィジェットにボタンを追加していく
ウィジェット用のレイアウトファイルを編集しましょう。
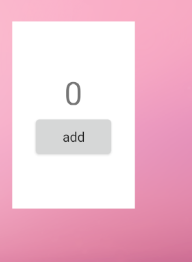
今回は以下のようにしました。
<LinearLayout xmlns:android="http://schemas.android.com/apk/res/android"
    android:layout_width="match_parent"
    android:layout_height="match_parent"
    android:background="@android:color/white"
    android:gravity="center"
    android:orientation="vertical"
    android:padding="@dimen/widget_margin">

    <TextView
        android:id="@+id/counter"
        android:layout_width="wrap_content"
        android:layout_height="wrap_content"
        android:text="0"
        android:textAppearance="@style/TextAppearance.AppCompat.Display1" />

    <Button
        android:id="@+id/add_button"
        android:layout_width="wrap_content"
        android:layout_height="wrap_content"
        android:text="add" />

</LinearLayout>
白背景にカウンターとボタンのみ配置しています。因みに,LinearLayoutにbackgroundが設定されていますが,これを設定しない場合,背景は透過します。
クリック時処理を追加していく
ウィジェット作成時にAppWidgetProviderを継承したクラスが作成されていると思います。
このクラスの中で,ウィジェットの初期設定や,削除時や更新時の設定を行うことができます。
AppWidgetProviderはBroadcastReceiverのサブクラスである為,AppWidgetProvideを継承したクラスでは,BroadcastReceiverのonReceiveをオーバーライドすることが出来ます。
onReceiveとは,そのクラス宛のIntentが送られてきた際に実行されるメソッドになります。onReceiveの中でintentの情報を読み取り,その情報に応じて各々の処理を実装するというのが一般的な流れになります。
以下が実際のソースになります
//com.example.android.stackwidgetの部分は自分のアプリのIDに修正する
private const val COUNT_UP = "com.example.android.buttonwidgettest.COUNT_UP"

class SampleAppWidget : AppWidgetProvider() {
    override fun onUpdate(
        context: Context,
        appWidgetManager: AppWidgetManager,
        appWidgetIds: IntArray
    ) {
        // There may be multiple widgets active, so update all of them
        for (appWidgetId in appWidgetIds) {
            updateAppWidget(context, appWidgetManager, appWidgetId)
        }
    }

    override fun onReceive(context: Context?, intent: Intent?) {
        super.onReceive(context, intent)

        if (context == null || intent == null) return

        when (intent.action) {
            COUNT_UP -> {
                // カウント値を読み込み
                val dataStore = context.getSharedPreferences("widget", Context.MODE_PRIVATE)
                var clickCount = dataStore.getInt("clickCount", -1)

                clickCount++

                // カウントアップ後のカウント値を書き込み
                dataStore.edit().putInt("clickCount", clickCount).commit()

                //TextViewにカウント値を適用
                val views = RemoteViews(context.packageName, R.layout.sample_app_widget)
                views.setTextViewText(R.id.counter, clickCount.toString())

                // ウィジェットを更新
                val myWidget = ComponentName(context, SampleAppWidget::class.java)
                val manager = AppWidgetManager.getInstance(context)
                manager.updateAppWidget(myWidget, views)
            }
        }
    }
}

//onUpdateのappWidgetId毎の処理はこちらで実装する
internal fun updateAppWidget(
    context: Context,
    appWidgetManager: AppWidgetManager,
    appWidgetId: Int
) {

    // SharedPreferencesからデータを読み出し(登録されていない場合は0)
    val dataStore = context.getSharedPreferences("widget", Context.MODE_PRIVATE)
    var clickCount = dataStore.getInt("clickCount", -1)
    if (clickCount == -1) {
        dataStore.edit().putInt("clickCount", 0).apply()
        clickCount = 0
    }

    // RemoteViews オブジェクトを作成
    val views = RemoteViews(context.packageName, R.layout.sample_app_widget)

    //TextViewにカウント値を適用
    views.setTextViewText(R.id.counter, clickCount.toString())

    //Button押下通知用のPendingIntentを作成しに登録
    val countIntent = Intent(context, SampleAppWidget::class.java).apply { action = COUNT_UP }
    val countPendingIntent =
        PendingIntent.getBroadcast(context, 0, countIntent, PendingIntent.FLAG_UPDATE_CURRENT)
    views.setOnClickPendingIntent(R.id.add_button, countPendingIntent)

    // ウィジェットを更新
    appWidgetManager.updateAppWidget(appWidgetId, views)
}
ウィジェット作成時の初期化処理
ウィジェット毎の,作成時の初期化処理は主にupdateAppWidgetに実装します。
今回は,カウント値の保存にはSharedPreferencesを使っていきます。
まず,カウント値をSharedPreferencesを使って読み込みます。
作成されていない場合は,新規に作成します。
そして,TextViewにカウント値を適用を適用します。
次に,countIntentというIntentを作成しています。Intentのactionには,自分で定義したCOUNT_UPという定数を設定しています。COUNT_UPはアプリのIDを含んでいますが,これはウィジェットからのブロードキャストを他のアプリも受け取る可能性がある為ですので,自分のアプリIDを含めてください。
次に,Intentを元にPendingIntentを作成します。PendingIntentはアラーム時の処理や今回のタップ時処理のように,Intentを後から利用したいときに作成するものになります。作成したPendingIntentをsetOnClickPendingIntentを使用して,ボタンウィジェットのクリック時処理に登録します。
最後にupdateAppWidgetを行います。変更を即座にUIに反映するためにはupdateAppWidgetを行う必要があるので,忘れず実行しましょう。
ボタンが押された際の処理
Intentの作成時に,Intentの通知先にSampleAppWidgetを設定しているため,ボタンが押された際にはこのクラスのonReceiveが実行されます。
onReceiveでは,送付されてきたIntentのactionを見ることで処理を振り分けしています。
actionがCOUNT_UPである場合,まずSharedPreferencesからカウント値を読み込み,カウントを+1して,+1した値をSharedPreferencesに保存し,TextViewを更新するというような流れになります。
これで,ウィジェットを起動してみると,ちゃんとカウントアップされると思います。
補足:アプリからウィジェットを操作する場合
今回はウィジェットのボタンにトリガーを設定しましたが,例えばアプリの何らかのトリガーによってウィジェットを操作したい場合もあると思います。(アプリでデータが更新されたらウィジェットも更新など)
そういった場合も同様に,インテントを作成してsendBroadcast()でブロードキャストしたり,PendingIntentにしてアラームに設定して,ウィジェットのonReceiveで受け取ることで実装できます。
ただこのままだと・・・
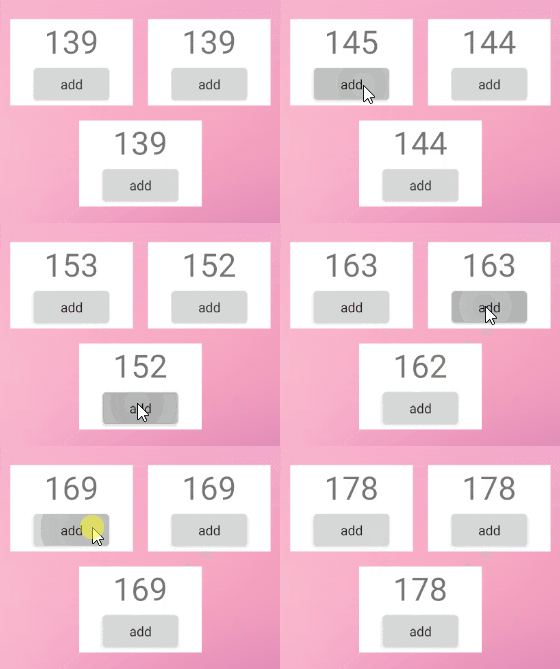
この実装で複数のウィジェットを作成した際に,複数が同じものとして動作します。
この動作で大丈夫であれば問題ないのですが,複数のウィジェットを作成した際,それぞれを独立させて動作させたい場合も多いかと思います。
その場合の実装方法ですが,別で記事を書いていますのでこちらの記事を御覧ください。
おわりに
もし説明や実装におかしな点がありましたら是非コメントください。
修正させて頂きます。

