Google Colaboratoryの利便性が素晴らしく、Pythonデータ分析環境はほぼこれ一本で試行錯誤している私です。
Kaggleでのコンペティション参加もColaboratory上で統一できるのかな?ってことで、
KaggleAPIをColaboratory上で実行するおまじないコード&作法です。
何か誤りなどがあったらご指摘いただけると喜びます!!
Google Driveを使う
Kaggle APIに関係ないんですが、処理上Google Driveを使うのが一番効率的だと思うので、
Google Driveを利用できるようにするマウント処理から。
Google Driveのラッパーをインストールします。
コードを実行するだけでOK。
!apt-get install -y -qq software-properties-common python-software-properties module-init-tools
!add-apt-repository -y ppa:alessandro-strada/ppa 2>&1 > /dev/null
!apt-get update -qq 2>&1 > /dev/null
!apt-get -y install -qq google-drive-ocamlfuse fuse
認証トークンを生成。
URL発行されるので、アクセスしてトークンをコピペしましょう。
from google.colab import auth
auth.authenticate_user()
Google Driveライブラリの認証トークンも生成、コピペ。
from oauth2client.client import GoogleCredentials
creds = GoogleCredentials.get_application_default()
import getpass
!google-drive-ocamlfuse -headless -id={creds.client_id} -secret={creds.client_secret} < /dev/null 2>&1 | grep URL
vcode = getpass.getpass()
!echo {vcode} | google-drive-ocamlfuse -headless -id={creds.client_id} -secret={creds.client_secret}
以下で最後。drive直下のファイルが表示されれば成功。
!mkdir -p drive
!google-drive-ocamlfuse drive

print ('Files in Drive:')
!ls drive/
Kaggle APIの準備
まずは Kaggleコマンドをノートブック上でインストールします。
!pip install kaggle
続いて、以下よりKaggle API トークンを生成。
kaggle.jsonファイルをダウンロードする。
https://www.kaggle.com/(ユーザー名)/account

kaggle.jsonファイルをGoogle Drive上の好きな場所に保存します。
ファイル名は変えない事。
次のコードでAPIを使えるようにします。
なお、このコードはKaggle Forumで情報提供していただいていた神様のコードそのまま引用です。
感謝です。
- useful Google Labs tool for people playing with data science and deep learning(Kaggle Forum)
- This notebook provides a recipe for using Kaggle API with Colab(Colaboratory)
from googleapiclient.discovery import build
import io, os
from googleapiclient.http import MediaIoBaseDownload
from google.colab import auth
auth.authenticate_user()
drive_service = build('drive', 'v3')
results = drive_service.files().list(
q="name = 'kaggle.json'", fields="files(id)").execute()
kaggle_api_key = results.get('files', [])
filename = "/content/.kaggle/kaggle.json"
os.makedirs(os.path.dirname(filename), exist_ok=True)
request = drive_service.files().get_media(fileId=kaggle_api_key[0]['id'])
fh = io.FileIO(filename, 'wb')
downloader = MediaIoBaseDownload(fh, request)
done = False
while done is False:
status, done = downloader.next_chunk()
print("Download %d%%." % int(status.progress() * 100))
os.chmod(filename, 600)
# Kaggle APIの利用

さぁ、試してみましょう。

コンペティションの一覧を取得してみます。

```python
!kaggle competitions list
コンペティションのデータのダウンロードもやってみます。
Google Drive上のディレクトリにダウンロードしてみましょう。
サイズが大きいファイルは、残り容量に要注意です。
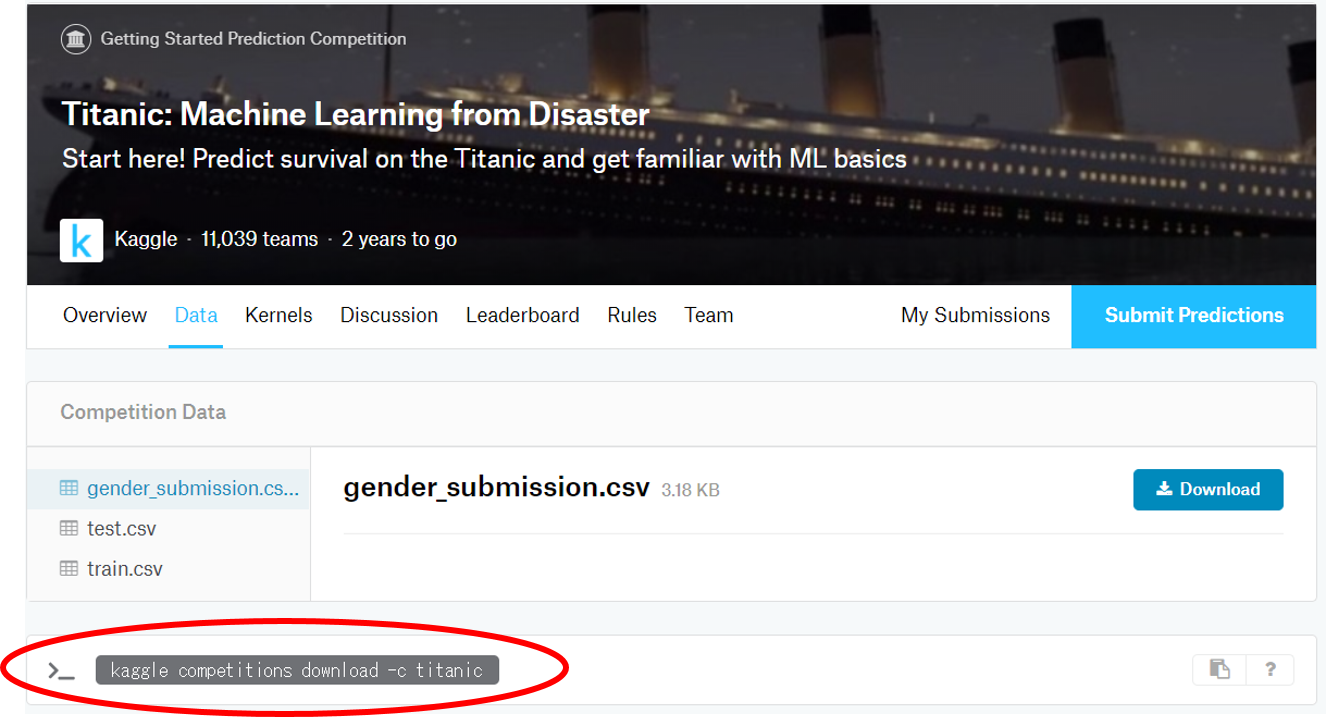
Kaggleのコンペサイトから、以下のAPI用コマンドをコピーします。

Google Colaboratory上に貼付け。
先頭にエクスクラメーションマーク(!)を付けるのを忘れずに。
ここでは、データをダウンロードするディレクトリを以下にしています。
drive/Colab Notebooks
※Colaboratoryファイルの作成の仕方によって、drive/Colab Notebooks下にファイルが生成されます。
このディレクトリ名が厄介で、半角スペースが入っています。
Linuxコマンドを書く際は、半角スペースの前に\が必要になりますので注意しましょう。
kaggle competitions download -c titanic -p drive/Colab\ Notebooks

# カレントディレクトリにダウンロードする場合は以下
# !kaggle competitions download -c titanic -p.
データセットが指定ディレクトリにダウンロードされたら成功
- gender_submission.csv
- test.csv
- train.csv
Kaggle API の詳しい仕様は以下のGitHubで公開されています。
Kaggle API
(おまけ)カレントディレクトリの変更
ローカル環境と同様、Colaboratory上でもカレントディレクトリは指定可能です。
import os
os.getcwd() # 現在のカレントディレクトリの取得
os.chdir('/content/drive/Colab Notebooks') # カレントディレクトリを指定
os.getcwd()
これでカレントディレクトリが変更されていることが確認できるはずです。
あとは以下のように普通にデータを取得してくればOK。
import pandas as pd
train = pd.read_csv('train.csv')
train.head()
Enjoy! Colaboratory and Kaggle!!
参考
参考にさせていただいたプロフェッショナルの方々の記事まとめ
