■ まず初めに
アプリ開発未経験&プログラミング初心者。以前よりアプリを作りたい願望があったので挑戦。
制作途中でつまずいた点と解決法を初心者なりに記載しましたので、これからAndroidアプリ開発を始められる方の参考になれば幸いです。
■ 開発環境
- AndroidStudio2.2.2(制作が2016年なのでちょっと古いです。。)
- JDK8
■ つまずいた事
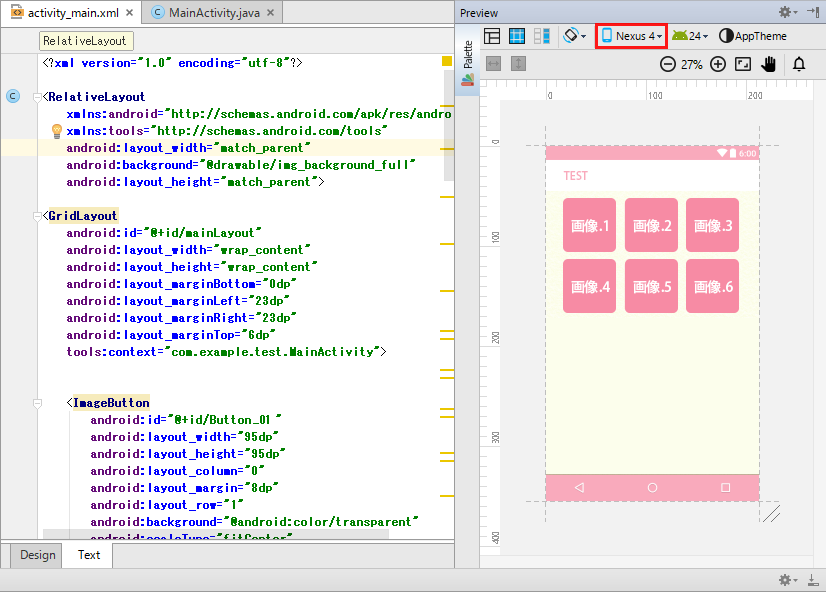
- 画像のボタン等を、大きさを指定して任意の場所に配置したい場合。デフォルトで搭載されているレイアウト機能では、デバイス毎の画面解像度の違いに対応ができない。GridLayoutとかRelativeLayoutとか
例:デバイス:Nexus4。"画像.1"〜"画像.6"までの仮ボタンを配置
↓ デバイス:Nexus7に変更
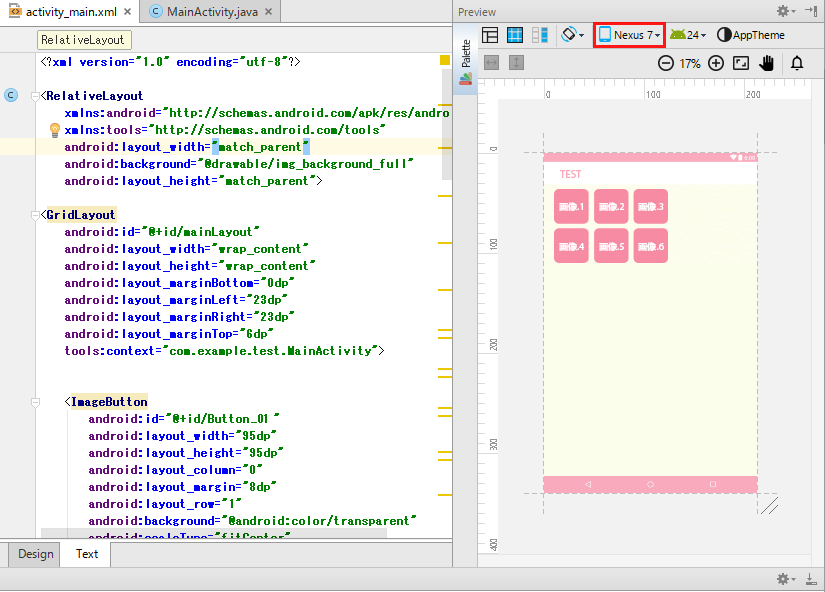
画像がおててけぼりに…
cssみたいにwidth: ○○%ができればいいのに…
なので、javaの記述でデバイス毎の画面解像度違いに対応してみる
※Android Support Library 23.0 から 提供された『PercentRelativeLayout』を使用すれば画像の%指定ができるっぽい。
今回は勉強も兼ねてjavaの記述だけでデバイスの画面解像度違いに対応してみる。(マルチデバイス対応ではないです)
参考:https://qiita.com/komatatsu/items/c9ea73de513dd287aacb
■ javaでやったこと
- 表示される端末の画面幅をonWindowFocusChangedメソッドを使って取得
- 取得した画面幅を使って、画像が適切な大きさで表示されるように拡縮比を定義。
- 取得した画面幅と拡縮比より計算した画像幅を使って、適切な余白幅を定義。
- 今回は端末の縦向きのみ対応する(横向きorタブレット対応する方はif文で別途対応でしてください。)
画像.1= Button01
画像.2= Button02
画像.3= Button03
画像.4= Button04
画像.5= Button05
画像.6= Button06
以下レイアウト用プログラム
MainActivity.java
    /*onWindowFocusChanged()を使います*/
    @Override
    public void onWindowFocusChanged(boolean hasFocus) {
        super.onWindowFocusChanged(hasFocus);

        RelativeLayout layout = (RelativeLayout) findViewById(R.id.mainLayout);

        /*画面(デバイス)の幅,高さを取得*/
        float mainHeight = layout.getHeight();
        float mainWidth = layout.getWidth();


        /*取得したレイアウトの幅"A"とし、配置したい画像の幅"B"とした場合
        "B"が端末内で想定した大きさになる拡縮比が"A/4"*/
        float mainIconScale = layout.getWidth() / 4;


        /*各画像をfindViewByIdで取得。"各iconに格納"*/
        ImageButton icon1 = (ImageButton) findViewById(R.id.Button01);
        ImageButton icon2 = (ImageButton) findViewById(R.id.Button02);
        ImageButton icon3 = (ImageButton) findViewById(R.id.Button03);
        ImageButton icon4 = (ImageButton) findViewById(R.id.Button04);
        ImageButton icon5 = (ImageButton) findViewById(R.id.Button05);
        ImageButton icon6 = (ImageButton) findViewById(R.id.Button06);


        /*取得した画像の幅を.getWidth()で取得。"iconOriginWidth"に格納*/
        /*サイズの違う画像を配置する場合は別途取得してください*/
        float iconOriginWidth = icon1.getWidth();


        /*拡縮比 / 元画像幅 = 画像の縮小比を定義、取得する*/
        float iconScale = mainIconScale / iconOriginWidth;


        /*定義した比率から表示するicon幅,余白を取得する*/
        int iconWidth = (int) (iconOriginWidth * iconScale);
        int iconMargin = (int)(mainWidth - iconWidth * 3) / 4;


        /*icon画面出力*/
        FrameLayout.LayoutParams params1 =
                new FrameLayout.LayoutParams(iconWidth, iconWidth);
        params1.leftMargin = (int) (iconMargin * 1.2);  //画像.1の左の余白を定義
        params1.topMargin = (int) (iconMargin * 2.5);  //画像.1の上の余白を定義
        icon1.setLayoutParams(params1);

        FrameLayout.LayoutParams params2 =
                new FrameLayout.LayoutParams(iconWidth, iconWidth);
        params2.leftMargin = (int) (iconMargin * 2.0 + iconWidth);  //画像.2の左の余白を定義
        params2.topMargin = (int) (iconMargin * 2.5);  //画像.2の上の余白を定義
        icon2.setLayoutParams(params2);

        FrameLayout.LayoutParams params3 =
                new FrameLayout.LayoutParams(iconWidth, iconWidth);
        params3.leftMargin = (int) (iconMargin * 2.8 + iconWidth * 2);
        params3.topMargin = (int) (iconMargin * 2.5);
        icon3.setLayoutParams(params3);

        FrameLayout.LayoutParams params4 =
                new FrameLayout.LayoutParams(iconWidth, iconWidth);
        params4.leftMargin = (int) (iconMargin * 1.2);
        params4.topMargin = (int) (iconMargin * 3.1 + iconWidth);
        icon4.setLayoutParams(params4);

        FrameLayout.LayoutParams params5 =
                new FrameLayout.LayoutParams(iconWidth, iconWidth);
        params5.leftMargin = iconMargin * 2 + iconWidth;
        params5.topMargin = (int) (iconMargin * 3.1 + iconWidth);
        icon5.setLayoutParams(params5);

        FrameLayout.LayoutParams params6 =
                new FrameLayout.LayoutParams(iconWidth, iconWidth);
        params6.leftMargin =(int) (iconMargin * 2.8 + iconWidth * 2);
        params6.topMargin = (int) (iconMargin * 3.1 + iconWidth);
        icon6.setLayoutParams(params6);
    }
■ 結果
例:左デバイス:Nexus7 右デバイス:Nexus10
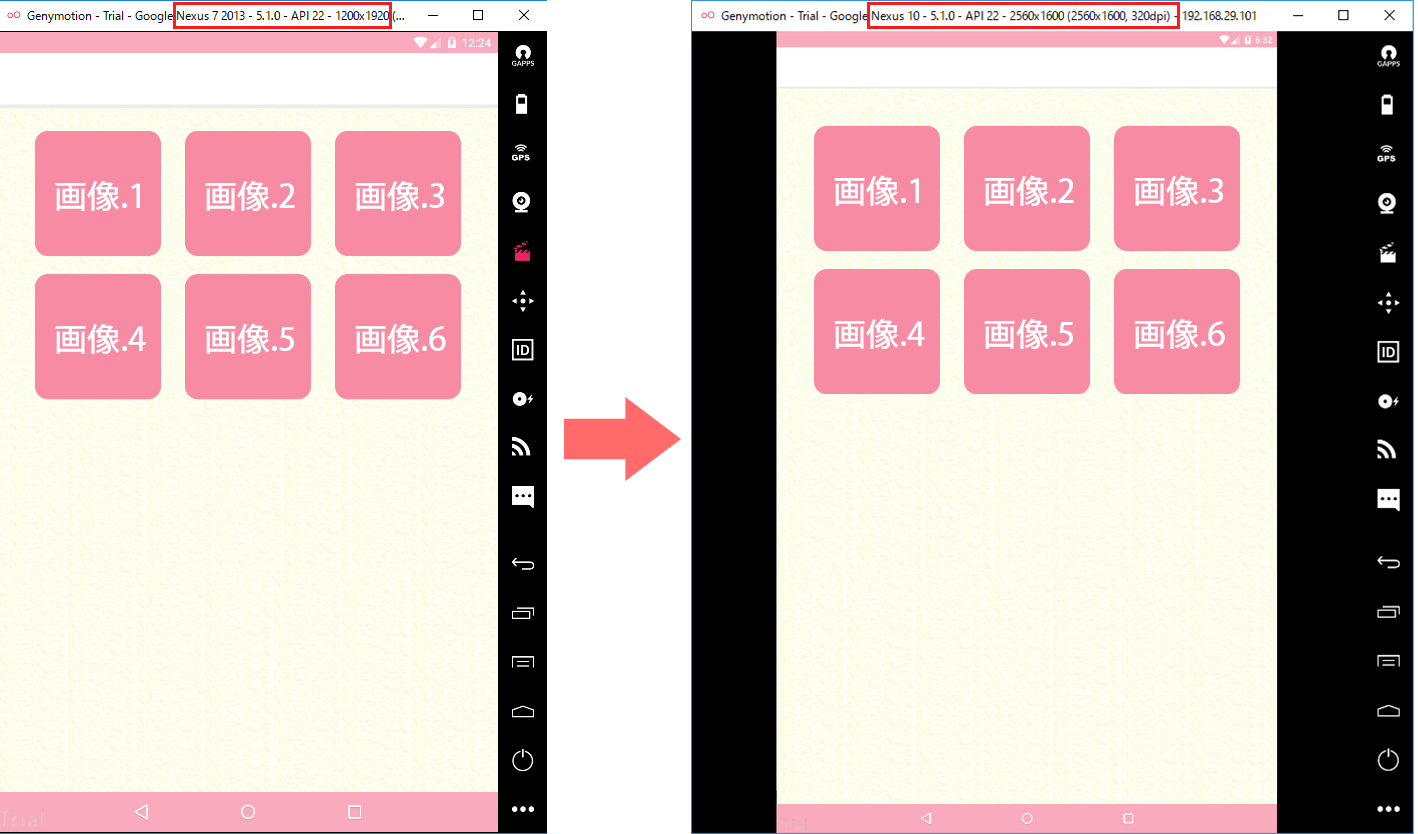
↑少しわかりづらいが画面解像度の違いに対応している
■ 感想
.xmlのレイアウト機能に頼らずとも、javaの書き方でどうにでもなることがわかった。
これからAndroidのプログラミングを始める人には勉強になるので、一度javaでレイアウトを書いてみることをオススメです。
※初心者なりの書き方なのでもっと効率の良いやり方はいっぱいあります。粗末なコードですが何卒ご容赦ください