amplify-swiftを使ってSocial Sign-inを実装するメモです。
プロバイダーにはGoogleを使用してます。
環境
amplify-swift v2
Amplifyコマンドの設定
最初にAmplifyコマンドを実行するIAMユーザーを作成します。
amplify configure
ターミナルで対話型のプロンプトが立ち上がります。それぞれ答えていきましょう。
自分は以下のように設定しました。
Specify the AWS Region
? region:  ap-northeast-1
Specify the username of the new IAM user:
? user name:  qiita-demo
usernameを入力し終えるとブラウザに飛ばされるはずです。
画面の指示通りに進んでIAMユーザーを作成しましょう。
作成し終えたら、アクセスキーIDとシークレットアクセスキーが作成されるのでターミナルに入力します。
IAMユーザーが作成されました。
Enter the access key of the newly created user:
? accessKeyId:  ********************
? secretAccessKey:  ****************************************
This would update/create the AWS Profile in your local machine
? Profile Name:  qiita-demo

Successfully set up the new user.
アプリ作成
次にiOSアプリを作成して、作成したアプリのディレクトリでAmplifyの設定を行います。
適当にiOSアプリを作成してください。
自分はQiitaDemoというUIKitのアプリを作成しました。

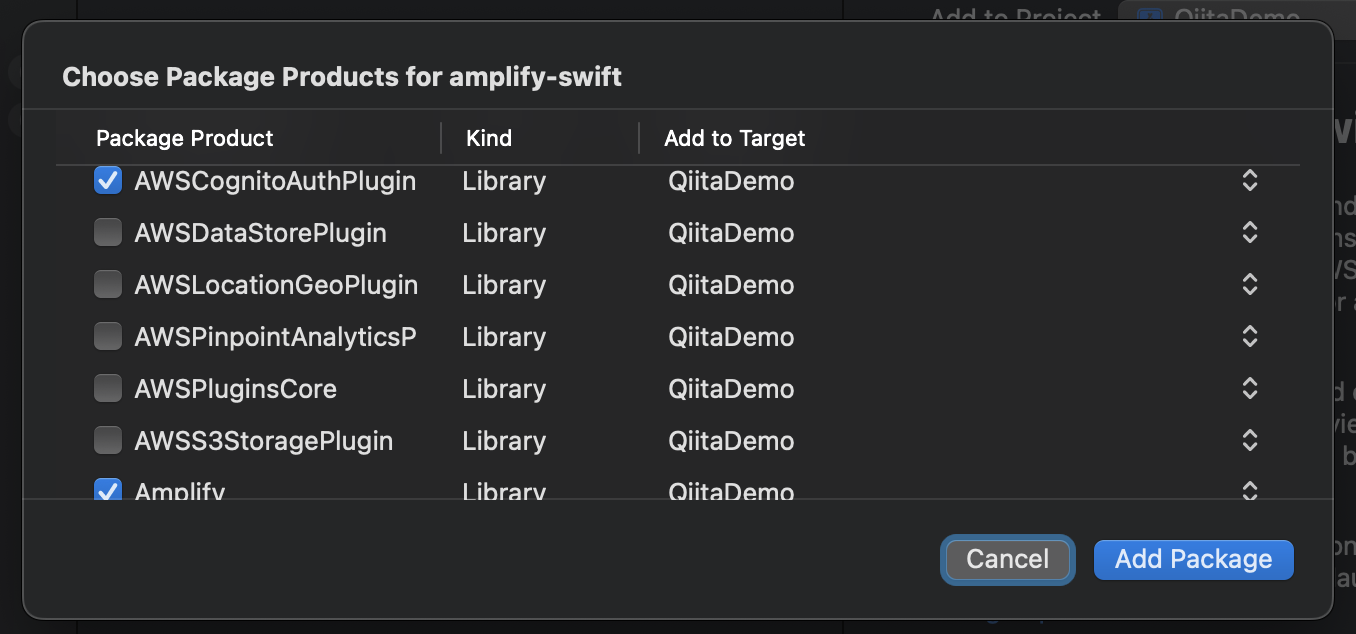
アプリをXcodeで開いたら、AmplifyのライブラリをSwift Package Mangerを使って導入します。
Amplifyの中でも認証を使うのでパッケージはAmplifyとAWSCognitoAuthPluginを追加します。
ライブラリの導入が済んだら、プロジェクトのルートディレクトリへ移動し、Amplifyの設定を行います。
次のコマンドを入力します。
amplify init
このコマンドを打つことで先ほどのように対話形式で設定を行えます。
僕の環境では以下のようになりました。
? Enter a name for the project QiitaDemo
? Initialize the project with the above configuration? Yes
Using default provider  awscloudformation
? Select the authentication method you want to use: AWS profile
? Please choose the profile you want to use qiita-demo
ここまでできたら、AppDelegateでAmplifyの初期化を行います。
func application(_ application: UIApplication, didFinishLaunchingWithOptions launchOptions: [UIApplication.LaunchOptionsKey: Any]?) -> Bool {
    do {
        try Amplify.add(plugin: AWSCognitoAuthPlugin())
        try Amplify.configure()
    } catch {
        print(error)
    }
    return true
}
GCPプロジェクト作成
これまでで、プロジェクトで使うAmplifyの設定ができました。
次はGoogle OAuthで使うプロジェクトを作成します。
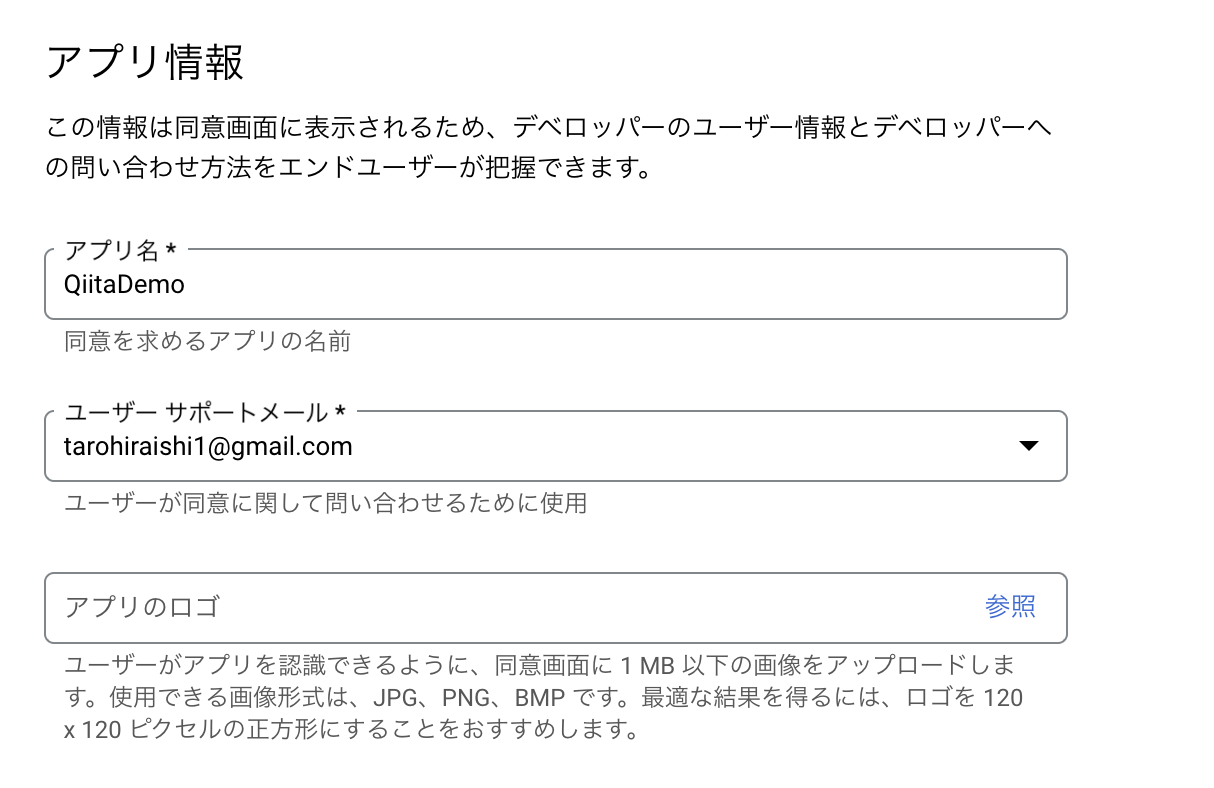
次にOAuth同意画面を構成します。
OAuth同意画面でアプリ名, ユーザーサポートメール, デベロッパーのメールアドレス情報を記載します。
スコープとテストユーザーの箇所は何も記載しなくて大丈夫です。
先ほど作ったプロジェクトにアクセスするための認証情報を作成します。
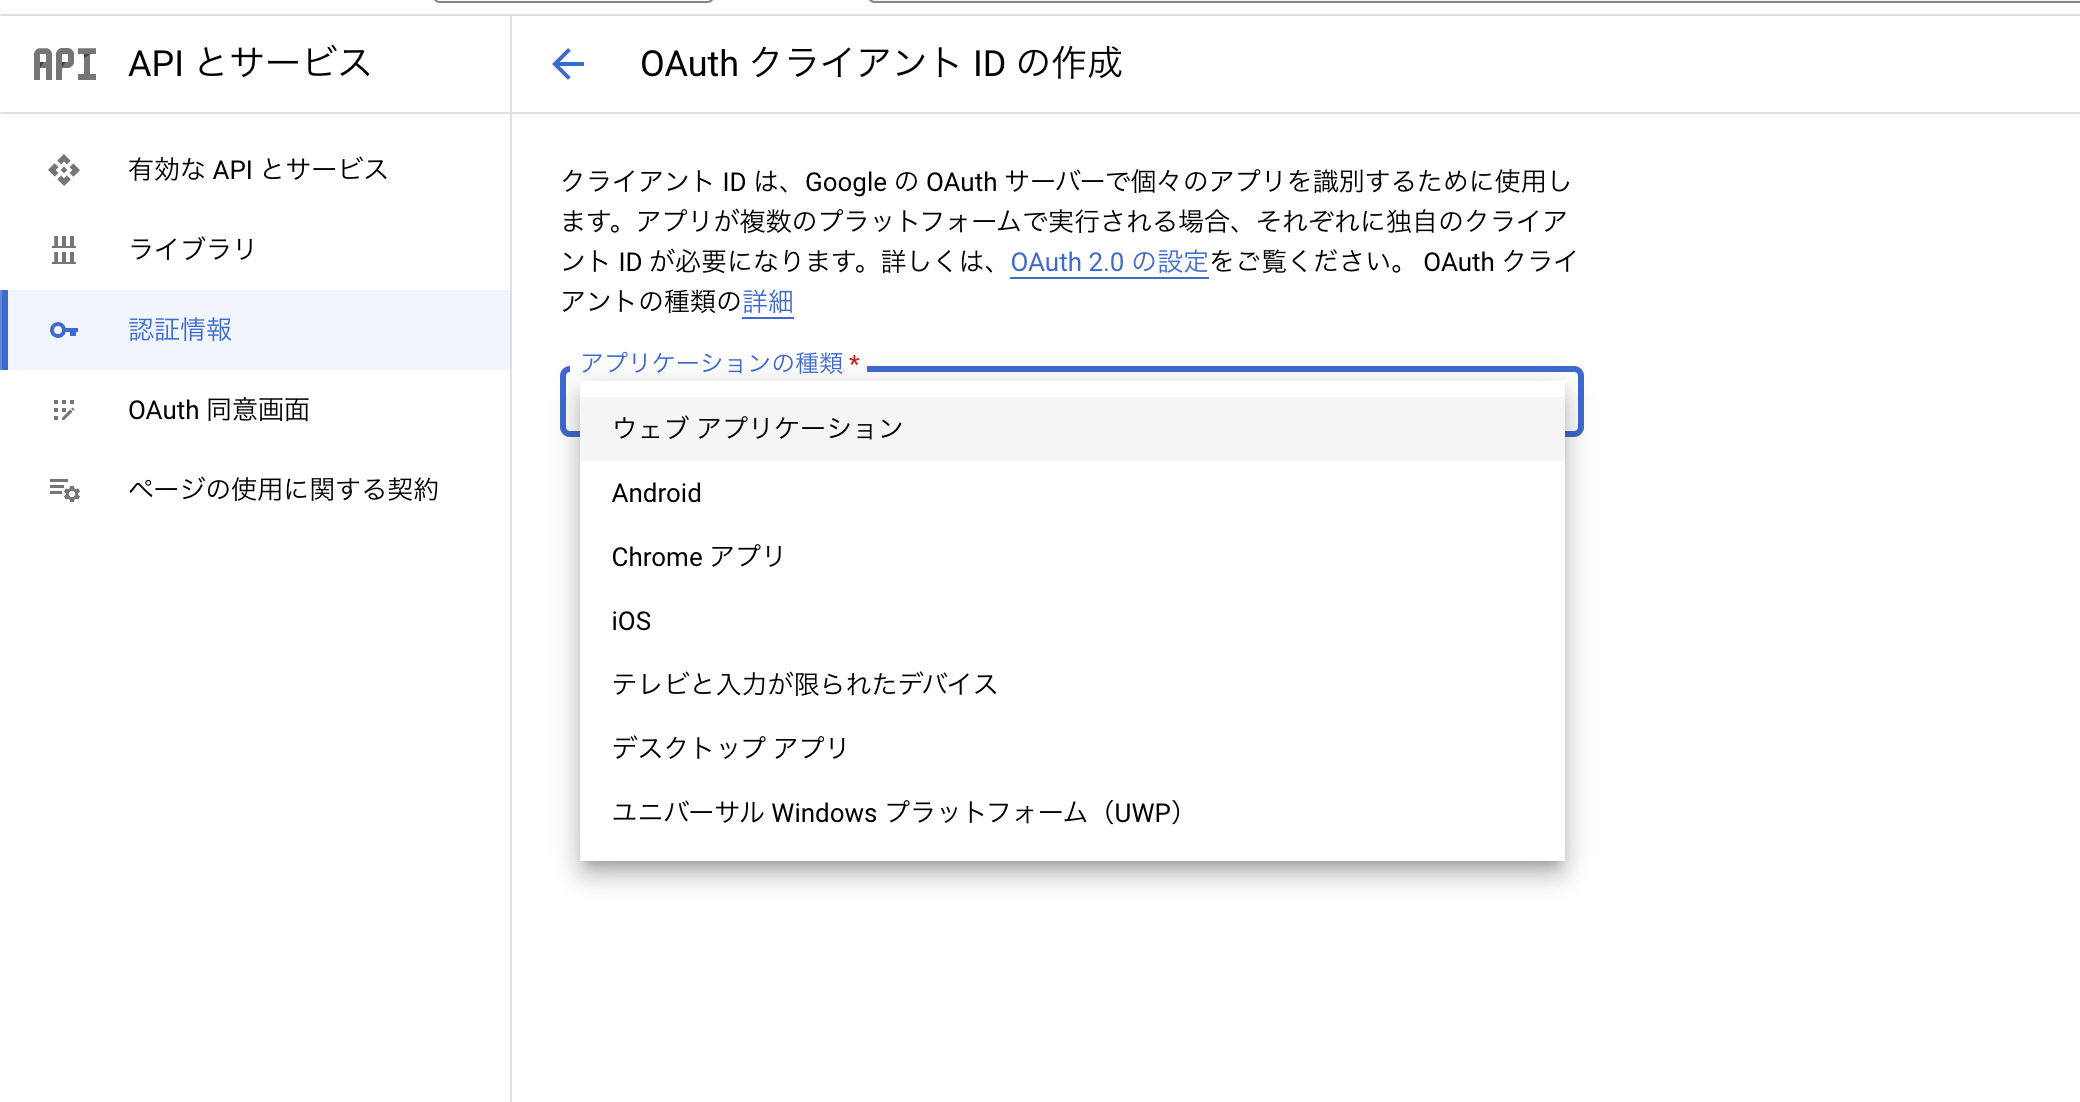
認証情報 > OAuthクライアントIDの作成の順にアクセスします。
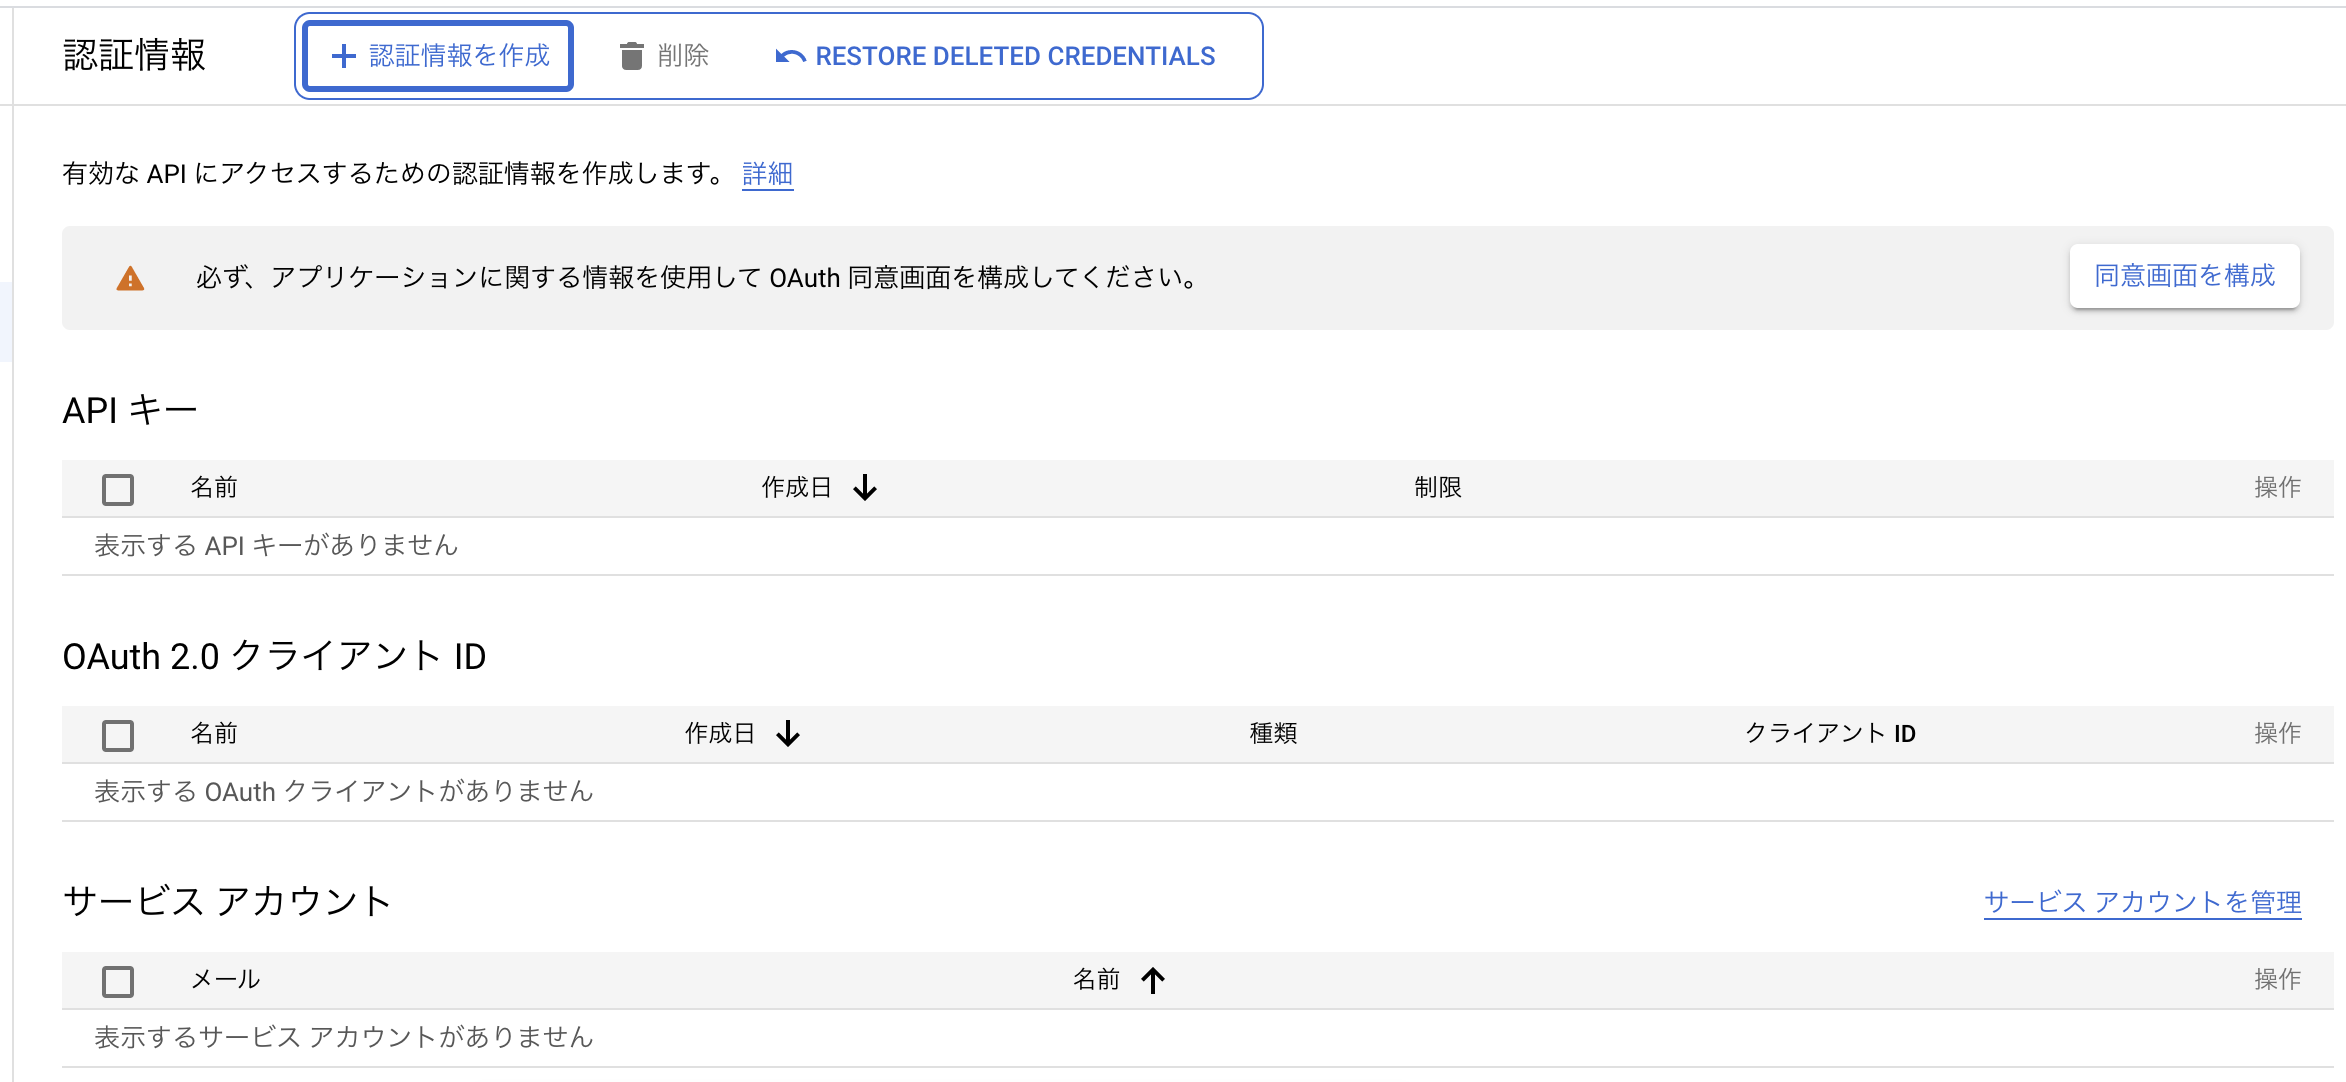
アプリケーションのタイプにはウェブアプリケーションを選択します。
OAuthクライアントを作成するとクライアントIDとクライアントシークレットが生成されます。
これは後ほど使うので控えておきましょう。
Amplify Authの設定
今度はiOSプロジェクトのルートディレクトリに移動してAmplify Authの設定を行います。
ルートディレクトリに移動したら、次のコマンドを打ちます。
amplify add auth
すると、同じように対話型でプロジェクトの設定ができます。
自分は以下のような感じになりました。
また、この箇所で先ほと控えたクライアントIDとクライアントシークレットを記載します。
? Do you want to use the default authentication and security configuration?
    `Default configuration with Social Provider (Federation)`
? How do you want users to be able to sign in?
    `Username`
? Do you want to configure advanced settings?
    `No, I am done.`
? What domain name prefix you want us to create for you?
    `qiitademo`
? Enter your redirect signin URI:
    `qiitademo://`
? Do you want to add another redirect signin URI
    `No`
? Enter your redirect signout URI:
    `qiitademo://`
? Do you want to add another redirect signout URI
    `No`
? Select the social providers you want to configure for your user pool:
    `Sign in with Google`
? Enter your Google Web Client ID for your OAuth flow:
    `<your client ID>`
? Enter your Google Web Client Secret for your OAuth flow:
    `<your client secret>`
ここまでできたら作成した環境をAWSにデプロイします。
amplify push
このコマンドが完了すればユーザープールのドメインURLを取得できます。
次のセクションでこのURLを使用します。
GCPプロジェクト設定更新
承認済みのJavascript生成元と承認済みのリダイレクトURIを設定します。
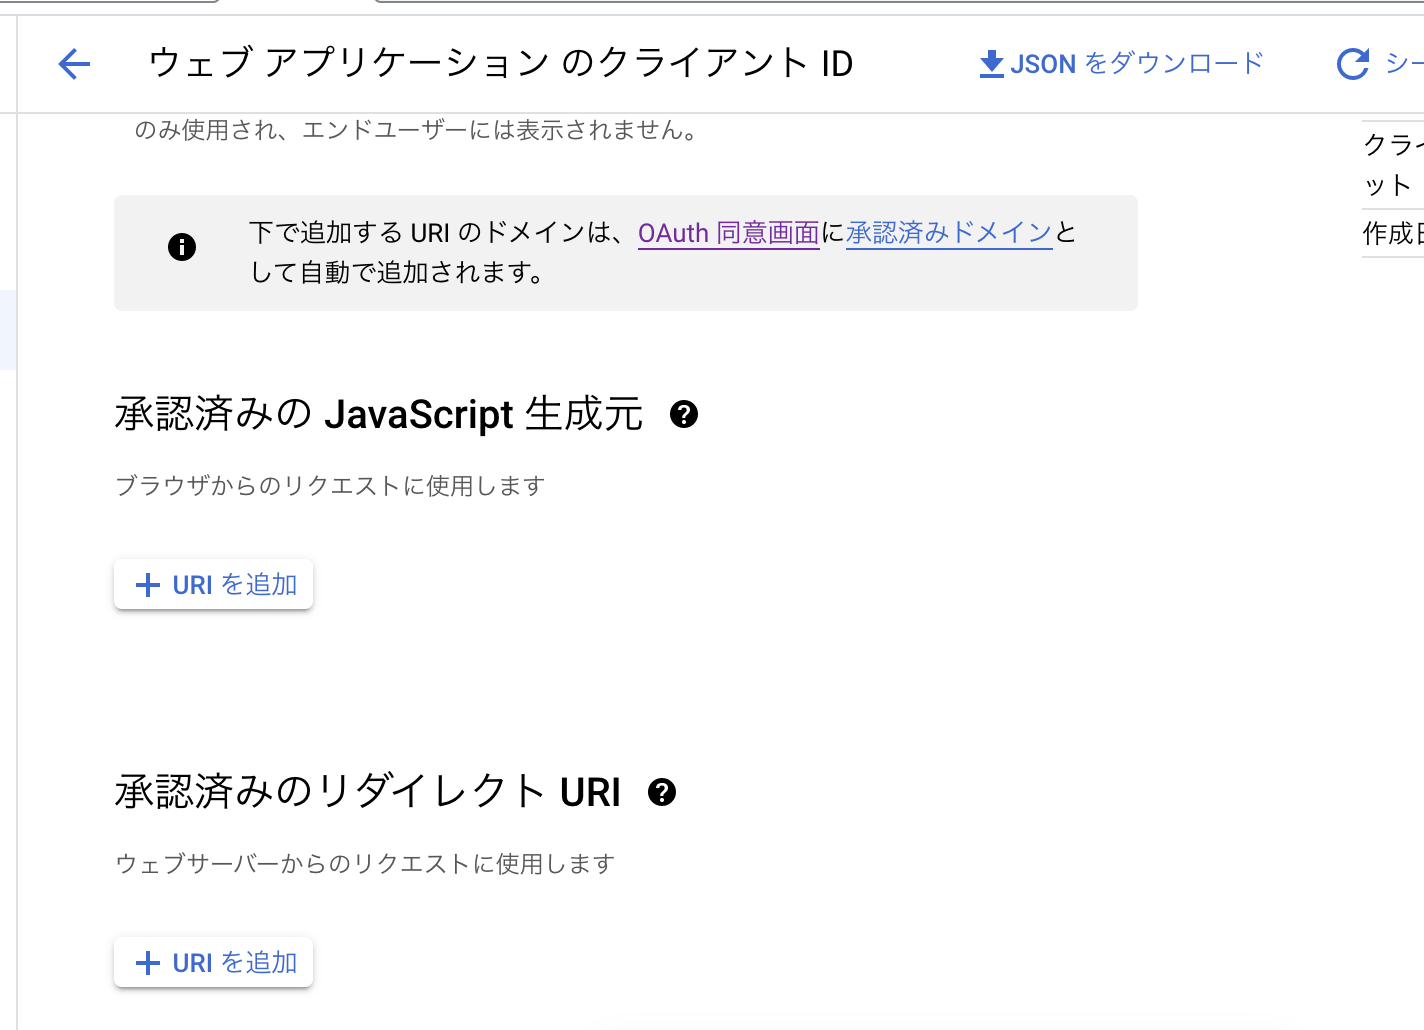
Javascript生成元には先ほど取得したURLを
リダイレクトURIには末尾に/oauth2/idpresponseを追加したものを設定します。
Info.plist更新
アプリ内でOAuthのサインイン画面を表示できるようにInfo.plistを更新します。
Info.plistの先頭を編集しました。
<plist version="1.0">

<dict>
<!-- YOUR OTHER PLIST ENTRIES HERE -->

<!-- ADD AN ENTRY TO CFBundleURLTypes for Cognito Auth -->
<!-- IF YOU DO NOT HAVE CFBundleURLTypes, YOU CAN COPY THE WHOLE BLOCK BELOW -->
<key>CFBundleURLTypes</key>
<array>
    <dict>
        <key>CFBundleURLSchemes</key>
        <array>
            <string>qiitademo</string>
        </array>
    </dict>
</array>

<!-- ... -->
</dict>
サインイン画面 実装
以下の関数でサイン画面を立ち上げることができます。
func socialSignInWithWebUI() async {
    do {
        let result = try await Amplify.Auth.signInWithWebUI(for: .google)
        print(result)
    } catch {
        print(error)
    }
}
この関数をviewDidLoadで実行し、ログを確認します。
以下のようなログが表示されれば、ユーザー作成に成功してます。
Amplify.AuthSignInStep.done
以上です。
参考