概要
Cognito, Amplifyを使って認証機能を実装するメモです。
環境
amplify-swift v2
前提
今回はアプリ側の実装や設定にフォーカスします。
また、メールアドレスとパスワードで認証する想定です。
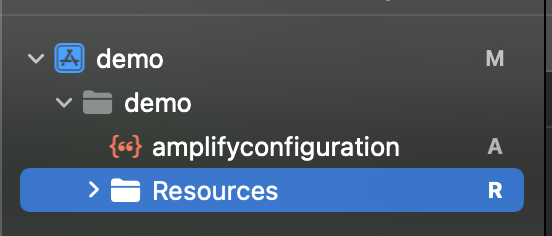
Cognitoの設定情報はプロジェクトのルートにamplifyconfigure.jsonを設置することにしました。

初期設定
Swift Package Managerを使ってamplify-swiftを導入します。
その後、amplifyconfigure.jsonに必要情報を記載します。
{
    "auth": {
        "plugins": {
            "awsCognitoAuthPlugin": {
                "IdentityManager": {
                    "Default": {}
                },
                "CredentialsProvider": {
                    "CognitoIdentity": {
                        "Default": {
                            "PoolId": "[COGNITO IDENTITY POOL ID]",
                            "Region": "[REGION]"
                        }
                    }
                },
                "CognitoUserPool": {
                    "Default": {
                        "PoolId": "[COGNITO USER POOL ID]",
                        "AppClientId": "[COGNITO USER POOL APP CLIENT ID]",
                        "Region": "[REGION]"
                    }
                },
                "Auth": {
                    "Default": {
                        "authenticationFlowType": "USER_SRP_AUTH"
                    }
                }
            }
        }
    }
}
AppDelegate.swift
AppDelegateでAmplifyの初期化を行います。
func application(
    _ application: UIApplication,
    didFinishLaunchingWithOptions launchOptions: [UIApplication.LaunchOptionsKey: Any]?
) -> Bool {
    do {
        try Amplify.add(plugin: AWSCognitoAuthPlugin())
        try Amplify.configure()
    } catch {
        print(error)
    }

    return true
}
ユーザ作成
サインアップを処理する関数です。
func signUp(email: String, password: String) async throws {
    let userAttributes = [AuthUserAttribute(.email, value: email)]
    let options = AuthSignUpRequest.Options(userAttributes: userAttributes)

    let result = try await Amplify.Auth.signUp(username: email, password: password, options: options)
    if case let .confirmUser(details, _, userID) = result.nextStep {
        print("details: \(details), userID: \(userID)")
    }
}
検証
テストします。
UIViewControllerのviewDidLoadでサインアップ処理を実施し、AWSマネジメントコンソールにユーザが追加されるか確認します。
確認したところ画像のようにユーザが追加されてました。

また、入力したメールアドレスにはCognitoから認証コードが届いてました。

届いた認証コードを使ってユーザを認証する、
サインアップしたユーザでサインインするのが、次のステップになるかと思います。
AmplifyのSDKを使うことで認証処理を簡単に実装することができました。
参考