前提知識
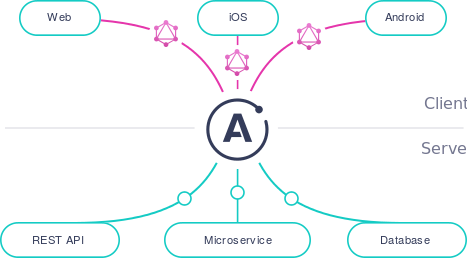
GraphQLとは
Web APIのためのクエリ言語です。
# Schema
type Query {
  todo(todoId:ID!): Todo!
}
type Todo {
  id: ID!
  todoId: ID!
  title: String!
}

# Request
query GetTodo {
  todo(todoId: 1) {
    id
    todoId
    title
  }
}

# Response
{
  "data": {
    "todo": {
      "id": "dXNlci80Mgo=",
      "todoId": 1,
      "title": "foo",
    }
  }
}

# Request(必要なフィールドのみリクエスト)
query GetTodo {
  todo(todoId: 1) {
    title
  }
}

# Response(必要なフィールドのみがレスポンスされる)
{
  "data": {
    "todo": {
      "title": "foo",
    }
  }
}
「GraphQL」徹底入門 ─ RESTとの比較、API・フロント双方の実装から学ぶがわかりやすいです。
Schema stitchingとは
Schema stitchingは複数のGraphQL APIのスキーマを1つのGraphQLスキーマを提供するための機能のことです。
stitching(縫う、縫いとじる)という単語の意味からも、複数のGraphQL APIサービスのスキーマを縫いとじて1つのGraphQL APIスキーマを提供するためのものであることがなんとなくイメージできるでしょうか。
エンドポイントが分かれていてもスキーマを統合できるため、マイクロサービスアーキテクチャと相性が良い機能となります。
REST APIと違ってGraphQLが言語仕様としてスキーマが定義できるために実現可能な機能といえます。
Apollo Server v2.0のプロジェクトを作成
必要なパッケージをインストールします。
mkdir sample-project
cd sample-project
yarn init --yes
yarn add apollo-link-context apollo-link-http apollo-server-express express graphql graphql-request graphql-tools merge-graphql-schemas node-fetch path
yarn add -D @babel/cli @babel/core @babel/node @babel/preset-env eslint nodemon
package.jsonにscriptsを定義します。
  ...
  "scripts": {
    "dev": "nodemon --exec babel-node src/index.js",
    "build": "babel src --out-dir dist",
    "start": "node dist/index.js"
  },
  ...
ディレクトリ構造
┣ schemas
  ┣ foo.gql
  ┣ ...
  ┗ bar.gql
┣ resolvers
  ┣ foo.js
  ┣ ...
  ┗ bar.js
┣ src
  ┗ index.js
┣ .babelrc
┣ .eslintrc.json(任意)
┣ package.json
┗ yarn.lock
なお、schemasやresolversの下にはローカルで定義したいスキーマやリゾルバを定義します。
また、.babelrcに以下の設定を行っておきましょう。
{
  "presets": [
    [
      "@babel/preset-env", {
        "targets": {
          "node": "current"
        }
      }
    ]
  ]
}
targetsを指定しないと後の手順でregeneratorRuntime is not definedエラーが出るようになります。
参考: https://stackoverflow.com/questions/33527653/babel-6-regeneratorruntime-is-not-defined#answer-53010685
Apollo Serverの基本的なコード(Schema stitching無し)
今回の本題ではありませんが、Schema stitching無しのApollo Serverのコード例となります。
ローカルで定義したSchemaとResolverで構成された最もシンプルな実装例となります。
const express = require('express');
const { ApolloServer } = require('apollo-server-express');
const path = require('path');
const { fileLoader, mergeTypes } = require('merge-graphql-schemas');

const runApp = async () => {
  const localSchema = mergeTypes(fileLoader(path.join(__dirname, '../schemas')), { all: true });
  const resolvers = mergeResolvers(fileLoader(path.join(__dirname, './resolvers')));

  const app = express();

  const options = {
    schema,
    resolvers,
  };

  const server = new ApolloServer(options);
  server.applyMiddleware({ app });

  const port = process.env.PORT || 4000;

  app.listen({ port }, () => {
    // eslint-disable-next-line no-console
    console.log(`App listening on port ${port}`);
    // eslint-disable-next-line no-console
    console.log('Press Ctrl+C to quit.');
  });
};

try {
  runApp();
} catch (err) {
  // eslint-disable-next-line no-console
  console.error(err);
}
以下のコマンドでサーバーを起動できます。
$ yarn dev
App listening on port 4000
Press Ctrl+C to quit.
ブラウザからhttp://localhost:4000/graphqlにアクセスすると、Apollo Serverで実装されているPlaygroundで遊べるようになります。
Schema stitchingの実装
さて、本題です。
graphql-toolsのintrospectSchema, makeRemoteExecutableSchema, mergeSchemasを使ってSchema stitchingを行うことができます。
また、End User認証のためにJWT等のtokenを送る必要がある場合は、Apollo Serverのオプションで必要なヘッダー情報をcontextに格納する設定をしておき、apollo-link-contextのsetContextメソッドを使ってheadersに設定しなおすことで、リクエストのヘッダー情報をStitchingを行った先のサービスに転送することができます。
...
import { introspectSchema, makeRemoteExecutableSchema, mergeSchemas } from 'graphql-tools';
import { setContext } from 'apollo-link-context';
...

const createRemoteSchema = async (uri) => {
  const http = createHttpLink({uri, fetch});
  const link = setContext((_, previousContext) => {
    const headers = {};
    if (previousContext && previousContext.graphqlContext && previousContext.graphqlContext.Authorization) {
      headers.Authorization = previousContext.graphqlContext.Authorization;
    }
    return { headers };
  }).concat(http);
  return makeRemoteExecutableSchema({
    schema: await introspectSchema(link),
    link,
  });
};

const runApp = async () => {
  ...
  const remoteSchemas = await Promise.all([
    'http://example.com/service1/graphql',
    'http://example.com/service2/graphql',
    'http://example.com/service3/graphql',
    'http://example.com/service4/graphql',
  ].map(async (type) => {
    return await createRemoteSchema(remoteHost + type).catch(error => {
      // eslint-disable-next-line no-console
      console.log(error);
    });
  }));

  const schema = mergeSchemas({
    schemas: [localSchema].concat(remoteSchemas)
  });

  const options = {
    context: ({ req }) => {
      return {
        Authorization: req.headers.authorization
      };
    },
    schema,
    resolvers,
  };

  const server = new ApolloServer(options);
  ...
}