Scala現場でプロジェクトの依存関係をクローズドなMavenリポジトリで管理できないかという話が上がったので、ひとまずローカル上で簡易に検証した内容を備忘として残します。
ローカルにリポジトリサーバを建てる
本番用のリポジトリサーバは別途現場で用意される。
ローカルでの検証は手軽にNexus公式のDockerイメージを使用。
Nexusサーバ作成~ログイン
適当に作業フォルダを掘ってdocker-compose.ymlを下記の通り作成。
$ mkdir nexus && cd nexus
$ vim docker-compose.yml
version: '2'
services:
  nexus3:
    image: sonatype/nexus3
    volumes:
      - nexus-data:/nexus-data
    ports:
      - 8081:8081
volumes:
  nexus-data:
作成したらDockerコンテナを起動、しばし待機。
$ docker-compose up -d
Creating network "nexus_default" with the default driver
Creating nexus_nexus3_1 ...
Creating nexus_nexus3_1 ... done
コンテナのログに下記のように表示されたら起動完了。
$ docker-compose logs
...
nexus3_1  | -------------------------------------------------
nexus3_1  |
nexus3_1  | Started Sonatype Nexus OSS 3.6.2-01
nexus3_1  |
nexus3_1  | -------------------------------------------------
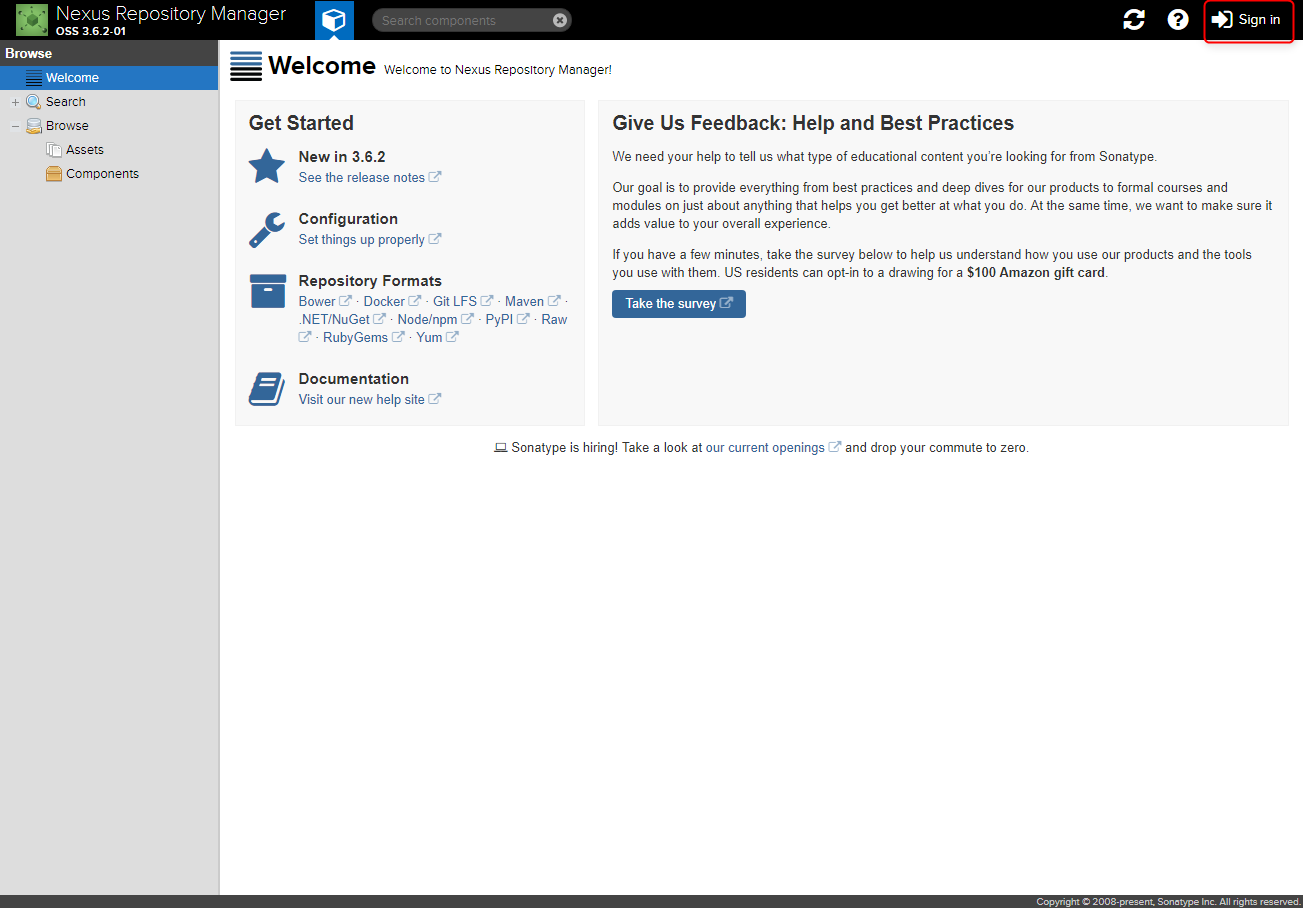
http://localhost:8081/にアクセスするとNexusの管理コンソールが表示される。
右上のリンクから「Sign In」
※デフォルトで次の管理ユーザ/パスワードが用意されている:[admin/admin123]
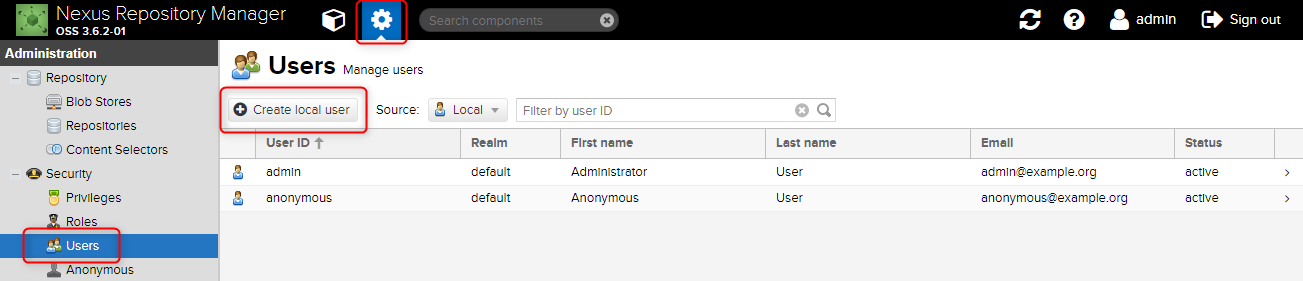
⇒ログイン後、必要に応じて「設定」>「Users」からユーザを作成。(今回は検証用なので省略)
Mavenリポジトリ作成
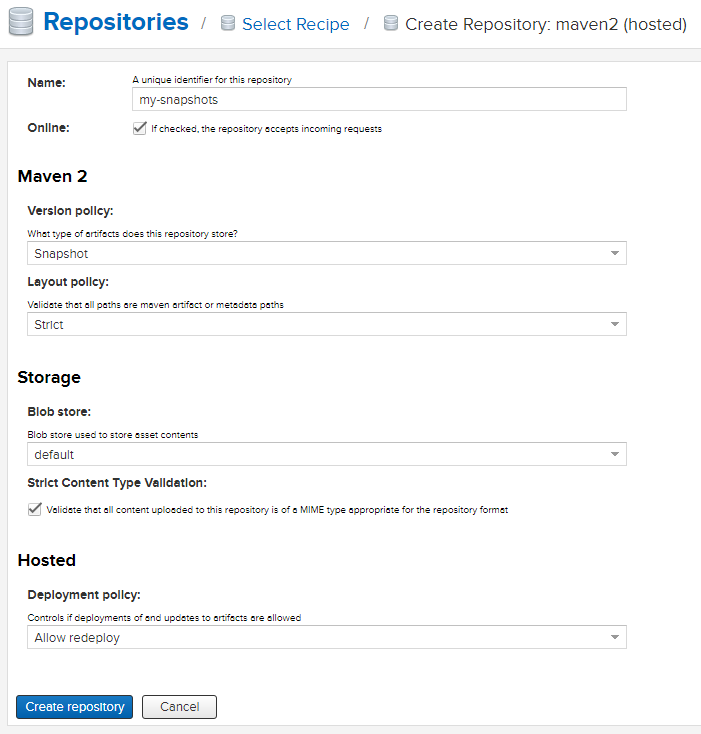
自前のライブラリを登録するMavenリポジトリを作成する。
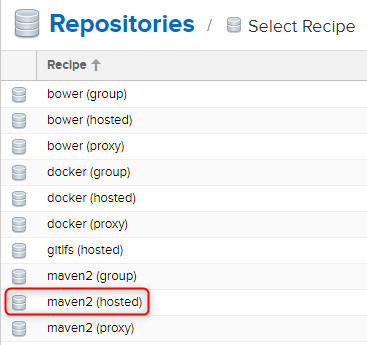
「repositories」>「Create repository」>「maven2 (hosted)」
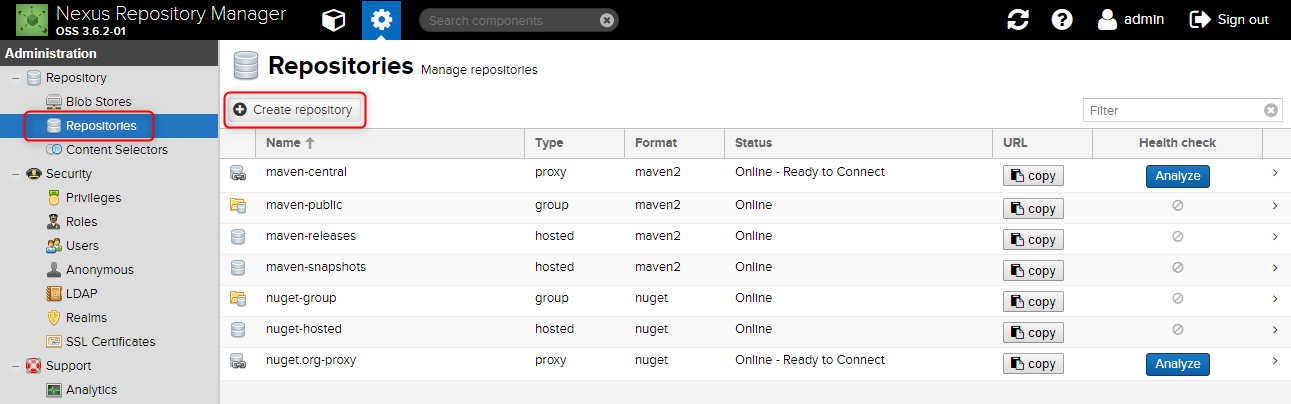
Snapshot用とRelease用をそれぞれ作成。

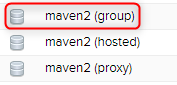
参照用に上記リポジトリをまとめたグループを作成。
「repositories」>「Create repository」>「maven2 (group)」
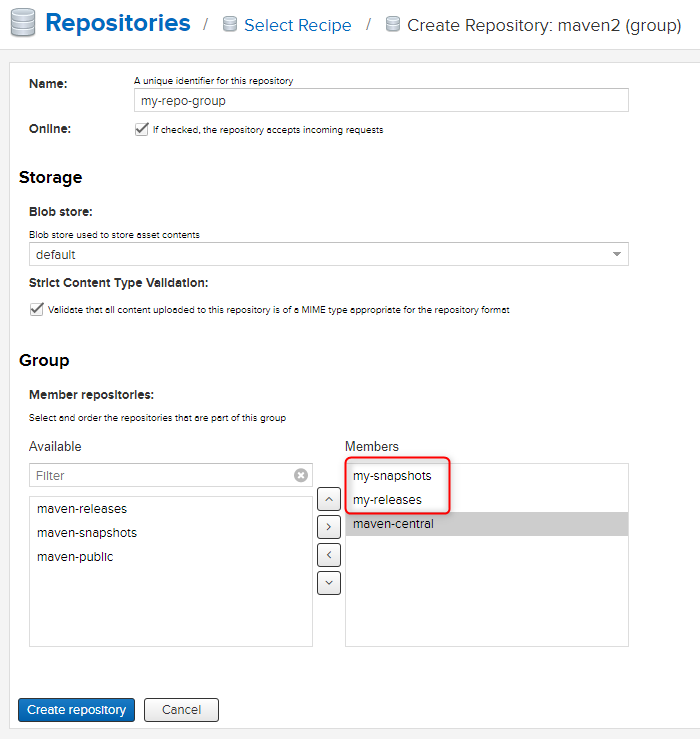
※maven-central等の追加はお好みで。
sbtからリポジトリを使用する
自作したリポジトリをScalaプロジェクトで利用するにはbuild.sbtに下記のように設定する。
organization := "com.example"

name := "scala-libs-sample"

version := "0.0.1-SNAPSHOT"

////////////////////////////////////////////////////////////////////////////////////
// My Hosted Repository
val myrepos = "http://localhost:8081/"
// リポジトリ認証情報 => 後述の[~/.sbt/.credentials]の内容を読み込む
credentials += Credentials(Path.userHome / ".sbt" / ".credentials")

// リポジトリへデプロイする側の設定
publishMavenStyle := true
publishArtifact in Test := false
pomIncludeRepository := { _ => false }
publishTo := {
  if (isSnapshot.value)
    Some("snapshots" at myrepos + "repository/my-snapshots")
  else
    Some("releases"  at myrepos + "repository/my-releases")
}

// モジュールを利用する側の設定
resolvers += "Nexus" at myrepos + "repository/my-repo-group/"
libraryDependencies += "com.example" % "scala-libs-sample" % "0.0.1-SNAPSHOT"
リポジトリサーバの認証情報は、ホームディレクトリに.sbt/.credentialsファイルを作成し下記のように記載する。(※ユーザ名などは適宜変更)
realm=Sonatype Nexus Repository Manager
host=localhost
user=admin
password=admin123
設定に問題が無ければpublishコマンドでサーバにモジュールがデプロイされるはず>
$ sbt publish
...
[info]  published scala-libs-sample_2.10 to http://localhost:8081/repository/my-snapshots/com/example/scala-libs-sample_2.10/0.0.1-SNAPSHOT/scala-libs-sample_2.10-0.0.1-SNAPSHOT.pom
[info]  published scala-libs-sample_2.10 to http://localhost:8081/repository/my-snapshots/com/example/scala-libs-sample_2.10/0.0.1-SNAPSHOT/scala-libs-sample_2.10-0.0.1-SNAPSHOT.jar
[info]  published scala-libs-sample_2.10 to http://localhost:8081/repository/my-snapshots/com/example/scala-libs-sample_2.10/0.0.1-SNAPSHOT/scala-libs-sample_2.10-0.0.1-SNAPSHOT-sources.jar
[info]  published scala-libs-sample_2.10 to http://localhost:8081/repository/my-snapshots/com/example/scala-libs-sample_2.10/0.0.1-SNAPSHOT/scala-libs-sample_2.10-0.0.1-SNAPSHOT-javadoc.jar
[success] Total time: 2 s, completed 2017/12/16 23:14:43