はじめに
ASP.NET Coreには、[Required]、[StringLength]、[RegularExpression]、[Url]などたくさんの検証属性が用意されていますが、これらの組み込みの検証属性では不十分な場合もあります。そんな時は、カスタム検証属性を作成することで対応することができます。
動作環境は、.NET6 で、C#はnull許容参照型を利用しています。
ここで紹介したソースコードはGitHubで公開しています。
なおクライアント側検証についてはこの記事の対象外とします。クライアント検証については、ASP.NET Core MVC および Razor Pages でのモデルの検証の「クライアント側の検証」をご覧ください。
カスタム検証属性の概要
カスタム検証属性を作成するには、ValidationAttribute を継承するクラスを作成し、IsValid メソッドをオーバーライドします。
基本的なカスタム検証属性クラスはこんな感じになります。
[AttributeUsage(AttributeTargets.Property, AllowMultiple = false)]
public class CustomValidationAttribute : ValidationAttribute
{
    // コンストラクタの引数は自由に決めて良い。
    public CustomValidationAttribute(...)
    {
    }

    public string GetErrorMessage()
    {
        return "エラーメッセージ";
    }

    protected override ValidationResult? IsValid(object? value, ValidationContext validationContext)
    {
        // ここでvalueの検証を行うロジックを書く。
        if (...)
            return new ValidationResult(GetErrorMessage());
       else
           return ValidationResult.Success;
    }
}
この検証属性はAttributeTargets.Propertyを指定することで、プロパティに付加できる属性となります。AllowMultiple = falseとすることで、一つのプロパティには一つの[CustomValidation]属性を付加できます。
具体的な例
では、実際にカスタム検証属性クラスを定義してみます。ここでは「2つのプロパティのうちどちらか一方は入力する必要がある」という検証属性RequiredEitherattributeを定義してみます。
検証属性の例(利用側)
まずはどんなふうにRequiredEitherattributeを使うのかその例を見てください。
public class ViewModel
{
    const string ErrMessage = "{0},{1}どちらかを入力してください";

    [Display(Name="名前1")]
    // これがカスタム検証属性を利用しているところ
    [RequiredEither(nameof(Name2), ErrorMessage = ErrMessage)]
    public string? Name1 { get; set; } = string.Empty;

    [Display(Name = "名前2")]
    public string? Name2 { get; set; } = string.Empty;
}
これでName1, Name2のいずれか片方の入力が必要になります。
Name2プロパティにも
[RequiredEither(nameof(Name1), ErrorMessage = ErrMessage)]
と検証属性を付加してもOKです。その場合は、Name1, Name2両方にエラーメッセージが表示されることになります。
検証属性の例(定義側)
では、RequiredEitherAttributeクラスを定義してみます。
検証には2つのプロパティが必要になるため、少々複雑なコードになっていますがご了承ください。
using System.ComponentModel.DataAnnotations;
using System.Reflection;

namespace CustomValidationSample.Validators;

[AttributeUsage(AttributeTargets.Property, AllowMultiple = false)]
public sealed class RequiredEitherAttribute : ValidationAttribute
{
    public string OtherProperty { get; set; }

    public RequiredEitherAttribute(string otherProperty)
    {
        OtherProperty = otherProperty;
    }

    protected override ValidationResult? IsValid(object? value, ValidationContext validationContext)
    {
        if (value != null)
            return ValidationResult.Success;
        // 検証に依存するプロパティへの参照を取得
        var containerType = validationContext.ObjectType;
        var pinfo = containerType.GetProperty(OtherProperty);
        if (pinfo != null)
        {
            // 依存プロパティの値を取得
            var dependentvalue = pinfo.GetValue(validationContext.ObjectInstance, null);
            if (dependentvalue != null)
                return ValidationResult.Success;
        }
        var otherPropertyDisplayName = GetOtherPropertyDisplayName(validationContext.ObjectInstance, this.OtherProperty);

        return new ValidationResult(FormatErrorMessage(validationContext.DisplayName, otherPropertyDisplayName));
    }

    private string FormatErrorMessage(string thisPropertyDisplayName, string otherPropertyDisplayName)
    {
        return String.Format(ErrorMessageString, thisPropertyDisplayName, otherPropertyDisplayName);
    }

    private static string GetOtherPropertyDisplayName<T>(T model, string otherPropertyName) where T: notnull
    {
        var type = model.GetType();
        var prop = type.GetProperty(otherPropertyName);
        if (prop == null)
            return "";
        var attr = prop.GetCustomAttribute<DisplayAttribute>();
        return attr?.Name ?? otherPropertyName;
    }
}
ページを定義する
では、この検証属性の動作を確認するためにページを作成してみましょう。ここでは、Razor Pagesを利用しています。
using CustomValidationSample.Validators;
using Microsoft.AspNetCore.Mvc;
using Microsoft.AspNetCore.Mvc.RazorPages;
using System.ComponentModel.DataAnnotations;

namespace CustomValidationSample.Pages;

public class IndexModel : PageModel
{
	private readonly ILogger<IndexModel> _logger;

	public string Message { get; set; } = string.Empty;

	[BindProperty]
	public ViewModel Data { get; set; } = new ViewModel();

	public IndexModel(ILogger<IndexModel> logger)
	{
		_logger = logger;
	}

	public void OnGet()
	{
	}
	public void OnPost()
	{
		if (ModelState.IsValid)
		{
			Message = "正常に受けつました";
		}
	}
}

public class ViewModel
{
    const string ErrMessage = "{0},{1}どちらかを入力してください";

    [Display(Name="名前1")]
    [RequiredEither(nameof(Name2), ErrorMessage = ErrMessage)]
    public string? Name1 { get; set; } = string.Empty;

    [Display(Name = "名前2")]
    public string? Name2 { get; set; } = string.Empty;
}
@page
@model IndexModel
@{
ViewData["Title"] = "Home page";
}
<div class="col-lg-8 py-4 px-4 border rounded">
<div asp-validation-summary="ModelOnly" class="text-danger"></div>
<form method="post">
<!-- Data and Submit elements -->
<div class="mb-3 row">
<label asp-for="Data.Name1" class="col-lg-2 col-form-label text-end"></label>
<div class="col-lg-6">
<input asp-for="Data.Name1" class="form-control" >
<span asp-validation-for="Data.Name1" class="text-danger"></span>
</div>
</div>
<div class="mb-3 row">
<label asp-for="Data.Name2" class="col-lg-2 col-form-label text-end"></label>
<div class="col-lg-6">
<input asp-for="Data.Name2" class="form-control" >
<span asp-validation-for="Data.Name2" class="text-danger"></span>
</div>
</div>
<div class="text-right row mt-5">
<div class="col-lg-2"> </div>
<div class="col-lg-2">
<button type="submit" class="btn btn-primary" >Submit</button>
</div>
<div class="col-lg-8">
<div>@Model.Message</div>
</div>
</div>
</form>
</div>
実行してみる
では、実行してみましょう。
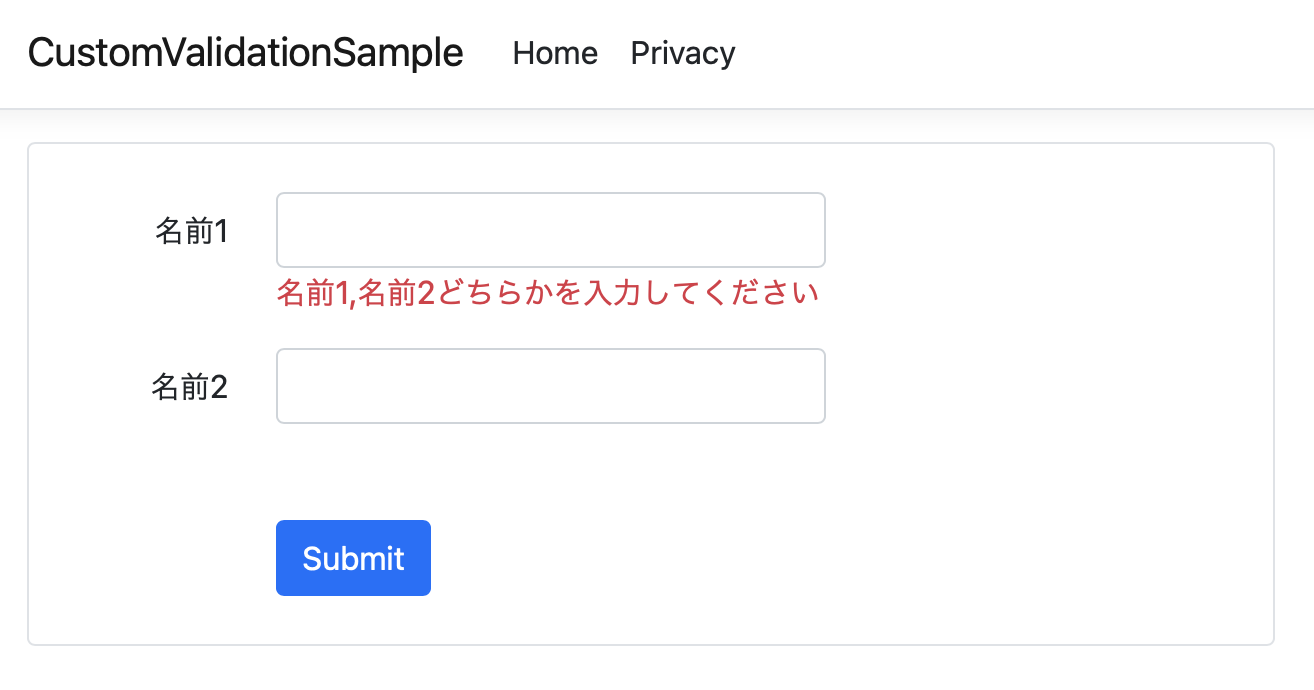
■ 未入力でSubmitボタンを押した場合
■ Name1, Name2に値を入力してSubmitボタンを押した場合
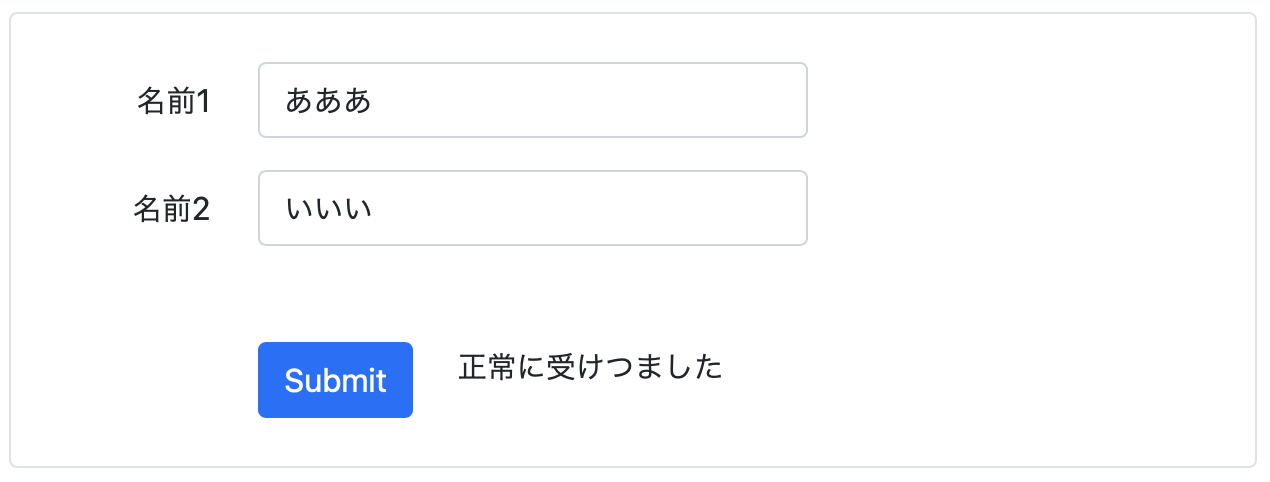
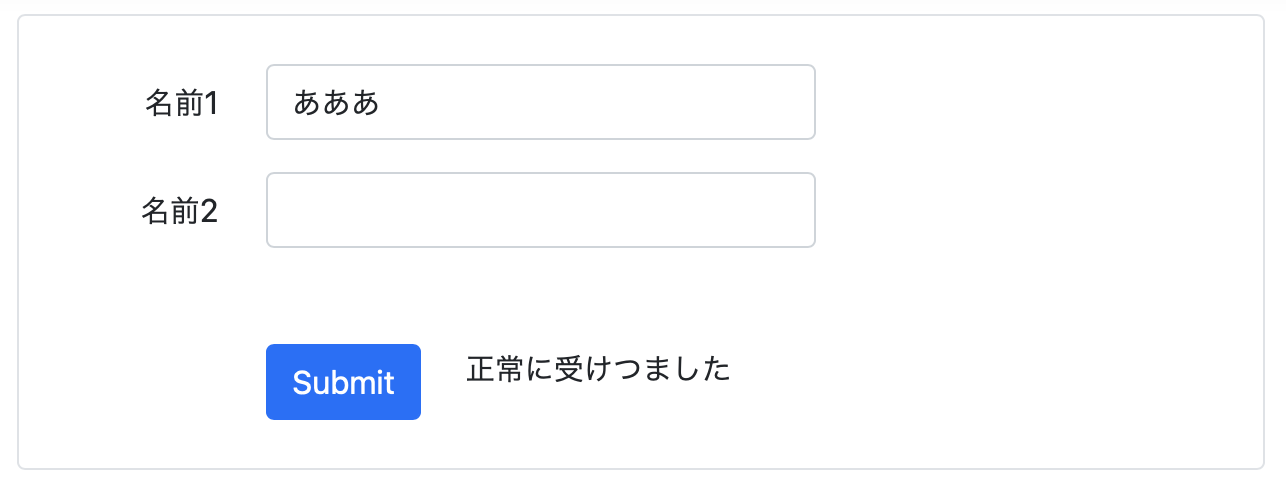

想定通り動いていることが確認できました。