SC(非公式)Advent Calendar 2017 の21日目です。
前回のAzure Storage セキュリティ関連まとめ①の続きになります。
前回から
Storageのクライアント側暗号化を実践しても、暗号化キーをどこに保存するの?
ということでAzure Key Vaultを使ってみましょうという試み。
①暗号化キー相当の何かしらの文字列をKey Vaultに格納して取り出す。
②Key Vaultで管理されたStorage Accountを作成して、アクセスキーの管理(キーのローテーションとか)から解放されたい。
以上の2つを試していきます。
Azure Key Vault
- Azureの提供しているServiceで使用するKeyやSecretの情報を暗号化して、HSM(Hardware Security Module)で保護・保存してくれるサービス
- Key Vaultで管理しているキーやシークレットを利用することで、StorageAccountにアクセスキー無しでアクセスすることができる。
- AzureADが必要。
①暗号化キーの保護
暗号化キーをKey Vaultのシークレットに登録して、C#のプログラムから呼び出します。
その際、KeyVaultにアクセスするために、AzureADに登録したアプリケーションのプリンシパルを使用します。
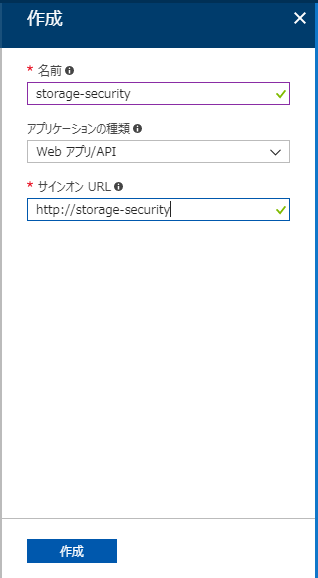
アプリケーション登録
Azure Active Directory --> アプリの登録 --> +新しいアプリケーション
storage-securityというアプリを登録します。
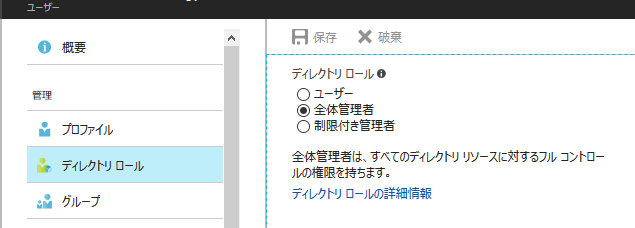
注意![]()
アプリケーションの登録は、ディレクトリに対する全体管理者の権限がないとできません。ポータルにログインしているユーザーが全体管理者のロールを持っていない場合は、管理者ロールのアカウントから、権限をもらってください。
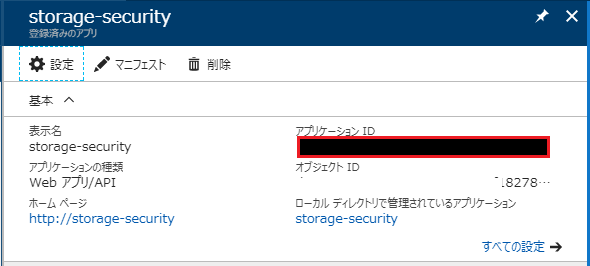
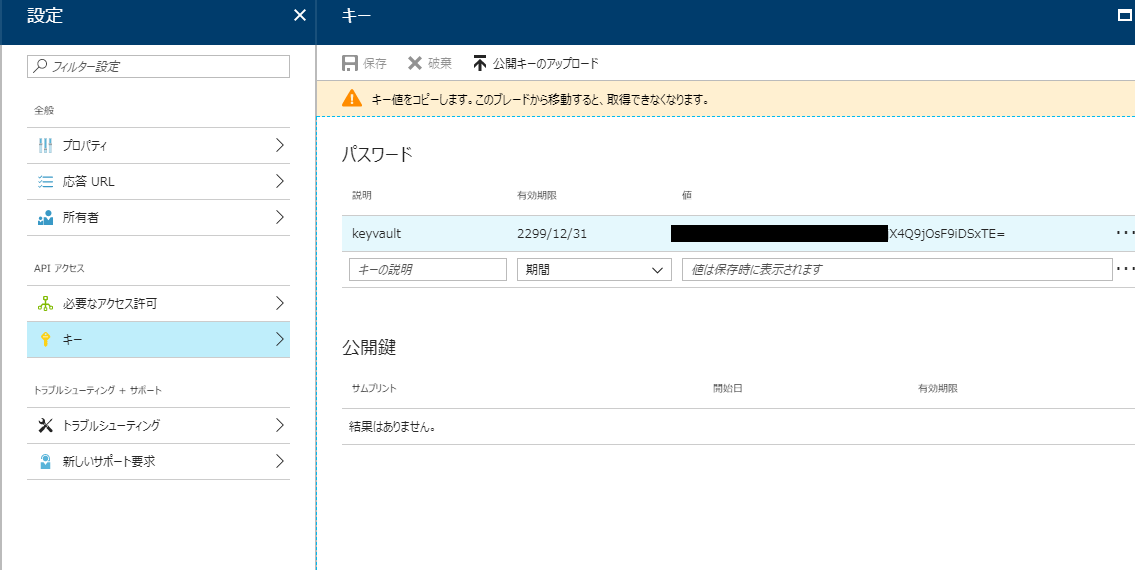
登録したアプリのアプリケーションIDとアプリケーションキーをメモします。
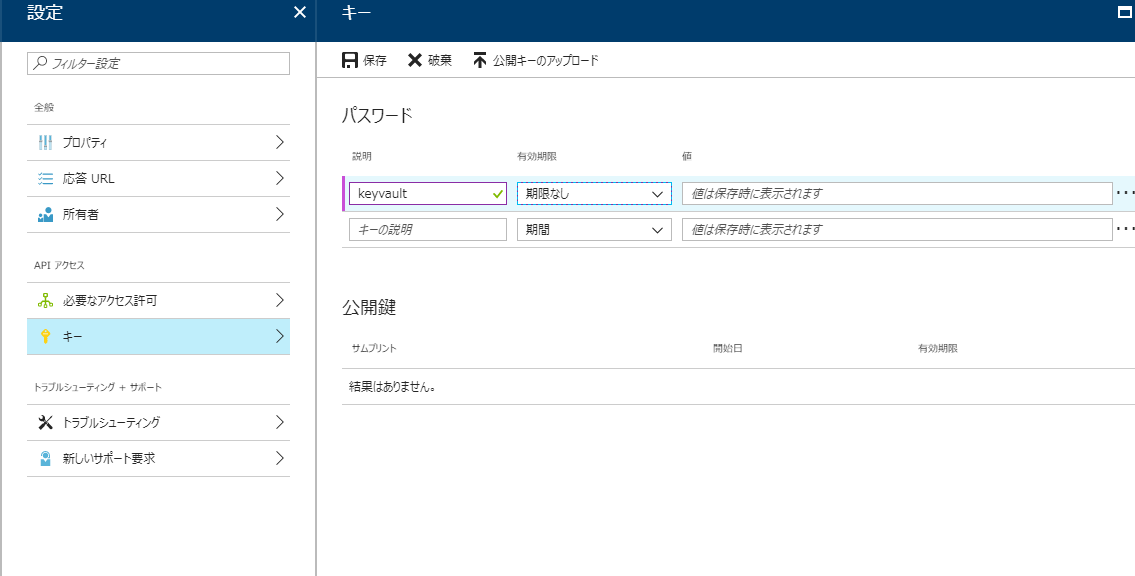
キーを登録します。保存ボタンを押したときに表示される値をメモしておきます。
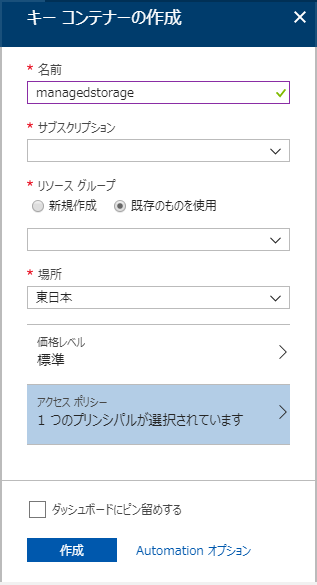
Key Vault作成
ほかのAzureのサービス同様、リージョンとかリソースグループとかを選びます。
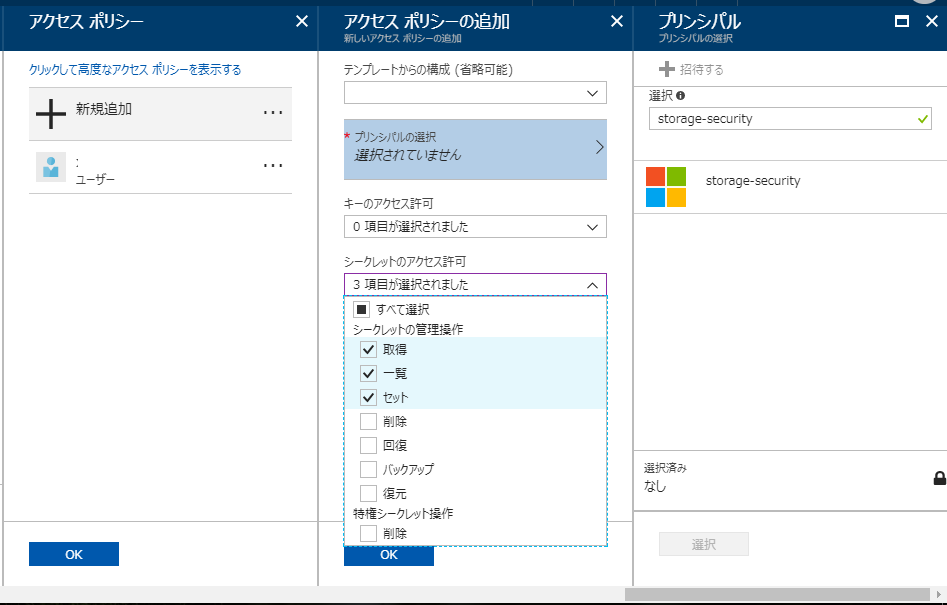
先ほど追加したアプリケーションのプリンシパルをアクセスポリシーを追加します。
シークレットアクセス許可の「取得・一覧・セット」にチェックします。
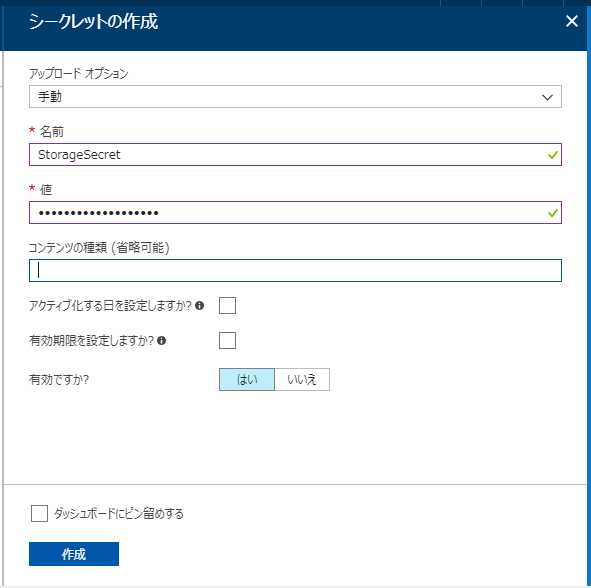
Key Vaultのシークレットの登録
任意の文字列を追加します。
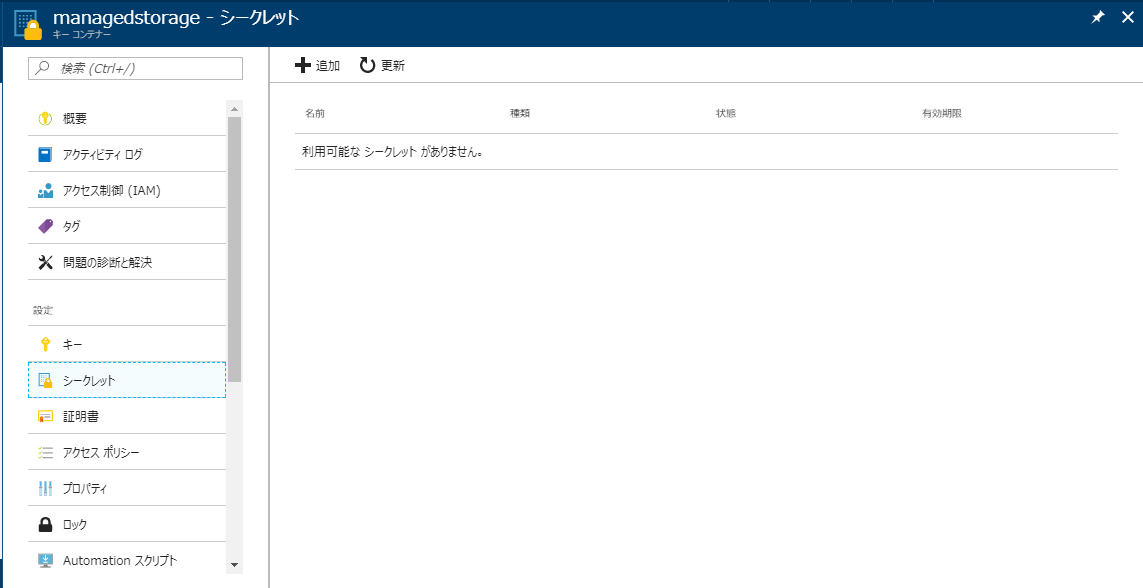
名前:StorageSecret
値 :SomthigKeyToEncript
Secretの取得
今しがた登録したシークレットを取得します。
using AzureStorageSecurityLabo.Common;
using Microsoft.Azure.KeyVault;
using Microsoft.IdentityModel.Clients.ActiveDirectory;
using System;
using System.Threading.Tasks;

public class EncriptKV
{
    static async Task Main(string[] args)
    {
        StorageSettings settings = StorageSettings.Default;

        var cliantId = settings.AppId;
        var secret = settings.AppSecret;
        var secretIdentifier = settings.SecretIdentifier;

        try
        {
            var kv = new KeyVaultClient(new KeyVaultClient.AuthenticationCallback(
                    (authority, resource, scope) =>
                        GetAccessToken(authority, resource, scope, cliantId, secret)));

            var sec = await kv.GetSecretAsync(secretIdentifier);

            Console.WriteLine(sec.Value); // SomthigKeyToEncript
        }
        catch (Exception ex)
        {
            Console.WriteLine("One or more exceptions occurred.");
            Console.WriteLine(ex);
        }
        finally
        {
            Console.WriteLine("Press enter key to exit");
            Console.ReadLine();
        }
    }

    private static async Task<string> GetAccessToken(
        string authority, string resource, string scope, string cliantId, string secret)
    {
        var authContext = new AuthenticationContext(authority);

        ClientCredential clientCred = new ClientCredential(cliantId, secret);

        AuthenticationResult result = await authContext.AcquireTokenAsync(resource, clientCred);

        if (result == null)
            throw new InvalidOperationException("Failed to obtain the JWT token");

        return result.AccessToken;
    }
}
var cliantId = settings.AppId;
AzureADに登録したアプリのアプリケーションID
var secret = settings.AppSecret;
AzureADに登録したアプリの設定したキー
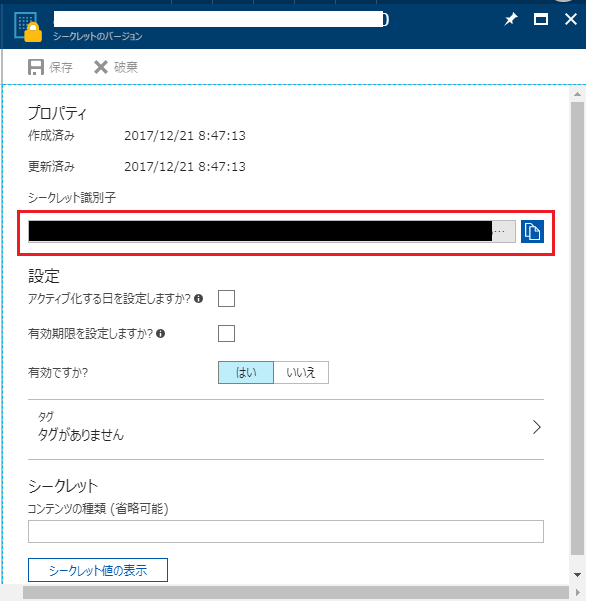
var secretIdentifier = settings.SecretIdentifier;
Key Vaultで設定したシークレットのIdentifier
※KeyVaultのブレードから閲覧可能
Key Vaultに格納したSecret(今回は暗号化キー)を取得することができました。
暗号化キーでもいいし、DBの接続文字列でも、SotrageAccountのアクセスキーでもいいと思いますが、
Azure Key Vaultは、Key Vaultで管理されたStorage Serviceを作成することができます。
②Key Vault で管理されたStorageの利用
Azure Key Vault ストレージアカウントキー
- Azure Key Vaultで管理されたAzure Storage アカウントを使用してキーの一覧表示ができる。
- Azure Key Vault は定期的にキーを再生成することができる。
- キーの値は、呼び出し元に応答で返されることはない。
- 2017/12/21時点プレビュー
つまり、Storageアクセスキーの管理をAzure Key Vaultが勝手にやってくれて、
アプリケーションプリンシパル経由でKey Vaultにアクセスして、
Key Vault管理下にあるStorageへのアクセス権限を上手いことやってくれるやつです。
Azure Storage の作成
まずは普通にストレージアカウントを作成します。
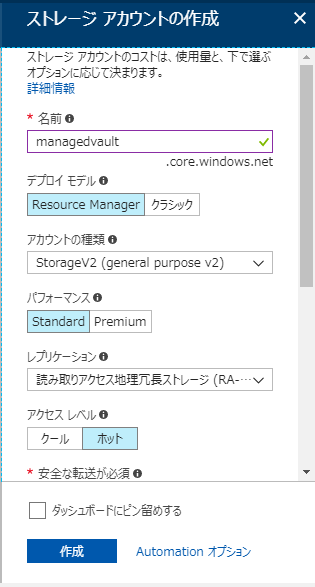
注意![]()
Key Vaultとの紐づけを行うため、対象のストレージはKey Vaultと同じリージョンにある必要があります。
Key VaultとStorage Accountの紐づけ
ここからはPowerShellの出番です。
任意のユーザーでAzureRmにログインします。
ロール ベースのアクセス制御 (RBAC) の権限設定
# Azure Key Vaultのプリンシパルを取得
$yourKeyVaultServicePrincipalId = (Get-AzureRmADServicePrincipal -ServicePrincipalName cfa8b339-82a2-471a-a3c9-0fc0be7a4093).Id
# Storage AccountのリソースID
$storageResourceId = '/subscriptions/{SubscriptionId}/resourceGroups/{ResousrceGroupName}/providers/Microsoft.Storage/storageAccounts/managedvault'
# Key Vaultにストレージアカウントのキーオペレーターロールを追加
New-AzureRmRoleAssignment -ObjectId $yourKeyVaultServicePrincipalId -RoleDefinitionName 'Storage Account Key Operator Service Role' -Scope $storageResourceId
ロール ベースのアクセス制御 (RBAC) の権限設定をします。
Azure Key Vaultにストレージアカウントのキーを操作する権限を追加します。
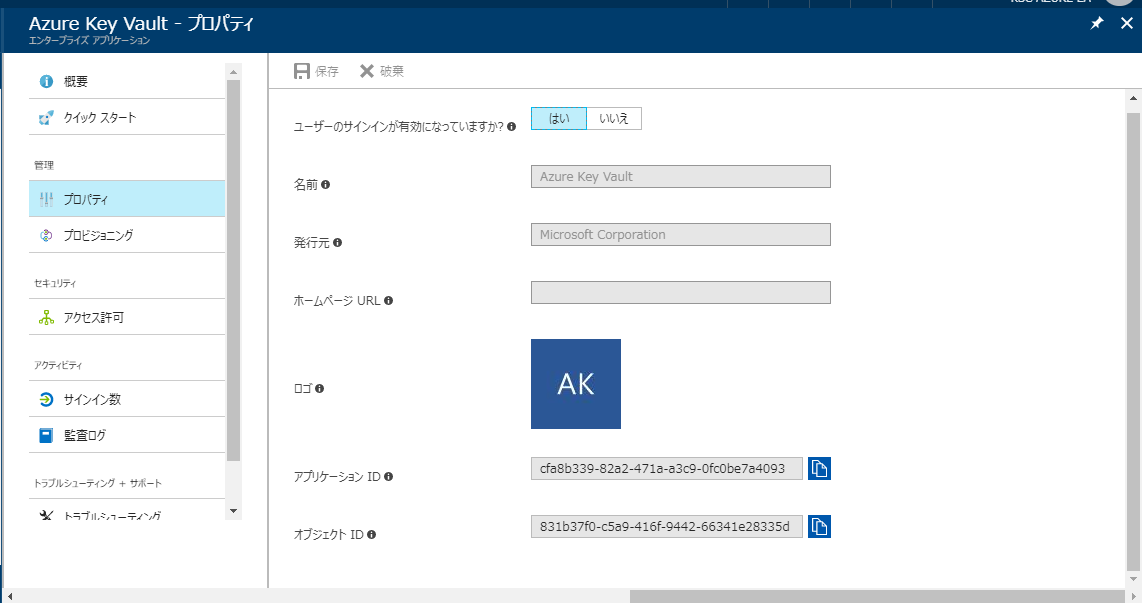
cfa8b339-82a2-471a-a3c9-0fc0be7a4093はAzure Key VaultのアプリケーションIDです。
Azure AD-->エンタープライズアプリケーション-->すべてのアプリケーション
-->Azure Key Vault-->プロパティからアプリケーションIDがわかります。
Key Vaultのアクセスポリシー追加
# 操作するユーザーのプリンシパルを取得
$youruserPrincipalId = (Get-AzureRmADUser -SearchString "your user principal name").Id
# Key Vaultのアクセスポリシーを追加
Set-AzureRmKeyVaultAccessPolicy -VaultName managedstorage -ObjectId $youruserPrincipalId -PermissionsToStorage all -PermissionsToSecrets all
管理されたストレージアカウントと SAS定義を作成する前に、
ストレージ アカウントに、Key Vaultサービスへのアクセスを追加します。
-PermissionsToStorageはPowerShellやAzureCLIからじゃないと登録できないみたいです。プレビューだから???
Key Vaultで管理されたStorageアカウント作成
# Key Vaultで管理されたStorageアカウントを作成します
Add-AzureKeyVaultManagedStorageAccount -VaultName managedstorage -Name managedvault -AccountResourceId $storageResourceId -ActiveKeyName key1 -RegenerationPeriod ([System.Timespan]::FromDays(3))
-RegenerationPeriodはKeyの再生成期間。
プレビュー期間は無料。
一般提供価格 - 更新あたり ¥102
Sas定義の設定・利用
ここまでで、Key Vault、Storage Account、Key Vaultで管理されたStorage Accountが作成されているはずです。
Key Vaultで管理されたStorage Accountが内部的にどういう仕組みになっているかわかりませんが、既存のStorage Accountをラップする形でインターフェースを提供していると予想してます。
その証拠に、Storage Exploreなどからは、今まで通りStorage Accountにアクセスできます。
では、Key Vaultで管理されたStorage AccountにSasの定義を追加します。
ここからはC#です。
class StorageAccessKV
{
    static async Task Main(string[] args)
    {
        StorageSettings settings = StorageSettings.Default;
        var cliantId = settings.AppId;
        var clientSecret = settings.AppSecret;
        string vaultAddress = "https://managedstorage.vault.azure.net/";
        string storageName = "managedvault";

        try
        {
            var kv = new KeyVaultClient(new KeyVaultClient.AuthenticationCallback(
                    (authority, resource, scope) =>
                            GetAccessToken(authority, resource, scope, cliantId, clientSecret)));

            var sas = "sas1";
            var fields = new Dictionary<string, string>() {
                {"sasType", "account"},
                {"signedProtocols", "https"},
                {"signedServices", "b"},
                {"signedResourceTypes", "sco"},
                {"signedPermissions", "rwl"},
                {"signedVersion", "2016-05-31"},
                {"validityPeriod", "P1D"}
            };
            var attr = new SasDefinitionAttributes { Enabled = true };

            var sasDefinition =
                    await kv.SetSasDefinitionAsync(vaultAddress, storageName, sas, fields, attr);

            var secret = await kv.GetSecretAsync(sasDefinition.SecretId);

            var credential = new StorageCredentials(secret.Value);
            var blobUri = new Uri("https://managedvault.blob.core.windows.net/");
            var accountWithSas = new CloudStorageAccount(credential, blobUri, null, null, null);

            var blobClientWithSas = accountWithSas.CreateCloudBlobClient();
            CloudBlobContainer container = blobClientWithSas.GetContainerReference(settings.ContainerName);
            await container.CreateIfNotExistsAsync();
            CloudBlockBlob blob = container.GetBlockBlobReference("keyvault.txt");

            await blob.UploadTextAsync("Hello Key Vault!");

        }
        catch (Exception ex)
        {
            Console.WriteLine("One or more exceptions occurred.");
            Console.WriteLine(ex);
        }
        finally
        {
            Console.WriteLine("Press enter key to exit");
            Console.ReadLine();
        }
    }
    private static async Task<string> GetAccessToken(
        string authority, string resource, string scope, string cliantId, string secret)
    {
        var authContext = new AuthenticationContext(authority);

        ClientCredential clientCred = new ClientCredential(cliantId, secret);

        AuthenticationResult result = await authContext.AcquireTokenAsync(resource, clientCred);

        if (result == null)
            throw new InvalidOperationException("Failed to obtain the JWT token");

        return result.AccessToken;
    }
}
SasDefinitionAttributes.Enabledはデフォルトfalseですので、
明示的にtrueを指定しています。
ややこしそうなSasのパラメータの設定は以下です。
var fields = new Dictionary<string, string>() {
    {"sasType", "account"},
    {"signedProtocols", "https"},
    {"signedServices", "b"},
    {"signedResourceTypes", "sco"},
    {"signedPermissions", "rwl"},
    {"signedVersion", "2016-05-31"},
    {"validityPeriod", "P1D"}
};
{"signedServices", "b"}はBlob、
{"signedResourceTypes", "sco"}はService、Container、Object、
{"signedPermissions", "rwl"}はRead、Write、List
です。
Storageアカウントのアクセスキーは使用せず、
Sas定義経由でStorageにアクセスしているのがわかると思います。
実際運用するってなった場合は、
1か月に1回キーをローテーションするように設定したストレージアカウントに対して、
何日単位でSasを定義してアプリケーションにキャッシュ。
キャッシュの期限切れ-->Sasの期限切れ-->Sas定義再作成
といった感じになるのかな。(適当)
おわりに
今回はStorageサービスにスポットを当てましたが、
DBの接続文字列や、他システムのURIなど、用途は多そうです。
Functionsや、Mobile Appsを利用してよりライトにアプリケーションを作成することが可能になっていますが、機微な情報やセキュリティを担保しないといけないデータに関してはおろそかになりがちです。
これを機に重要な設定値をconfigに書くことは卒業しましょう!
(Azure ADアレルギー発症しました・・・![]() )
)