本記事の内容
- MacでSonarQube構築する手順
- SonarQubeでpythonのunittestカバレッジ出力する手順
環境
- docker-compose(本記事ではバージョン 1.23.2)
- Homebrew(本記事ではバージョン 2.0.0)
- python(本記事ではバージョン 3.5.2)
SonarQube構築手順
docker-composeでSonarQubeの環境を構築する
- SonarSourceのdocker-compose.ymlを任意のディレクトリに配備し、docker-composeを起動する
$ ls
docker-compose.yml

$ docker-compose up
-
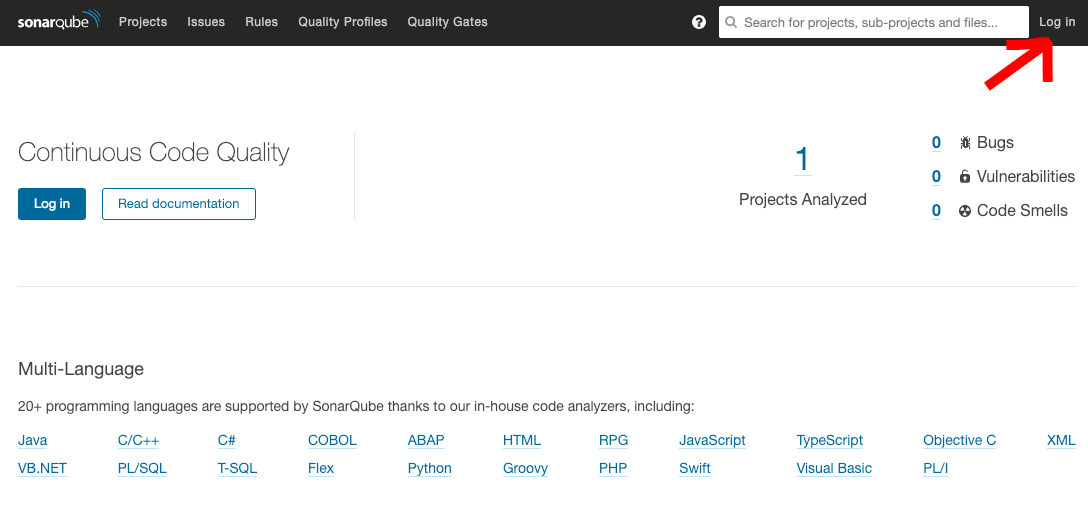
http://localhost:9000 にアクセスし、以下のような画面が出力されるか確認

Homebrewでsonar-scannerをインストール
- 以下のコマンドを実行し、sonar-scannerをインストールする
$ brew install sonar-scanner
SonarQubeでpythonのunittestカバレッジ出力する手順
SonarQubeの設定
- http://localhost:9000 の画面右上の「Log in」をクリックし、ログインする(id,パスワードは両方とも"admin")
- ログインするとtoken名を聞かれるので入力。入力後tokenが発行されるのでどこかに記録しておく。
- 主なプログラム言語、OS、プロジェクトキーを聞かれるので入力し、Doneボタンをクリック。その後画面右下の「Finish」をクリック。
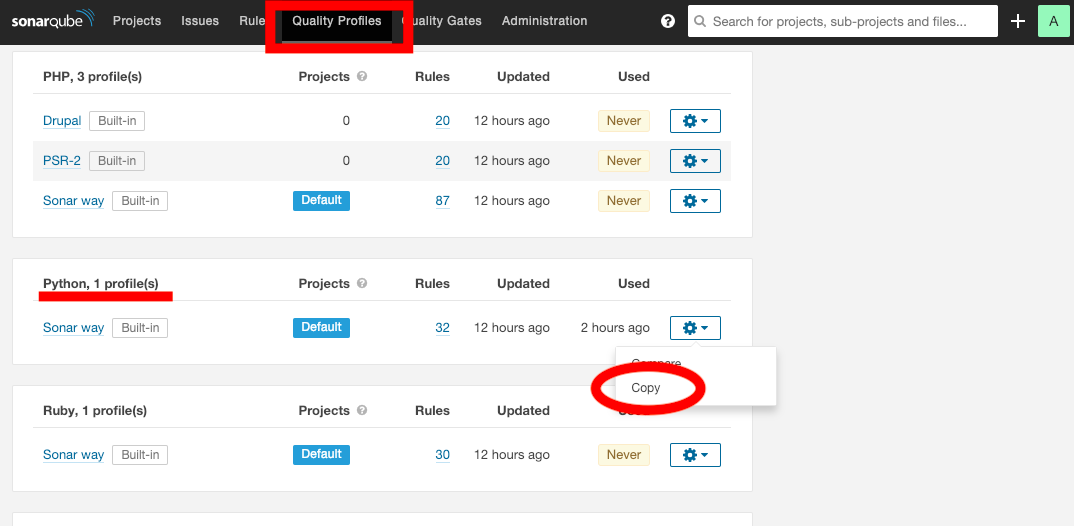
- 画面上部にある「Quality Profiles」をクリックし、一覧からpythonの項目を探してコピーする。コピー時にプロファイル名を聞かれるので入力。
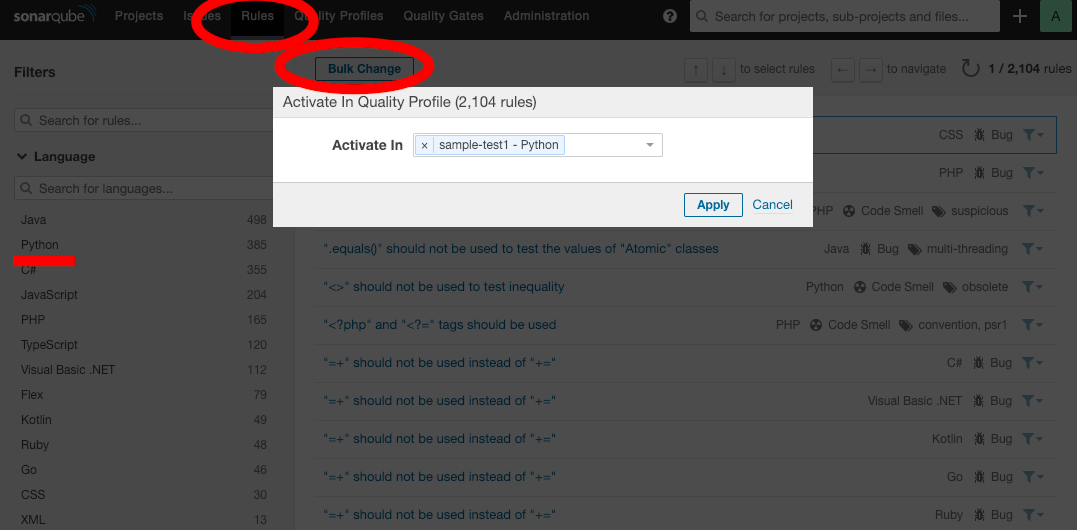
- 画面上部にある「Rules」をクリック、画面左側に言語一覧が表示されるのでpythonを選択。画面上部の「bulk Change」>「Activate in ...」をクリックし設定を有効にする。以上でSonarQubeの設定は完了。
pythonカバレッジ出力
SonarPythonはcoverage.pyを使った出力をサポートしている。今回はunittestで出力した結果をcoverage.pyでカバレッジをxml形式で出力し、それをSonarQubeで出力する。
- coverage.pyをインストール
pip3 install coverage
- 今回は以下のpythonファイルを用意
$ ls
test_hoge.py            hoge.py

$ cat hoge.py
class Hoge:
    def plus(self, a, b):
        return a + b

    def minus(self, a, b):
        return a - b

    def multiply(self, a, b):
        return a * b

    def divide(self, a, b):
        return a / b

$ cat test_hoge.py
import unittest
from hoge import Hoge

class TestHoge(unittest.TestCase):
    def test_plus(self):
        h = Hoge()
        a = h.plus(1, 2)
        self.assertEqual(a, 3)

    def test_minus(self):
        h = Hoge()
        a = h.minus(3, 2)
        self.assertEqual(a, 1)

if __name__ == "__main__":
    unittest.main()
- 以下のコマンドを実行しカバレッジを出力し、coverage.xmlを作成。
$ coverage erase
$ coverage run test_hoge.py
$ coverage xml -i
sonar-scannerを実行
- pythonファイルのあるディレクトリ内にsonar-project.propertiesを作成。
$ ls
coverage.xml			sonar-project.properties
hoge.py				test_hoge.py
- 設定は以下のように記載
$ cat sonar-project.properties
sonar.projectKey=sample-test
sonar.sources=.
sonar.exclusions=**/test_*.py
sonar.host.url=http://localhost:9000
sonar.login={メモしたtokenを記載}
sonar.language=py
sonar.python.coverage.reportPath=coverage.xml
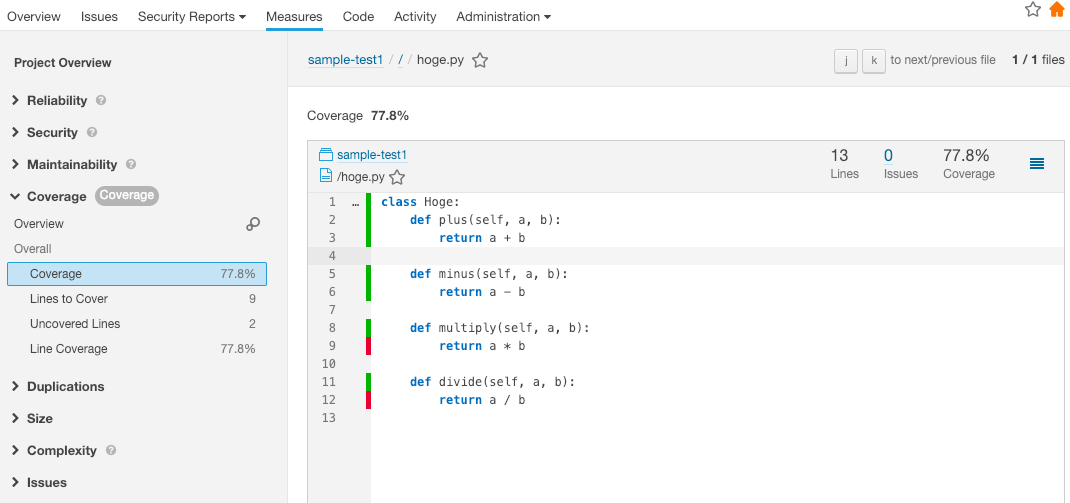
- sonar-project.propertiesのあるディレクトリ内でsonar-scannerを実行。カバレッジ結果が出力される。
$ sonar-scanner


