はじめに
本記事ではタイトルの通り、GitHub Actions を使って、Playwright でのテスト実行とテスト結果レポートを公開する方法を紹介します。
テスト自動化を導入するに当たって大切なことの1つは、具体的な自動化の手順や、最終的な形がイメージできていることです。
また、簡単なデモを作れると、説得力が増し、上層部やメンバーの理解も得やすくなります。
と、若干こじつけのようですが、初めていきます。
環境
- MacOS (M2)
- Bun + React + Vite
こちらの記事で作成したプロジェクトを利用して、Playwright のテストを導入します。
以下のようなシンプルなページを実装しています。
Playwrightの導入
プロジェクトへ追加
bun add -d @playwright/test
bun create playwright
対話形式になるので、以下の通り入力 (分かる方は変えても構いません)
Getting started with writing end-to-end tests with Playwright:
Initializing project in '.'
✔ Where to put your end-to-end tests? · tests
✔ Add a GitHub Actions workflow? (y/N) · true
✔ Install Playwright browsers (can be done manually via 'npx playwright install')? (Y/n) · true
内容は以下の通りです。
- E2Eテストの格納ディレクトリ => tests
- GitHub Actions のワークフロー作成 => y (ほぼ書き直すので N でも良い)
- Playwrightで利用するヘッドレスブラウザのインストール => y
Playwright Configの修正
playwright.config.ts を以下のように修正します。
import { defineConfig, devices } from '@playwright/test'

/**
 * Read environment variables from file.
 * https://github.com/motdotla/dotenv
 */
// import dotenv from 'dotenv';
// import path from 'path';
// dotenv.config({ path: path.resolve(__dirname, '.env') });

/**
 * See https://playwright.dev/docs/test-configuration.
 */
export default defineConfig({
  testDir: './tests',
  /* Run tests in files in parallel */
  fullyParallel: true,
  /* Fail the build on CI if you accidentally left test.only in the source code. */
  forbidOnly: !!process.env.CI,
  /* Retry on CI only */
  retries: process.env.CI ? 2 : 0,
  /* Opt out of parallel tests on CI. */
  workers: process.env.CI ? 1 : undefined,
  /* Reporter to use. See https://playwright.dev/docs/test-reporters */
  reporter: 'html',
  /* Shared settings for all the projects below. See https://playwright.dev/docs/api/class-testoptions. */
  use: {
    /* Base URL to use in actions like `await page.goto('/')`. */
-   // baseURL: 'http://127.0.0.1:3000',
+   baseURL: 'http://localhost:3000',

    /* Collect trace when retrying the failed test. See https://playwright.dev/docs/trace-viewer */
    trace: 'on-first-retry',

+   /* screenshot when test failed. */
+   screenshot: { mode: 'only-on-failure', fullPage: true },
  },

  /* Configure projects for major browsers */
  projects: [
    {
      name: 'chromium',
      use: { ...devices['Desktop Chrome'] },
    },

    {
      name: 'firefox',
      use: { ...devices['Desktop Firefox'] },
    },

    {
      name: 'webkit',
      use: { ...devices['Desktop Safari'] },
    },

    /* Test against mobile viewports. */
    // {
    //   name: 'Mobile Chrome',
    //   use: { ...devices['Pixel 5'] },
    // },
    // {
    //   name: 'Mobile Safari',
    //   use: { ...devices['iPhone 12'] },
    // },

    /* Test against branded browsers. */
    // {
    //   name: 'Microsoft Edge',
    //   use: { ...devices['Desktop Edge'], channel: 'msedge' },
    // },
    // {
    //   name: 'Google Chrome',
    //   use: { ...devices['Desktop Chrome'], channel: 'chrome' },
    // },
  ],

  /* Run your local dev server before starting the tests */
- // webServer: {
- //   command: 'npm run start',
- //   url: 'http://127.0.0.1:3000',
- //   reuseExistingServer: !process.env.CI,
- // },
+ webServer: {
+   command: 'bun run dev',
+   url: 'http://localhost:3000',
+   reuseExistingServer: !process.env.CI,
+ },
})
変更内容は以下の通りです。
- テスト対象のURLを指定
- テスト失敗時にスクリーンショットを撮る設定
- テスト実行前にWebサーバーを起動する設定
テストの作成
./tests/example.spec.ts の内容を以下に変更します。(全修正)
import { test, expect } from '@playwright/test'

test.beforeEach(async ({ page }) => {
  await page.goto('/')
})

test('has title', async ({ page }) => {
  await expect(
    page.getByRole('heading', { name: 'Key Usage Sample' })
  ).toBeVisible()
})

test('count up', async ({ page }) => {
  await expect(page.getByText('現在のカウントは「0」です。')).toBeVisible()

  await page.getByRole('button', { name: 'Count UP!' }).click()

  await expect(page.getByText('現在のカウントは「1」です。')).toBeVisible()
})
以下のテストケースを追加しています。
- has title => 「Key Usage Sample」が画面に表示されていることを確認
- count up =>「Count UP!」ボタンを押すとカウントが増加することを確認
テストの実行
package.json の scripts に Playwright の実行を追加
  "scripts": {
    "dev": "bunx --bun vite",
    "build": "tsc -b && bunx --bun vite build",
    "lint": "eslint .",
    "format": "prettier --write .",
    "format-check": "prettier --check .",
    "preview": "bunx --bun vite preview",
+   "integration-test": "bun playwright test"
  },
実行します。
bun run integration-test
問題なければ、テストが実行され、レポートが出力されるはずです。
./playwright-report/index.html に以下のような結果が出力されていれば成功です。
GitHub Actionsの構築
Playwright の導入ができたので、続けてGitHub Actions で CI を構築していきます。
GitHub Pages の設定
GitHub リポジトリの設定から GitHub Pages を有効にします。
- Settings -> Pages に移動
-
Source を
GitHub Actionsに設定
GitHub Actions ワークフローの設定
ワークフローファイルの作成
.github/workflows に playwright.yml という名前のファイルを作成されているので、これを修正します。
(Playwight 導入時に自動作成されたものですが、npm 用になっているのと、Pages へのアップロードがないので、ほぼ書き換えとなります)
name: Playwright Tests
on:
  push:
    branches: [main]
  pull_request:
    branches: [main]

permissions:
  contents: read
  pages: write
  id-token: write

jobs:
  test:
    timeout-minutes: 60
    runs-on: ubuntu-latest
    steps:
      - uses: actions/checkout@v4

      - name: Install bun
        uses: oven-sh/setup-bun@v2

      - name: Install dependencies
        run: bun install

      - name: Install Playwright Browsers
        run: bun playwright install --with-deps

      - name: Playwright tests
        run: bun playwright test

      - uses: actions/upload-artifact@v4
        if: ${{ !cancelled() }}
        with:
          name: playwright-report
          path: playwright-report/
          retention-days: 30

      - name: Setup Pages
        uses: actions/configure-pages@v5
        if: ${{ !cancelled() }}

      - name: Upload Artifacts to GitHub Pages
        uses: actions/upload-pages-artifact@v3
        if: ${{ !cancelled() }}
        with:
          path: ./playwright-report

      - name: Deploy to GitHub Pages
        id: deployment
        uses: actions/deploy-pages@v4
        if: ${{ !cancelled() }}
permissions ではGitHub Pages にデプロイするための権限をつけています
テスト失敗時にもレポートがアップロードされるようにするため、
if: ${{ !cancelled() }} を付けています。
この辺りは実際の要件に従って調整してください。
各ステップの説明
| # | ステップ名 | 説明 |
|---|---|---|
| 1 | actions/checkout@v4 | リポジトリのコードをチェックアウトして、ワークフロー内で利用できるようにします。 |
| 2 | Install Bun | CI 環境に Bun をインストールします。 |
| 3 | Install dependencies | 必要な依存関係をインストールします。 |
| 4 | Install Playwright Browsers | Playwrightのブラウザをインストールします。 |
| 5 | Playwright tests | Playwright テストを実行し、HTML レポートを生成します。 |
| 6 | actions/upload-artifact@v4 | テストレポートをアーティファクトとして保存します。 |
| 7 | Setup Pages | GitHub Pagesの設定を行います。 |
| 8 | Upload Artifacts to GitHub Pages | 生成されたレポートをGitHub Pagesにアップロードします。 |
| 9 | Deploy to GitHub Pages | GitHub Pagesにデプロイします。 |
実行と確認
main ブランチにコードをプッシュまたは PR を作成すると、GitHub Actions が実行されます。
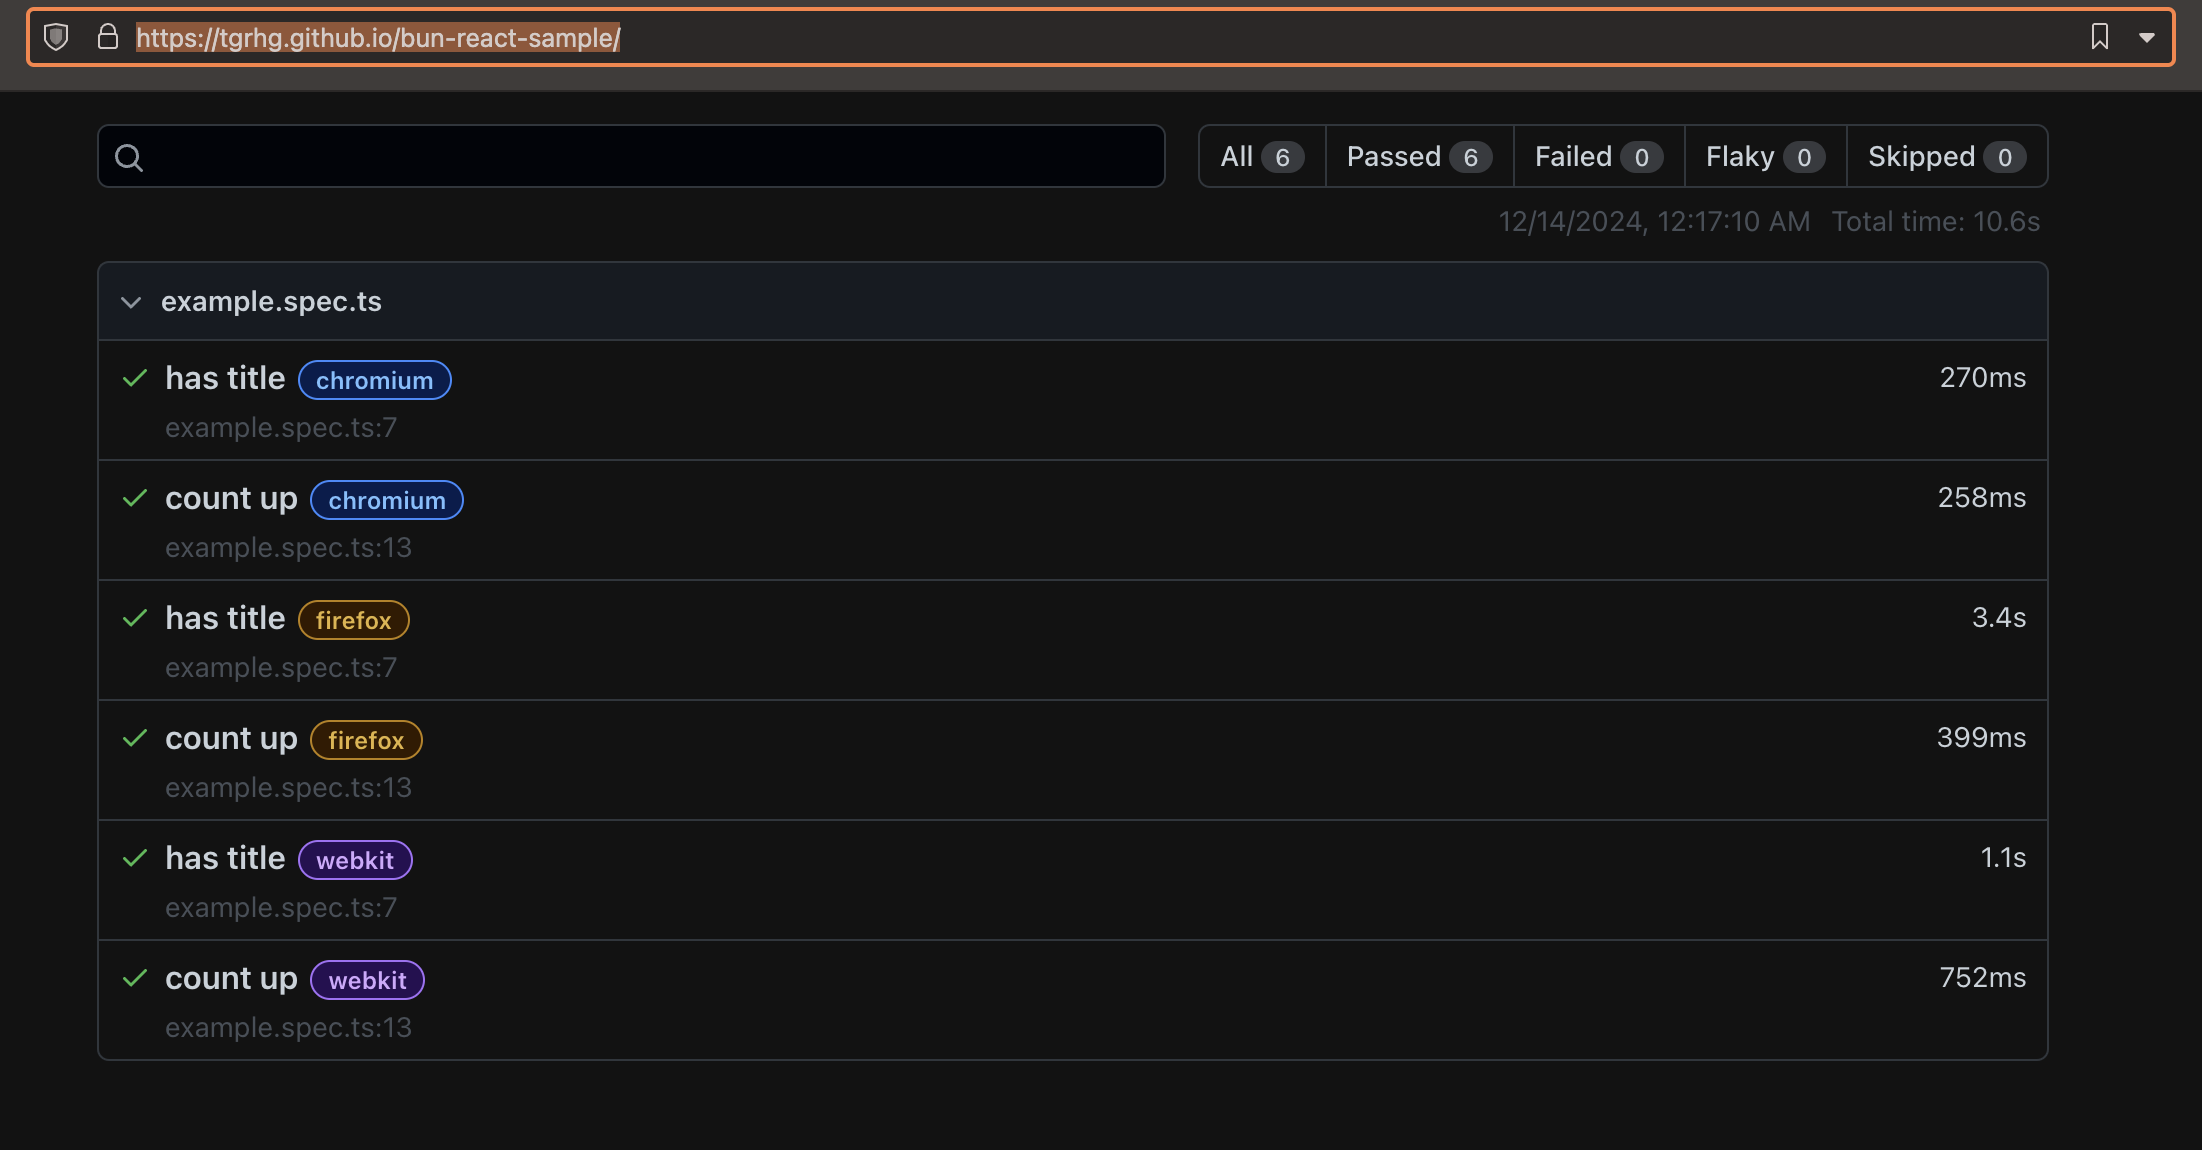
ワークフローが成功すると、GitHub Pages にテストレポートが公開されます。
(URL は通常 https://<username>.github.io/<repository>/ になります)
無事に公開されていることが確認できました!
テスト失敗時の確認
./tests/example.spec.ts を少し修正して、2番目のテストを失敗させてみます。
import { test, expect } from '@playwright/test'

test.beforeEach(async ({ page }) => {
  await page.goto('/')
})

test('has title', async ({ page }) => {
  await expect(
    page.getByRole('heading', { name: 'Key Usage Sample' })
  ).toBeVisible()
})

test('count up', async ({ page }) => {
  await expect(page.getByText('現在のカウントは「0」です。')).toBeVisible()

  await page.getByRole('button', { name: 'Count UP!' }).click()

- await expect(page.getByText('現在のカウントは「1」です。')).toBeVisible()
})
+ await expect(page.getByText('現在のカウントは「0」です。')).toBeVisible()
})
上記をCommit+Pushすると、CIが失敗するのが確認できます。
また、GitHub Pages にアップロードされたレポートをみると、失敗した箇所をスクリーンショットと共に確認することができます。
まとめ
Playwright と GitHub Actions を利用したテスト自動化の一例を紹介しました。
少しでも自動化に取り組む際の参考になりましたら幸いです。


