0. 初めに
先日、iOSアプリケーションの強制アップデートの実装をしました。
方法は色々あるなと考えたのですが、今回はGoogleさんが提供しているFirebase Remote Configを使用する方法が簡単だったので備忘録的にまとめました。
参考にしていただければ幸いです。
目次
手順
Firebaseは、Googleのモバイルプラットフォームです。
Firebaseには無料で使える便利な機能が多く、ドキュメントも充実しており、読みやすいのでおすすめです。
今回はその中の、Remote Config機能を使用していきます。
1. Firebaseで新規プロジェクトを作成する
まずはFirebaseの公式サイトへ行き、右上の"コンソールへ移動"します。
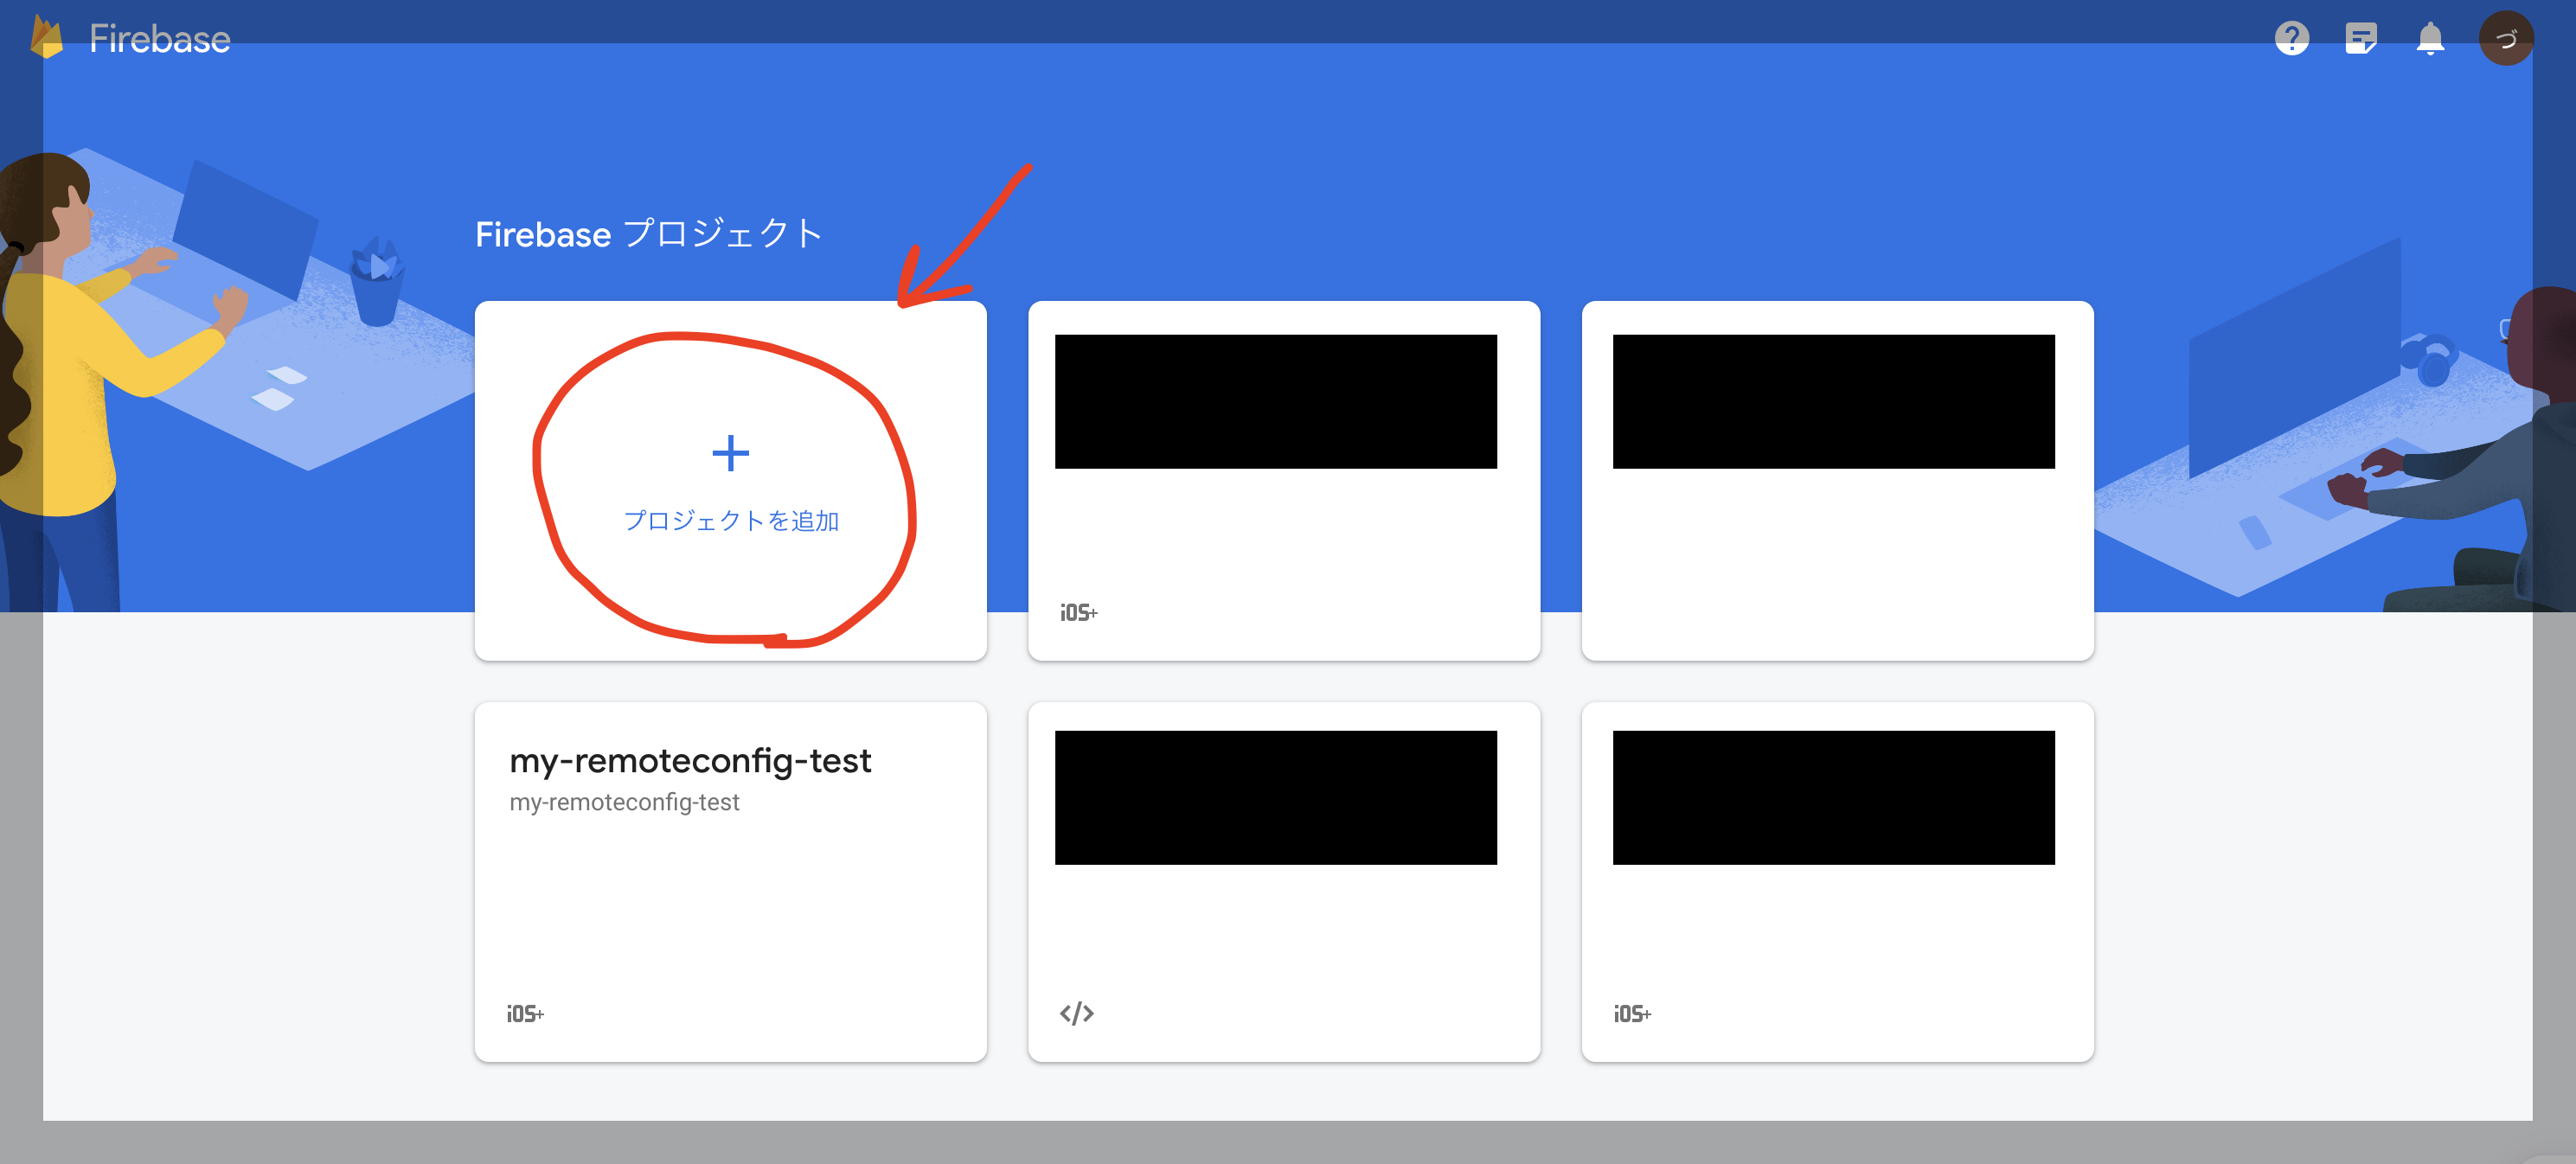
次に、Firebase プロジェクトから"プロジェクトを追加"し、作成手順へ進みます。
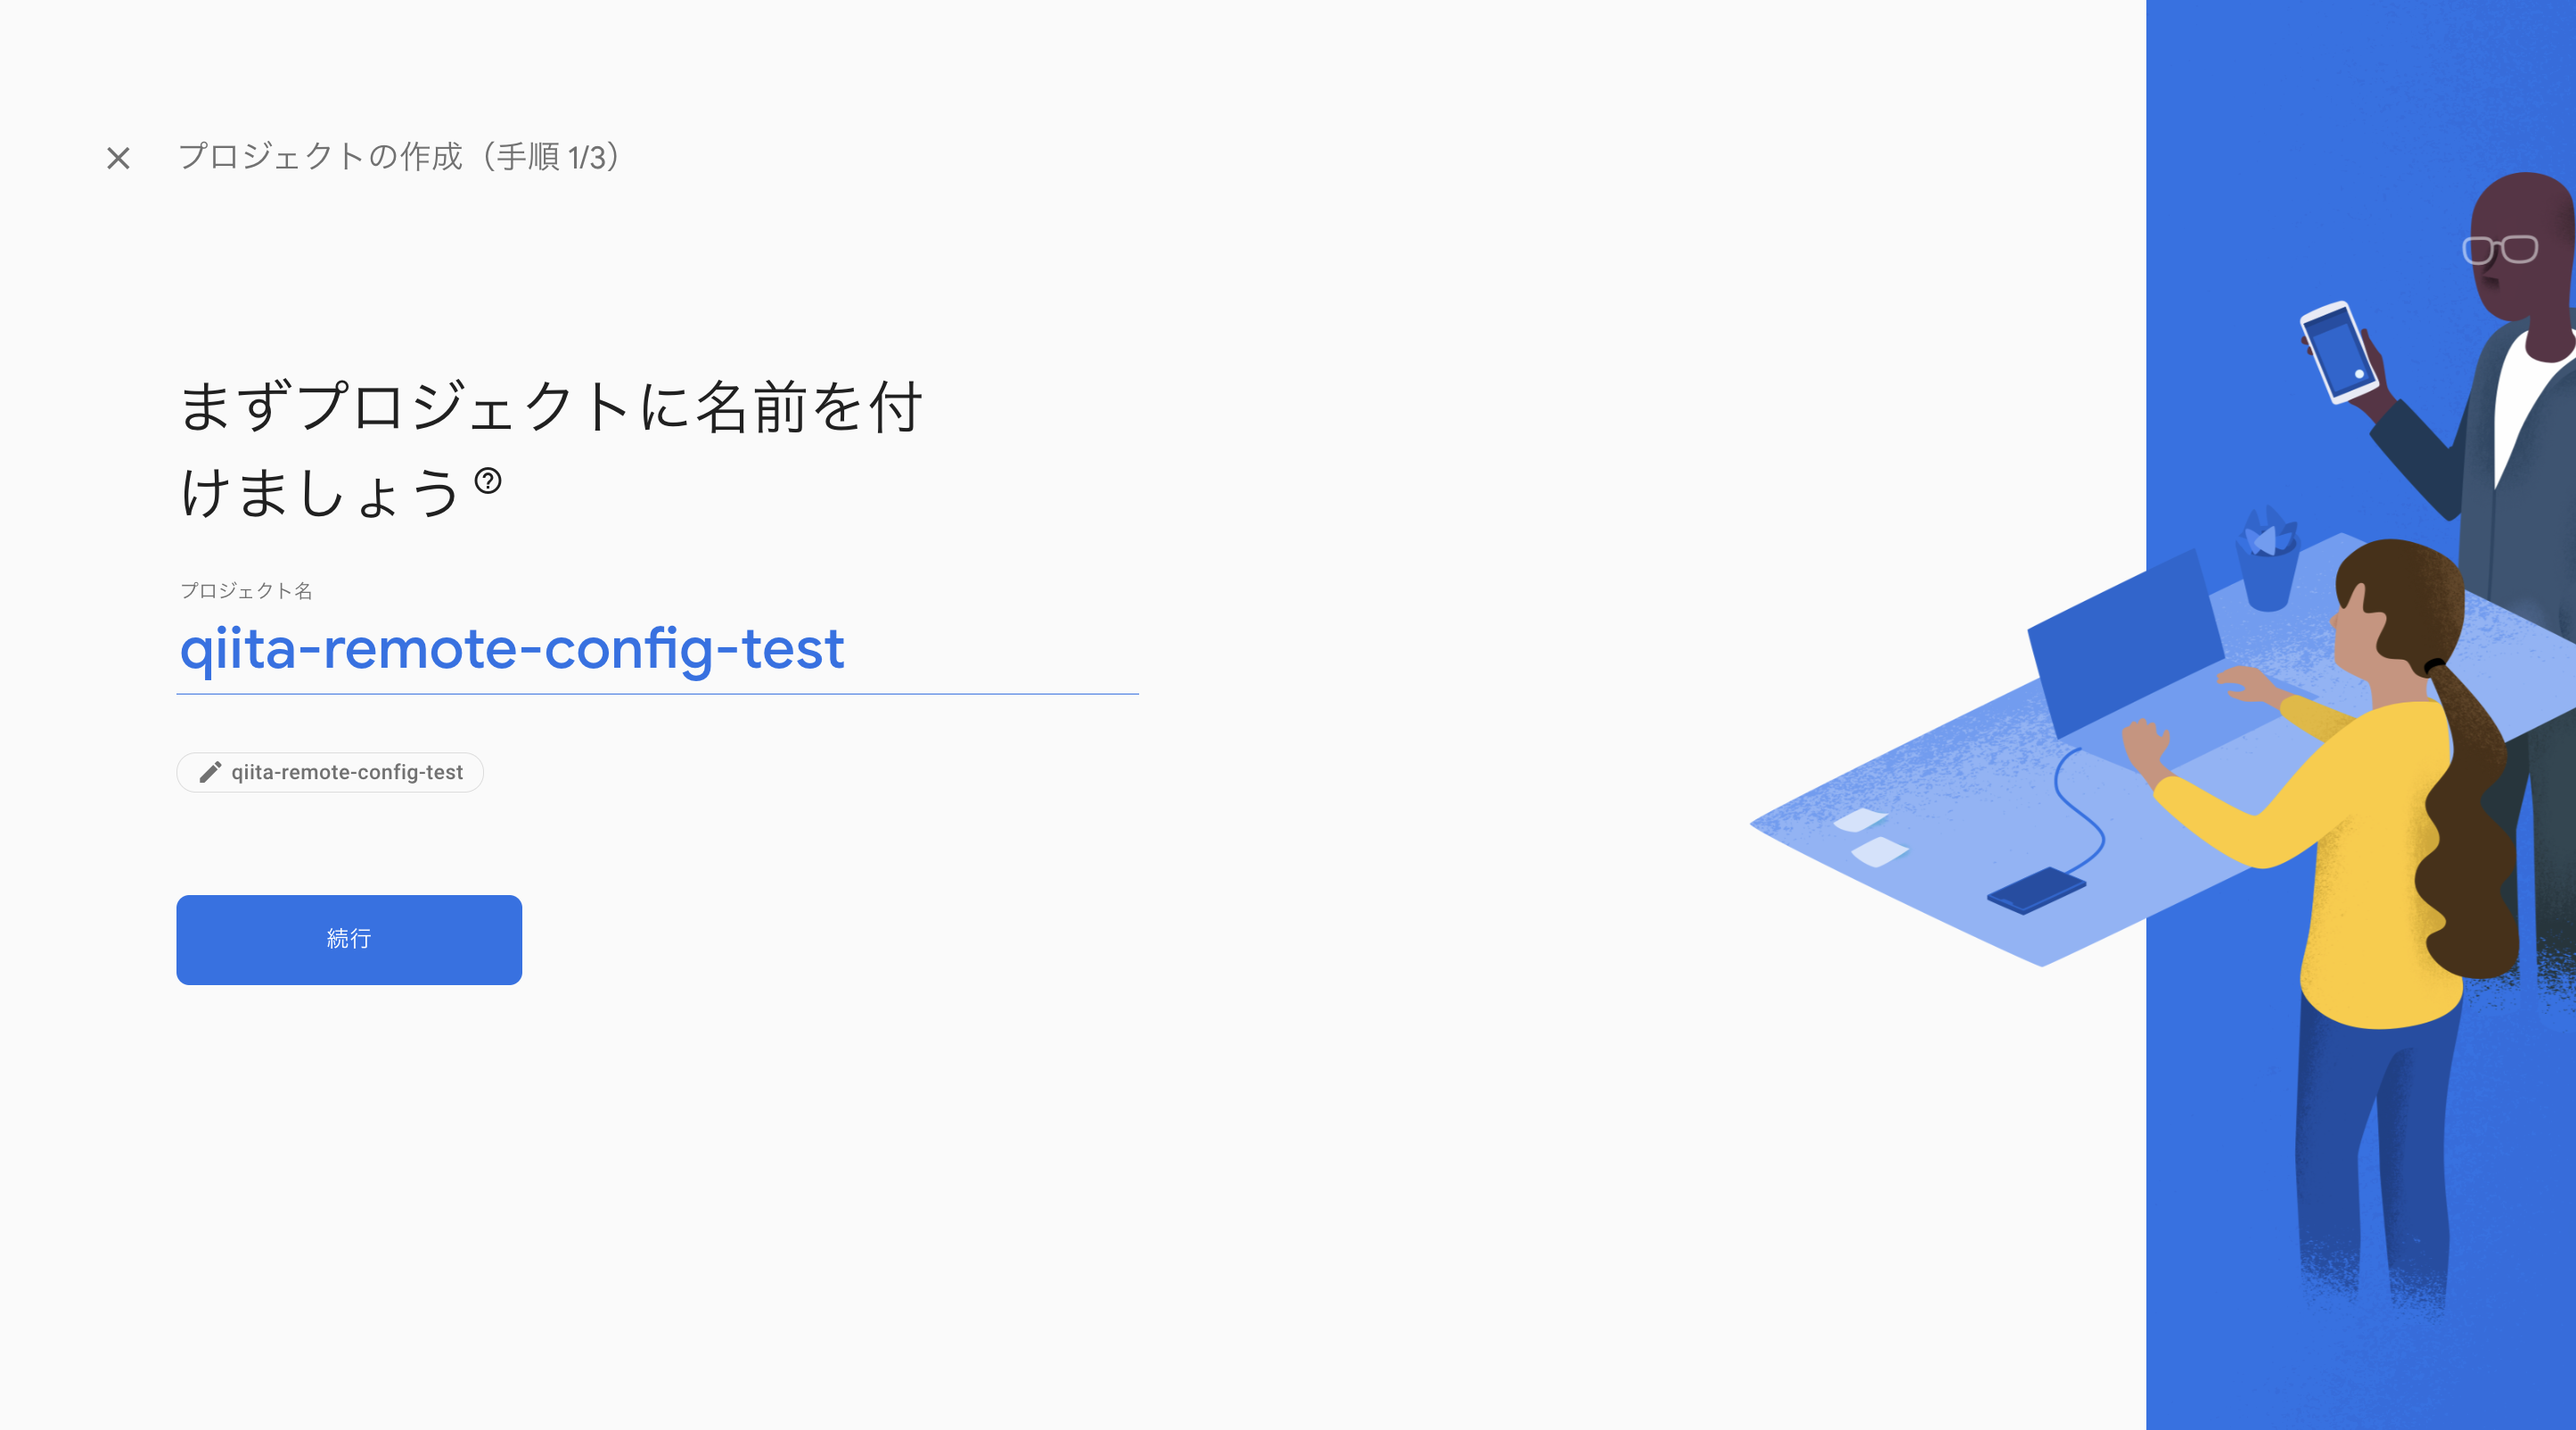
手順通りに進めていきます。
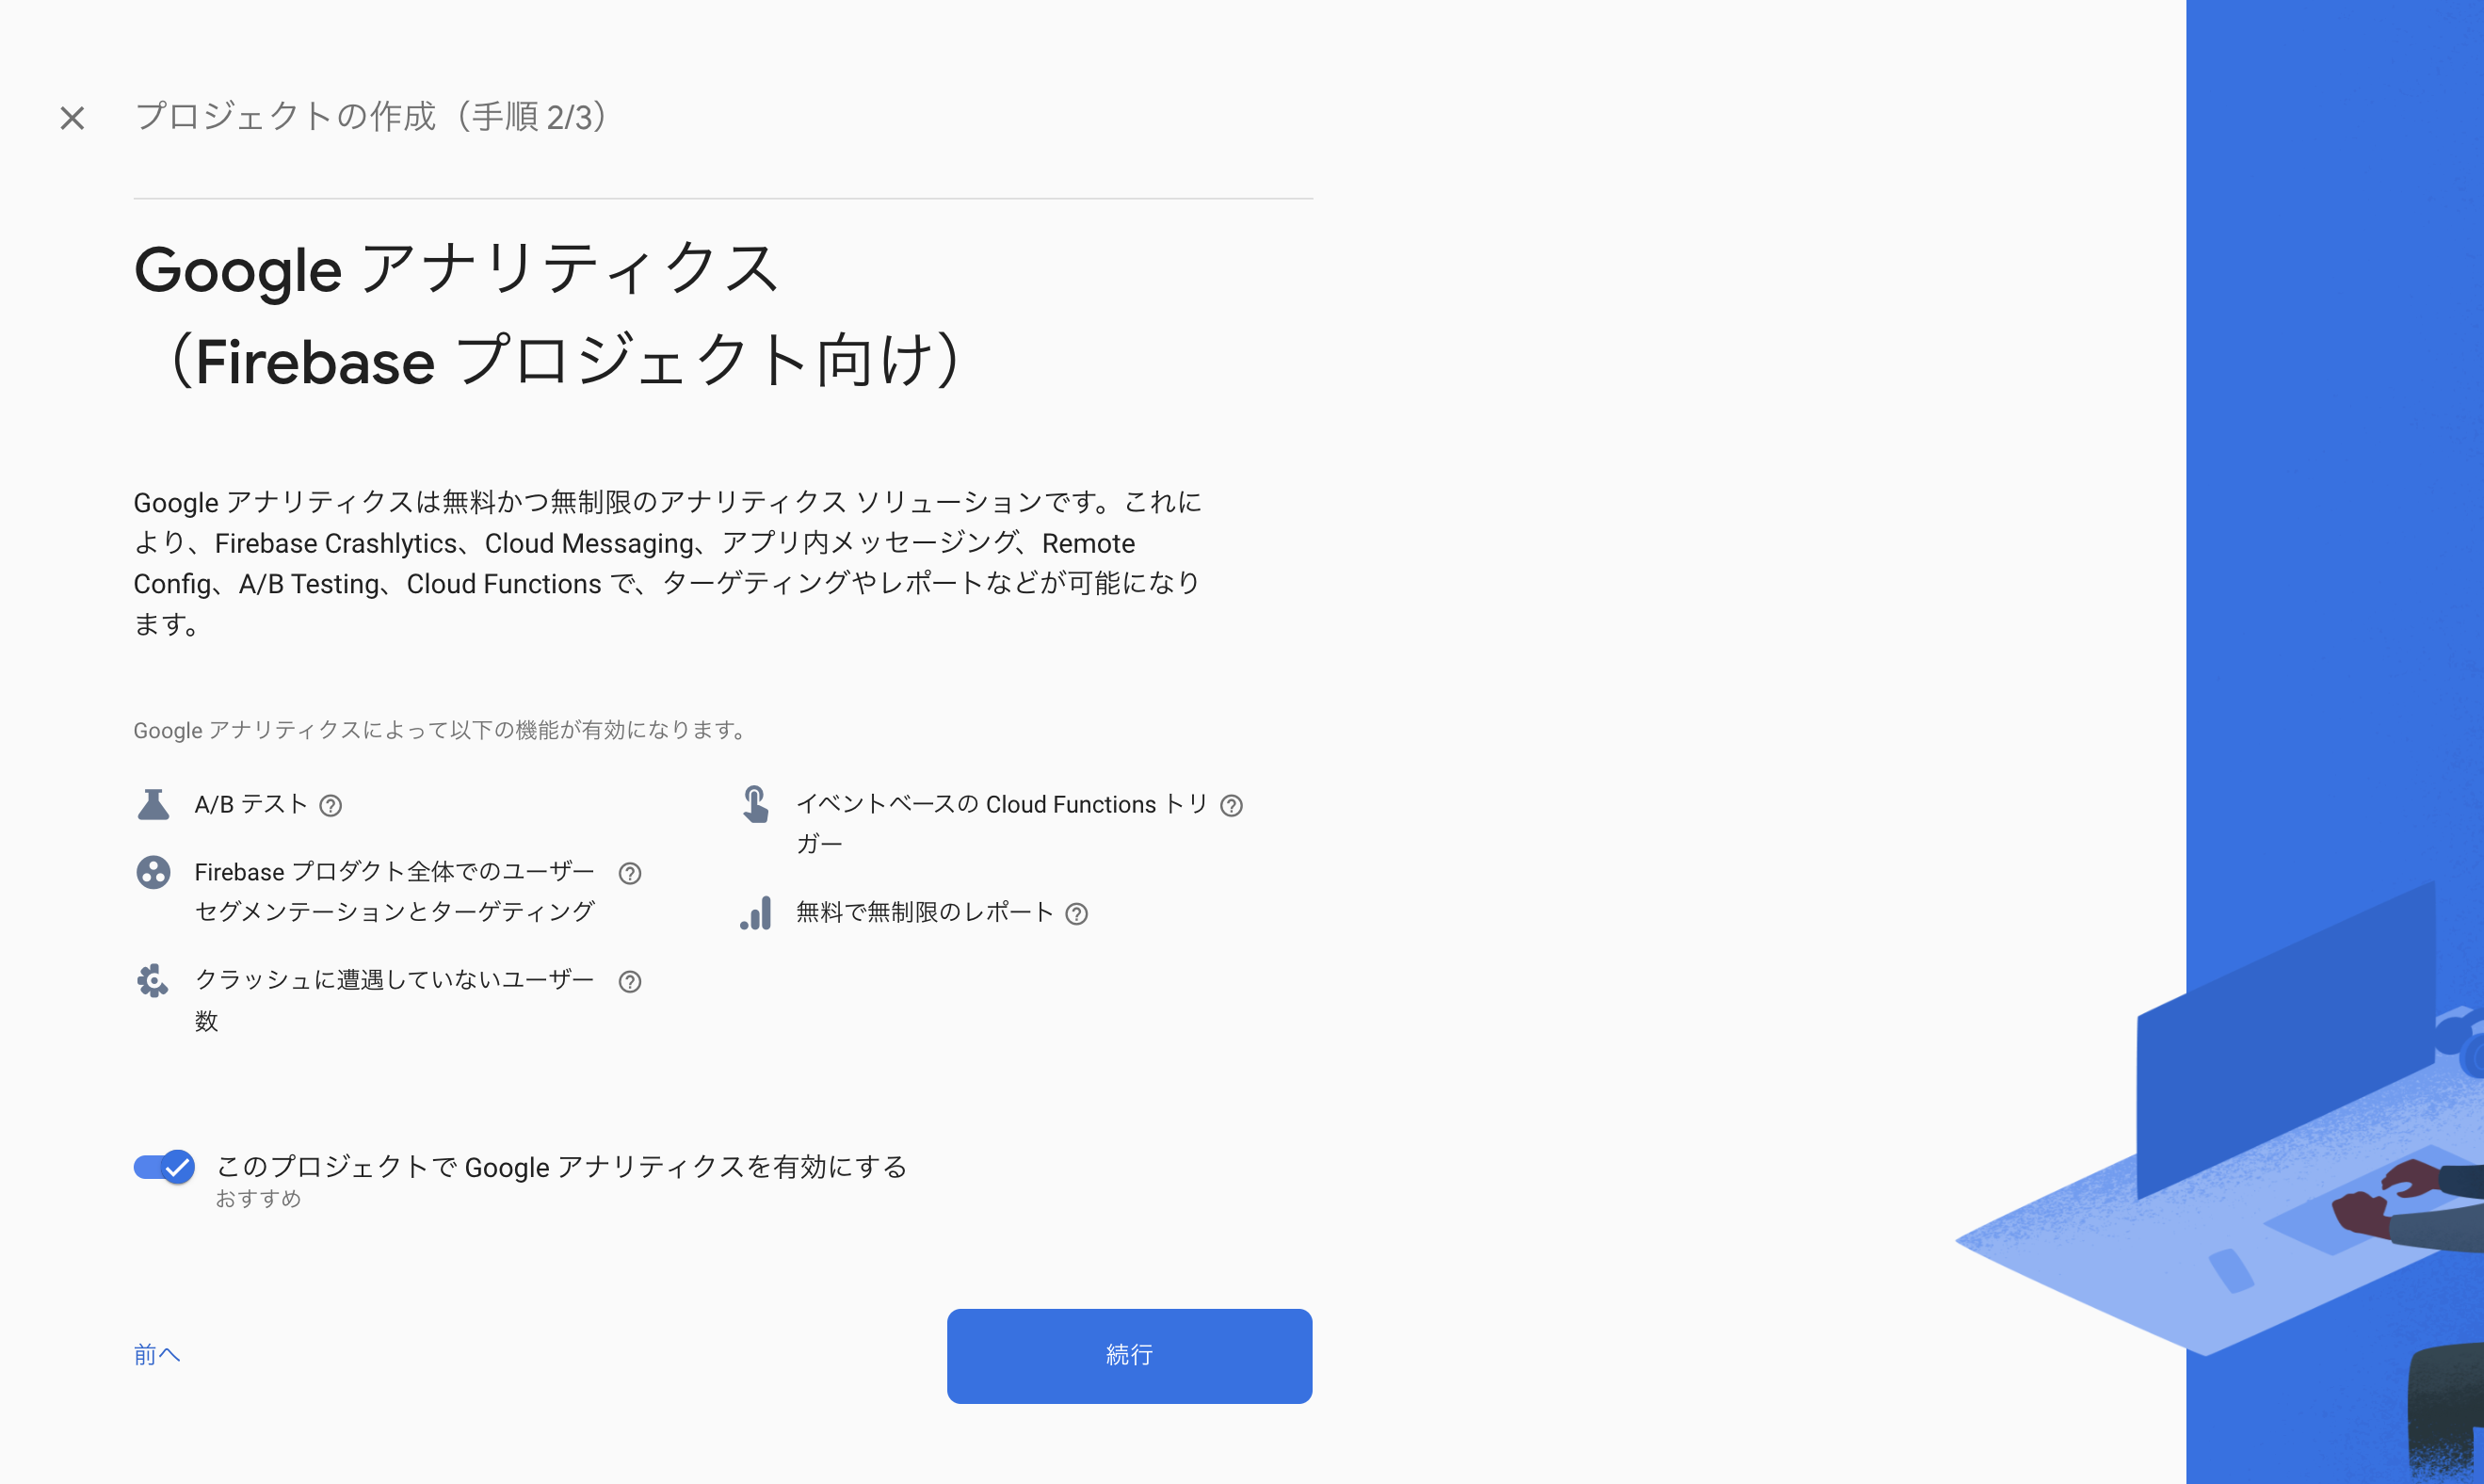
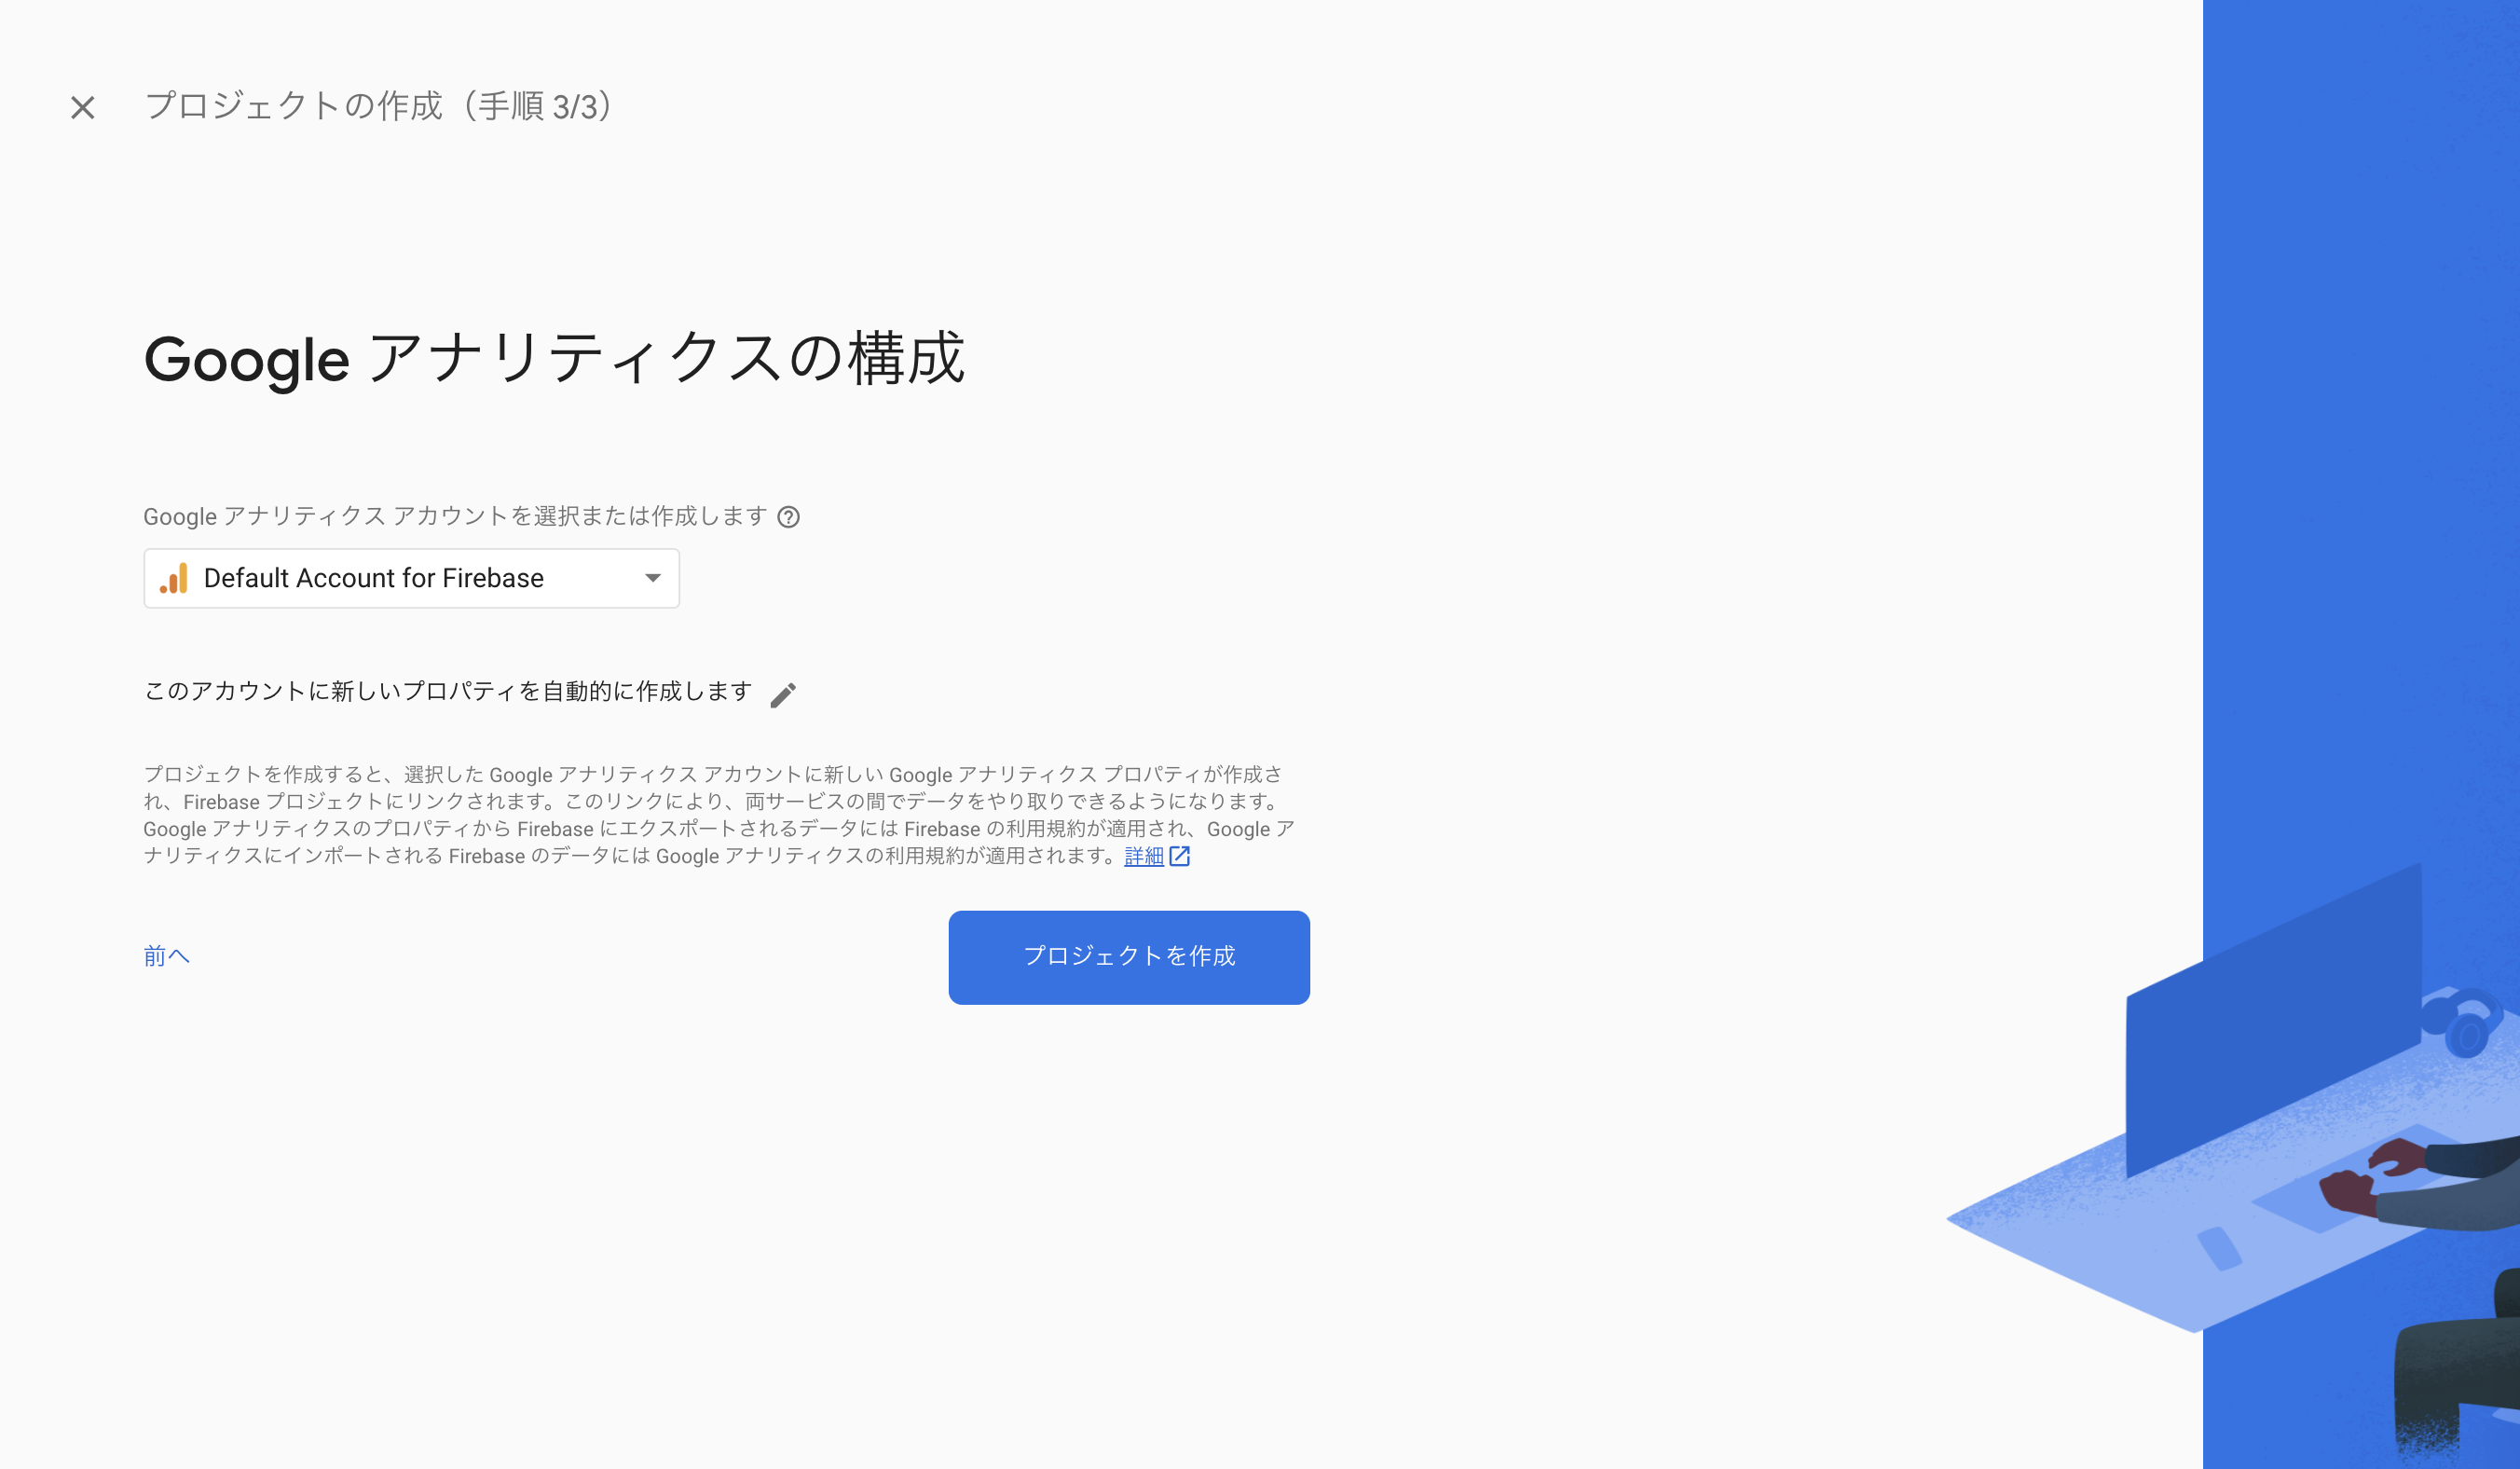
手順(2/3)のGoogleアナリティクスは有効にすることをおすすめします!
プロジェクト内で、AnalyticsやCrashlytics等を使用する際に必要となるからです。
手順(3/3)で"Default Account for Firebase"をセレクトし、プロジェクトを作成!
少し作成までに時間がかかることもありますが、これで完了です。(簡単だぜ)
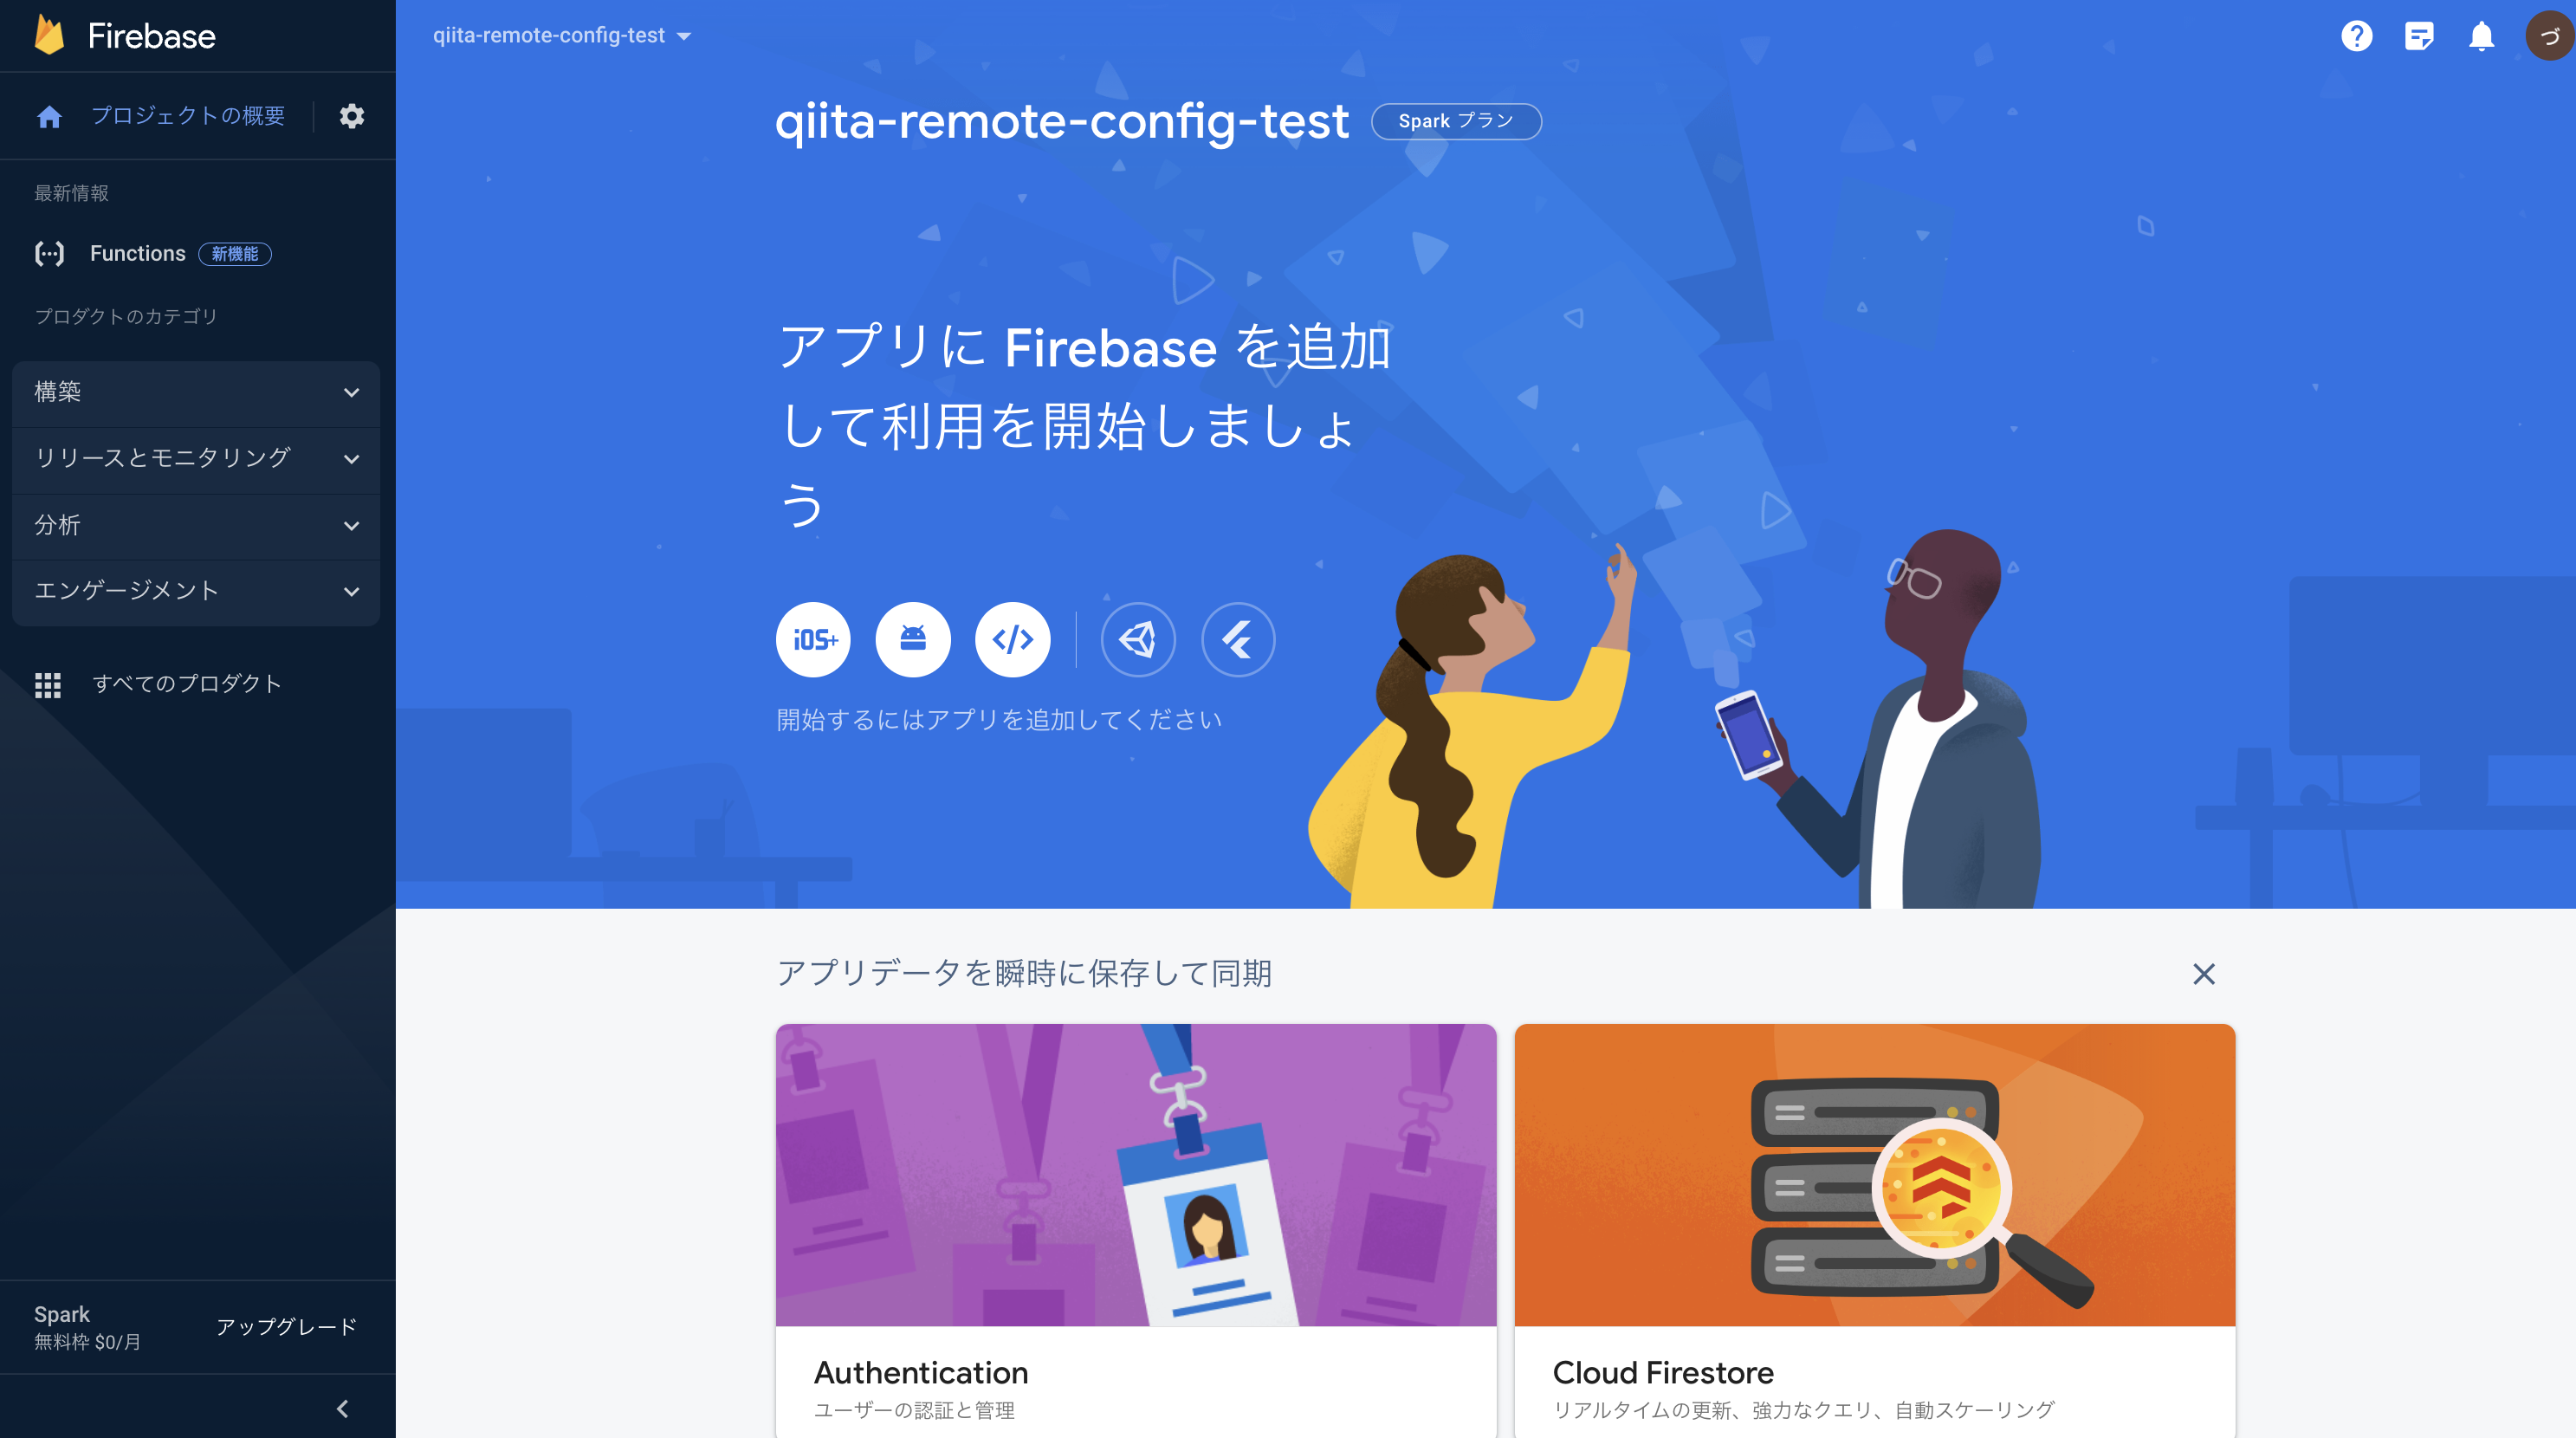
以下のようなプロジェクト概要画面が表示されます。
2. Remote Configを設定する
Remote Configでは、任意の名前(パラメータ名)をつけた値(value)を登録できます。
Firebaseとアプリを繋ぎ、その値をアプリ側で取得することで様々な機能を実装できます!
今回実装する強制アップデートでは、事前にRemote Configに最新のアプリバージョンの値を登録しておき、Remote Configのバージョンと、ローカルのアプリのバージョンを比較することでアプリ上に強制アップデートの通知を出すように実装していきます。
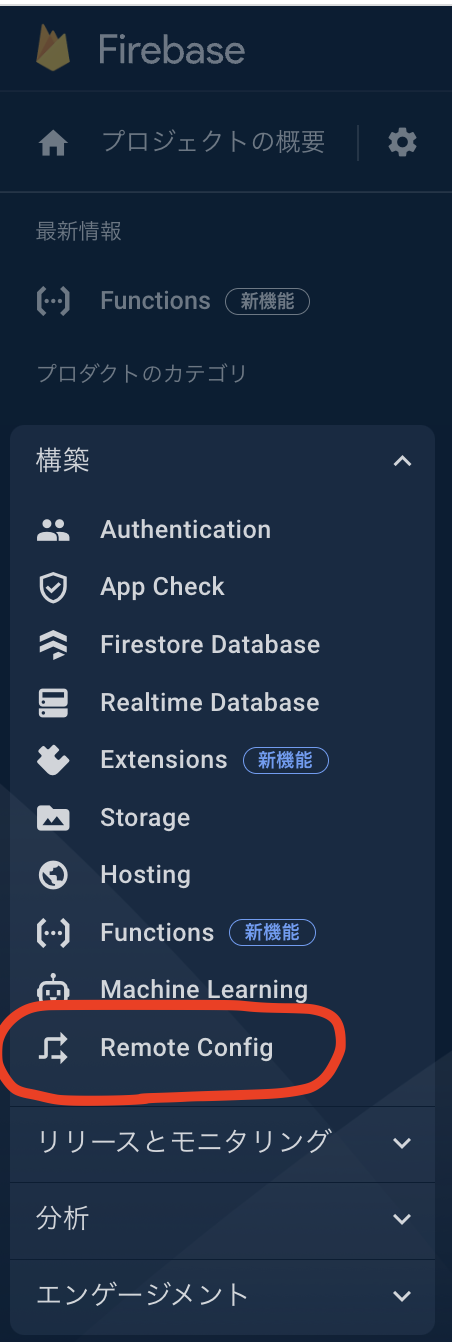
それでは、プロジェクト概要画面の左から "構築 > Remote Config" を選んでいきましょう!
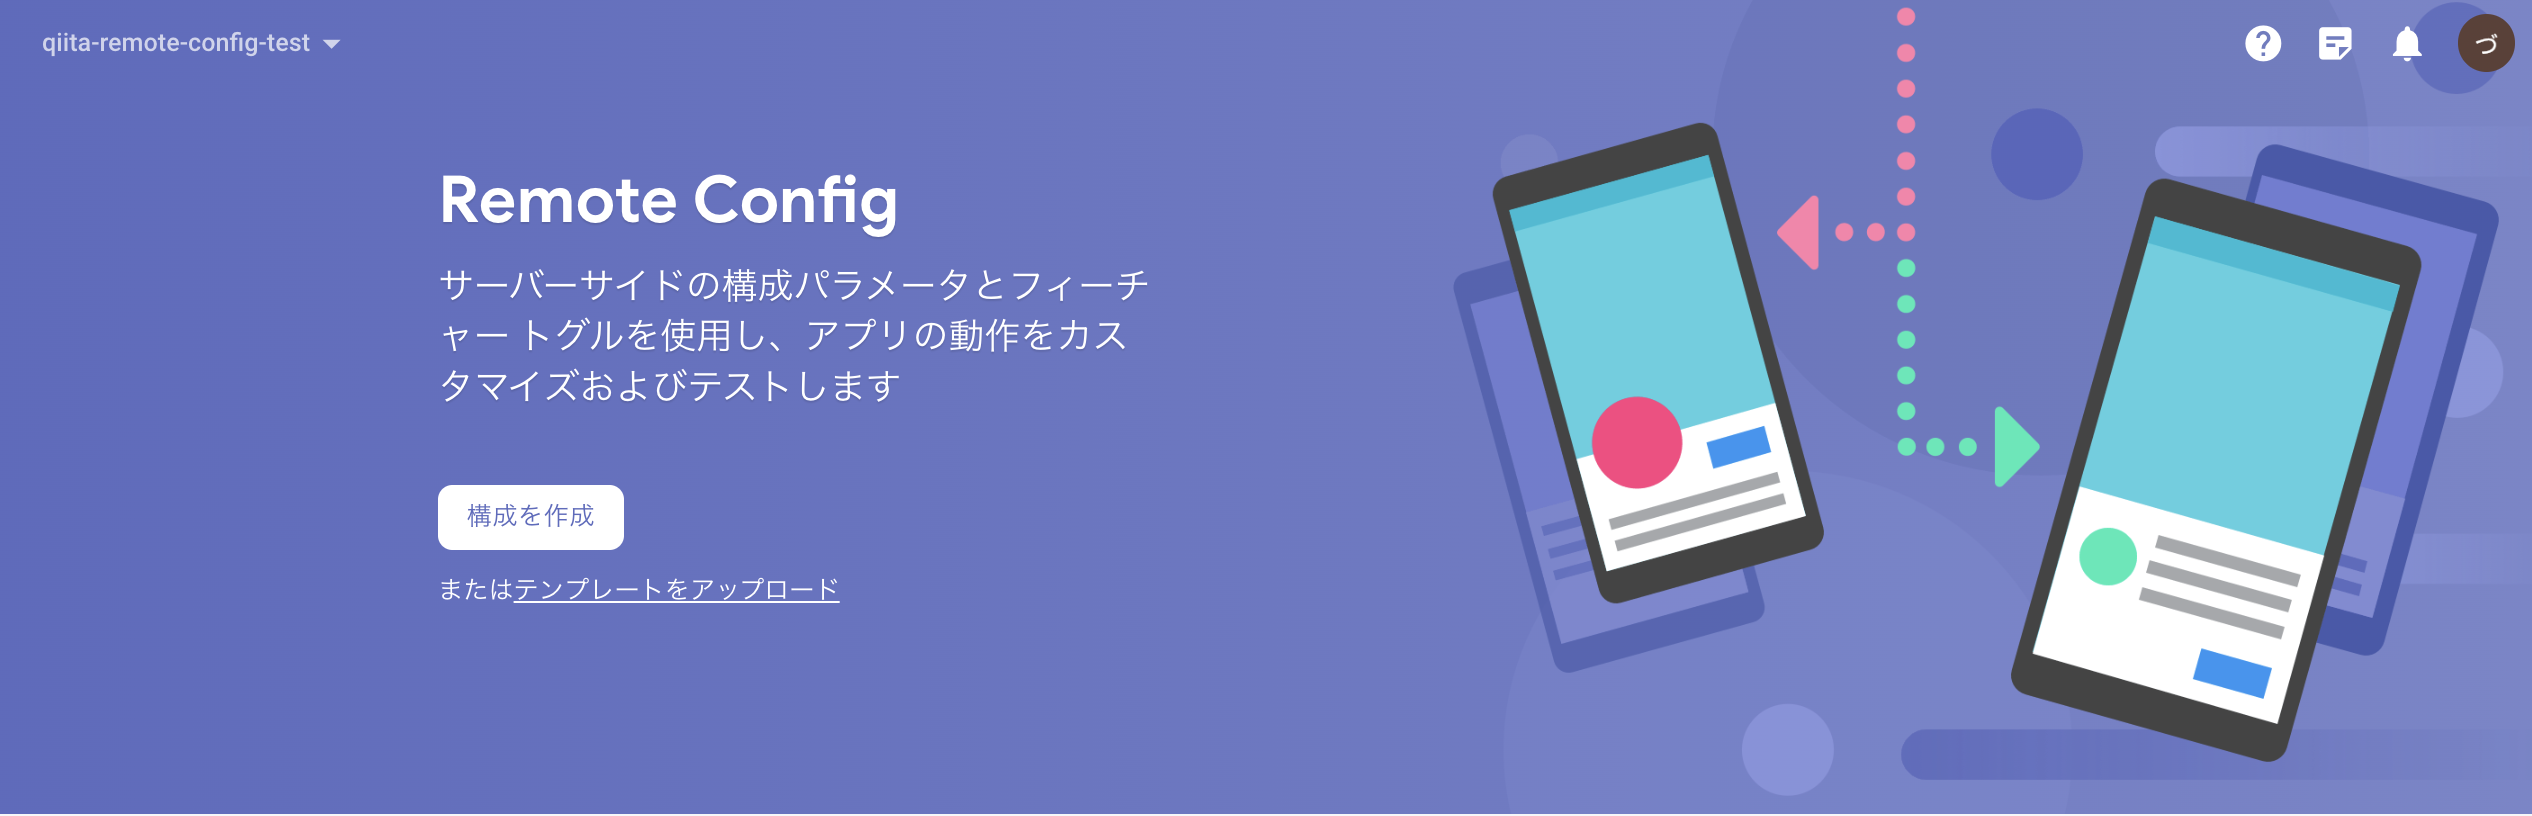
以下の"構成を作成"へ進みます!ここでパラメータ名等を作ります。
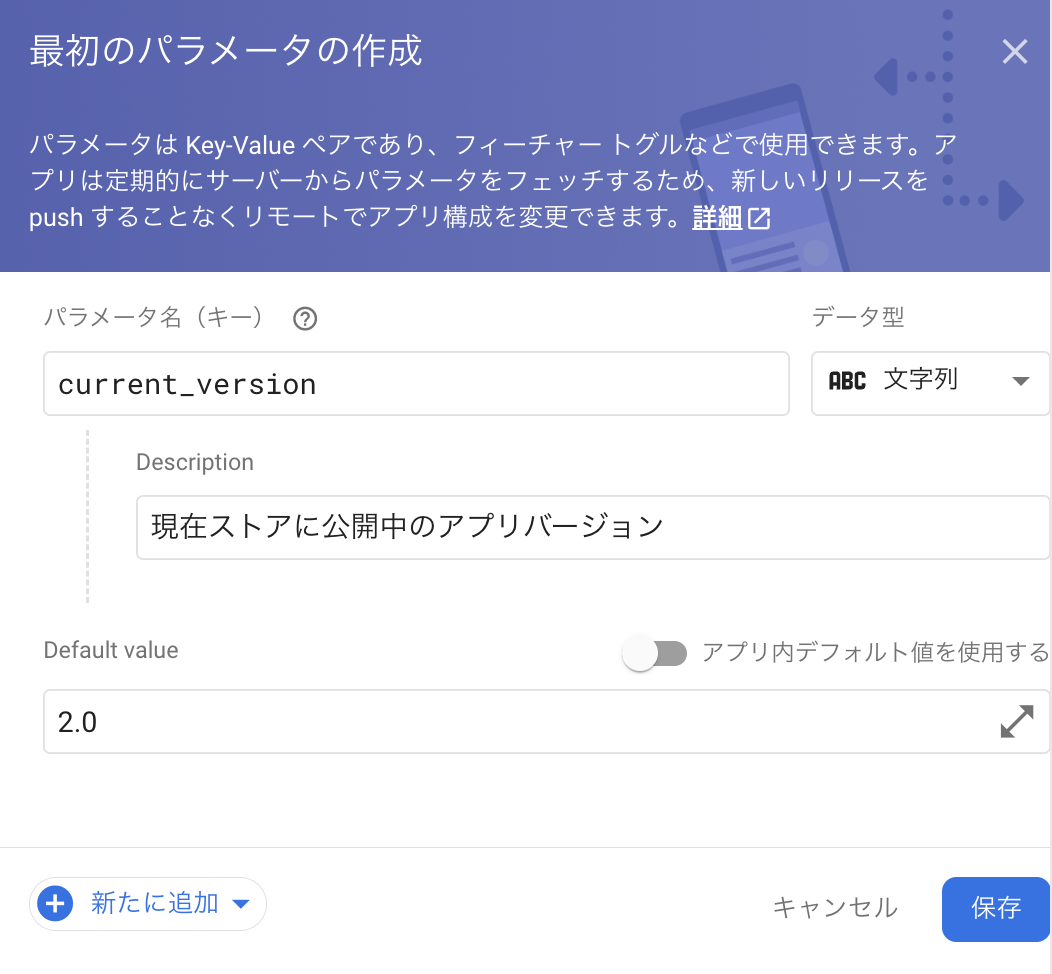
右側からパラメータの作成画面が出ますので、名前(パラメータ名)と値(value)、説明(Description)を入れます。
今回は最新のバージョンを登録したいので、名前(current_version)、値(2.0)、説明(現在ストアに公開中のアプリバージョン)を記入し、保存しましょう!
これでRemote Configの設定は完了です!
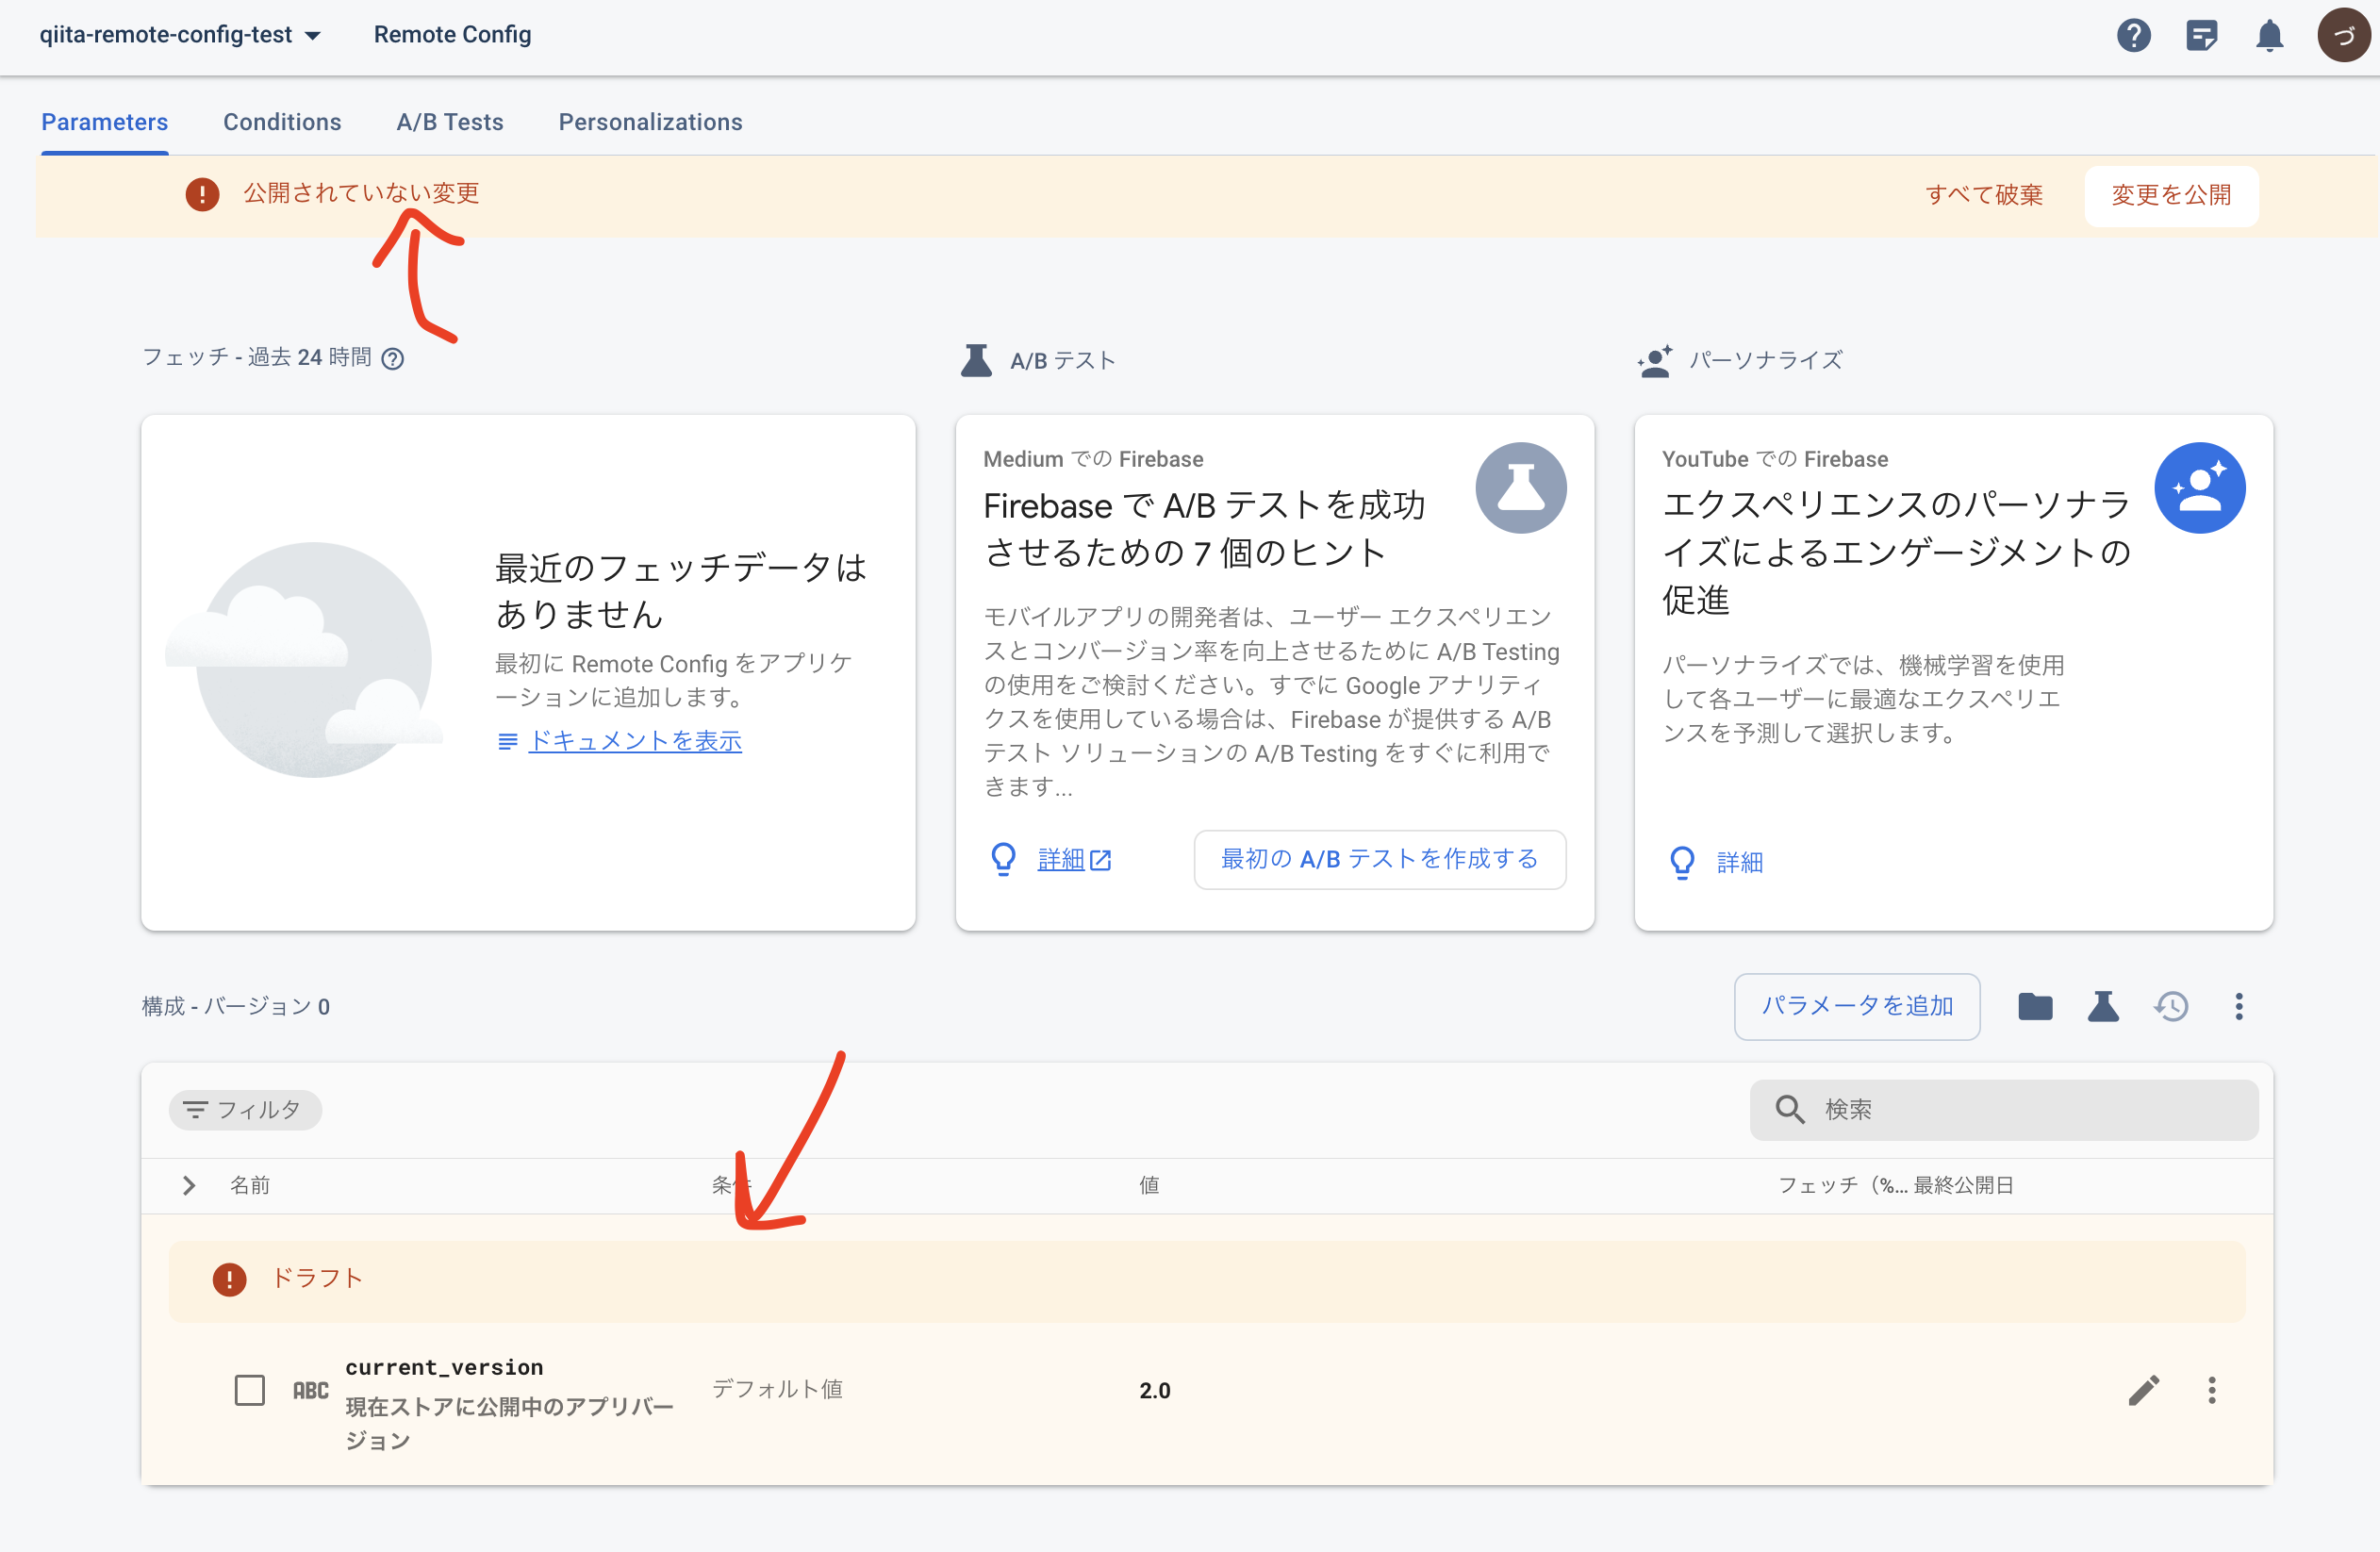
構成を公開のアラートについて
Remote Configの構成は公開しないとアプリ側で取得はできません。
なので以下のように警告が出ていますが、後で公開するので一旦スルーします。
3. アプリとFirebaseを繋ぐ
では次に、アプリとFirebaseを繋ぎます。
先ほど作成したFirebaseのプロジェクトにアプリを登録すると言った方がいいかもしれません。
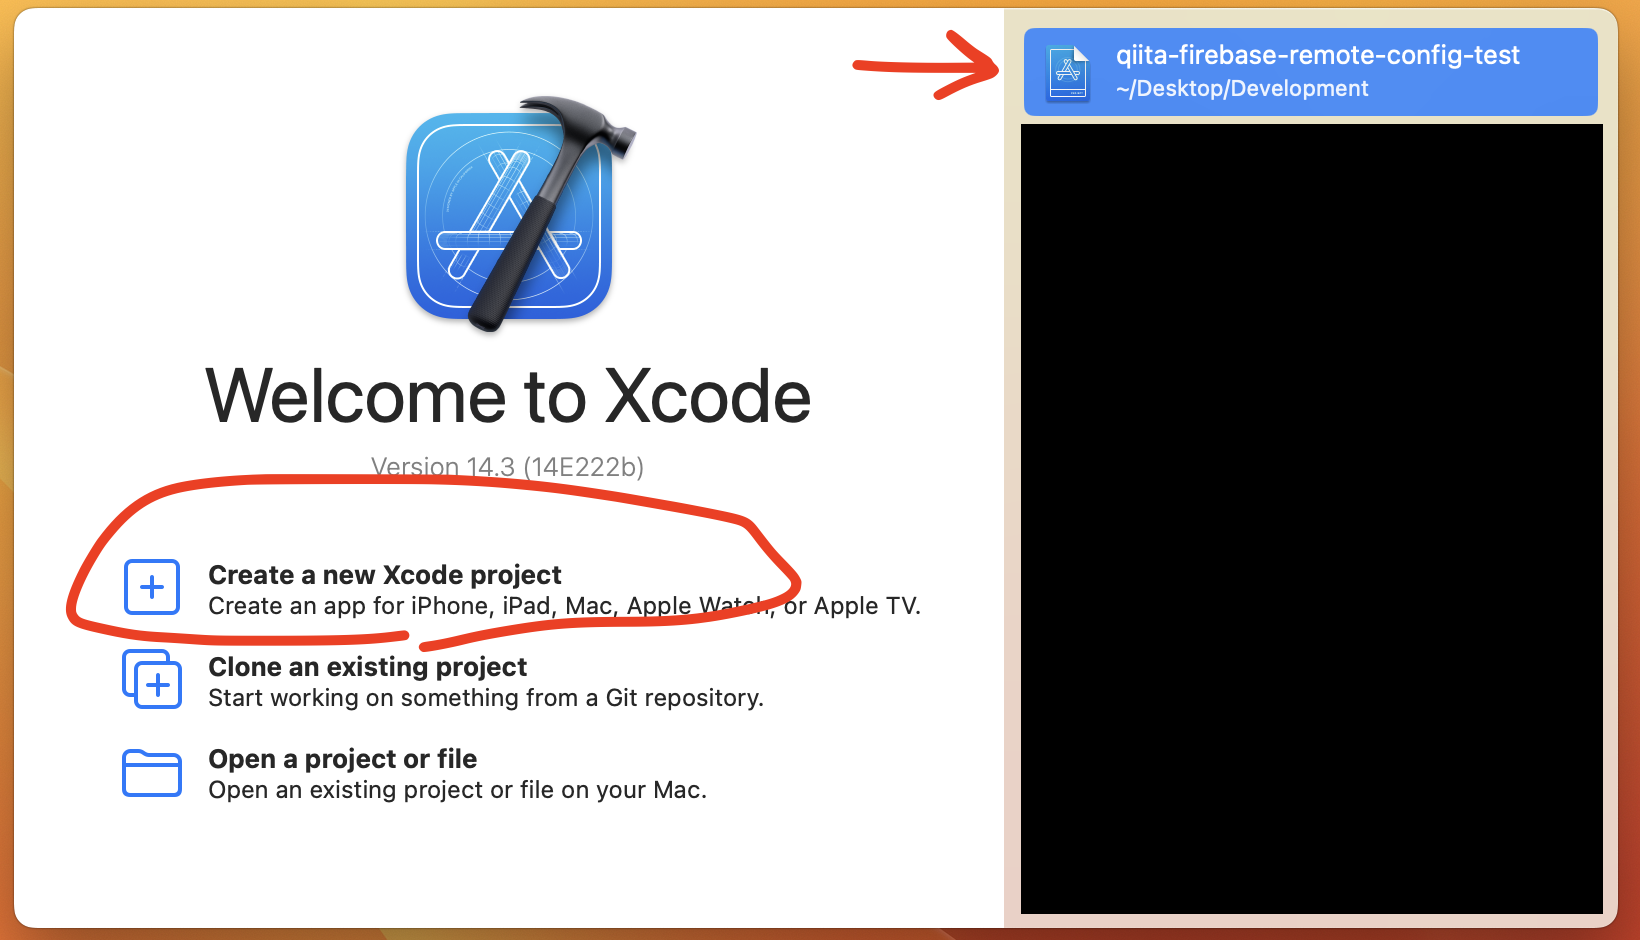
まずは、適当なアプリを用意しましょう!
新規作成でもOKです。
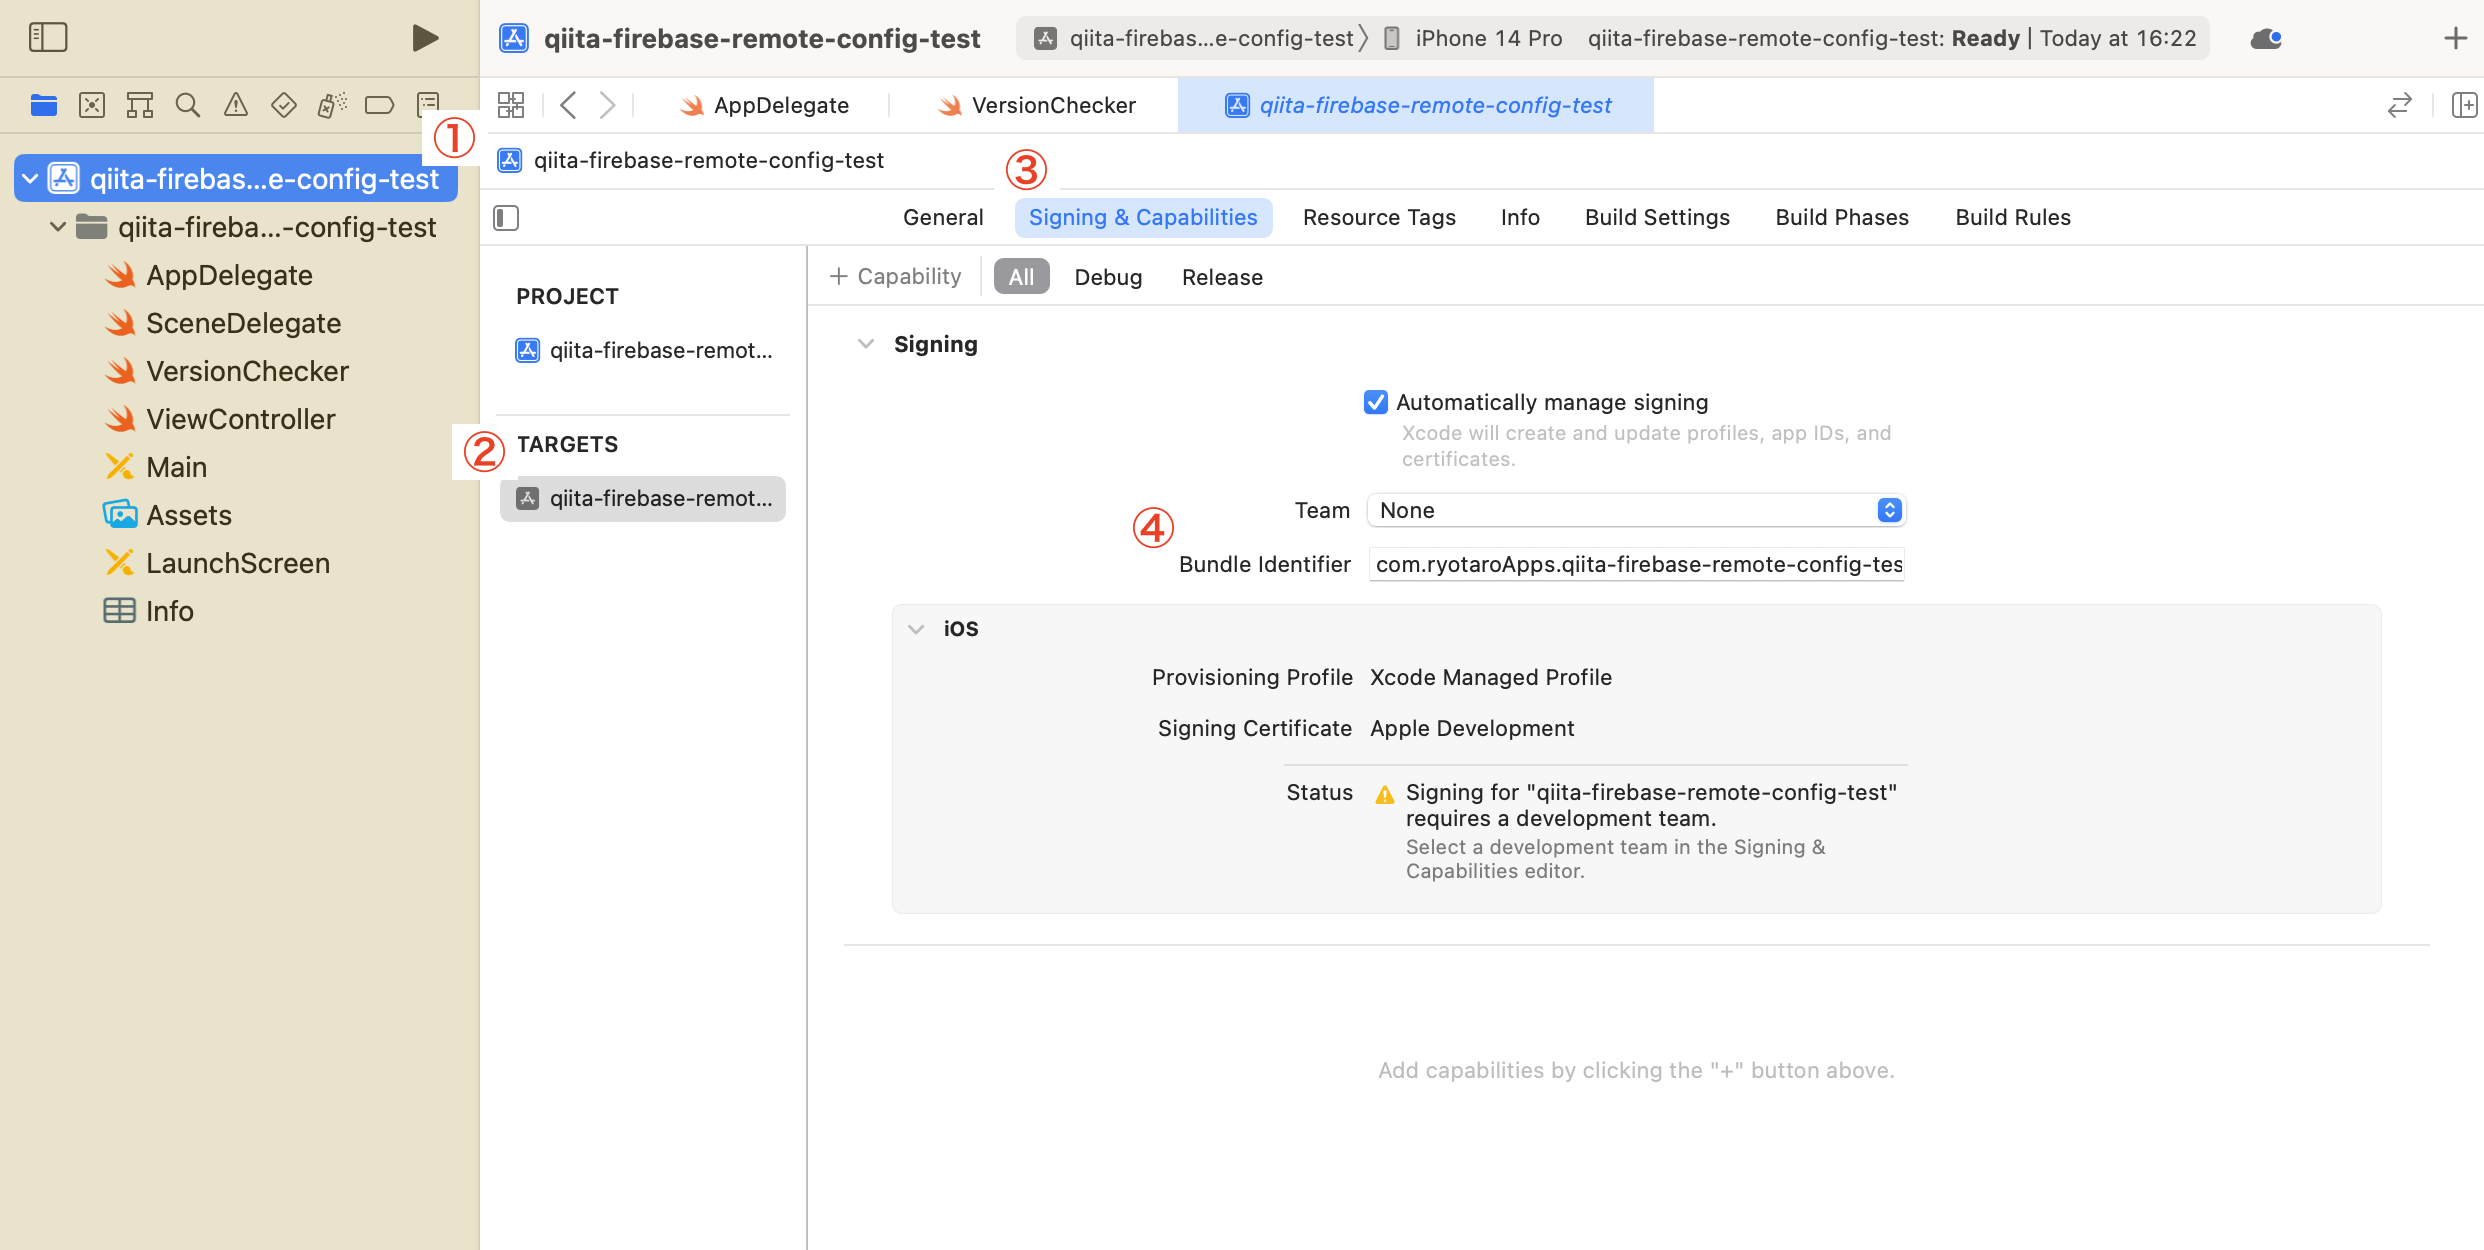
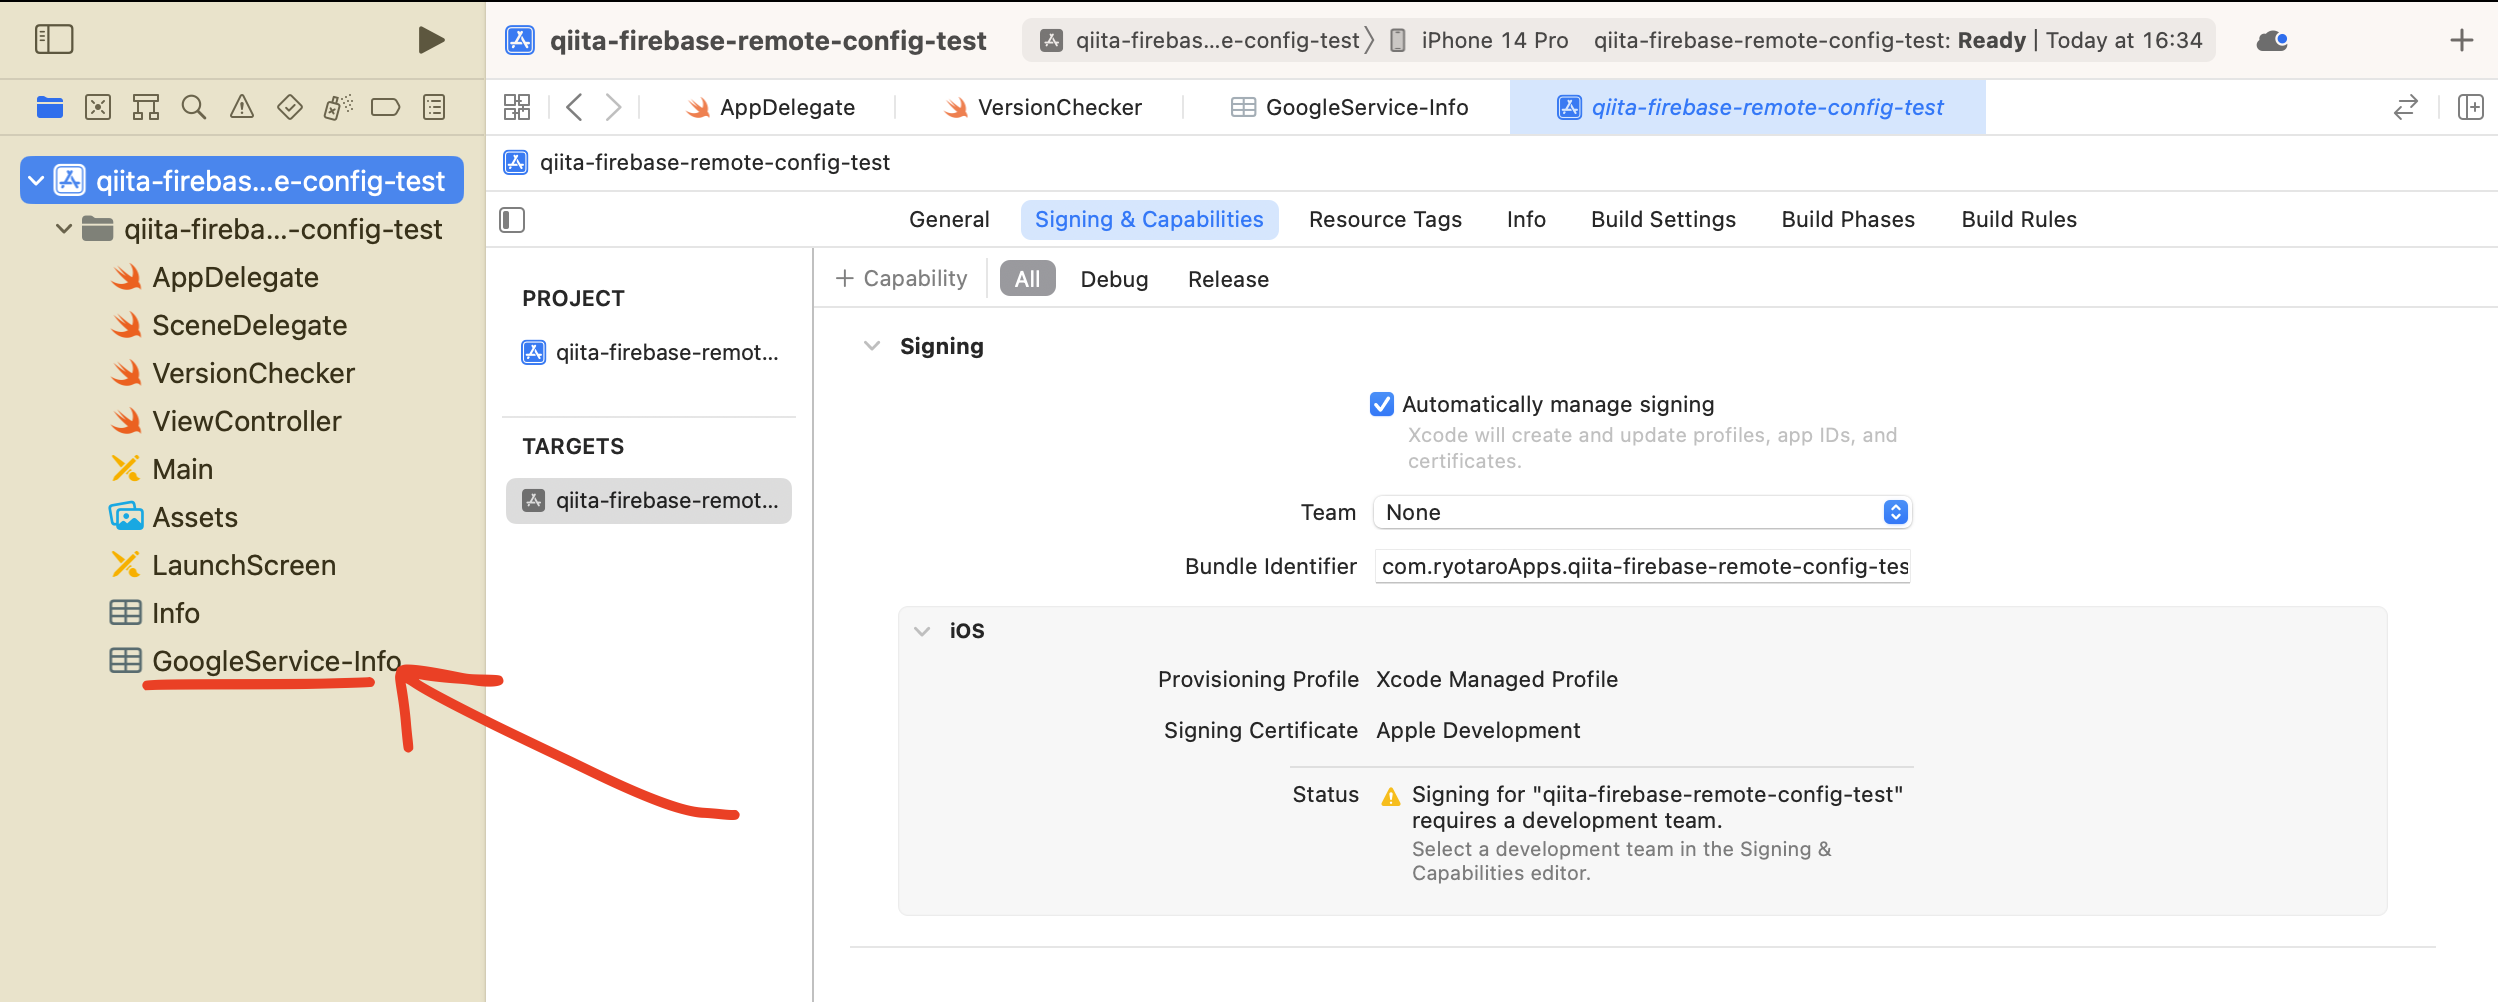
次に、"①アプリ > ②TARGET > ③Sining & Capability" から "④Bundle Identifier" をコピーします。
Firebaseの"プロジェクト概要"に戻り、"iOS+"をクリックします。
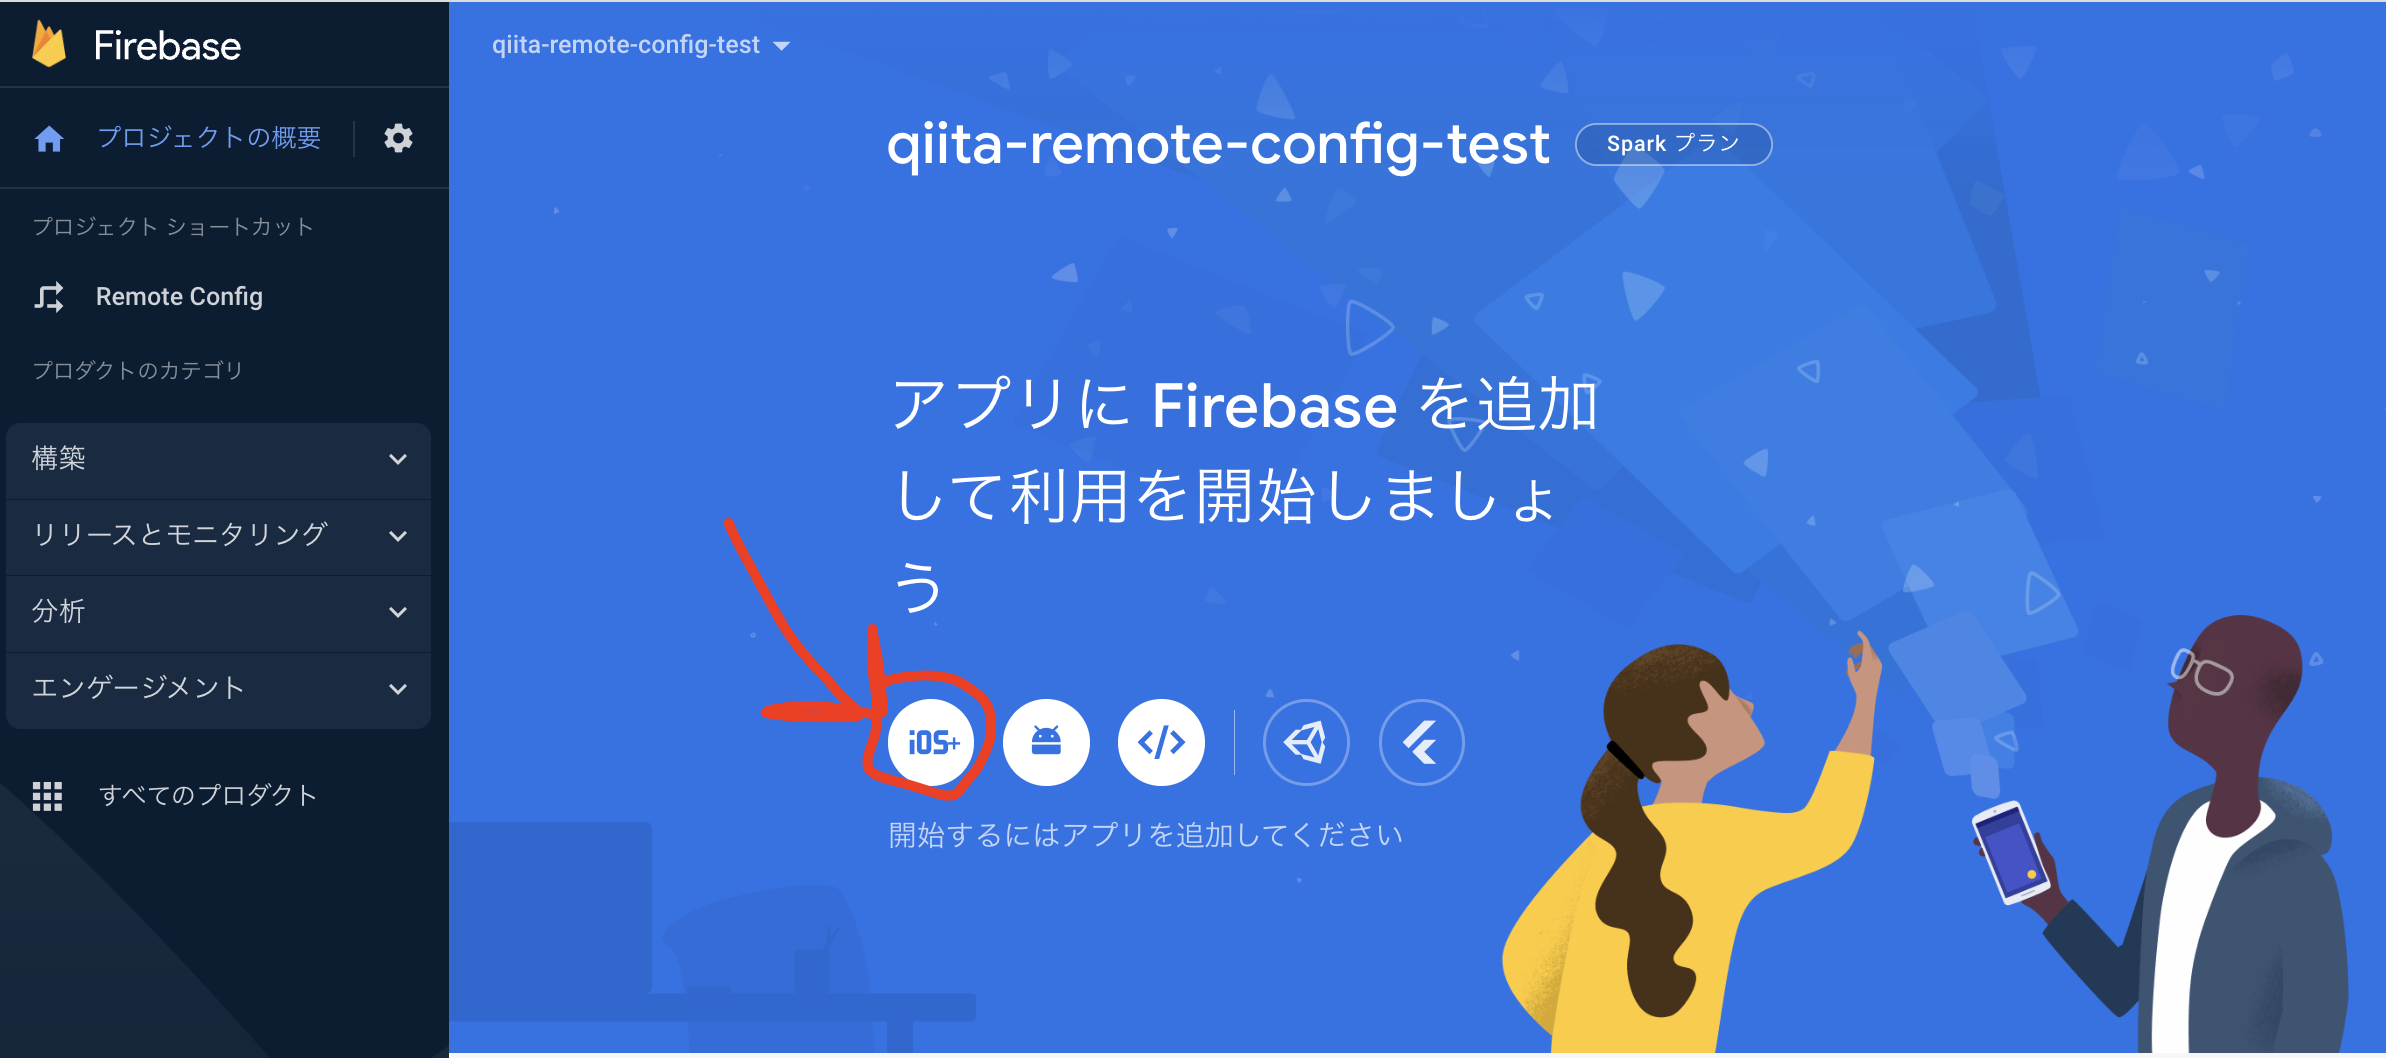
先ほどコピーしたBundle Idcentifierを記入し、
以下、手順に従います。
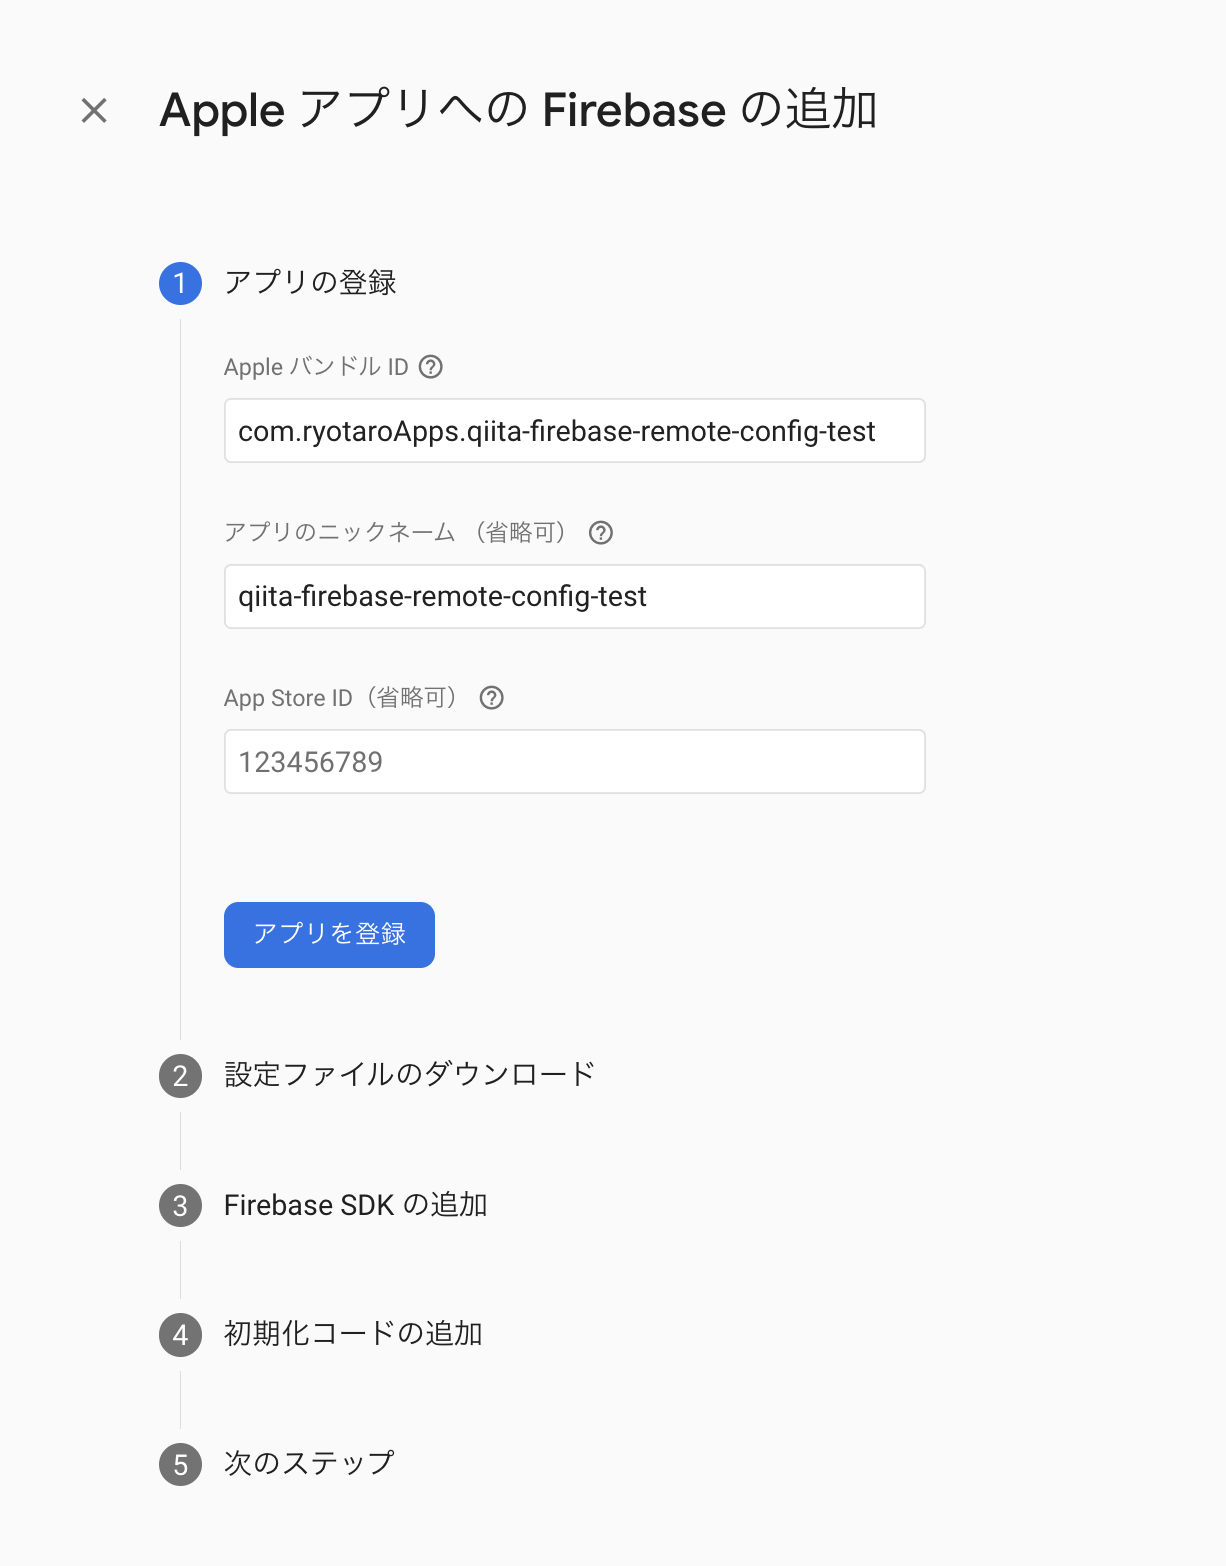
手順②で、Info.plistをダウンロードして、アプリに入れましょう。
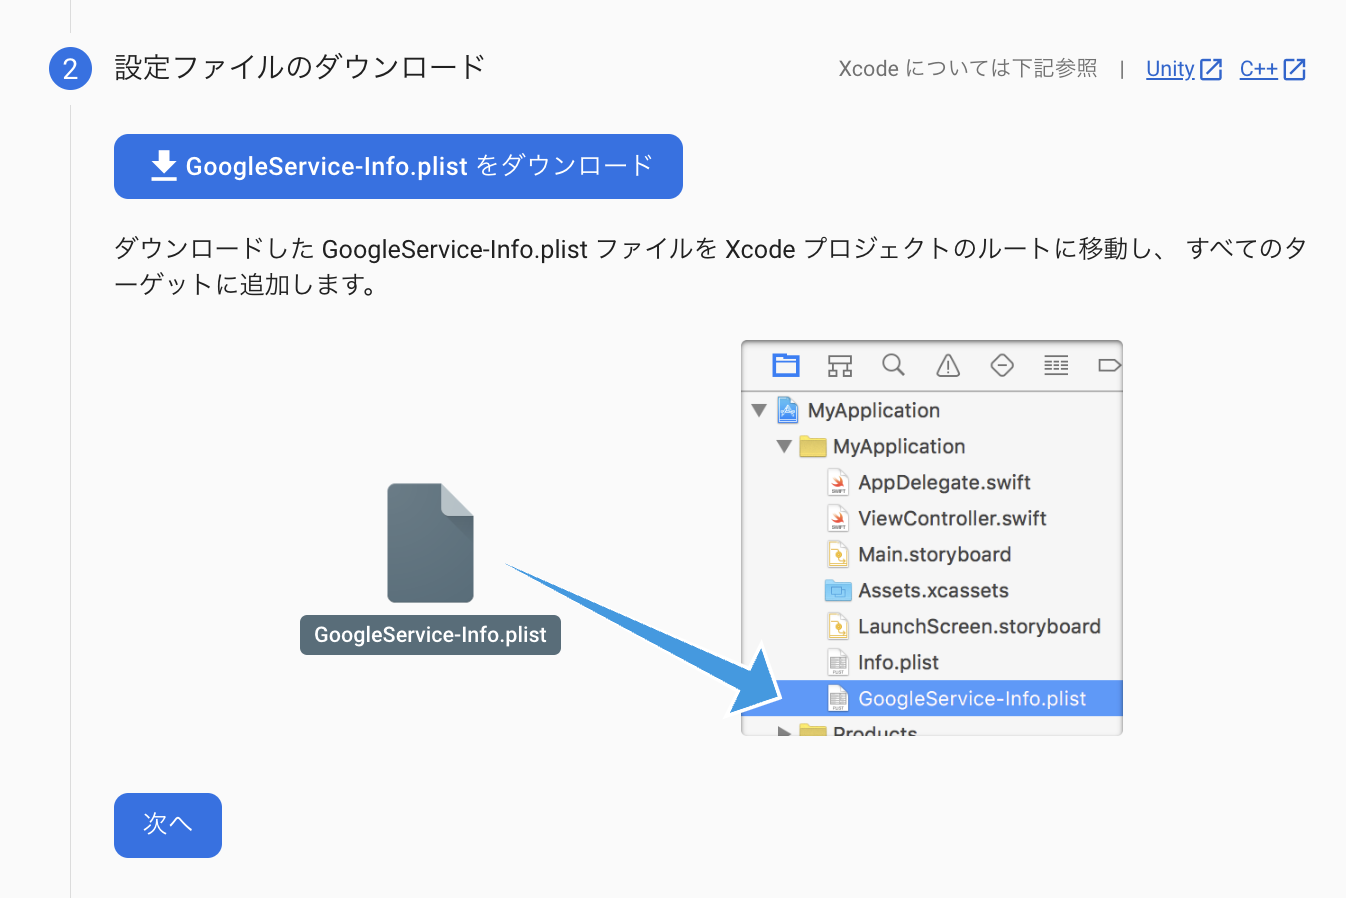
以下のように、自分のアプリのinfo.plistの下あたりにインポートすれば問題ありません。
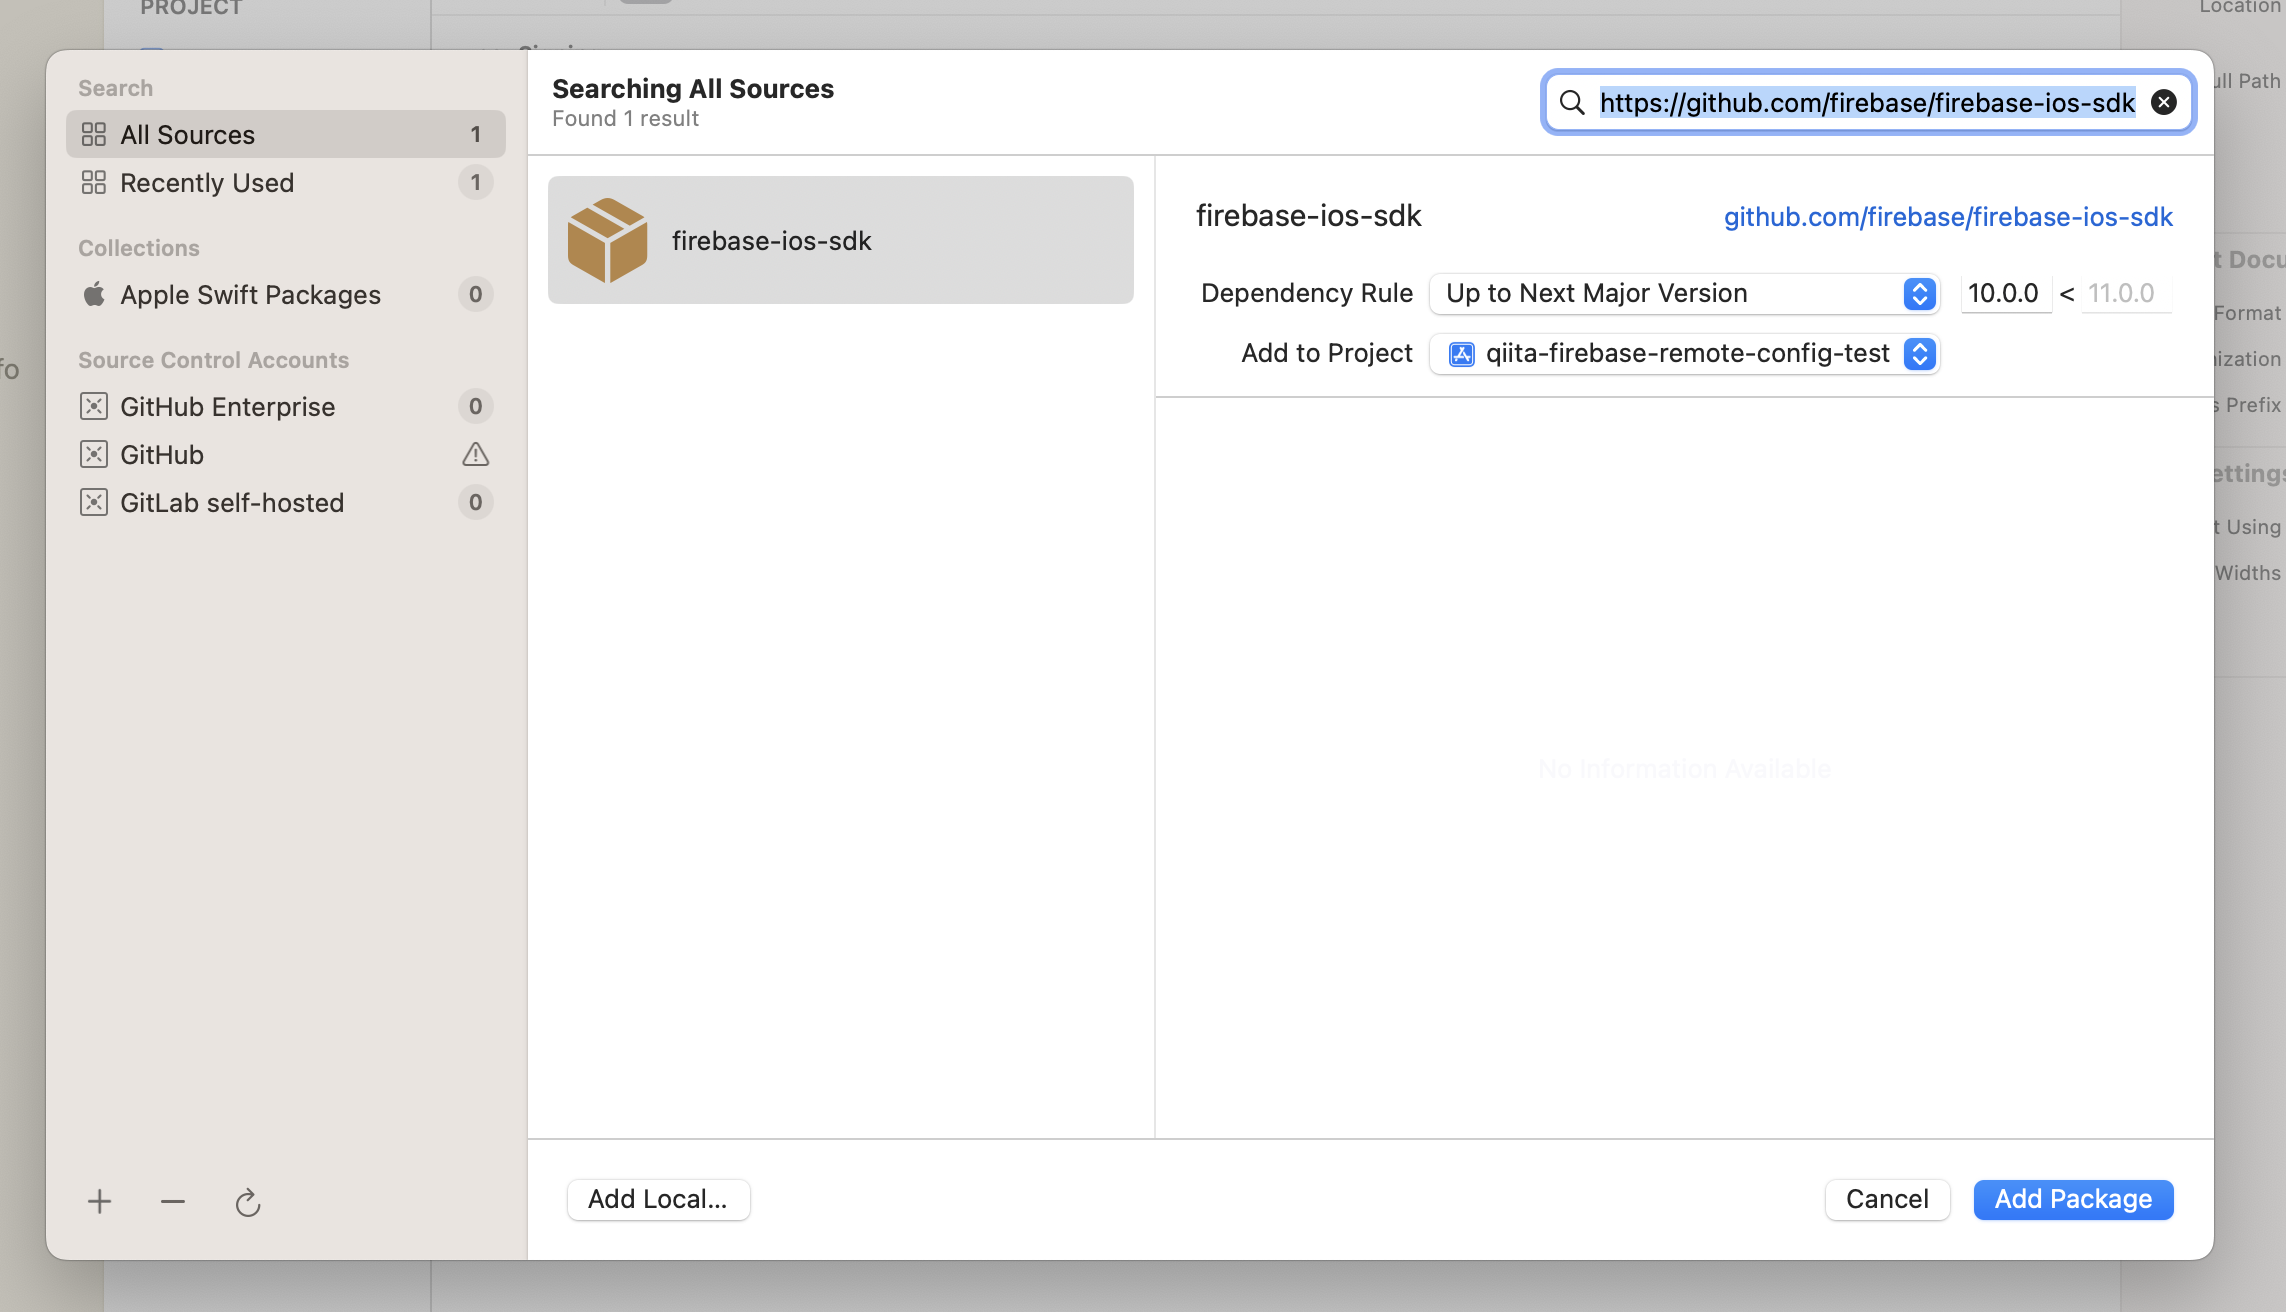
③手順にて、PackageをInstallします。
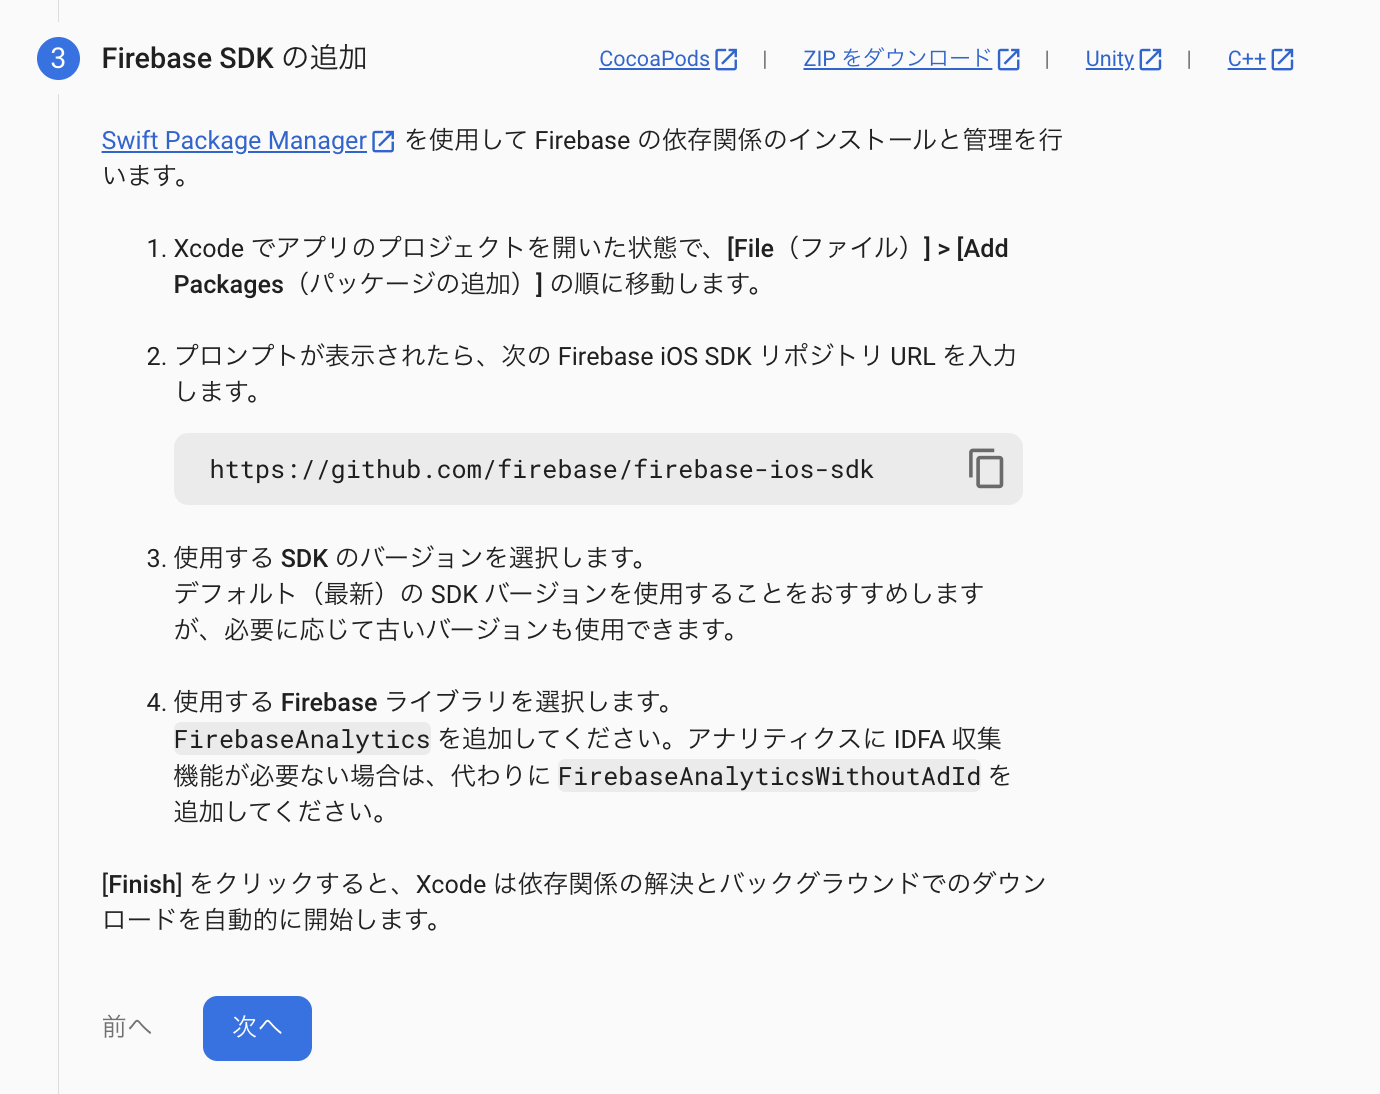
以下のように、URLを入れ、"Add Package"をクリック
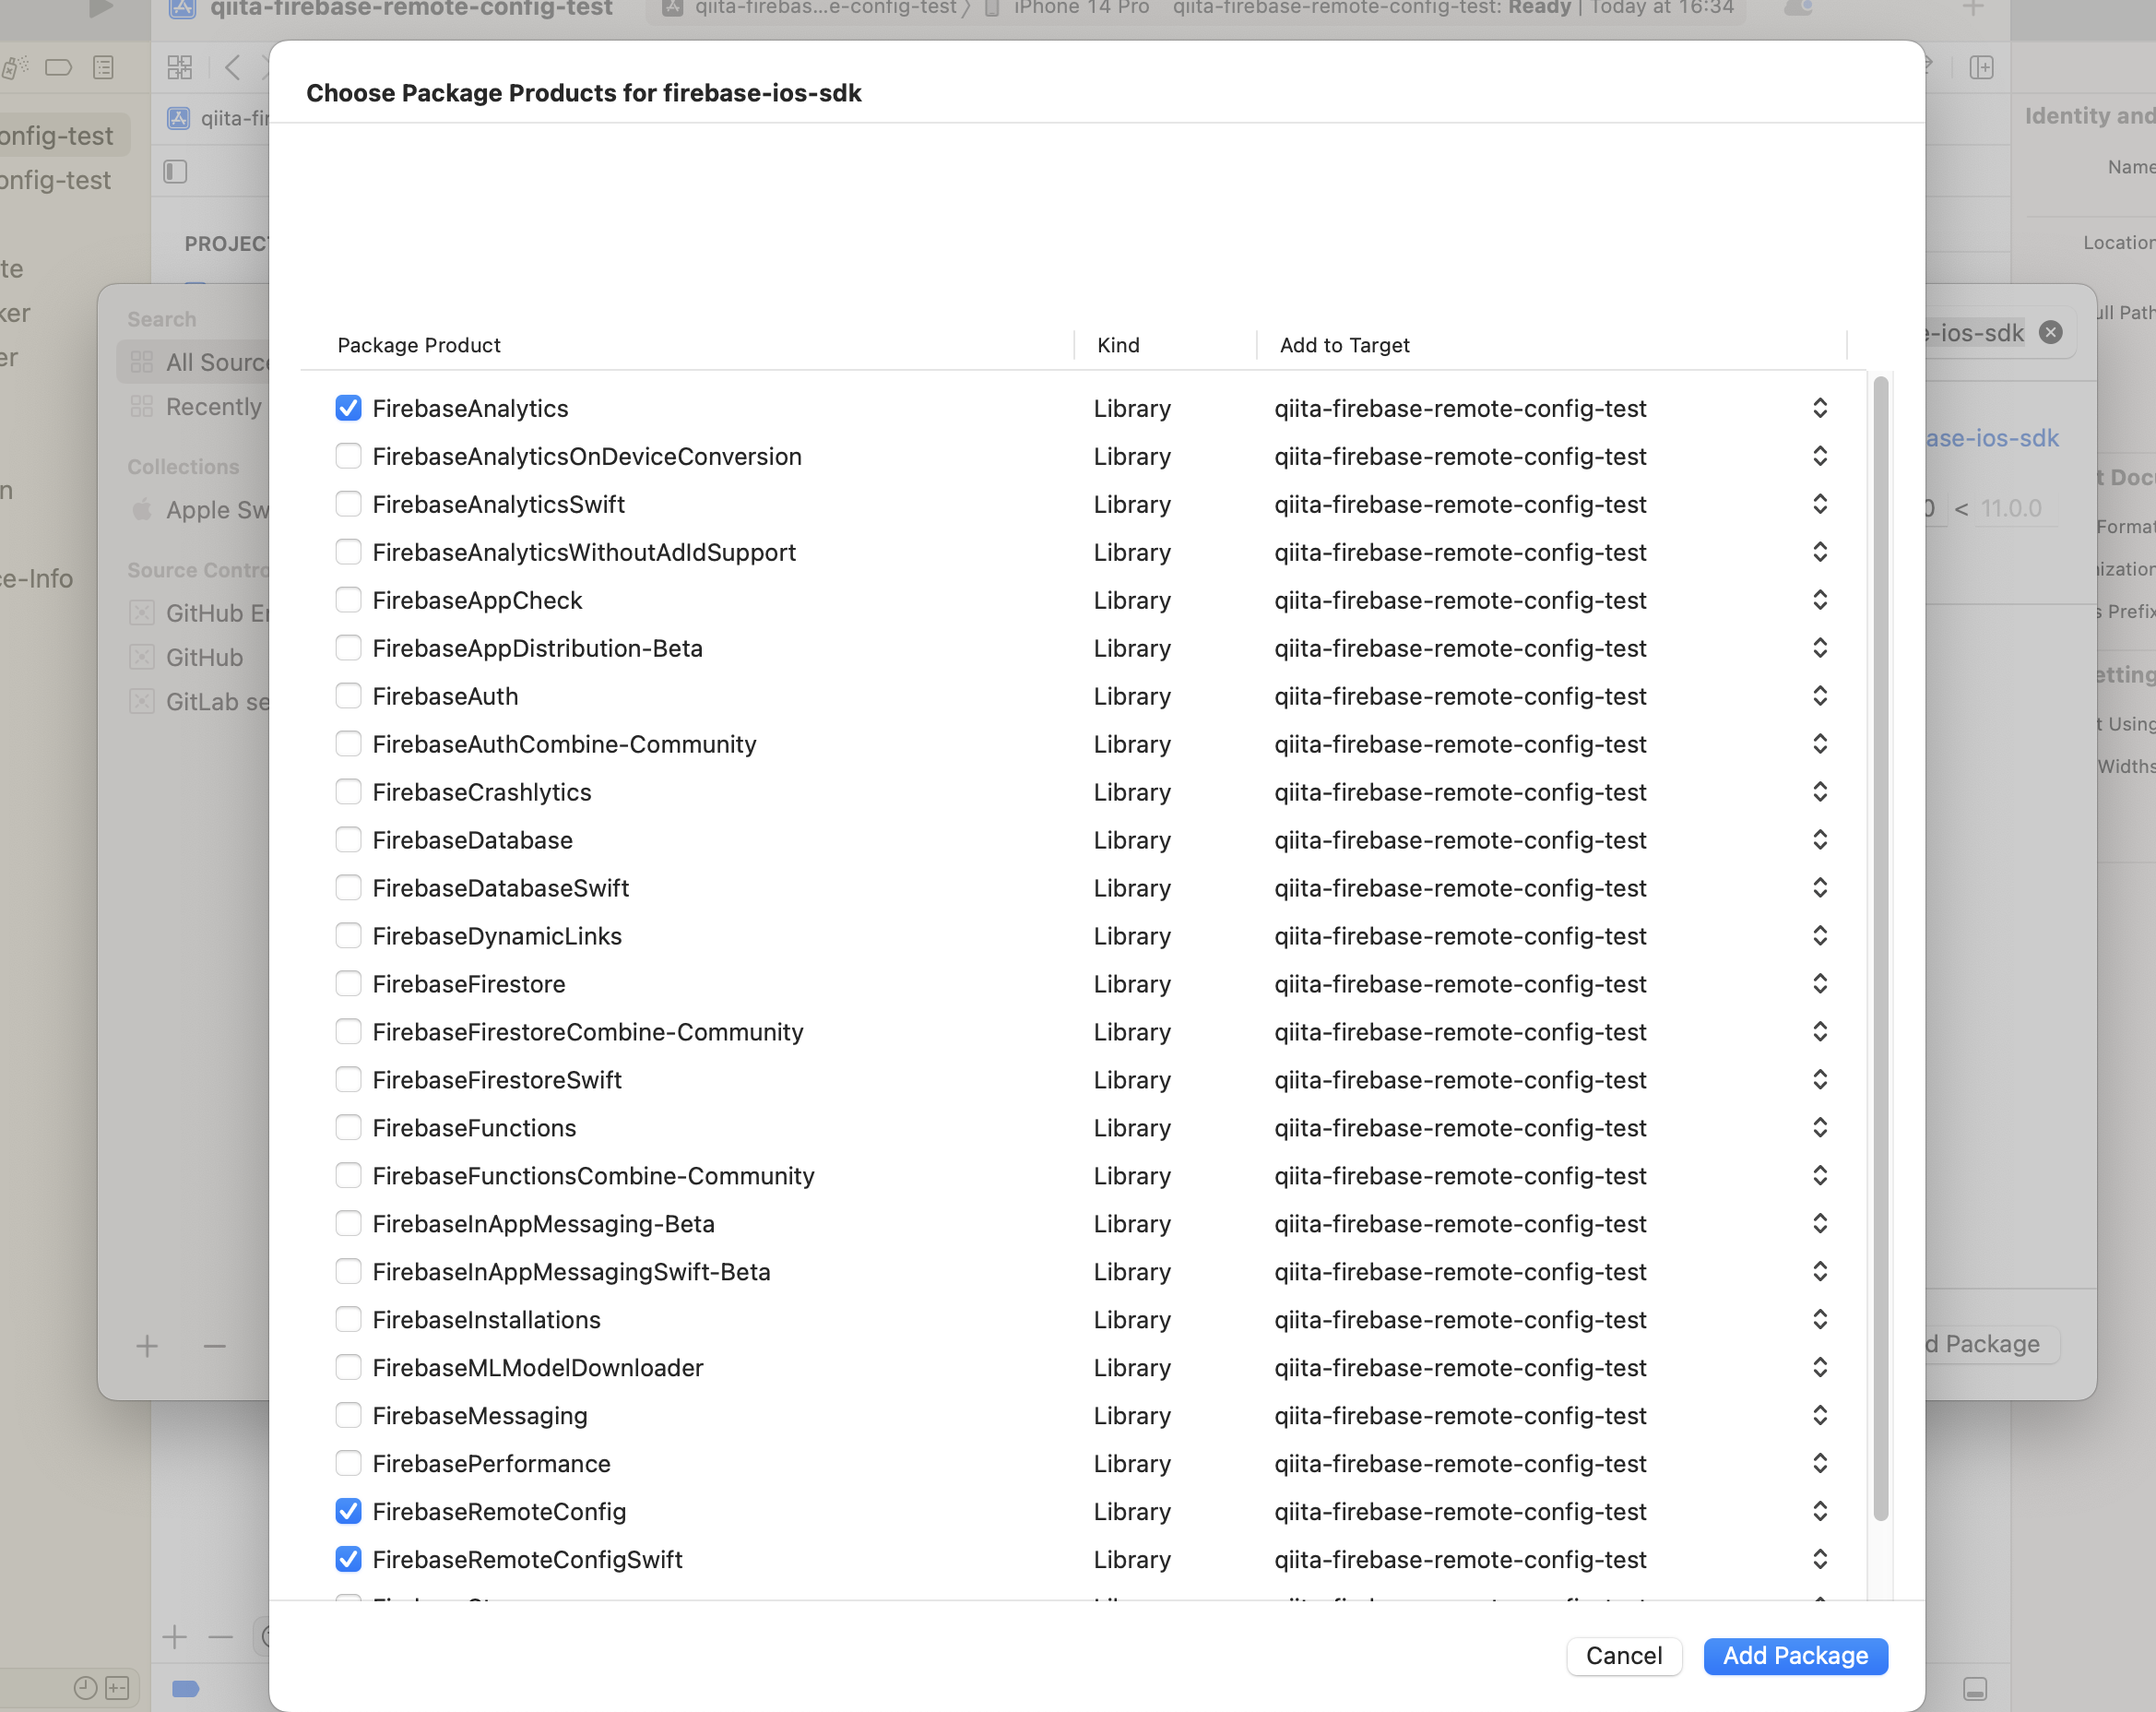
Packageが表示されるので、"FirebaseAnalytics" と"FirebaseRemoteConfig"を追加し、
"Add Package"をクリック
手順④の通りに、アプリのAppDelegate.swiftへ移動し、以下を記載
    import UIKit
    import FirebaseCore //ここ追加だよ!


    @UIApplicationMain
    class AppDelegate: UIResponder, UIApplicationDelegate {

      var window: UIWindow?

      func application(_ application: UIApplication,
        didFinishLaunchingWithOptions launchOptions:
          [UIApplicationLaunchOptionsKey: Any]?) -> Bool {
        FirebaseApp.configure()  //ここ追加だよ!

        return true
      }
    }
最後に、手順⑤を完了させれば連携は完了!!!
4. 強制アップデートのコード実装を実装する
あとはコードを書くだけです。
まずは全文書きます。
import UIKit
import FirebaseCore

@main
class AppDelegate: UIResponder, UIApplicationDelegate {

    func application(_ application: UIApplication, didFinishLaunchingWithOptions launchOptions: [UIApplication.LaunchOptionsKey: Any]?) -> Bool {
        // Override point for customization after application launch.

        // Configure Firebase
       FirebaseApp.configure()

         //バージョン確認を実行
       VersionChecker.sharedChecker.setApplicationDidBecomeActive()

        return true
    }

    // MARK: UISceneSession Lifecycle

    func application(_ application: UIApplication, configurationForConnecting connectingSceneSession: UISceneSession, options: UIScene.ConnectionOptions) -> UISceneConfiguration {
        // Called when a new scene session is being created.
        // Use this method to select a configuration to create the new scene with.
        return UISceneConfiguration(name: "Default Configuration", sessionRole: connectingSceneSession.role)
    }

    func application(_ application: UIApplication, didDiscardSceneSessions sceneSessions: Set<UISceneSession>) {
        // Called when the user discards a scene session.
        // If any sessions were discarded while the application was not running, this will be called shortly after application:didFinishLaunchingWithOptions.
        // Use this method to release any resources that were specific to the discarded scenes, as they will not return.
    }


}
import UIKit
import Firebase
import FirebaseRemoteConfig
import FirebaseRemoteConfigSwift

class VersionChecker {
    private let remoteConfig = RemoteConfig.remoteConfig()

    static let sharedChecker = VersionChecker()

    public func setApplicationDidBecomeActive() {
        NotificationCenter.default.addObserver(self, selector: #selector(applicationDidBecomeActive), name: UIApplication.didBecomeActiveNotification, object: nil)
    }

    @objc private func applicationDidBecomeActive() {
        fetchRemoteConfigAndCheckVersion()
    }

    private func fetchRemoteConfigAndCheckVersion() {
        remoteConfig.fetch(withExpirationDuration: 0) { (status, error) in
            guard error == nil else {
                print("error in fetching. value: \(error)")
                return
            }
            self.remoteConfig.fetchAndActivate { _, _ in
                if self.checkVersion() {
                    self.showUpdateAlertIfNeeded()
                }
            }
        }
    }

    private func checkVersion() -> Bool {
        let currentVersion = remoteConfig.configValue(forKey: "current_version").stringValue ?? ""
        let localVersionString = Bundle.main.object(forInfoDictionaryKey: "CFBundleShortVersionString") as! String
        return currentVersion != localVersionString
    }

    private func showUpdateAlertIfNeeded() {
        guard let rootViewController = getTopViewController() else { return }

        let alertController = UIAlertController(title: "アップデートが必要です", message: "新しいバージョンがApp Storeにあります。アップデートしてください。", preferredStyle: .alert)

        let updateAction = UIAlertAction(title: "アップデート", style: .default) { _ in
            guard let url = URL(string: "https://www.apple.com/jp/app-store/"),
                  UIApplication.shared.canOpenURL(url) else { return }
            UIApplication.shared.open(url, options: [:], completionHandler: nil)
        }

        let laterAction = UIAlertAction(title: "あとで", style: .cancel, handler: nil)

        alertController.addAction(updateAction)
        alertController.addAction(laterAction)
        rootViewController.present(alertController, animated: true, completion: nil)
    }

    private func getTopViewController(_ viewController: UIViewController? = UIApplication.shared.windows.first?.rootViewController) -> UIViewController? {
        if let navigationController = viewController as? UINavigationController {
            return getTopViewController(navigationController.visibleViewController)
        } else if let tabBarController = viewController as? UITabBarController, let selected = tabBarController.selectedViewController {
            return getTopViewController(selected)
        } else if let presented = viewController?.presentedViewController {
            return getTopViewController(presented)
        } else {
            return viewController
        }
    }
}
各部分の説明:
-
Firebase,FirebaseRemoteConfig,FirebaseRemoteConfigSwiftで必要なフレームワークをインポートします。 -
class VersionChecker: バージョンのチェックと必要ならばアップデートのアラートを表示するためのクラスを定義します。 -
private let remoteConfig = RemoteConfig.remoteConfig(): Firebase Remote Configのインスタンスをプライベートプロパティとして保持します。 -
static let sharedChecker = VersionChecker(): VersionCheckerのシングルトンインスタンスを作成します。 -
public func setApplicationDidBecomeActive(): UIApplicationがアクティブになった時に呼ばれる関数を設定します。 -
@objc private func applicationDidBecomeActive(): UIApplicationがアクティブになった時にRemote Configを取得し、バージョンのチェックを行います。 -
private func fetchRemoteConfigAndCheckVersion(): Remote Configを取得し、バージョンのチェックを行う関数です。 -
private func checkVersion() -> Bool: Firebaseから取得したバージョンとローカルのアプリのバージョンを比較し、一致しなければtrueを返します。 -
private func showUpdateAlertIfNeeded(): バージョンが一致しない場合にアップデートを促すアラートを表示します。 -
private func getTopViewController(...) -> UIViewController?: 表示中の最上位のViewControllerを取得します。
今回の場合、アプリを開いた際にすぐに強制アップデートを起動させたいのでAppDelegateにVersionChecker()を記載しています。
また、開いた画面の最上位のViewControllerを取得することで、他の画面と被ることを防いでいます。
難しく見えますが、コードのブロックごとを見れば優しい内容です。
最後に、"Firebase RemoteConfig"へ戻り、変更を公開を実施します。
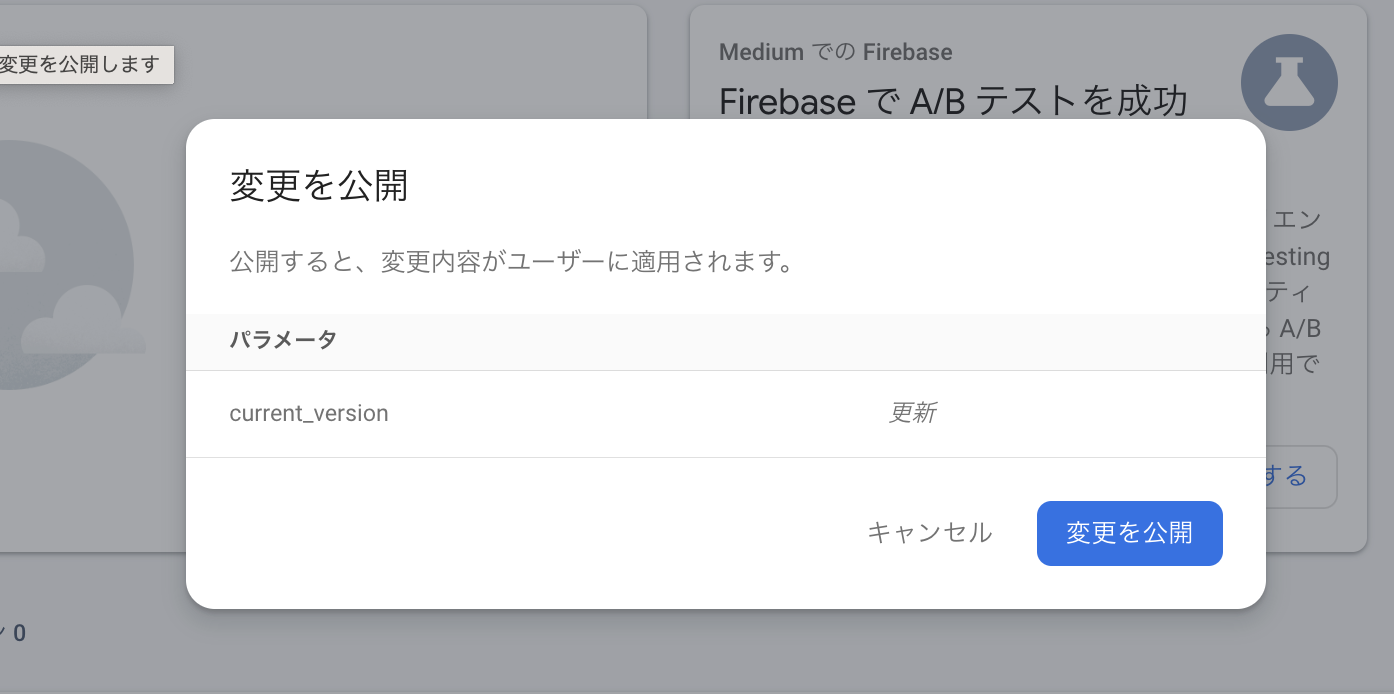
公開後、アプリを起動すると、以下のAlertが出れば完成です!!!
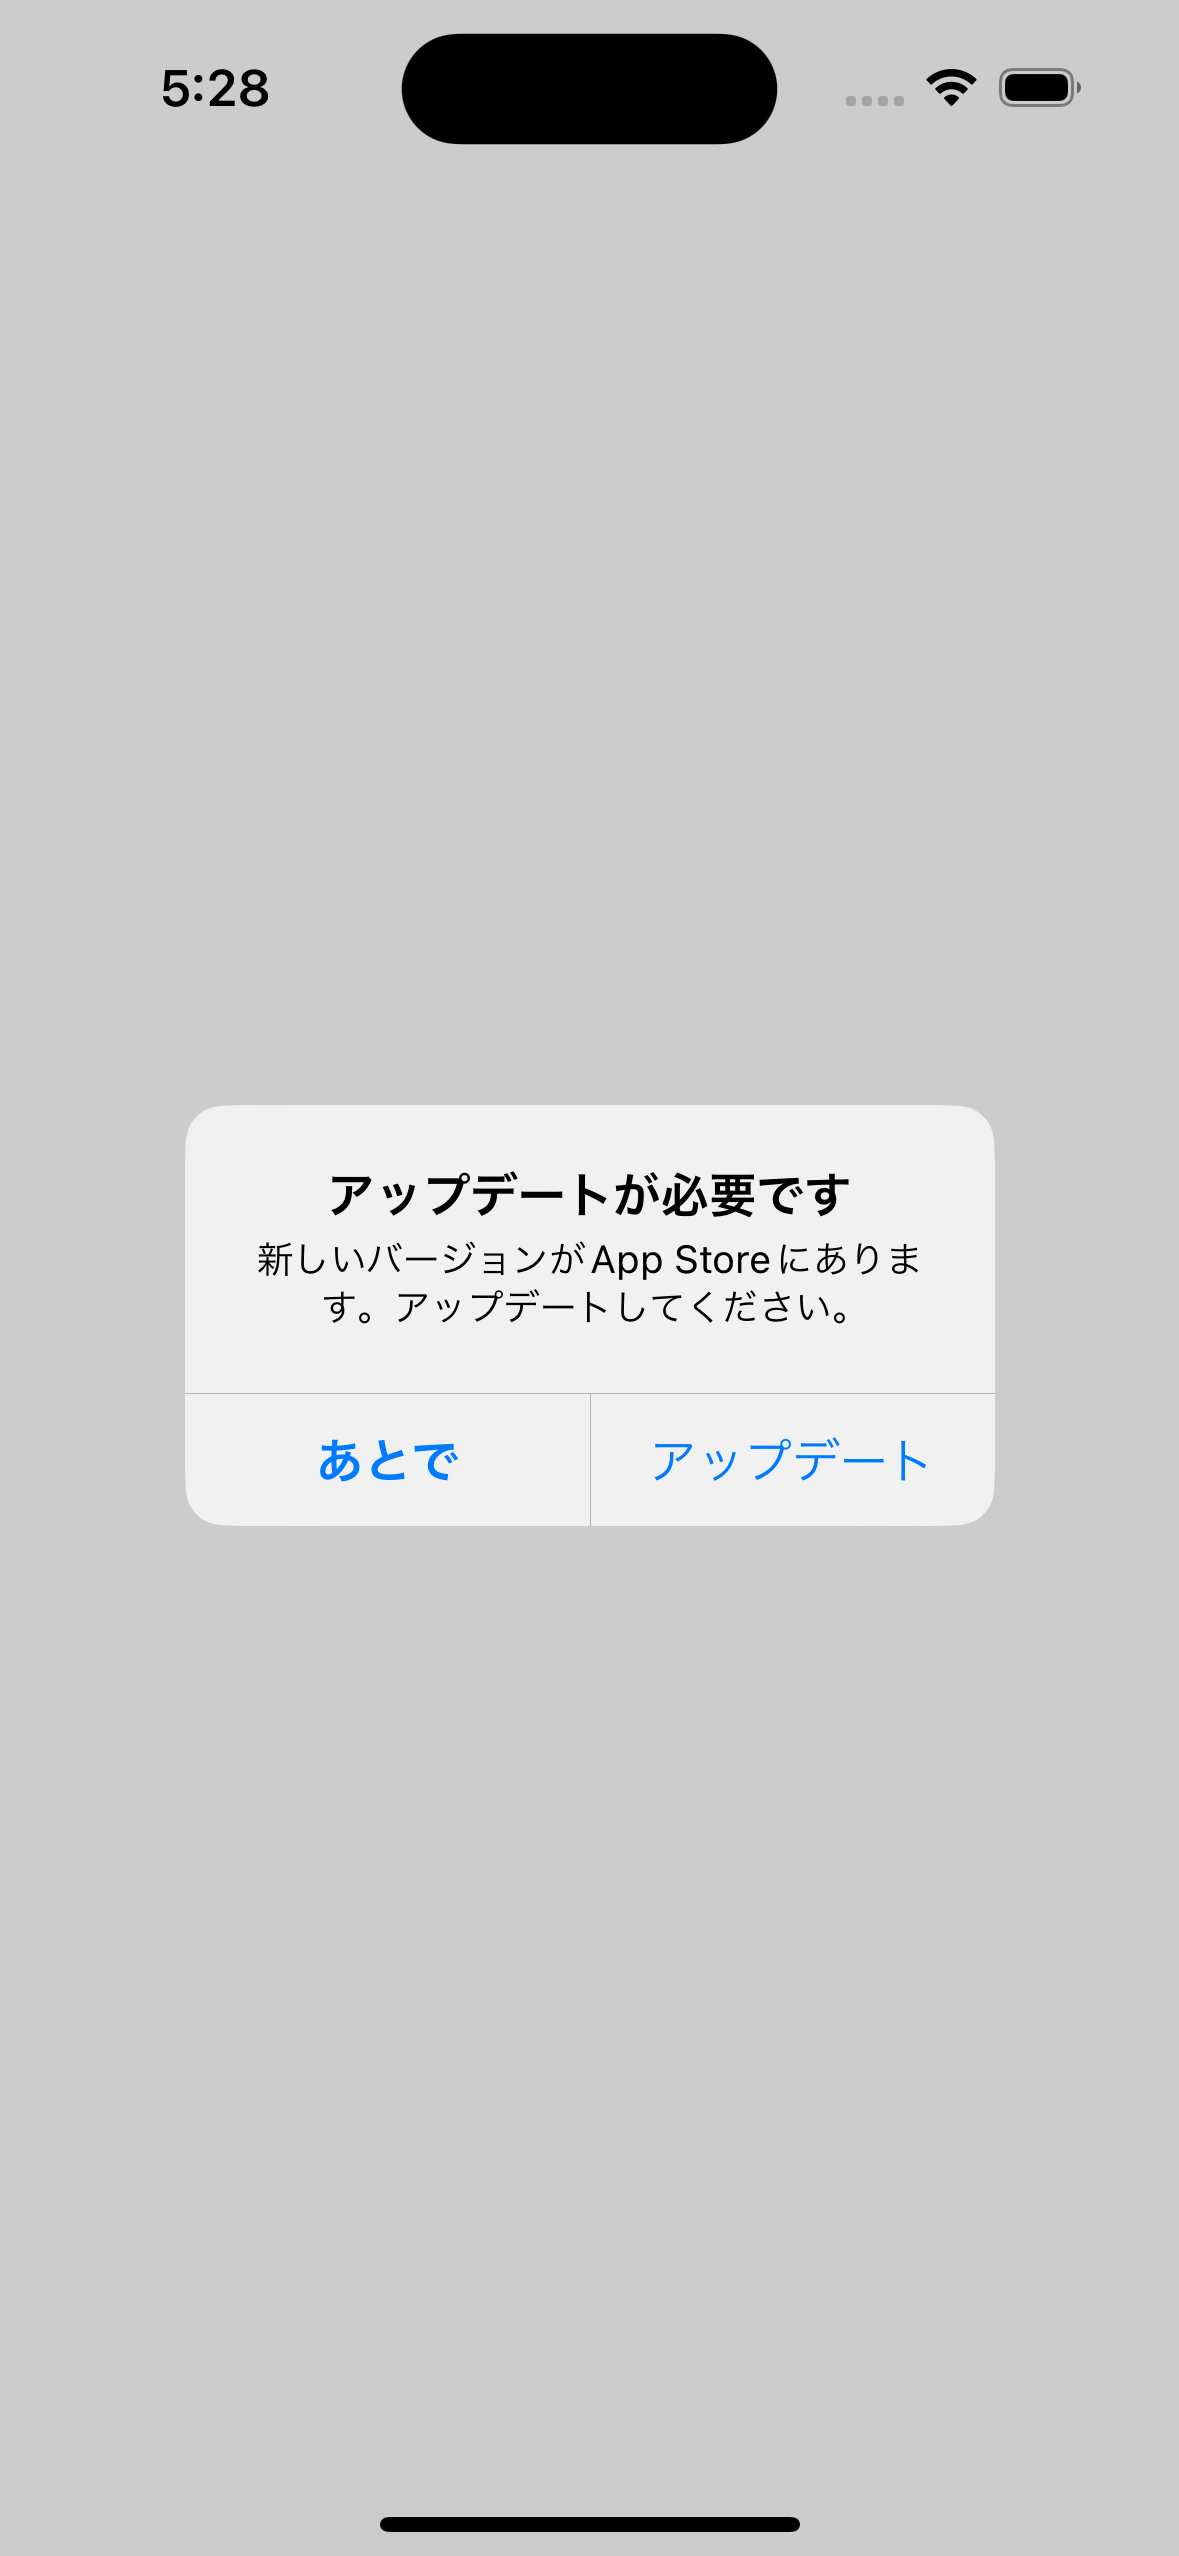
ローカルアプリのバージョンと、Firebase RemoteConfig上(構成のパラメーター値)のバージョンが同じな場合、アラートは出ません!
5. 最後に
いかがでしたでしょうか?
RemoteConfigはこのような使い方だけでなく、他の使い方もあります。
今回はバージョンアップのみにフォーカスしました。
まだまだこの強制アップデートの課題として、バックエンド側の運用としては、RemoteConfigの値を管理していかなくてはいけない欠点はあります。ここら辺自動的に管理できれば楽なのですが・・・・(勉強不足)
少しでもみなさんの学習の一助になれば幸いです。
ではでは〜