はじめに
パラメーターストアをNode.jsで扱う系の記事がパッと見つからなかったので「扱ってみた」を書き残します。
難しい事は無いのですが、色んな記事の行ったり来たりや、公式ドキュメントを読むのが面倒な私みたいな人向けに書いています。
手順
- パラーメータストアを作成する
- Lambdaを作成する
- IAMポリシーを追加する
- Lambdaを実行する
1. パラメーターストアを作成する
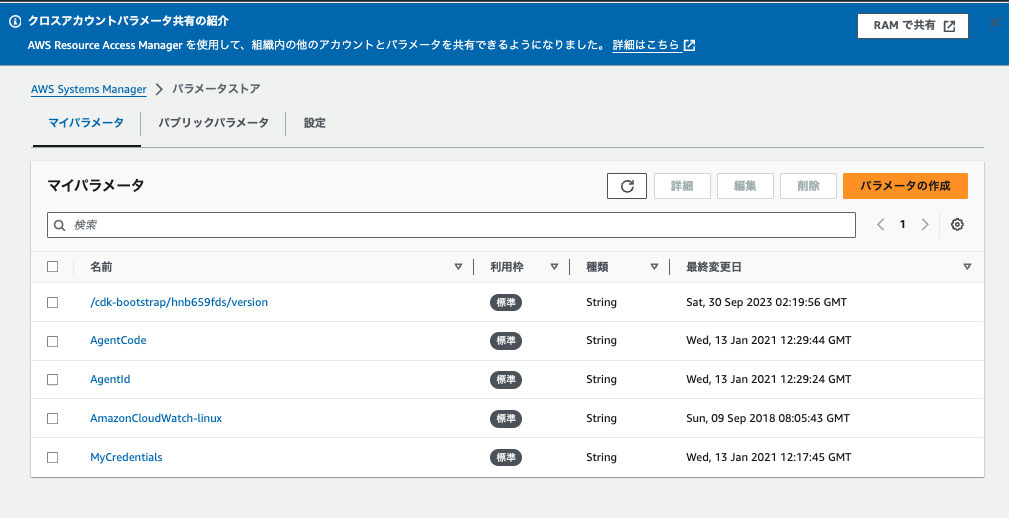
マネコンの検索窓に「Systems Manager」と入力してSystems Managerに移動する。左ペインの「パラメーターストア」をクリックする。

「パラメータの作成」をクリック。
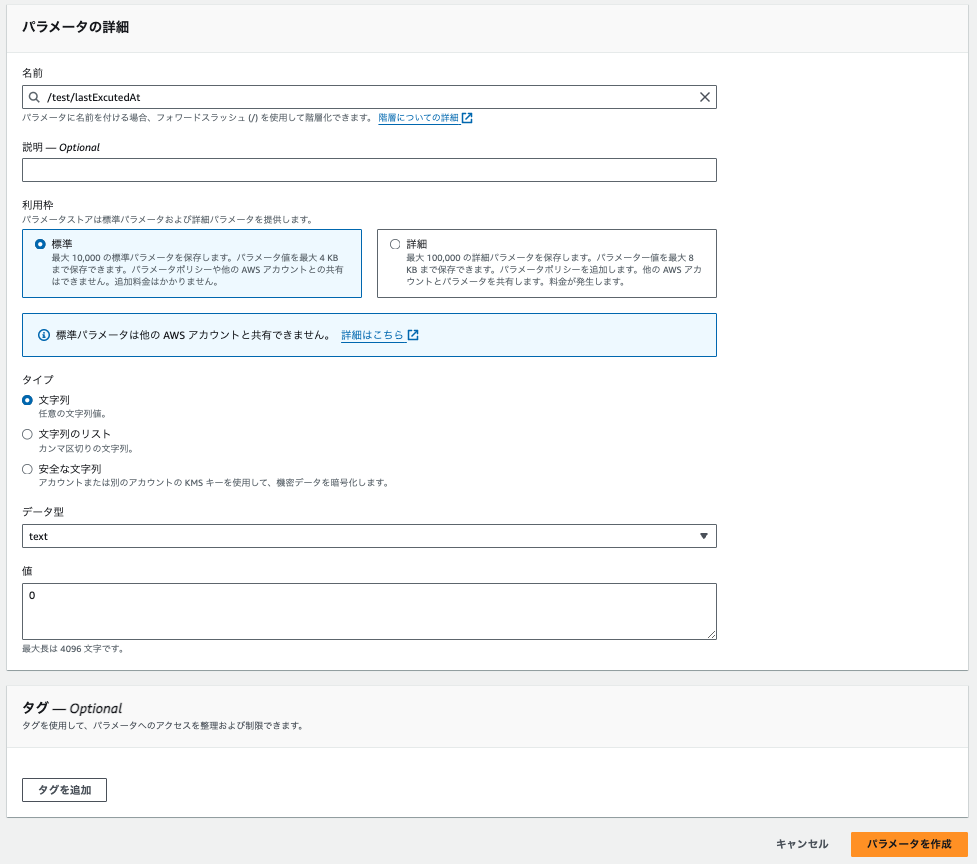
以下のように作成します。
名前
/test/lastExcutedAt
データ型
文字列
値
0
2. Lambdaを作成する
関数名
get-ssm-parameter
ランタイム
Node.js 20.x
あとはデフォルトで「関数の作成」をする。
3. IAMポリシーを追加する
Lambdaにパラメーターストアを読み書きするための権限を与えます。
作成したLambdaの「設定」タブから「アクセス権限」に移動します。
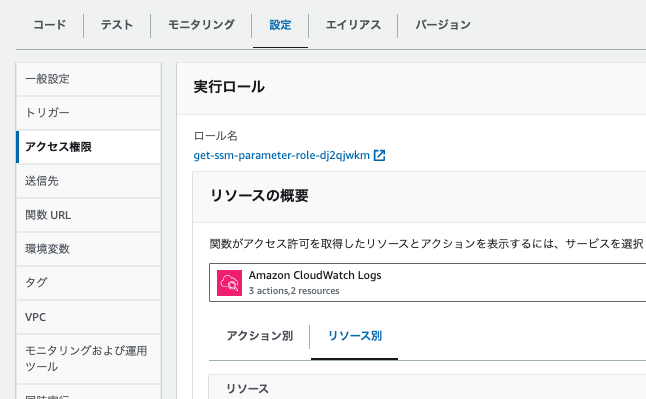
ロール名のリンクをクリックしてIAMに移動します。
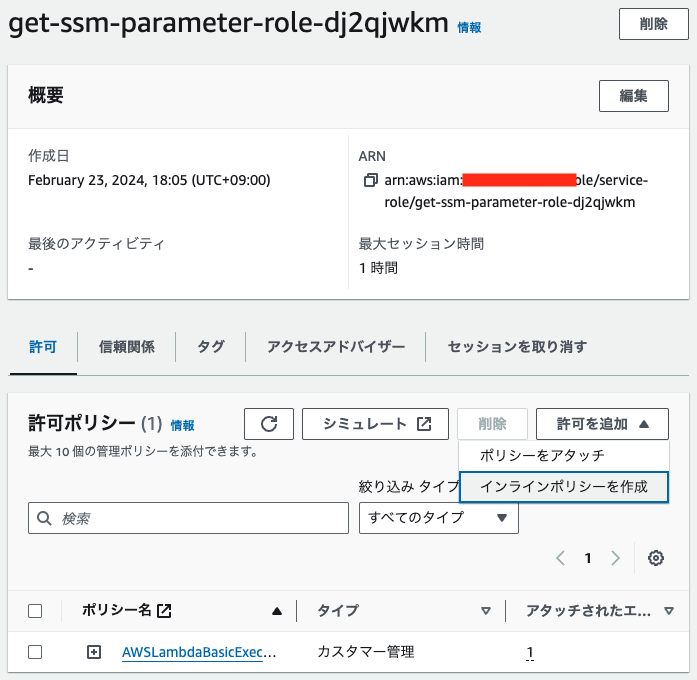
「許可を追加」から「インラインポリシーを作成」を選択。
以下のJSONを貼り付けます。
ResourceにはパラメーターのARNを記載します。
{
	"Version": "2012-10-17",
	"Statement": [
		{
			"Effect": "Allow",
			"Action": [
				"ssm:DescribeParameters"
			],
			"Resource": "*"
		},
		{
			"Effect": "Allow",
			"Action": [
				"ssm:GetParameter",
				"ssm:PutParameter"
			],
			"Resource": "arn:aws:ssm:ap-northeast-1:1234567890:parameter/test/lastExcutedAt"
		}
	]
}
GetParameter、PutParameter以外については下記リンクを参考にしてください。
4. Lambdaを実行する
index.mjsを以下と置き換える。
実行すると、Lambdaの前回実行時と今回実行時のタイムスタンプが返って来ると言う関数です。
import { SSMClient, GetParameterCommand, PutParameterCommand } from '@aws-sdk/client-ssm';

export const handler = async (event, context) => {

    let lastTime = 0;
    let thisTime = (new Date()).getTime();

    try {
        const client = new SSMClient({ region: 'ap-northeast-1' });
        const params = {
            Name: '/test/lastExcutedAt',
            WithDecryption: true
          };
         // パラメーターストアに保存した前回実行時のタイムスタンプを取得
        const commandGet = new GetParameterCommand(params);
        const paramStore = await client.send(commandGet);


        lastTime = +paramStore.Parameter.Value;

         // 今のタイムスタンプをパラメーターストアに保存
        const commandUpdate = new PutParameterCommand({
            Name: '/test/lastExcutedAt',
            Value: String(thisTime),
            Overwrite: true
        });

        const commandResult = await client.send(commandUpdate);

        console.log(commandResult);

    } catch (err) {
        return err;
    }

    return {
      'statusCode': 200,
      'body': JSON.stringify({
          lastTime, thisTime
      })
  }
};
「Deploy」して「Test」すると以下のようにパラメーターストアに保存した値が取得出来ます。実行するたびに、lastTimeの値が変わり、パラメーターストアをLambdaから更新出来ていることを確認出来ます。
Test Event Name
MyEvent

Response
{
  "statusCode": 200,
  "body": "{\"lastTime\":1708680020789,\"thisTime\":1708681929920}"
}
以上ですー!