こんにちわ
最近ターミナルですべての作業を済ませたいターミナルマンに覚醒しました。
ターミナルがないと作業効率が下がるので、生活必需品です。
今日はタイトル通り、
アプリランチャー作ってみたので軽く紹介と実装について書いていきます。
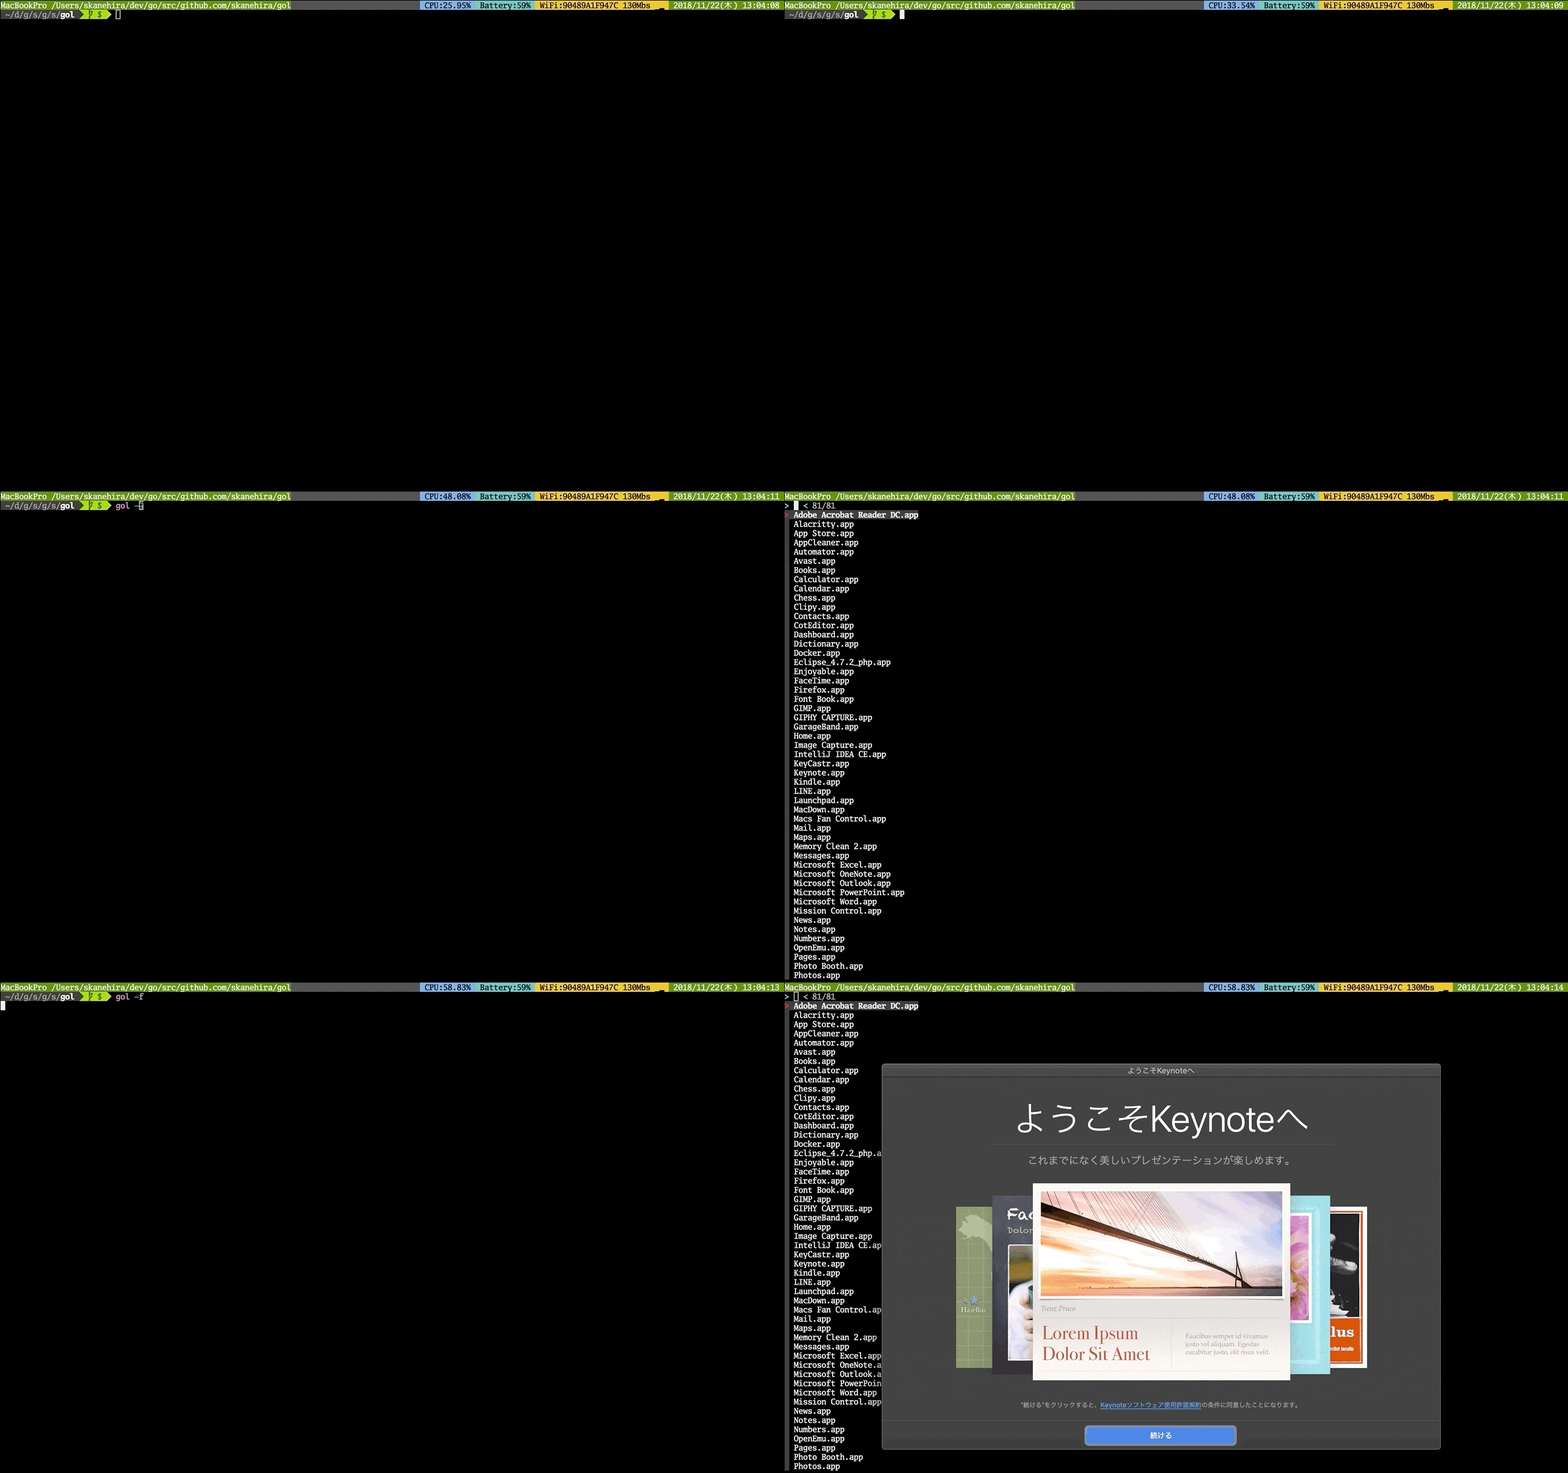
こんなかんじのやつです。
アジェンダ
作った背景
といっても大したことではなく、単純に普段使用しているMacBook 2015 Earlyの性能が低いため、
Spotlightが重たいので、ターミナルからサクッと起動できたらいいんじゃないかなと思ったのがきっかけです。
実際使ってみて若干便利になった感じはしますので、悪くはないかなと。
いまのところ、Macしか対応していません。
そのうちWindowsとLinux対応する予定です。
WindowsやLinuxでも使用したい方はあの有名なmattnさんが作成されたgofをぜひ使ってみてください。
gofにはランチャーモードが用意されています。
導入
go getで取ってくるだけです。
バイナリを用意していないので、Goがインストールされている必要があります。
気が向いたらそのうちバイナリ用意します。
go get -u github.com/skanehira/gol
使い方
READMEにも書いてありますが、大体の使い方をざっくり書いていきます。
引数なしの場合
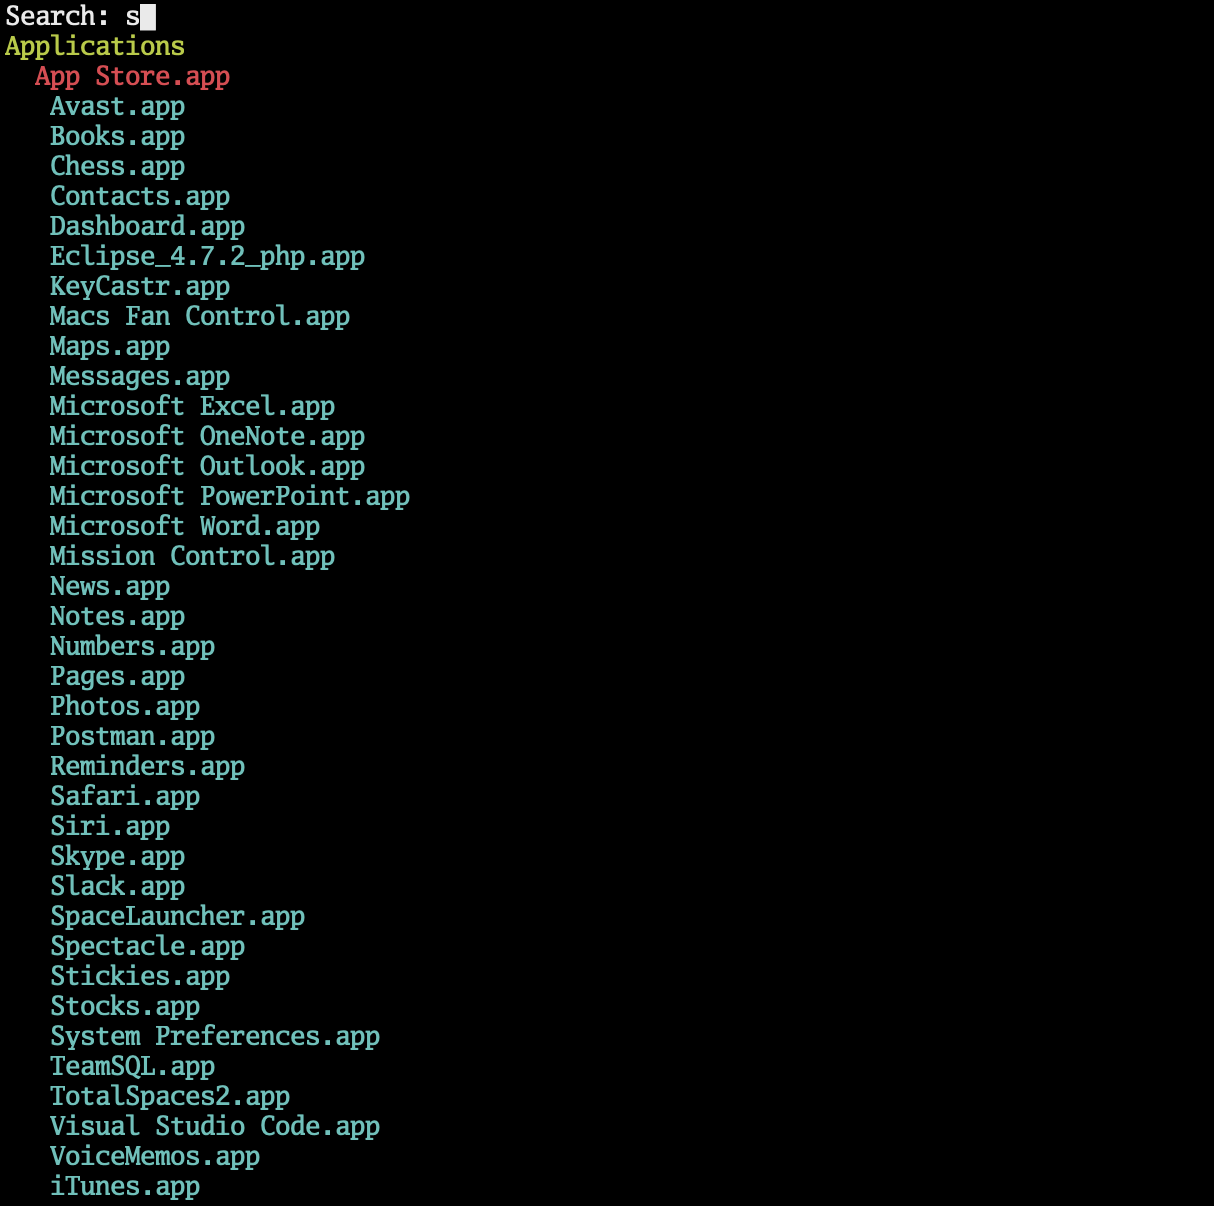
$ gol
起動したいアプリ名を入力すればフィルターしてくれます。
アプリの選択は↑↓。
検索モードから抜けたい場合は/を入力すればOKです。
fzfモード
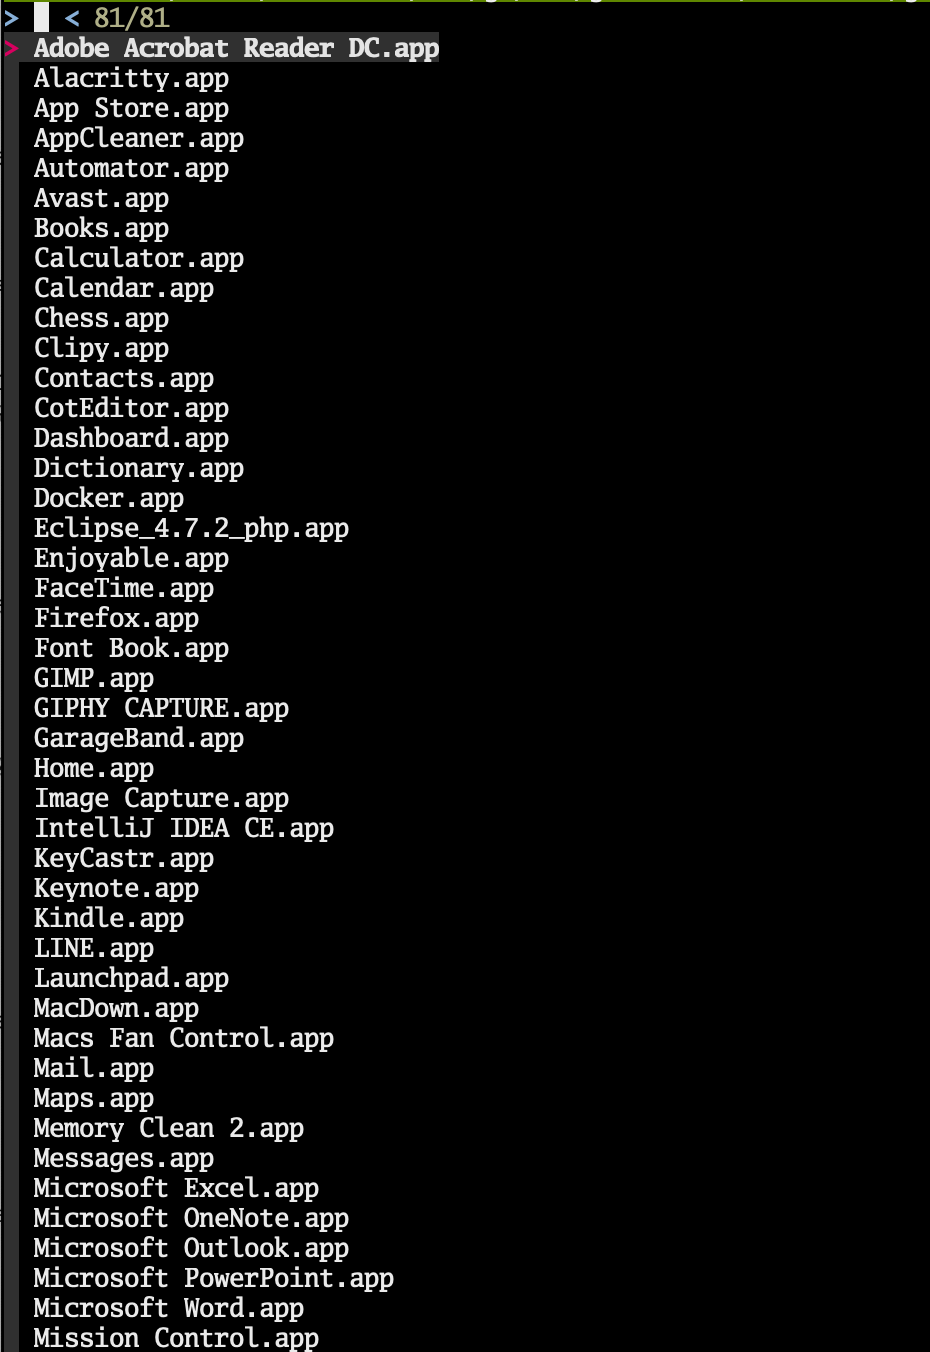
$ gol -f
fzfを使ったモードを用意してあります。
fzfがインストールされている必要があります。
複数のアプリを起動したい場合は、tabかCtrl+iで選択してEnter押せばOKです。
複数のアプリを起動したい場合
OS起動時にまとめて起動するときに使えそうなので実装しました。
$ gol -s safari
$ gol -s safar,notes
アプリ一覧を出力
使い道はなさそうだけど、あるかもしれないのでとりあえず実装しただけの機能です。
アプリ一覧を出力するだけで、gofとかと組み合わせて使うのもありかもですね。
$ gol -l
実装
ディレクトリ構成
.
├── README.md
├── cmd
│   └── command.go
├── config
│   └── config.go
└── main.go
configパッケージ
OSの種類とOS毎のアプリのフォルダを定義しています。
LinuxとWindows書いてありますが、そのうち対応のためとりあえず書いておいたレベルです。
const (
	MacOS   = "darwin"
	Linux   = "linux"
	Windows = "windows"
)

type Config struct {
	OS              string
	ApplicationPath string
}

func New() *Config {
	var path string

	switch runtime.GOOS {
	case MacOS:
		path = "/Applications"
	case Linux:
		path = "/opt"
	case Windows:
		path = "C:¥¥Program Files"
	}

	return &Config{
		ApplicationPath: path,
		OS:              runtime.GOOS,
	}
}
cmdパッケージ
Run()にメイン処理が書かれています。
超シンプルなので、超ざっくり流れを解説します。
あとはソースを読めばわかります。
1.flagパッケージを使用して、引数を処理(-fとか-s)して、グローバルで定義した変数に突っ込む
var (
	fzfMode  *bool
	listMode *bool
	spec     *string
)

// 中略

func (cmd *Command) parseArgs() {
	fzfMode = flag.Bool("f", false, "fzf mode")
	listMode = flag.Bool("l", false, "output application list")
	spec = flag.String("s", "", "specified application")
	flag.Parse()
}
2.configで取得したアプリディレクトリをもとに、ファイル名とパスを取得する、
Macの場合、.appというディレクトリになっているので普通のディレクトリか、アプリのディレクトリの判定が必要。
type Application struct {
	Name string
	Path string
}

// 中略

func (cmd *Command) getApplications(dir string) []Application {
	files, err := ioutil.ReadDir(dir)
	if err != nil {
		panic(err)
	}

	var apps []Application
	for _, file := range files {
		name := file.Name()
		//  exlusion dotfiles
		if strings.HasPrefix(name, ".") || !strings.HasSuffix(name, "app") {
			continue
		}

		// mac app has app suffix
		if file.IsDir() && !strings.HasSuffix(name, ".app") {
			apps = append(apps, cmd.getApplications(filepath.Join(dir, name))...)
			continue
		}

		apps = append(apps, Application{
			Name: name,
			Path: filepath.Join(dir, name),
		})
	}

	return apps
}
3.アプリを引数で指定した場合は取得したアプリ情報と照合してパスをrunAppメソッドに渡して起動
func getPathFromAppName(apps []Application, name string) string {
	name = strings.ToLower(name)
	for _, app := range apps {
		if strings.Contains(strings.ToLower(app.Name), name) {
			return app.Path
		}
	}
	return ""
}

func (cmd *Command) Run() {
	// get specified apps
	if *spec != "" {
		for _, name := range strings.Split(*spec, ",") {
			if name != "" {
				cmd.runApp(getPathFromAppName(apps, name))
			}
		}
		return
	}
//中略
}
4.fzfモードで指定された場合は、
アプリ名一覧を、パイプラインで渡す必要があるので、
mattnさんが作成されたgo-pipelineのパッケージを使用して実行する。
また、Ctrl+Dでfzfを終了するとエラーが返ってくる(仕様…?)ので、その判定も必要になる。
	// use fzf
	if *fzfMode {
		paths := make(map[string]string)
		var appNames string

		for _, app := range apps {
			name := app.Name
			paths[name] = app.Path
			appNames += name + "\n"
		}

		for {
			selected, err := pipeline.Output(
				[]string{"echo", strings.TrimRight(appNames, "\n")},
				[]string{"fzf"},
			)
			if err != nil {
				// if abort fzf then be output "exit status 130"
				if strings.Split(err.Error(), " ")[2] == "130" {
					return
				}
				panic(err)
			}

			for _, app := range strings.Split(strings.TrimRight(string(selected), "\n"), "\n") {
				cmd.runApp(paths[string(app)])
			}
		}
	}
5.アプリ一覧の出力はただfor分回してprintlnしているだけ。
	// list applications
	if *listMode {
		for _, app := range apps {
			fmt.Println(app.Name)
		}
		return
	}
6.標準ではpromptuiを使用していて、
フォーマットとフィルター処理を定義指定実行するだけ。
promptuiについてはこちらの記事で少し触れているので、
興味ある方は覗いてみてください。
	// use default
	for {
		prompt := promptui.Select{
			Label: "Applications",
			Templates: &promptui.SelectTemplates{
				Label:    `{{ . | green }}`,
				Active:   `{{ .Name | red }}`,
				Inactive: ` {{ .Name | cyan }}`,
				Selected: `{{ .Name | yellow }}`,
			},
			Items: apps,
			Size:  50,
			Searcher: func(input string, index int) bool {
				item := apps[index]
				name := strings.Replace(strings.ToLower(item.Name), " ", "", -1)
				input = strings.Replace(strings.ToLower(input), " ", "", -1)

				return strings.Contains(name, input)
			},
			StartInSearchMode: true,
		}

		i, _, err := prompt.Run()

		if err != nil {
			if isEOF(err) || isInterrupt(err) {
				os.Exit(0)
			}
			panic(err)
		}

		cmd.runApp(apps[i].Path)
	}
終わりに
最近CLIツールを作る時promptuiばっかり使っているので、そろそろ飽きてきました。
fuzz finder系の自前ライブラリ作ろうかなあと考え中です。
気が向いたら作って記事でも書こうかと思います。
おまけですが、ステップ数は192です。
もっと削れそう…
github.com/AlDanial/cloc v 1.80  T=0.02 s (236.7 files/s, 16686.3 lines/s)
-------------------------------------------------------------------------------
Language                     files          blank        comment           code
-------------------------------------------------------------------------------
Go                               3             45             11            192
Markdown                         1              8              0             26
-------------------------------------------------------------------------------
SUM:                             4             53             11            218
-------------------------------------------------------------------------------


