こちらの記事で知った Collections が素晴らしく自分向きっぽかったのでいろいろ試してみようと思います。
Collectionsのセットアップ
ひとまずドキュメント通りに起動していきます。
npx create-collections-app my-app
cd my-app
npm run dev
めちゃくちゃ簡単に起動しました ![]() すごい
すごい ![]()
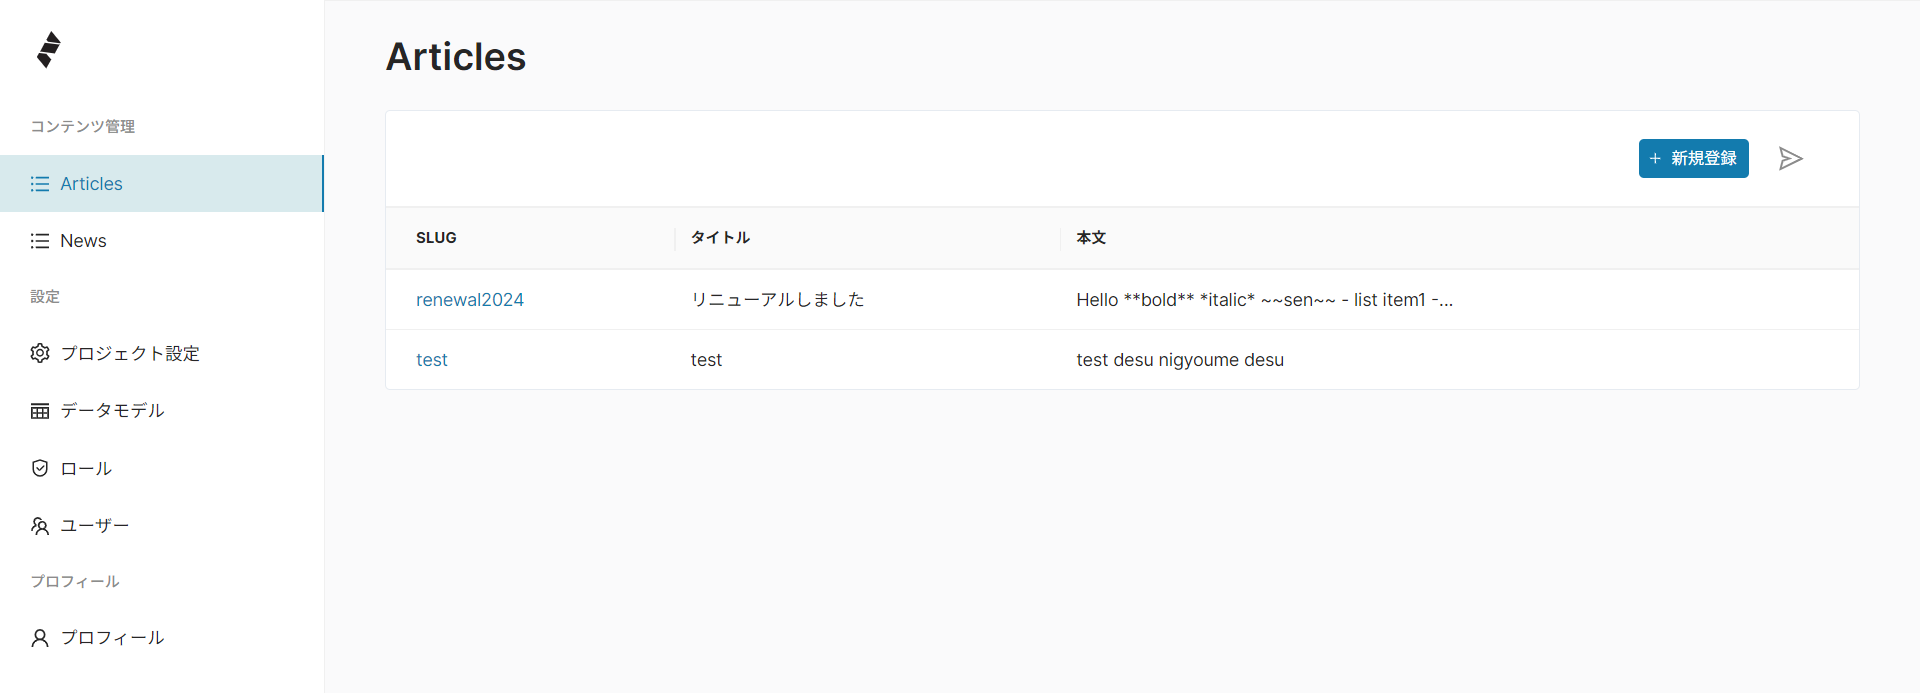
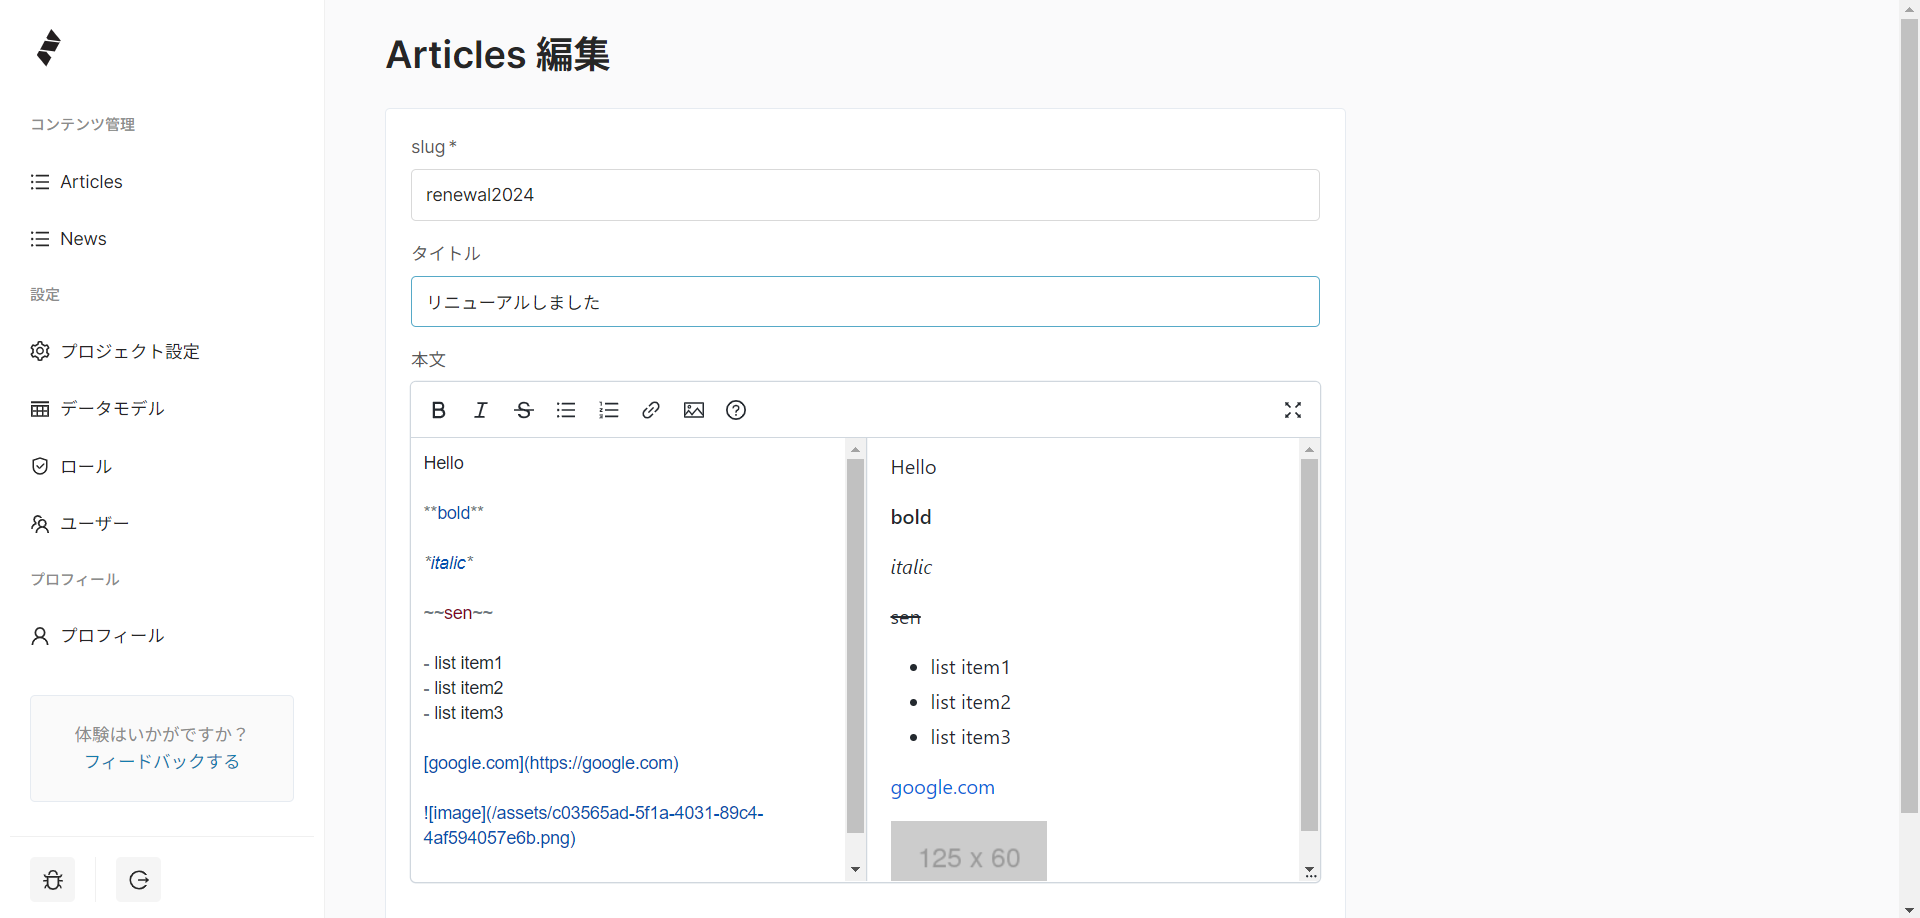
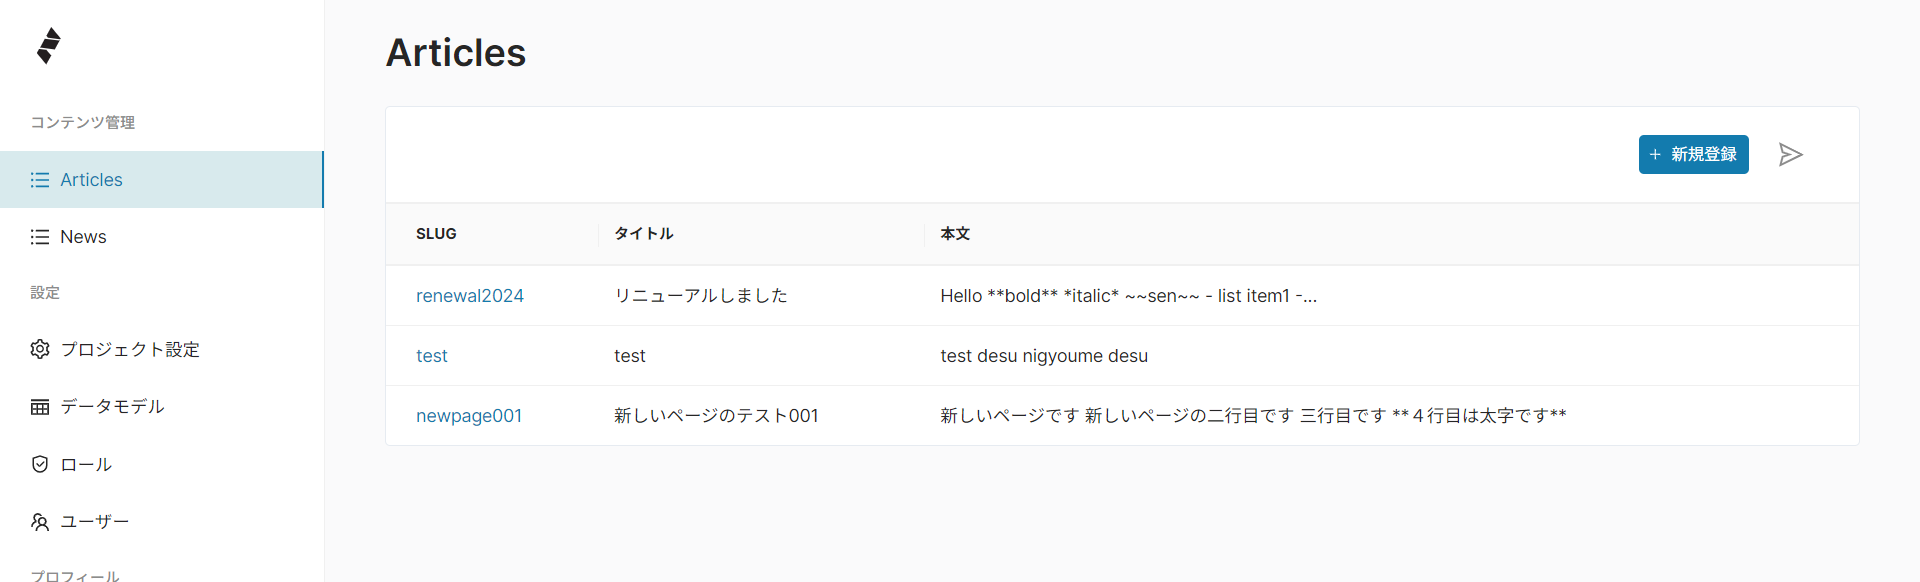
テスト用のデータを追加しておきます。
Astro 4.0のセットアップ
# Create a new Astro 4.0 project:
npm create astro@latest
cd tender-tower #勝手に付いたディレクトリ名
npm dev start
これも素晴らしく簡単に起動しますね。 ![]()
Collectionsと接続
AstroにはヘッドレスCMSと接続する方法がいくつも用意されています。
しかし残念ながら この中に Collections はまだ載っていないため、独自に作っていきたいと思います。(そのうちサポートされれば嬉しいですね)
上のGuidesをいくつか見てみたところ、Prepr(どなたか存じないですが)への繋ぎ方が真似できそうなので参考にしていきます。
src/lib/collections.ts
export async function Collections(modelId: string): Promise<Response> {
    const endpoint: string = import.meta.env.COLLECTIONS_ENDPOINT as string;
    const token: string = import.meta.env.COLLECTIONS_TOKEN as string;
    const response: Response = await fetch(`${endpoint}/api/models/${modelId}/contents`, {
        method: 'GET',
        headers: {
            'Content-Type': 'application/json',
            'Authorization': `Bearer ${token}`
        },
    })
    return response
}
.env
COLLECTIONS_ENDPOINT="http://localhost:4000"
COLLECTIONS_TOKEN="***************"
src/env.d.ts
/// <reference types="astro/client" />
interface ImportMetaEnv {
    readonly COLLECTIONS_ENDPOINT: string
    readonly COLLECTIONS_TOKEN: string
}
src/pages/index.astro
---
import Layout from '../layouts/Layout.astro';
import {Collections} from '../lib/collections';
import Card from '../components/Card.astro';
const response = await Collections(1)
const { data } = await response.json()
const articles = data
---
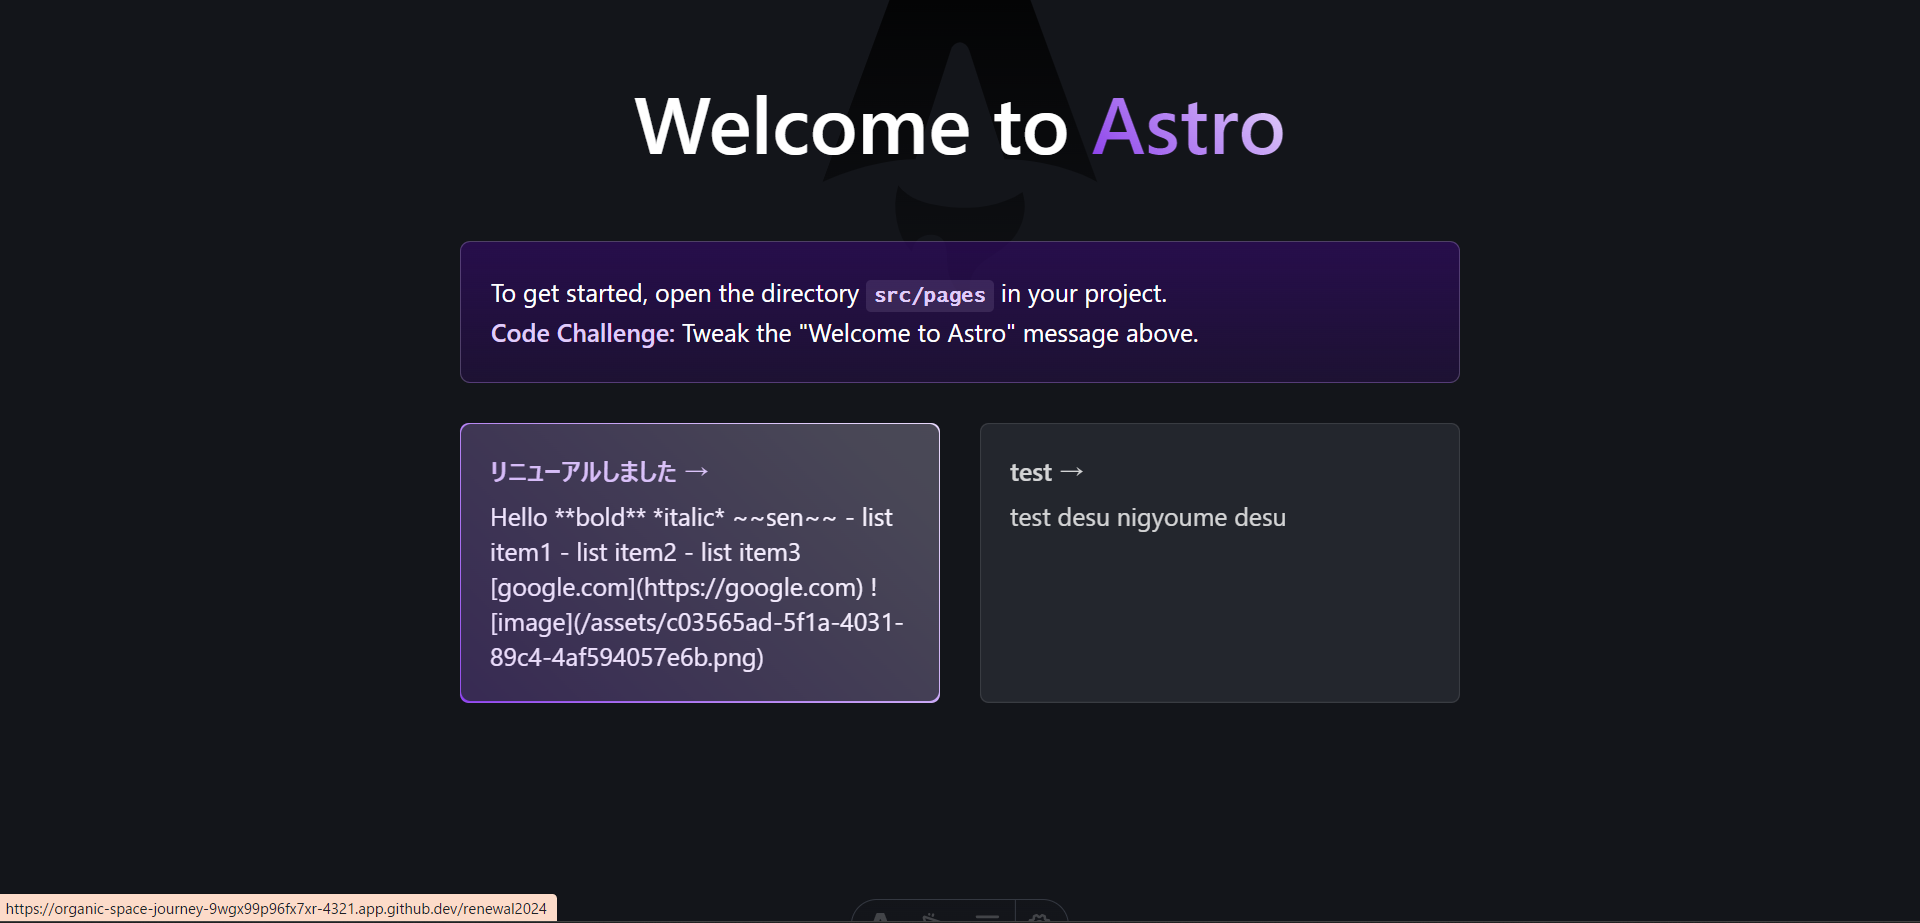
<Layout title="Welcome to Astro.">
<main>
<h1>Welcome to <span class="text-gradient">Astro</span></h1>
<p class="instructions">
To get started, open the directory <code>src/pages</code> in your project.<br />
<strong>Code Challenge:</strong> Tweak the "Welcome to Astro" message above.
</p>
<ul role="list" class="link-card-grid">
{
articles.map((article) => (
<Card
href={article.slug}
title={article.title}
body={article.body}
/>
))
}
</ul>
</main>
</Layout>
src/pages/[...slug].astro
---
import Layout from '../layouts/Layout.astro';
import {Collections} from '../lib/collections';
export async function getStaticPaths() {
const response = await Collections(1)
const { data } = await response.json();
return data.map((data: any) => { return {params: {slug: data.slug}} })
}
const { slug } = Astro.params;
const response = await Collections(1)
const { data } = await response.json()
const article = data.find((data: any) => data.slug === slug )
---
<Layout title="Welcome to Astro.">
<main>
<h1>Welcome to <span class="text-gradient">Astro</span></h1>
<p class="instructions">
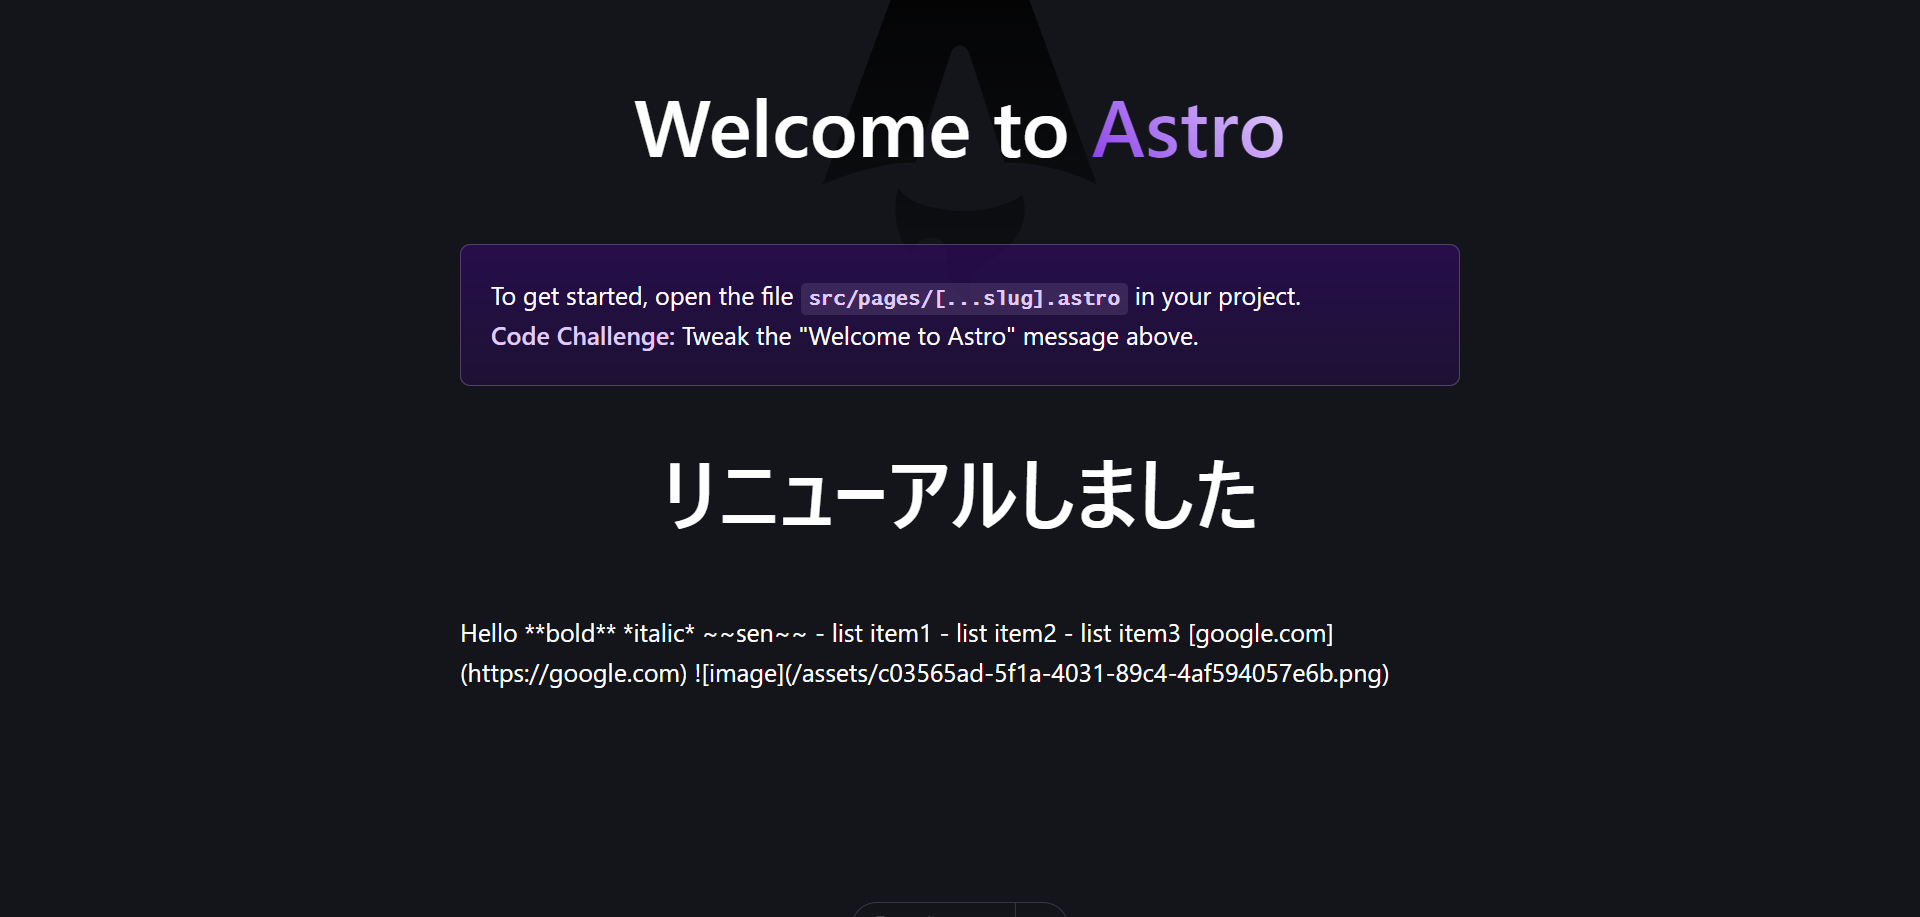
To get started, open the file <code>src/pages/[...slug].astro</code> in your project.<br />
<strong>Code Challenge:</strong> Tweak the "Welcome to Astro" message above.
</p>
<section>
<h1>{article.title}</h1>
<div>{article.body}</div>
</section>
</main>
</Layout>
完成
できました ![]()
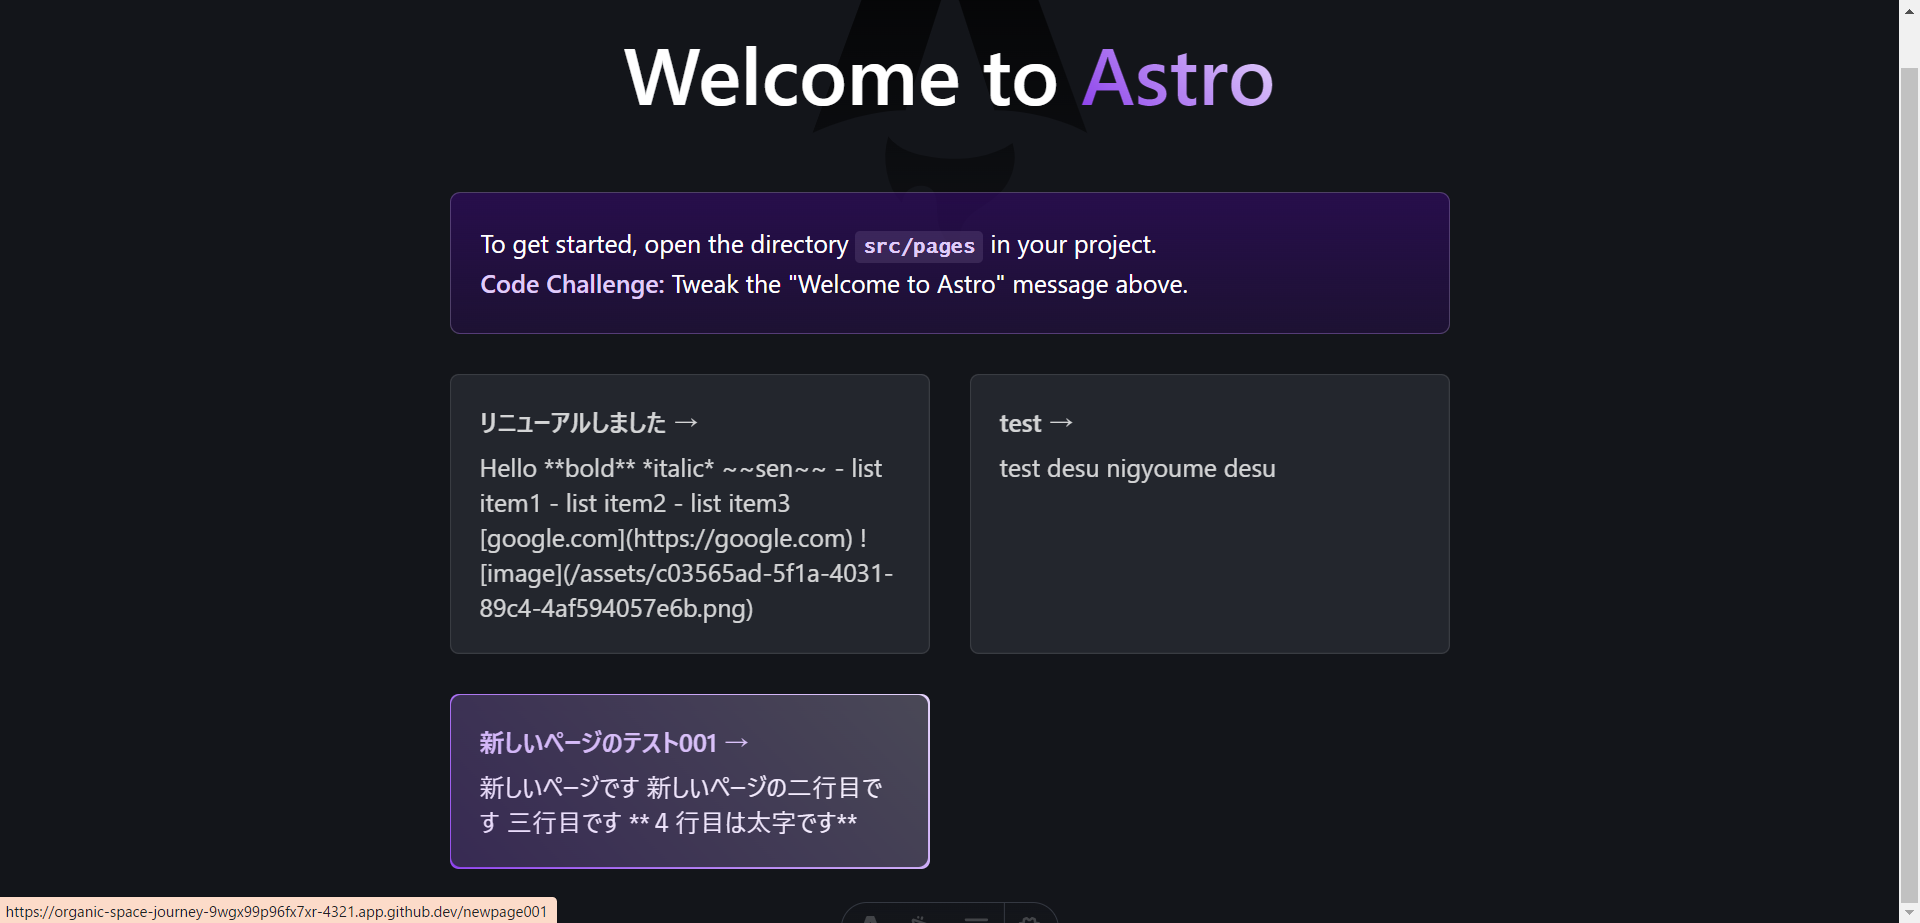
子ページにもアクセスできます。 ![]()
新規ページ作成
ページを増やしてみます。
反映されますね。 ![]()
静的ビルド
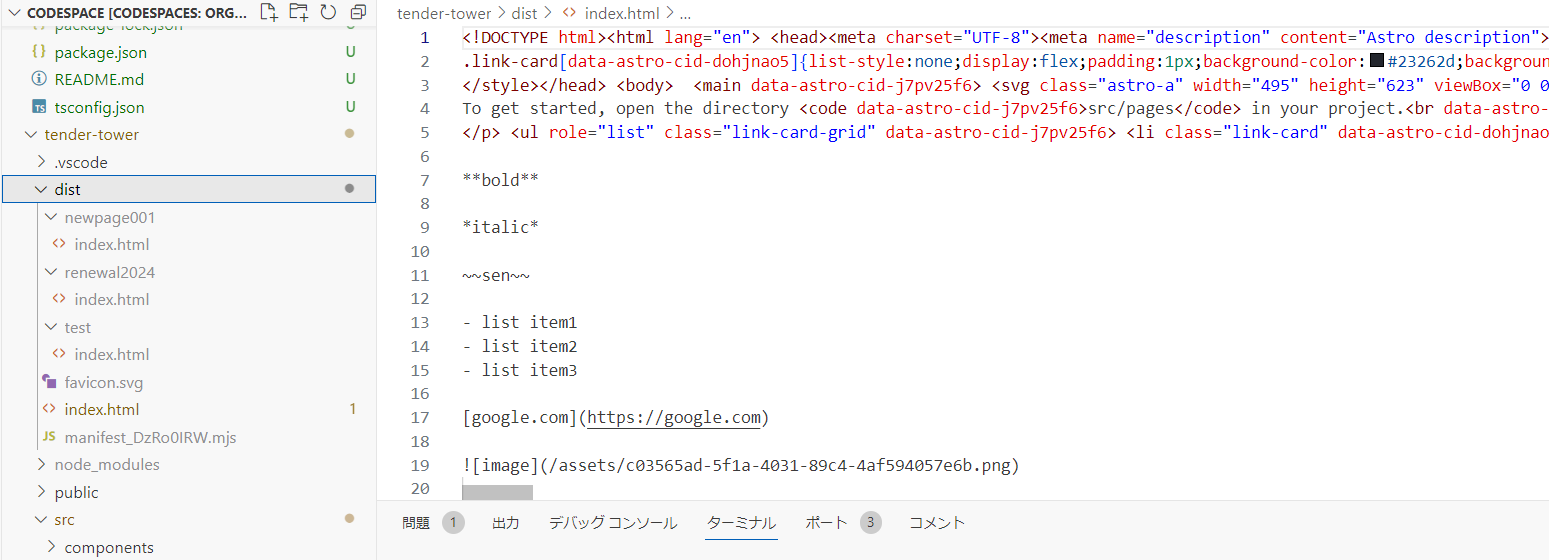
ビルドも無事できてプレビューも確認できました。 ![]()
npm run build
npm run preview
素晴らしく自分向き とは?
ローカルで簡単に起動してデータはSQLiteで持ち運べるのが最高ですね。
コンテンツ編集もデザイン作成もローカルで出来て、そのままGitにコミットしてしまえるのが最高で最高ですね。
ちょっとしたサイトの構築が全てローカルで作業できて1リポジトリで完結しそうなので、この構成は今後すごく活躍しそうです。