blastengineはシンプルに使える開発者向けメールサービスを提供しています。何かと面倒なメール配信をシンプルに、かつ確実に送信先に届くようになります。
今回はblastengineを使ってNode.jsでメール送信を行うまでの流れを解説します。
ユーザ登録する
blastengineにユーザ登録します。管理画面に入るためのユーザID、パスワードが手に入るので、ログインします(ユーザIDは後で使います)。
送信元ドメインのSPFを設定する
送信元として利用するドメイン(自分で持っているもの)の設定をします。これは任意のドメイン管理サービスで設定できますが、TXTレコードに以下のSPFを追加します。
txt @ v=spf1 include:spf.besender.jp ~all
API経由で配信する
まずはAPIを使ってHTMLメールを配信する流れを紹介します。今回利用するライブラリは下記のsuperagentです。
HTTPアクセスできるライブラリがあれば良いので、好きなものを利用してください。Node.jsプロジェクトの作成と、ライブラリのインストール用コマンドを実行します。
$ npm init -y
$ npm install superagent
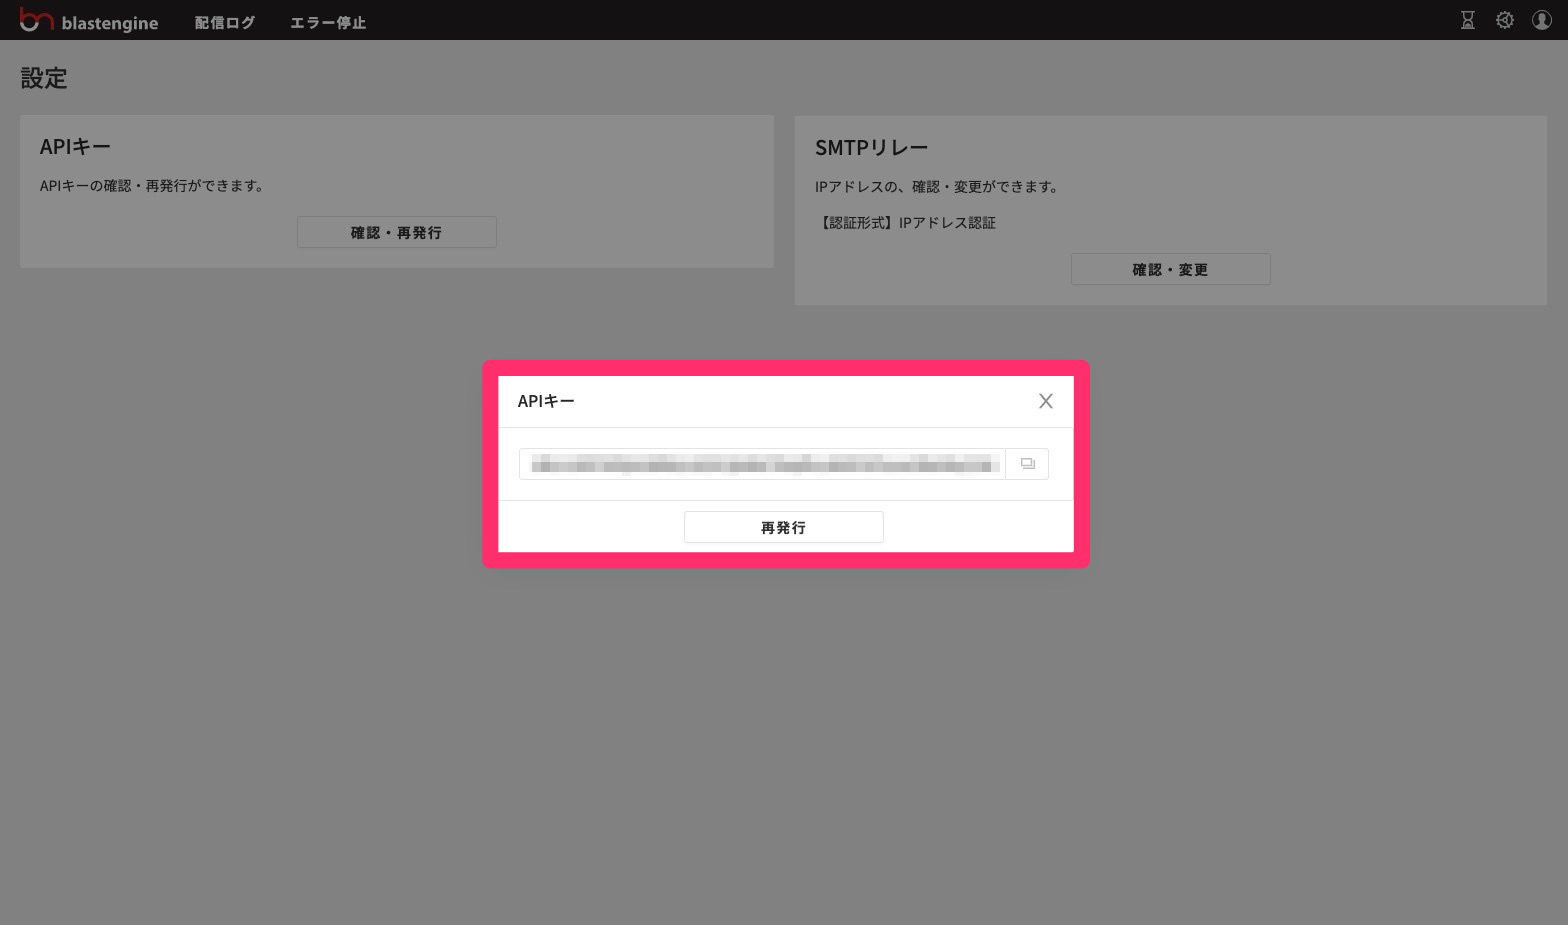
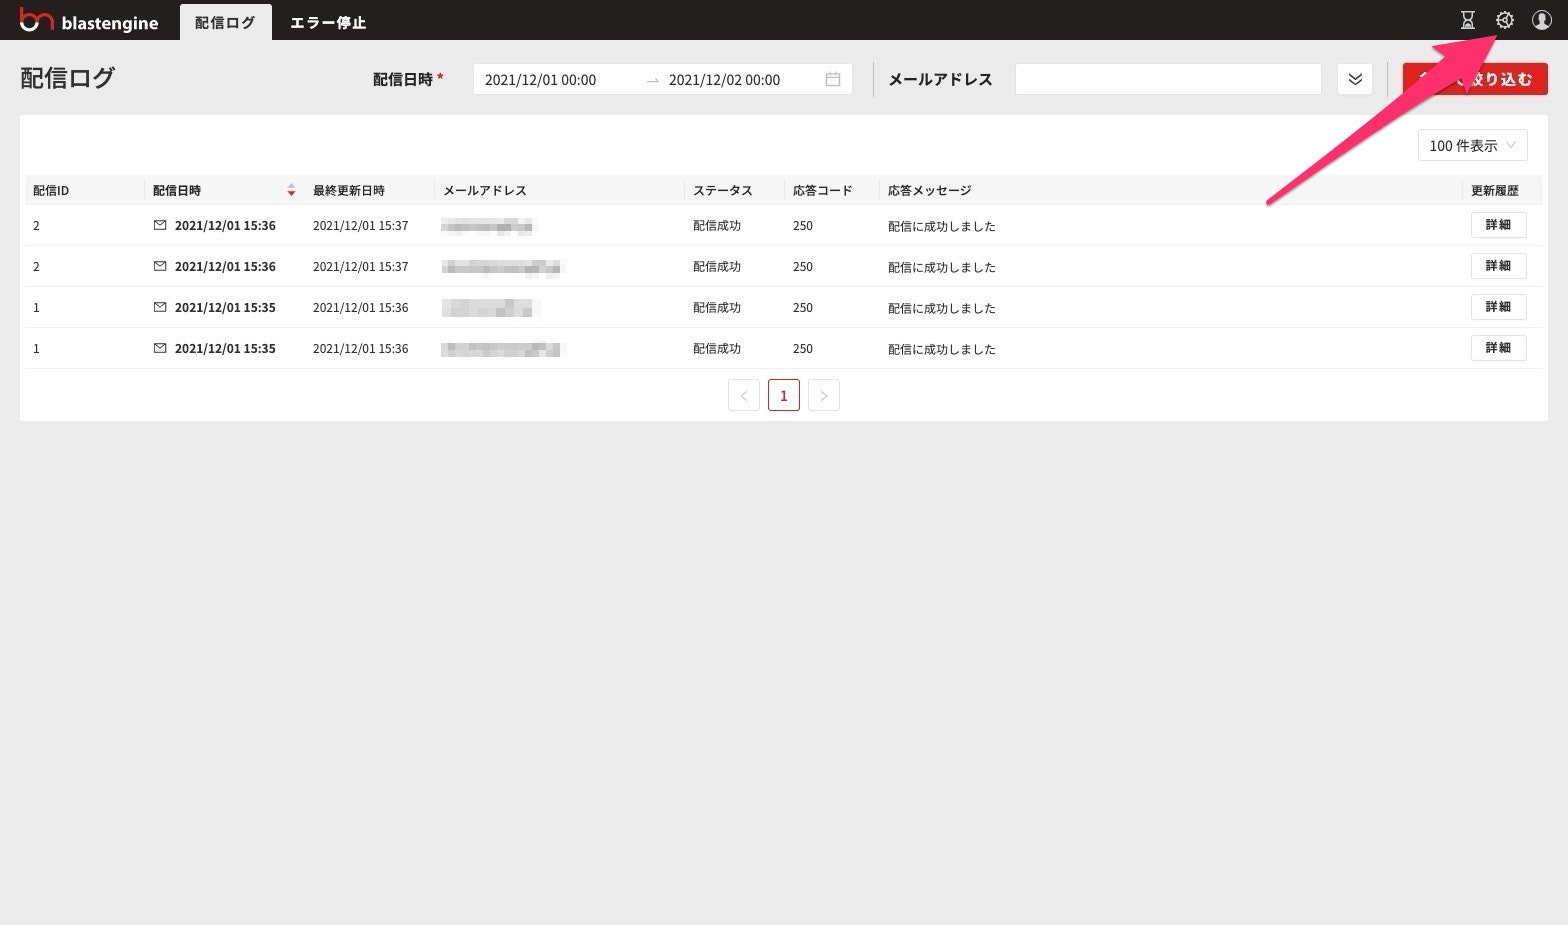
APIキーを取得する
ログイン後、管理画面の右上にある設定メニューに移動します。

そして設定の中で、APIキーを取得します。
ライブラリを読み込む
まず必要なライブラリを読み込みます。上記の superagent に加えて、ハッシュを作る際に利用する crypto も読み込みます。
const request = require('superagent');
const crypto = require('crypto');
ネットワーク処理は非同期なので、あらかじめasyncで囲っておきます。ここからは関数内での処理を記述していきます。
(async () => {
	// この中に処理を記述
})();
必要な変数を取得
今回はターミナル(コマンドプロンプト)から実行します。その際にユーザIDとAPIキーを渡す仕組みにしますので、スクリプト側で入力値を受け取ります。また、両方とも必須なので、入力がなかったらエラーとします。
const userId = process.env.BE_USERID;
const APIKEY = process.env.BE_APIKEY;
if (!userId) {
	console.error('ユーザIDを入力してください');
	process.exit(1);
}
if (!APIKEY) {
	console.error('APIキーを入力してください');
	process.exit(1);
}
トークンを生成する
APIリクエストするためのトークンを生成します。手順としては次のとおりです。
- ユーザIDとAPIキーを連結する
- SHA256のハッシュを生成する
- ハッシュを全て小文字にする
- 3の文字列をBASE64エンコードする
実際のコードで言うと、次のようになります。 token がトークンです。
const str = `${userId}${APIKEY}`;
const hashHex = crypto
	.createHash('sha256')
	.update(str, 'utf8')
	.digest('hex');
const token = Buffer
	.from(hashHex.toLowerCase())
	.toString('base64');
APIリクエストする
では実際にメールを送信します。APIのエンドポイントは https://app.engn.jp/api/v1/deliveries/transaction になります。生成したトークンは Authorization ヘッダーに適用します。fromのemailやtoなど、メールアドレスは利用されるものに書き換えてください。
const res = await request
	.post('https://app.engn.jp/api/v1/deliveries/transaction')
	.send(
		{
			from: {
				email: 'no-reply@example.jp',
				name: '送信者サンプル'
			},
			to: 'test@example.com',
			subject: 'テスト件名',
			encode: 'ISO-2022-JP',
			text_part: 'テスト配信',
			html_part: '<!DOCTYPE html><html><header></header><body>sample html</body></html>'
		}
	)
	.set('Authorization', `Bearer ${token}`)
	.set('Content-Type', 'application/json');
結果
レスポンスを出力します。配信ID(delivery_id)は照会、変更および削除操作に必要です。
console.log(res.body);
// { delivery_id: 9 }
実行する
では実際にターミナル、またはコマンドプロンプトから実行してみます。 YOUR_USER_ID と YOUR_API_KEY はそれぞれ皆さんのものに置き換えてください。
$ BE_USERID=YOUR_USER_ID BE_APIKEY=YOUR_API_KEY npx node index.js
{ delivery_id: 9 }
全体のコード
今回のサンプルコードは次のようになります。実装時の参考にしてください。
const request = require('superagent');
const crypto = require('crypto');

(async () => {
	const userId = process.env.BE_USERID;
	const APIKEY = process.env.BE_APIKEY
	if (!userName) {
		console.error('ユーザIDを入力してください');
		process.exit(1);
	}
	if (!APIKEY) {
		console.error('APIキーを入力してください');
		process.exit(1);
	}
	const str = `${userId}${APIKEY}`;
	const hashHex = crypto
		.createHash('sha256')
		.update(str, 'utf8')
		.digest('hex');
	const token = Buffer
		.from(hashHex.toLowerCase())
		.toString('base64');

	const res = await request
		.post('https://app.engn.jp/api/v1/deliveries/transaction')
		.send(
			{
				from: {
					email: 'no-reply@example.jp',
					name: '送信者サンプル'
				},
				to: 'test@example.com',
				subject: 'テスト件名',
				encode: 'ISO-2022-JP',
				text_part: 'テスト配信',
				html_part: '<!DOCTYPE html><html><header></header><body>sample html</body></html>'
			}
		)
		.set('Authorization', `Bearer ${token}`)
		.set('Content-Type', 'application/json');
	console.log(res.body);
})();
SMTPリレーでの配信
次にSMTPリレーを使った方式です。こちらはnodemailerを利用します。
npm install nodemailer
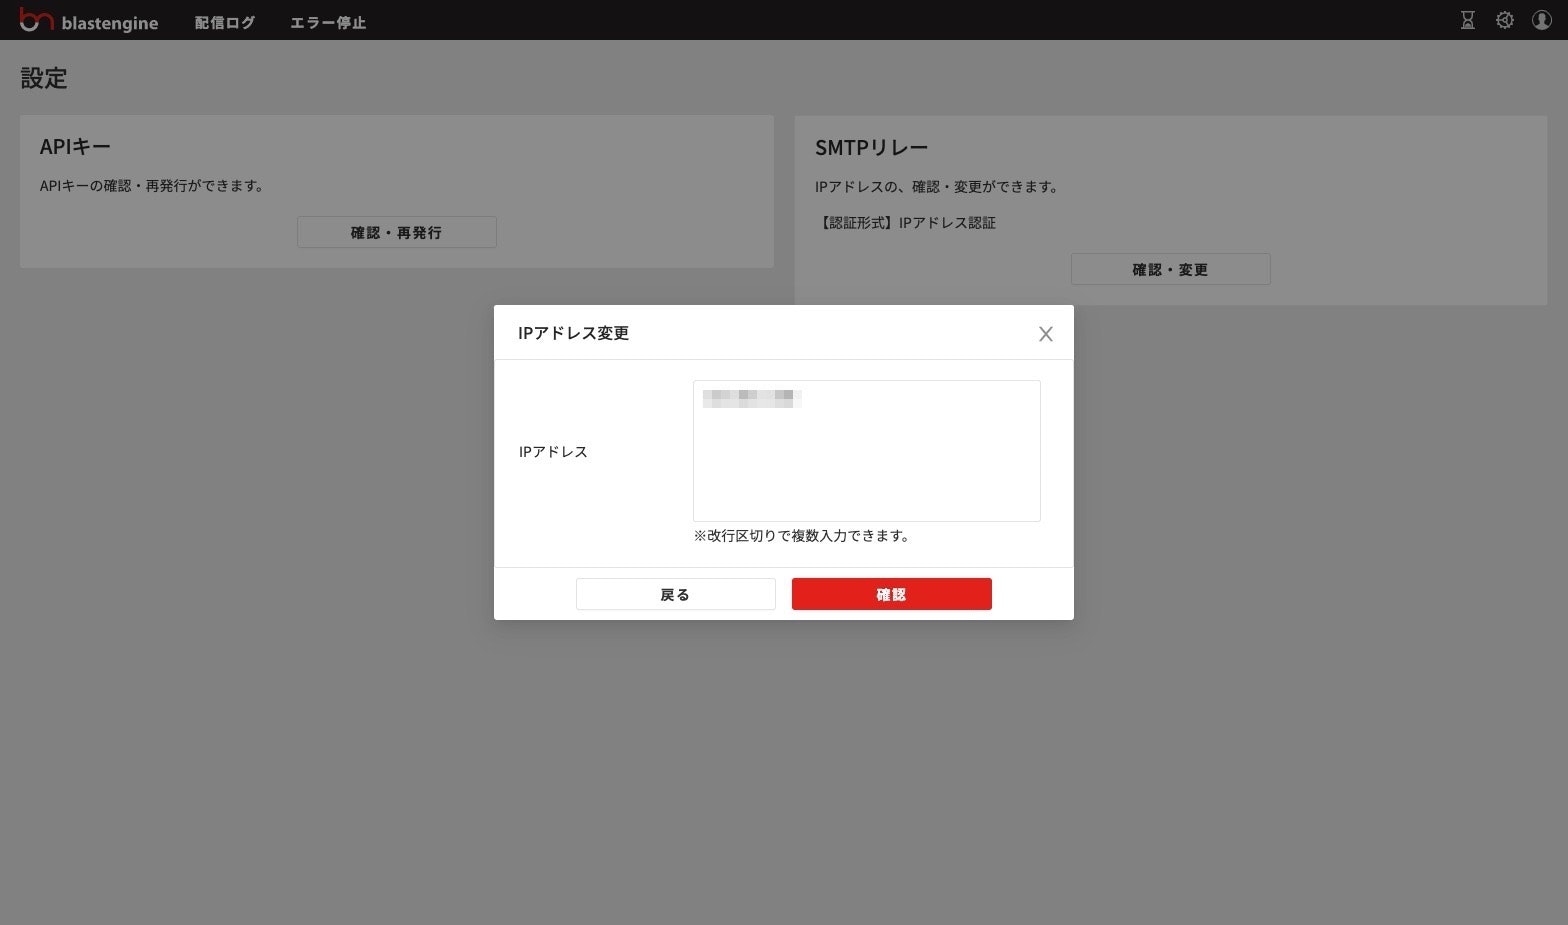
IPアドレスの登録
SMTPリレーを利用する場合、まず接続元サーバのIPアドレスを管理画面で登録する必要があります。
IPアドレスの設定ダイアログで、接続元サーバのIPアドレスを入力してください。
ライブラリを読み込む
API経由での実行時と同じように、必要なライブラリを読み込みます。
const nodemailer = require('nodemailer');
ネットワーク処理は非同期なので、あらかじめasyncで囲っておきます。ここからは関数内での処理を記述していきます。
(async () => {
	// この中に処理を記述
})();
初期化する
nodemailerを初期化して、配信用オブジェクトを作成します。
const transporter = nodemailer.createTransport({
	host: 'smtp.engn.jp',
	port: 587,
	secure: false
});
blastengineのSMTPサーバアドレスは smtp.engn.jp 固定になります。ポート番号は25/587/2525より選択できます。
配信する
実際の配信情報はJSONデータで与えます。Fromや宛先はそれぞれ書き換えてください。
const info = await transporter.sendMail({
	from: '"管理者より" <info@example.jp>',
	to: 'test@example.com, test2@example.com',
	subject: 'SMTPリレーによるテストメール',
	text: 'こちらはテストメールです',
	html: '<b>テストメールです</b>',
});
console.log(info);
infoの内容は次のようになります。API経由とは異なり配信IDは取得できませんので注意してください。
{
  accepted: [ "test@example.com", "test2@example.com" ],
  rejected: [],
  envelopeTime: 111,
  messageTime: 166,
  messageSize: 761,
  response: "250 2.6.0 Message received",
  envelope: {
    from: "info@example.jp",
    to: [ "test@example.com", "test2@example.com" ]
  },
  messageId: "<9999999-b99-00ca-93f1-99999999@example.jp>"
}
全体のコード
今回のサンプルコードは次のようになります。実装時の参考にしてください。
const nodemailer = require('nodemailer');

(async () => {
		const transporter = nodemailer.createTransport({
		host: 'smtp.engn.jp',
		port: 587,
		secure: false
	});
	const info = await transporter.sendMail({
		from: '"管理者より" <info@example.jp>',
		to: 'test@example.com, test2@example.com',
		subject: 'SMTPリレーによるテストメール',
		text: 'こちらはテストメールです',
		html: '<b>テストメールです</b>',
	});
	console.log(info);
})();
まとめ
クラウドサービスではSMTPポートが塞がれている場合があるので、そうした時にはAPI経由を利用してください。SMTPリレーを使えば、より信頼性高く、安定した配信が実現できるでしょう。
APIとSMTPリレー、それぞれの要件に合わせて最適な方を選択してください。