NCMBでは多様なプラットフォームに対してSDKを提供しています。公式ではiOS(Swift/Objective-C)、Android(Java/Kotlin)、JavaScript(Web/Node.js/Cordova/Monaca)、Unityがあります。さらにコミュニティSDKとしてRubyやPython、PHPなどのサーバーサイド言語、React NativeやFlutter向けのSDKも開発されています。
今回はそんなコミュニティSDKの一つ、Flutter SDKを使ってSign in with Apple認証を実装します。ソーシャル認証であればパスワードやメールアドレスの管理を行わずに済み、手軽に利用できます。
Appleの開発者用サイトでSign in with Appleを有効化
手順が多いので詳細はSign in with Appleを利用する際に必要な情報について - ニフクラ mobile backend(mBaaS)お役立ちブログを参照して欲しいのですが、最終的に必要な情報は下記の4つになります。
- アプリのバンドルID(App ID)
- AppleチームID
- AppleキーID
- 秘密鍵(p8ファイル)
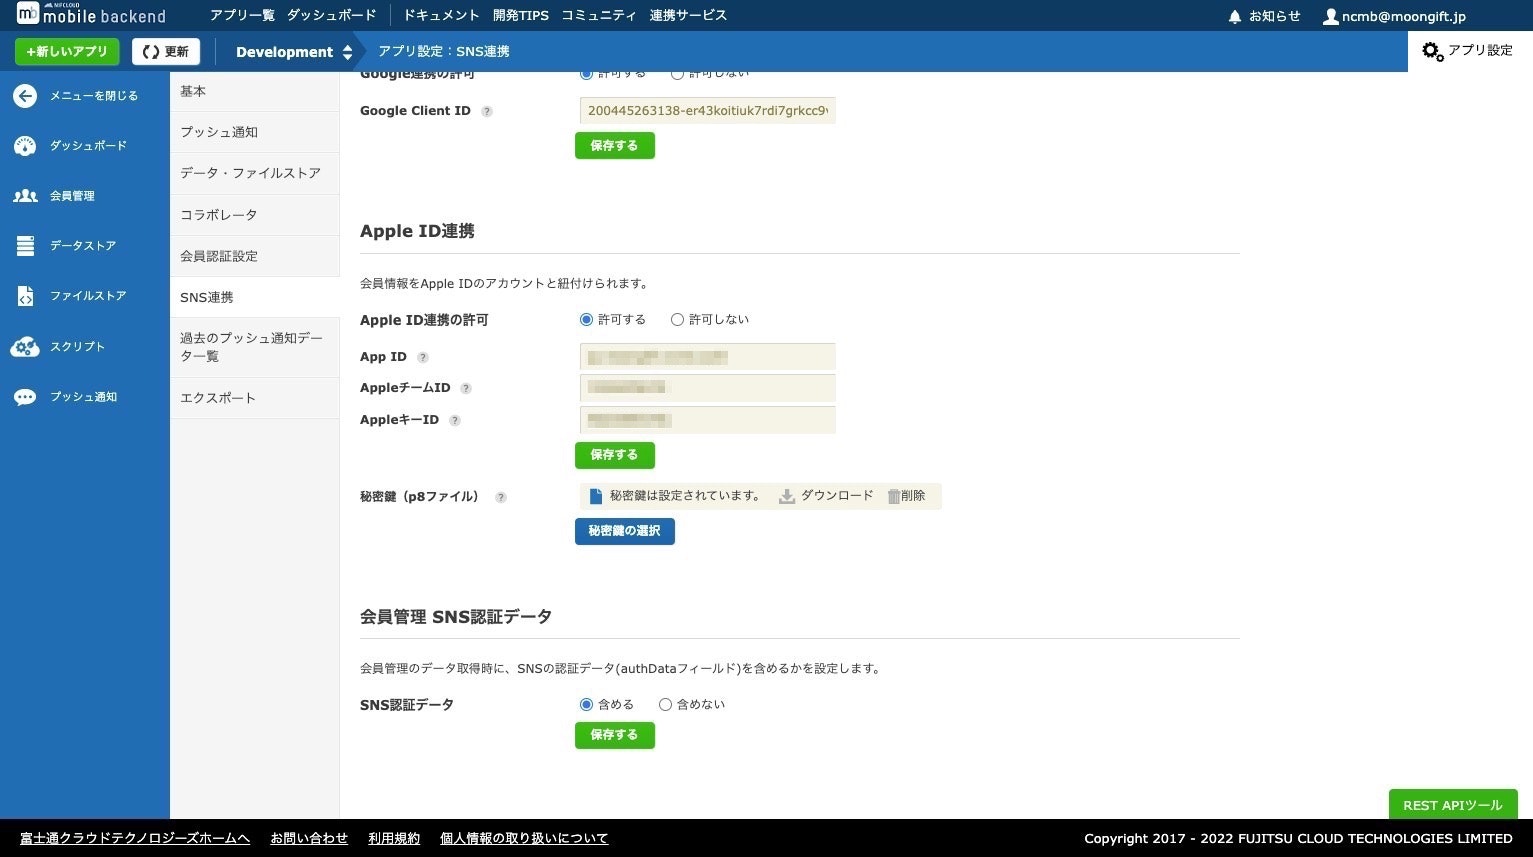
NCMBの設定
NCMBのSNS連携にて、先ほど取得した4つの情報を設定します。Apple ID連携も許可して保存してください。
Flutterの実装
ここからはFlutterでアプリを生成後の実装です。
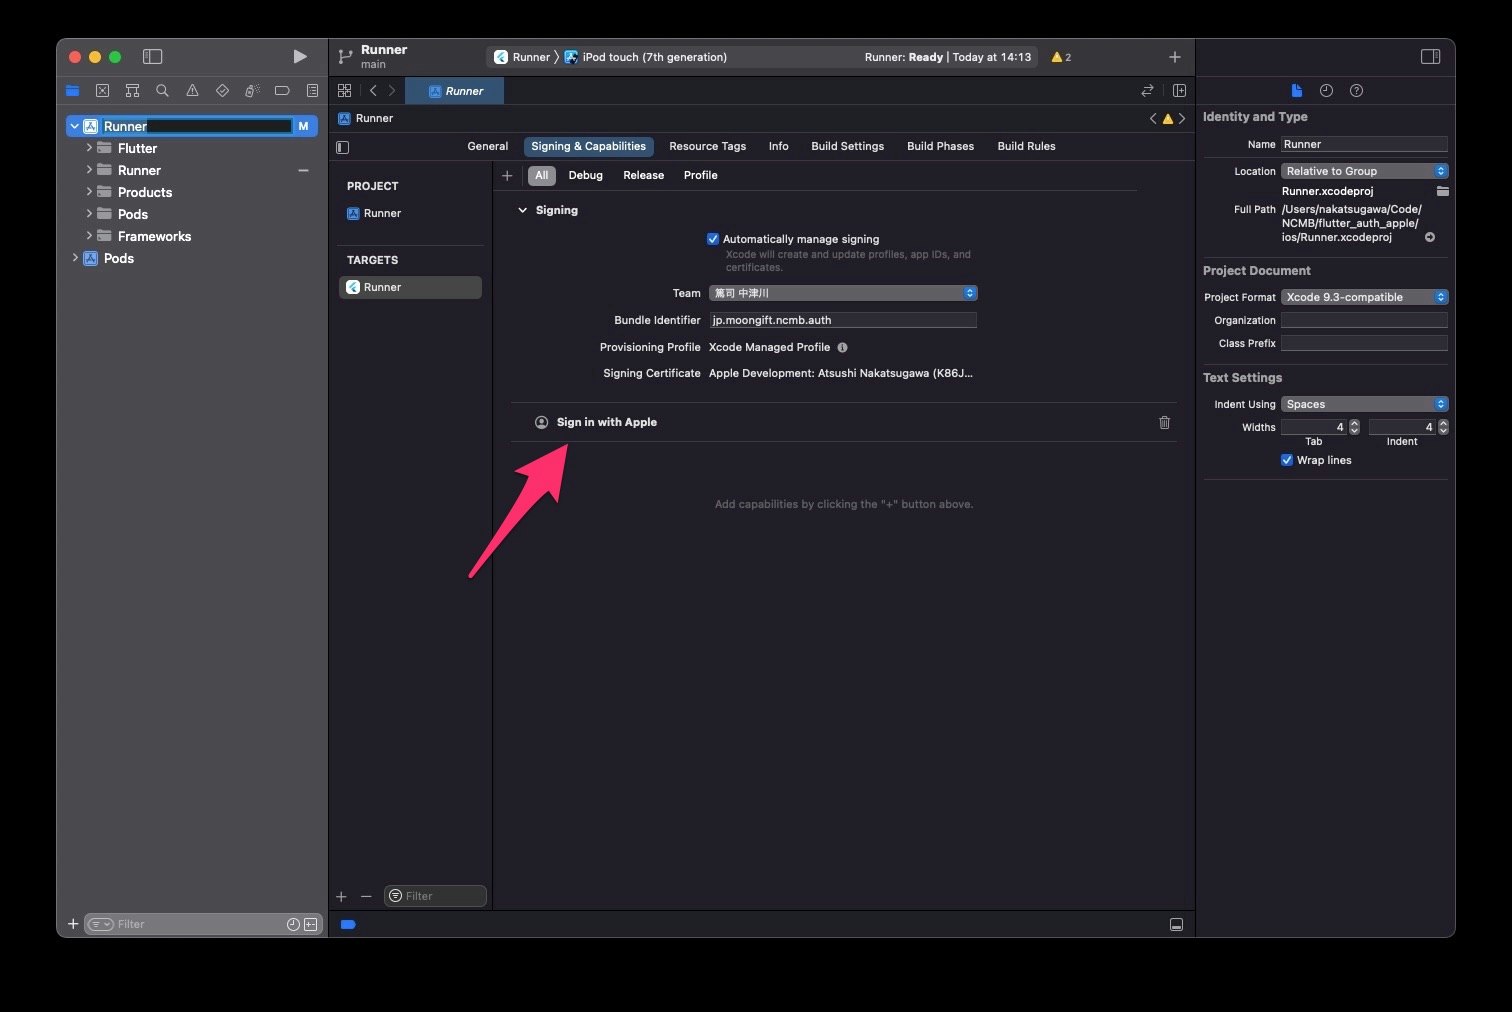
Xcodeの設定
CapabilitiesでSign in with Appleを追加
Signing & Capabilitiesで、Sign in with Appleを追加してください。
実装について
ライブラリ、SDKのインストール
利用するライブラリ、SDKをインストールします。 package_info_plus はバンドルIDを取得するものなので、固定文字列で指定する場合には不要です。
flutter pub add the_apple_sign_in
flutter pub add package_info_plus
flutter pub add ncmb
ライブラリのインポート
インストールしたライブラリ、SDKをインポートします。
import 'package:the_apple_sign_in/the_apple_sign_in.dart';
import 'package:ncmb/ncmb.dart';
import 'package:package_info_plus/package_info_plus.dart';
NCMBの初期化
ニフクラ mobile backendにて取得したアプリケーションキー、クライアントキーを使って初期化します。
void main() {
  // NCMBの初期化
  NCMB('YOUR_APPLICATION_KEY', 'YOUR_CLIENT_KEY');
  runApp(const MyApp());
}
ステートクラスの変数
ステートクラスではログイン状態を管理するための NCMBUser オブジェクトを定義します。初期値は null です。
class _MyHomePageState extends State<MyHomePage> {
  NCMBUser? _user;
ステートクラスの初期化
ステートクラスの初期化 initState では認証状態をチェックします。ログインしている場合には await NCMBUser.currentUser() でNCMBUserオブジェクトが取得できます。認証していない場合には null が返ってきます。
@override
void initState() {
	super.initState();
	Future(() async {
		// 現在ログインしているユーザー情報(未ログインの場合はnull)を取得
		final user = await NCMBUser.currentUser();
		setState(() {
			_user = user;
		});
	});
}
画面構築
build は次のように記述しています。 _user の状態によって表示を変えています。そして認証していない場合には login 、認証している場合には logout を処理するボタンを配置しています。
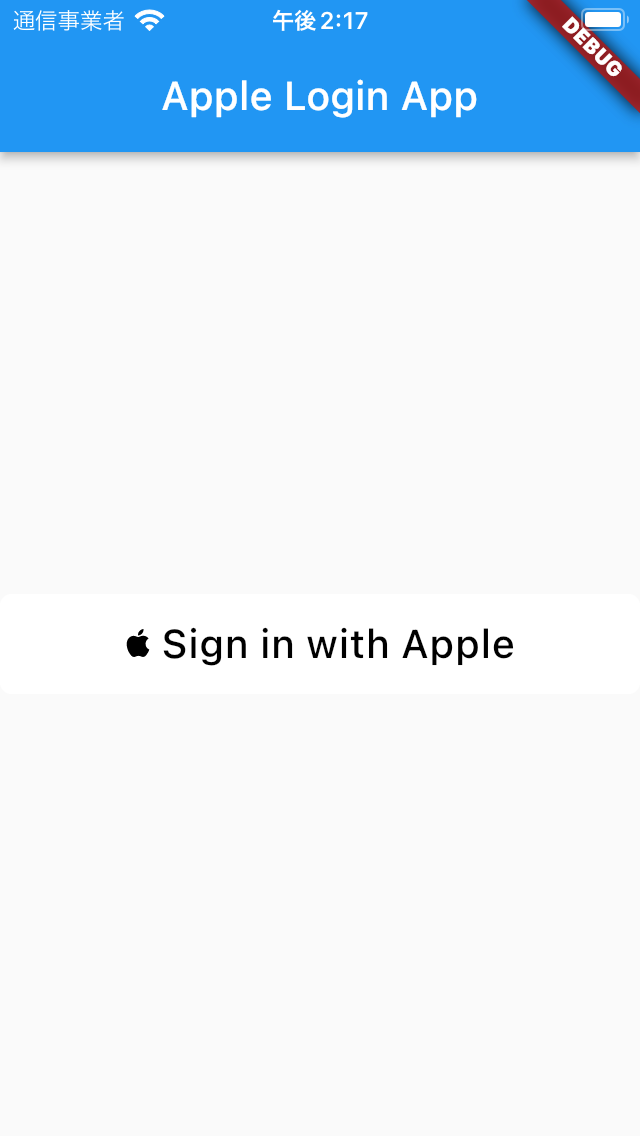
未ログイン時用に AppleSignInButton というコンポーネントが用意されています。Appleの推奨するボタンデザインで表示してくれるコンポーネントです。
@override
Widget build(BuildContext context) {
	return MaterialApp(
		home: Scaffold(
			appBar: AppBar(
				title: const Text('Apple Login App'),
			),
			body: Center(
					child: _user == null
							// 未ログインの場合
							? AppleSignInButton(
									onPressed: login,
								)
							// ログインしている場合
							: TextButton(
									child: Text(
											'Logged in by ${_user!.getString('displayName', defaultValue: 'No name')}'),
									onPressed: logout,
								)),
		),
	);
}
login処理
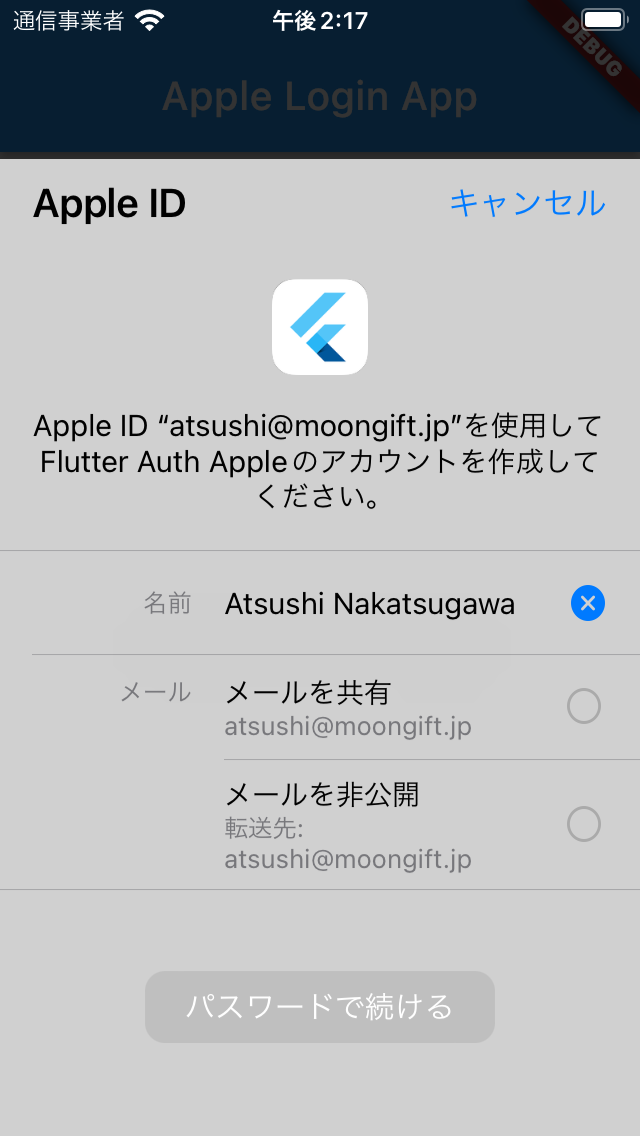
ログイン処理です。ちょっと長いですが、 Sign in with Appleは TheAppleSignIn.performRequests だけで完了します。スコープは必要な情報に対して行いますが、今回はメールアドレスとフルネームだけです。レスポンスのステータスが AuthorizationStatus.authorized であればログイン成功です。ログイン成功していない場合(ユーザーキャンセルやエラー)は何もせず終了します。
ログイン成功した場合には、アクセストークンを取得します。さらにIDとバンドルIDを組み合わせて、リクエストデータを作成します。後は NCMBUser.loginWith でSign in with Appleが完了します。
Sign in with AppleではuserNameなどは自動生成された文字列でユーザーが作成されます。そこで displayName フィールドにAppleから取得した表示名を適用してデータ更新しています。
// ログイン処理
login() async {
	final result = await TheAppleSignIn.performRequests([
		const AppleIdRequest(requestedScopes: [Scope.email, Scope.fullName])
	]);
	if (result.status != AuthorizationStatus.authorized) return;
	final credential = result.credential!;
	final accessToken = utf8.decode(credential.authorizationCode!.toList());
	final info = await PackageInfo.fromPlatform();
	// ログインを実行して結果を受け取る
	final data = {
		'id': credential.user,
		'access_token': accessToken,
		'client_id': info.packageName
	};
	// ログイン実行
	var user = await NCMBUser.loginWith('apple', data);
	// 表示名を追加
	var name = credential.fullName!;
	final displayName = "${name.givenName} ${name.familyName}";
	user.set('displayName', displayName);
	// 更新実行
	await user.save();
	// 表示に反映
	setState(() {
		_user = user;
	});
}
ログアウト処理
logout メソッドは以下のようになります。 NCMBUser.logout() で認証データを削除し、 _user を null にすることで画面表示を更新しています。
// ログアウト処理
logout() async {
	await NCMBUser.logout();
	setState(() {
		_user = null;
	});
}
まとめ
何らかのソーシャル認証を実装する場合、Sign in with Appleの実装も必須とされています。この方法を使ってFlutter SDKでもSign in with Appleを実装してください。
NCMBを使うことでユーザーごとにデータアクセス権限を制御したり、ソーシャルログイン機能が手軽に実装できます。ぜひお試しください。