Hexabase JavaScript/TypeScript SDKをVue3アプリの中で利用します。あまり複雑にならないように解説しますので、ぜひ試してみてください。
コード
コードはhexabase/example-vue3-todo: Hexabase demo todo app by vue3 projectにアップしてあります。実装時の参考にしてください。
必要なもの
- Hexabaseのアカウント
Vue3アプリの作成
今回は <script setup> を使い、かつTypeScriptで開発を行っています。また、UIライブラリとしてElement Plusを利用しています。
main.tsについて
main.tsではElement Plusの読み込みを追加しています。
// 追加
import ElementPlus from "element-plus";
import "element-plus/dist/index.css";

import App from "./App.vue";
import router from "./router";

import "./assets/main.css";

const app = createApp(App);

app.use(createPinia());
app.use(router);
// 追加
app.use(ElementPlus);
router/index.tsについて
ルーティングはHomeViewを読み込む処理のみとしています。
import { createRouter, createWebHistory } from "vue-router";
import HomeView from "@/views/HomeView.vue";

const router = createRouter({
  history: createWebHistory(import.meta.env.BASE_URL),
  routes: [
    {
      path: "/",
      name: "home",
      component: HomeView,
    },
  ],
});

export default router;
HomeViewについて
HomeViewでは認証状態に応じて、 <TaskList /> と <Login /> の表示を出し分けています。ストアについては後述します。
<script setup lang="ts">
import TaskList from "../components/TaskList.vue";
import Login from "../components/LoginForm.vue";
import { useHexabaseStore } from "../stores/hexabase";
const store = useHexabaseStore();
</script>

<template>
  <main>
    <div v-if="store.login">
      <TaskList />
    </div>
    <div v-else>
      <Login />
    </div>
  </main>
</template>
components/LoginForm.vueについて
LoginForm.vueはログイン処理を行うコンポーネントです。まずフォーム周りの情報を設定します。
import { reactive, ref } from "vue";
import { useHexabaseStore } from "../stores/hexabase";
import type { FormInstance } from "element-plus";
// Store
const store = useHexabaseStore();

// Form instance and inputs
const formRef = ref<FormInstance>();
const authForm = reactive<{
  email: string;
  password: string;
}>({
  email: import.meta.env.VITE_USER_EMAIL,
  password: import.meta.env.VITE_USER_PASSWORD,
});

// For error message
const message = ref("");
フォームの送信(ログイン処理)
フォームを送信したら、まずバリデーションを行います。その結果がtrueであれば、ログイン処理を行います。
// Submit form
const submit = (formEl: FormInstance | undefined) => {
  // If there is no form element, return
  if (!formEl) return;
  // Validate form
  formEl.validate(async (valid) => {
    // If validation fails, return
    if (!valid) return;
    // If validation succeeds, call login function
    await _login(authForm.email, authForm.password);
  });
};
_login 関数はHexabaseの認証処理を行い、問題なければ取得できるトークンをストアにセットします。
// Login function
const _login = async (email: string, password: string) => {
  // Login to Hexabase
  const { token, error } = await store.client.auth.login({
    email,
    password,
  });
  // If login fails, show error message
  if (error) {
    _setMessage("Login failed.");
    return;
  }
  // If login succeeds, set token to store
  store.setToken(token!);
};
ストアについて
ストアでは、まずHexabaseのインスタンスを初期化します。
import { ref } from "vue";
import { defineStore } from "pinia";
import { HexabaseClient } from "@hexabase/hexabase-js";
import type { UserInfo } from "@hexabase/hexabase-js/dist/lib/types/user";
const HB_URL = import.meta.env.VITE_API_ENDPOINT;
const STORAGE_KEY = import.meta.env.VITE_STORAGE_KEY;

export const useHexabaseStore = defineStore("hexabase", () => {
  // Get token from local storage, or empty string if not found
  const value = localStorage.getItem(STORAGE_KEY) || "";
  // Initialize Hexabase client
  const client = new HexabaseClient(HB_URL, value);
	// 省略
});
ログインしているユーザー
トークンがある場合には、ログインしているユーザー情報を取得し currentUser としてセットしています。
// Set user info, if there is a token
const currentUser = ref<UserInfo | null>(null);
if (value !== "") {
	client.user.get(value).then((res) => {
		currentUser.value = res.userInfo!;
	});
}
ログインフラグ
loginは、ログインしていればtrue、していなければfalseになります。本来であればトークンの検証も行うべきですが、今回はトークン文字列の有無で判定しています。
// Login status detection (true if token is not empty)
const login = ref(client.tokenHxb !== "");
トークンをセットする処理
setToken 関数はトークン文字列をセットします。HexabaseClientにセットするのと一緒に、リロード後にも使えるようにlocalStorageへ保存しています。
// Set token function
const setToken = async (token: string) => {
	// Set token to client
	client.setToken(token!);
	currentUser.value = (await client.user.get(token!)).userInfo!;
	// Set login status to true
	login.value = true;
	// Save token to local storage
	localStorage.setItem(STORAGE_KEY, token);
};
トークンを削除する処理
ログアウト時など、逆にトークンを削除する場合に備えて removeToken 関数も用意しています。
// Remove token function
const removeToken = () => {
	// Remove token from local storage
	localStorage.removeItem(STORAGE_KEY);
	// Set login status to false
	login.value = false;
};
ストア全体の内容
以下がストアファイル全体の内容です。
import { ref } from "vue";
import { defineStore } from "pinia";
import { HexabaseClient } from "@hexabase/hexabase-js";
import type { UserInfo } from "@hexabase/hexabase-js/dist/lib/types/user";
const HB_URL = import.meta.env.VITE_API_ENDPOINT;
const STORAGE_KEY = import.meta.env.VITE_STORAGE_KEY;
// const PROJECT_ID = import.meta.env.VITE_PROJECT_ID;
// const DATASTORE_ID = import.meta.env.VITE_DATASTORE_ID;

export const useHexabaseStore = defineStore("hexabase", () => {
  // Get token from local storage, or empty string if not found
  const value = localStorage.getItem(STORAGE_KEY) || "";
  // Initialize Hexabase client
  const client = new HexabaseClient(HB_URL, value);
  // Login status detection (true if token is not empty)
  const login = ref(client.tokenHxb !== "");
  // Set user info, if there is a token
  const currentUser = ref<UserInfo | null>(null);
  if (value !== "") {
    client.user.get(value).then((res) => {
      currentUser.value = res.userInfo!;
    });
  }
  // Set token function
  const setToken = async (token: string) => {
    // Set token to client
    client.setToken(token!);
    currentUser.value = (await client.user.get(token!)).userInfo!;
    // Set login status to true
    login.value = true;
    // Save token to local storage
    localStorage.setItem(STORAGE_KEY, token);
  };
  // Remove token function
  const removeToken = () => {
    // Remove token from local storage
    localStorage.removeItem(STORAGE_KEY);
    // Set login status to false
    login.value = false;
  };

  // Expose client, login, and setToken
  return { client, login, setToken, removeToken, currentUser };
});
ログアウト
ログアウト処理は App.vue に実装しています。ログアウトの結果にかかわらず、localStorageからトークンは削除しています。
<script setup lang="ts">
import { RouterLink, RouterView } from "vue-router";
import { useHexabaseStore } from "./stores/hexabase";
const store = useHexabaseStore();
const logout = () => {
  try {
    store.client.auth.logout("");
  } catch (e) {
    // ignore error
  }
  // Remove token from local storage
  store.removeToken();
};
</script>

<template>
  <main>
    <el-container class="hexabase-todo">
      <el-header>
        <div class="title">Todo App</div>
        <div class="toolbar" v-if="store.login">
          <el-button @click="logout" type="primary"
            >({{ store.currentUser?.username }}) Logout</el-button
          >
        </div>
      </el-header>
      <el-main>
        <RouterView />
      </el-main>
    </el-container>
  </main>
</template>
試す
ここまでの内容をCodeSandboxで試せます。
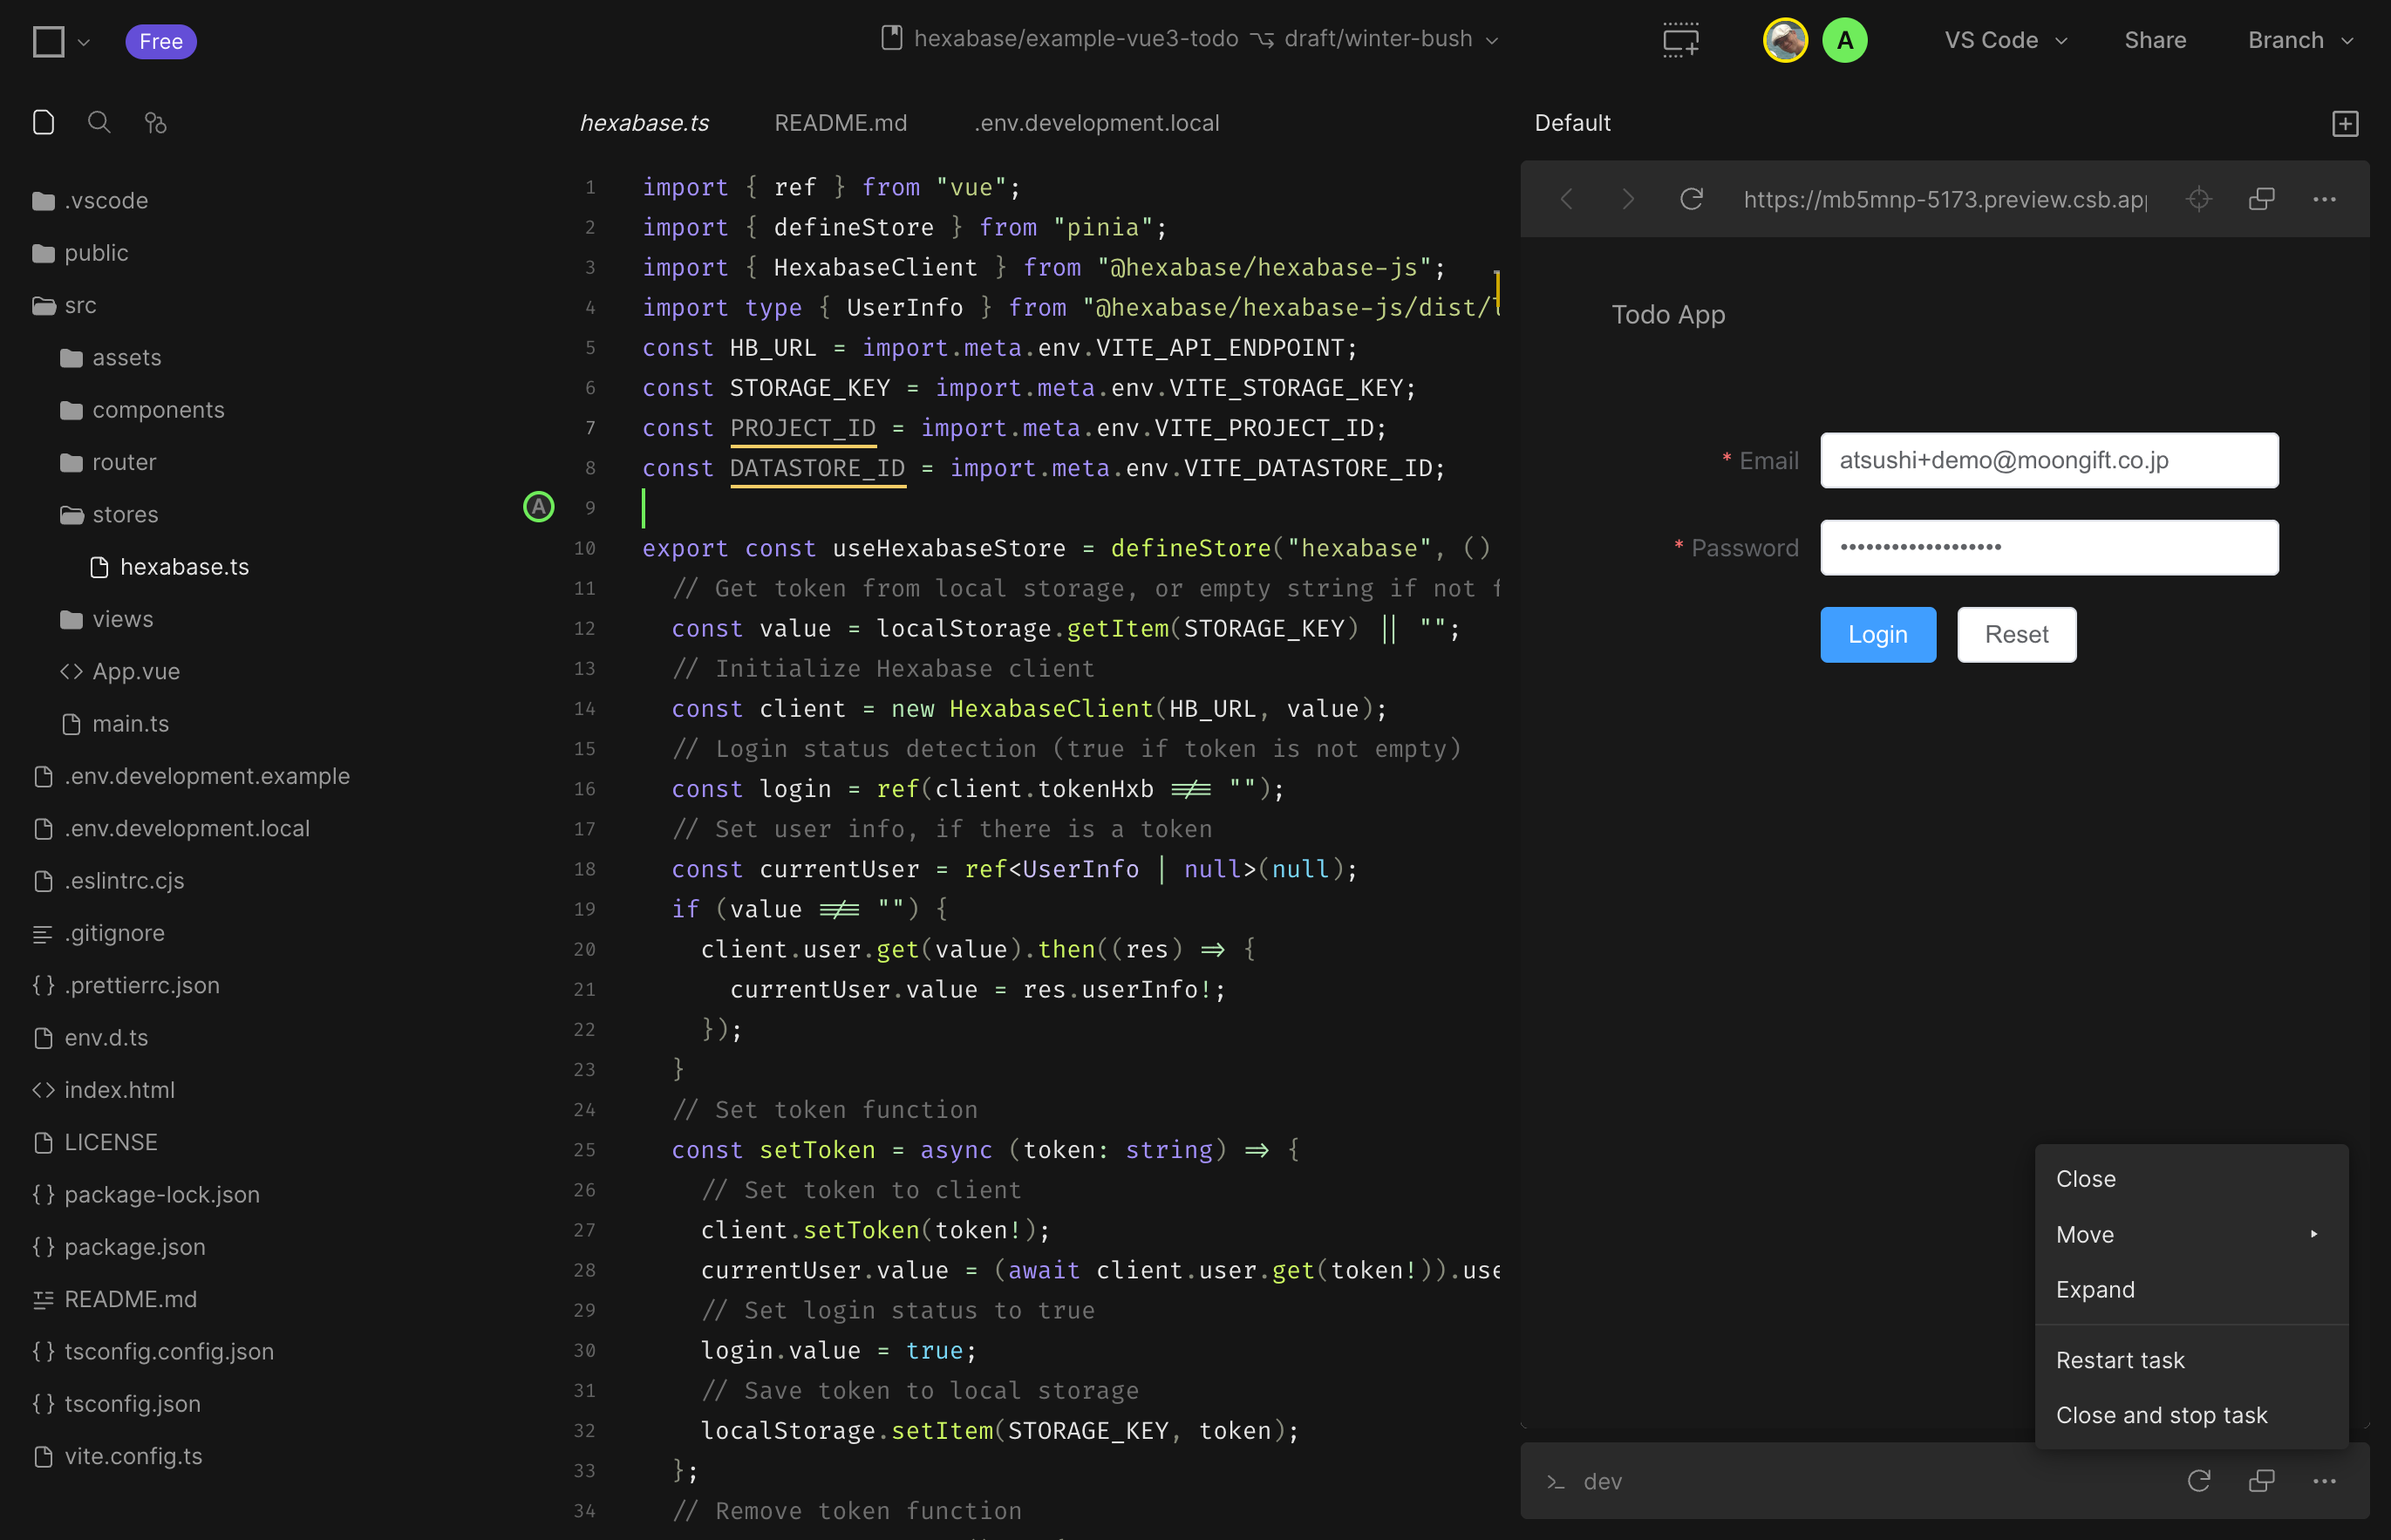
example-vue3-todo/draft/winter-bush - CodeSandbox
まとめ
なるべくHexabaseの処理をVueファイル側で行うようにし、各画面でデータの取得や更新を行えるようにしています。認証処理についても各画面で行えば、全体の見通しが良くなります。
次回以降、これをベースにして徐々に機能を追加していきます。