NCMBのFlutter SDKを使ってカレンダーアプリを作ります。予定を登録したり、カレンダーライブラリ(table_calendar)を使って予定を表示できるというアプリです。
コードについて
今回のコードはNCMBMania/flutter-calendar-handsonにアップロードしてあります。実装時の参考にしてください。
利用技術・ライブラリについて
今回は次のような組み合わせになっています。
- NCMB Flutter SDK
- table_calendar
- flutter_datetime_picker
- intl
仕様について
今回はNCMBのID/パスワード認証を利用しています。カレンダー表示についてはtable_calendarを利用し、アプリはFlutterで作成しています。
利用する機能について
カレンダーアプリで利用するNCMBの機能は次の通りです。
- 会員管理
- ID/パスワード認証
- データストア
- 予定の登録・更新・削除
- 予定の検索
画面について
今回は以下の5つのステートフルウィジェットがあります。
MyHomePage
メインのウィジェットです。認証状態によってログイン画面とカレンダー画面を出し分けています。
// 記述済み
@override
Widget build(BuildContext context) {
	return _isLogin ? const CalendarPage() : LoginPage(onLogin: _onLogin);
}
LoginPage

認証を行うウィジェットです。認証状態をMyHomePageにフィードバックしています。
CalendarPage

カレンダー表示用のウィジェットです。日付を選択した際に、該当日のイベントを一覧表示します。一覧表示時の1行あたりのデータはScheduleListPageで表示します。
ScheduleListPage
スケジュール一覧表示用のウィジェットです。NCMBObjectを受け取り、画面表示に利用します。
ScheduleFormPage

予定の入力・更新を行うウィジェットです。
SDKのインストール
flutterコマンドを使って各種ライブラリ・SDKをインストールします。
$ flutter pub get

# 以下を追加済み
# flutter pub add ncmb
# flutter pub add table_calendar
# flutter pub add flutter_datetime_picker
# flutter pub add intl
NCMBのAPIキーを取得
mBaaSでサーバー開発不要! | ニフクラ mobile backendにてアプリを作成し、アプリケーションキーとクライアントキーを作成します。
main.dartの修正
main.dartファイルを開いて、NCMB SDKの読み込みと初期化を行います。
// 記述してください
// NCMB SDKをインポート
import 'package:ncmb/ncmb.dart';
import 'package:intl/intl.dart';
import 'package:intl/date_symbol_data_local.dart';
import 'package:table_calendar/table_calendar.dart';
import 'package:flutter_datetime_picker/flutter_datetime_picker.dart';

void main() async {
  // NCMBの初期化
  NCMB('YOUR_APPLICATION_KEY',
      'YOUR_CLIENT_KEY');
  // 言語設定
  await initializeDateFormatting("ja");
  runApp(const MyApp());
}
これでNCMBの初期化が完了します。
認証画面について
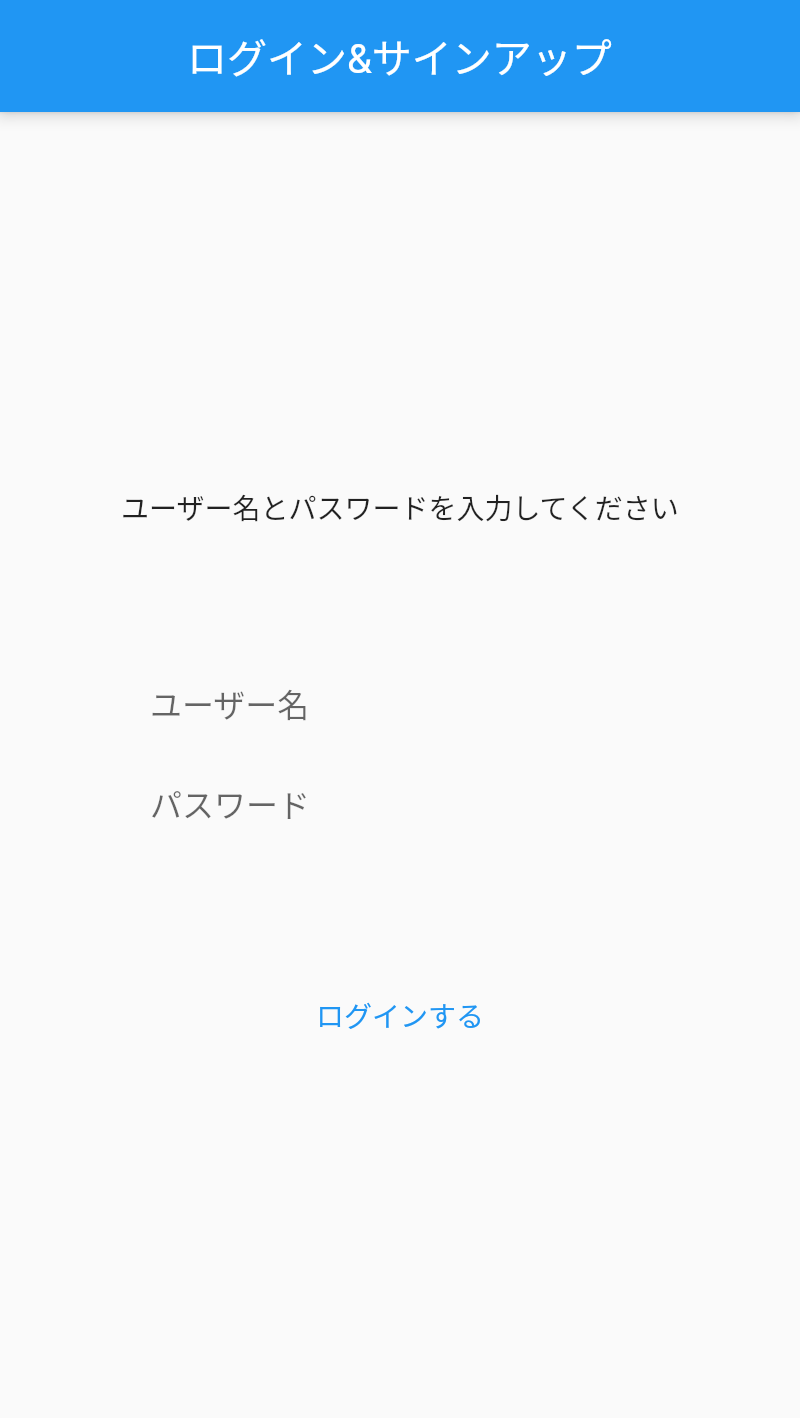
認証画面は以下のようになります。ID/パスワード入力欄があって、ボタンを押すと _login 関数が実行されます。
// 記述済み
@override
Widget build(BuildContext context) {
	return Scaffold(
			appBar: AppBar(title: const Text('ログイン&サインアップ')),
			body: Column(mainAxisAlignment: MainAxisAlignment.center, children: [
				Row(mainAxisAlignment: MainAxisAlignment.center, children: const [
					SizedBox(
							height: 100,
							child: Text(
								'ユーザー名とパスワードを入力してください',
							)),
				]),
				SizedBox(
						height: 50,
						width: 250,
						child: TextField(
							decoration: const InputDecoration.collapsed(hintText: 'ユーザー名'),
							onChanged: (value) {
								setState(() {
									_userName = value;
								});
							},
						)),
				SizedBox(
					width: 250,
					height: 100,
					child: TextField(
						obscureText: true,
						decoration: const InputDecoration.collapsed(hintText: 'パスワード'),
						onChanged: (value) {
							setState(() {
								_password = value;
							});
						},
					),
				),
				TextButton(onPressed: _login, child: const Text("ログインする"))
			]));
}
ログイン処理について
ログイン処理は、以下のような手順で行われます。
- ユーザーの新規登録
- ログイン処理
すでにユーザー登録を行っていた場合、ユーザーの新規登録はエラーになります。今回はユーザー登録とログインを兼ねているので、エラーが出たとしてもそのまま続けてログイン処理を行っていきます。
ユーザーの新規登録
取得した入力値を使ってユーザー登録処理を行います。エラーが出たとしても無視します。
try {
	// ユーザー登録処理
	await NCMBUser.signUpByAccount(_userName, _password);
} catch (e) {}
ログイン処理
そのまま続けてログイン処理を実行します。ログインがうまくいったら、 widget.onLogin(); を呼び出して結果を通知します。
// 成功しても失敗してもそのままログイン処理
await NCMBUser.login(_userName, _password);
widget.onLogin();
ここまででNCMBを使った認証処理の完成です。 _login 関数の内容は以下のようになります。
void _login() async {
  try {
    // ユーザー登録処理
    await NCMBUser.signUpByAccount(_userName, _password);
  } catch (e) {}
  // 成功しても失敗してもそのままログイン処理
  await NCMBUser.login(_userName, _password);
  widget.onLogin();
}
認証後のユーザー情報について
認証後にユーザー情報を取得する際には、下記のように記述します。以下は main.dart の記述です。
// 記述してください
void _onLogin() async {
  // ログイン状態の確認
  var login = await NCMBUser.currentUser();
  setState(() {
    _isLogin = login != null;
  });
}
認証していない場合には null が返ってきます。これを使って認証状態の判別が可能です。
カレンダーの予定一覧について
画面について

カレンダー画面は以下のようになります。カレンダーの表示自体はtable_calendarを利用しています。
// 記述済み
@override
Widget build(BuildContext context) {
  return Scaffold(
      appBar: AppBar(
        title: const Text("カレンダー"),
        actions: [
          IconButton(
            icon: const Icon(Icons.add),
            onPressed: _addSchedule,
          )
        ],
      ),
      body: Column(children: [
        TableCalendar(
          locale: 'ja',
          eventLoader: _eventLoader,
          firstDay: DateTime.utc(2010, 10, 16, 10),
          lastDay: DateTime.utc(2030, 3, 14),
          focusedDay: _focusDate,
          onDaySelected: _onDaySelected,
        ),
        _selectedSchedules.isEmpty
            ? const Text("該当日にイベントはありません")
            : Expanded(
                child: ListView.builder(
                    itemCount: _selectedSchedules.length,
                    itemBuilder: (BuildContext context, int index) {
                      final schedule = _selectedSchedules[index];
                      return ScheduleListPage(
                        schedule: schedule,
                        onEdited: (NCMBObject schedule) {
                          setState(() {
                            _selectedSchedules[index] = schedule;
                          });
                        },
                      );
                    }))
      ]));
}
予定の取得とカレンダーへの設定
画面を表示したタイミングでNCMBのデータストアから予定一覧を取得しています。デフォルトでは表示月の月初から月末までの予定をすべて取得し、それを _schedules へセットします。
// 記述してください
void _getSchedule() async {
  // 予定検索用クエリー
  var query = NCMBQuery("Schedule");
  // 基準日時
  var date = DateTime.now();
  // 月初
  DateTime startDate = DateTime(date.year, date.month, 1);
  // 翌月初
  DateTime endDate =
      DateTime(date.year, date.month + 1, 1).add(const Duration(days: -1));
  // 検索条件を設定
  query
    ..greaterThanOrEqualTo("startDate", startDate)
    ..lessThan("endDate", endDate);
  // 検索実行
  var schedules =
      (await query.fetchAll()).map((s) => s as NCMBObject).toList();
  // 表示に反映
  setState(() {
    _schedules = schedules;
  });
}
カレンダー表示
カレンダーはtable_calendarで行っていますが、予定があるところにはドットが表示されます。以下はその該当部分のコードです。最大4つまでの表示で、それ以上を返しても結果は変わりませんでした。
日付を選択後、予定を一覧表示する
// 記述してください
// イベントの有無を返す関数
List<NCMBObject> _eventLoader(DateTime day) {
	// 日付毎に呼ばれる
	return _filterdSchedule(day, updateSelected: false);
}

// ある日付に存在するスケジュールを一覧で返す関数
List<NCMBObject> _filteredSchedule(DateTime day, {updateSelected = true}) {
  // 日付を文字列にするフォーマッタ
  final dateFormat = DateFormat('yyyy/MM/dd');
  final targetDate = dateFormat.format(day);
  // フィルタリング
  final schedules = _schedules
      .where((schedule) =>
          dateFormat.format(schedule.getDateTime("startDate",
              defaultValue: DateTime.now())) ==
          targetDate)
      .toList();
  // 一覧表示の場合はtrue
  if (updateSelected) {
    setState(() {
      _selectedSchedules = schedules;
    });
  }
  return schedules;
}
カレンダーの日付を選択したら、該当日の予定を一覧表示します。まず該当日だけのデータにフィルタリングします。
// 記述済み
// 日付を選択した際の処理
void _onDaySelected(selectedDay, focusedDay) {
	// フォーカス日を更新
	setState(() {
		_focusDate = selectedDay;
	});
	// フィルタリングを実行
	_filterdSchedule(selectedDay);
}
そして、この結果をListで表示します。
// 記述済み
Expanded(
	child: ListView.builder(
			itemCount: _selectedSchedules.length,
			itemBuilder: (BuildContext context, int index) {
				final schedule = _selectedSchedules[index];
				return ScheduleListPage(
					schedule: schedule,
					onEdited: (NCMBObject schedule) {
						setState(() {
							_selectedSchedules[index] = schedule;
						});
					},
				);
			}))
ScheduleListPage は受け取ったスケジュールを描画します。そして、該当予定をタップすると、編集画面(ScheduleFormPage)に遷移します。
// 記述してください
@override
Widget build(BuildContext context) {
  return GestureDetector(
      onTap: _onTap,
      child: Container(
          decoration: const BoxDecoration(
            border: Border(
              bottom: BorderSide(color: Colors.black38),
            ),
          ),
          child: Column(
            children: [
              Row(
                children: [
                  Text(widget.schedule
                      .getString("title", defaultValue: "タイトルなし")),
                  const Spacer(),
                  Text(_viewTime())
                ],
              ),
              Container(
                  alignment: Alignment.centerLeft,
                  child: Text(
                      widget.schedule.getString("body", defaultValue: "")))
            ],
          )));
}
タップして予定を編集した際には、返却値として編集後のスケジュールが返ってきます。そのデータをスケジュール一覧と差し替えるため、 onEdited を呼び出します。
// 記述済み
void _onTap() async {
	var schedule = await Navigator.push(
			context,
			MaterialPageRoute(
					settings: const RouteSettings(name: '/new'),
					builder: (BuildContext context) =>
							ScheduleFormPage(schedule: widget.schedule)));
	if (schedule != null) {
		widget.onEdited(schedule);
	}
}
予定を追加・編集する
予定を追加したり、編集する際には ScheduleFormPage へ移動します。新規作成の場合は CalendarPage のナビゲーションーメニューにあるプラスアイコンより遷移します。
// 記述済み
appBar: AppBar(
	title: const Text("カレンダー"),
	actions: [
		IconButton(
			icon: const Icon(Icons.add),
			onPressed: _addSchedule,
		)
	],
),
_addScheduleは画面遷移し、結果として作成したスケジュールが返ってきます。そのスケジュールをリストに追加します。
// 記述済み
void _addSchedule() async {
  var schedule = await Navigator.push(
      context,
      MaterialPageRoute(
          settings: const RouteSettings(name: '/new'),
          builder: (BuildContext context) =>
              ScheduleFormPage(schedule: NCMBObject("Schedule"))));
  if (schedule != null) {
    _schedules.add(schedule as NCMBObject);
  }
}
フォーム画面について
フォーム画面(ScheduleFormPage)は予定のタイトルと詳細、予定開始日時、終了日時などを入力して登録を行います。
// 記述済み
@override
Widget build(BuildContext context) {
	return Scaffold(
			appBar: AppBar(
				title: const Text("予定の追加・編集"),
			),
			body: Row(mainAxisAlignment: MainAxisAlignment.center, children: [
				Column(mainAxisAlignment: MainAxisAlignment.center, children: [
					SizedBox(
							height: 50,
							width: 250,
							child: TextFormField(
								initialValue: _title,
								decoration: const InputDecoration.collapsed(hintText: 'タイトル'),
								onChanged: (value) {
									setState(() {
										_title = value;
									});
								},
							)),
					SizedBox(
							height: 50,
							width: 250,
							child: TextFormField(
								initialValue: _body,
								decoration: const InputDecoration.collapsed(hintText: '予定詳細'),
								maxLines: 10,
								onChanged: (value) {
									setState(() {
										_body = value;
									});
								},
							)),
					SizedBox(
							height: 50,
							width: 250,
							child: TextFormField(
									controller: _startDateController,
									decoration:
											const InputDecoration.collapsed(hintText: '開始日時'),
									maxLines: 10,
									enableInteractiveSelection: false,
									onTap: () => _showDateTimePicker("startDate"))),
					SizedBox(
							height: 50,
							width: 250,
							child: TextFormField(
									controller: _endDateController,
									decoration:
											const InputDecoration.collapsed(hintText: '終了日時'),
									maxLines: 10,
									enableInteractiveSelection: false,
									onTap: () => _showDateTimePicker("endDate"))),
					TextButton(onPressed: _save, child: const Text("保存する")),
				])
			]));
}
データの準備
NCMBObjectは編集にそのまま使えないので、画面表示を行ったタイミングで入力用変数に適用します。
// 記述してください
@override
void initState() {
	setState(() {
		_title = widget.schedule.getString("title", defaultValue: "");
		_body = widget.schedule.getString("body", defaultValue: "");
		if (widget.schedule.objectId == null) {
			_endDate = _startDate.add(const Duration(hours: 1));
		} else {
			_startDate = widget.schedule
					.getDateTime("startDate", defaultValue: DateTime.now());
			_endDate = widget.schedule
					.getDateTime("endDate", defaultValue: DateTime.now());
		}
		_startDateController.text = _dateFormat.format(_startDate);
		_endDateController.text = _dateFormat.format(_endDate);
	});
	super.initState();
}
データの保存
データを新規作成・更新する流れは同じです。入力値の適用と、ACL(アクセス権限)を設定します。ACLはデータをセキュアに扱うために必要です。今回はデータを作成した本人のみ、読み書きできるようにします。
// 記述してください
void _save() async {
	// 入力データを適用
	widget.schedule
		..set("title", _title)
		..set("body", _body)
		..set("startDate", _startDate)
		..set("endDate", _endDate);
	// ACL(アクセス権限)を設定
	var acl = NCMBAcl();
	var user = await NCMBUser.currentUser();
	acl
		..setUserReadAccess(user!, true)
		..setUserWriteAccess(user, true);
	widget.schedule.set("acl", acl);
	// 保存実行
	await widget.schedule.save();
	// 前の画面に戻る
	Navigator.pop(context, widget.schedule);
}
まとめ
ここまでの流れでカレンダーアプリの完成です。NCMBのデータストアでは日付や文字列(他にも数字や配列、真偽値、オブジェクト、位置情報)など様々な形式でデータの保存・取得ができます。ぜひ柔軟に皆さんのアプリに活かしてください。
今回のハンズオンではNCMBの以下の機能を利用しました。
- 会員管理
- ID/パスワード認証
- データストア
- 予定の登録・更新・削除
- 予定の検索
NCMBでは他にもファイルストア、プッシュ通知、スクリプトなどの機能があります。あなたのアプリ開発にぜひ役立ててください。