NCMBのSwift SDKを使ってデモアプリを作ってみます。今回は業務系でよくあるニーズの日報アプリを作ってみます。実際にはデータストアやファイルストアを使うので、応用すれば汎用的に使えるはずです。
今回は画面の説明とSDKの導入までを進めます。
コードについて
今回のコードはNCMBMania/swift_daily_reportにアップロードしてあります。実装時の参考にしてください。
利用技術について
今回は次のような組み合わせになっています。
- Swift 5.5
- Xcode 13.0
- NCMB Swift SDK 1.2.1
仕様について
今回はシンプルにするために認証は利用していません。入力された日報データをデータストアに保存しますが、写真が追加されている場合にはファイルストアにも保存します。また、レポート画面では日付を使ってデータストアの検索を行い、一致するデータの一覧表示を行います。
利用する機能について
チャットアプリで利用するNCMBの機能は次の通りです。
- データストア
- 日報データの保存
- 日報データの検索
- ファイルストア
- 写真のアップロード
- 写真のダウンロード
画面について
今回はSwiftUIを以下の5つのViewに分けています。
ContentView.swift
タブを2つ表示します。1つ目は入力画面(InputView)、2つ目はレポート画面(ReportView)です。
struct ContentView: View {
    var body: some View {
        TabView {
            InputView()
                .tabItem {
                    VStack {
                        Image(systemName: "pencil")
                        Text("入力")
                    }
            }.tag(1)
            ReportView()
                .tabItem {
                    VStack {
                        Image(systemName: "list.bullet")
                        Text("レポート")
                    }
            }.tag(2)
        }
    }
}
InputView.swift
日報の入力画面です。本文と日付が基本で、任意で写真を追加できます。ナビゲーションバーに保存ボタンを追加して、押すとデータをデータストアに保存します。
struct InputView: View {
    @State private var date = Date()     // 日報の日付
    @State private var text = ""         // 日報の本文
    @State private var showAlert = false // アラート表示用のフラグ
    @State private var message = ""      // アラートのメッセージ

    @State var imageData : Data = .init(capacity:0) // // 選択された写真データ
    @State var source:UIImagePickerController.SourceType = .photoLibrary // カメラまたはフォトライブラリ
    @State var isImagePicker = false // 写真ピッカーを表示する際のフラグ

    var body: some View {
        NavigationView {
            VStack(spacing: 10) {
                // 画像モーダルへの遷移用
                NavigationLink(
                    destination: Imagepicker(
                        show: $isImagePicker,
                        image: $imageData,
                        sourceType: source
                    ),
                    isActive:$isImagePicker,
                    label: {
                        Text("")
                    })
                // 日報の日付を選択
                DatePicker("日付",
                    selection: $date,
                    displayedComponents: .date
                )
                // 日報の内容を記述するTextEditor
                TextEditor(text: $text)
                    .frame(width: UIScreen.main.bounds.width * 0.8, height: 200)
                    .overlay(
                        RoundedRectangle(cornerRadius: 5)
                            .stroke(Color.blue, lineWidth: 2)
                    )
                // 画像が指定されれば、サムネイル表示
                if imageData.count != 0 {
                    Image(uiImage: UIImage(data: self.imageData)!)
                        .resizable()
                        .aspectRatio(contentMode: .fit)
                        .frame(height: 100)
                        .cornerRadius(15)
                        .padding()
                }
                // 写真選択モーダルの表示
                Button(action: {
                    self.source = .photoLibrary
                    self.isImagePicker.toggle()
                }, label: {
                    Text("写真を選択")
                })
            }
            .navigationBarTitle("日報入力", displayMode: .inline)
            .toolbar {
                // 右上のアイコンで保存しょりを実行
                ToolbarItem(placement: .navigationBarTrailing){
                    Button(action: {
                        save()
                    }) {
                        Image(systemName: "icloud.and.arrow.up")
                    }
                }
            }
        }
        .alert(isPresented: $showAlert) {
            Alert(title: Text(self.message))
        }
    }

    // 日報を保存する処理
    func save() {
    }
}
ReportView.swift
日報データを検索、結果を一覧表示する画面です。最初は日付だけを表示します。
struct ReportView: View {
    @State private var date = Date()            // 検索対象の日付
    @State private var ary: [NCMBObject]? = nil // 検索結果のNCMBObject(配列)

    var body: some View {
        NavigationView {
            VStack(spacing: 10) {
                if self.ary == nil {
                    VStack {
                        // 検索対象を指定(日報の日付)
                        DatePicker("日付を選択してください",
                            selection: $date,
                            displayedComponents: .date
                        )
                        // 検索実行
                        Button(action: {
                            search()
                        }, label: {
                            Text("日報を表示")
                        })
                    }
                } else {
                    // 検索結果をリスト表示
                    List {
                        ForEach(self.ary!, id: \.objectId) { report in
                            ReportRowView(report: report)
                        }
                    }
                }
            }
            .navigationBarTitle("日報検索", displayMode: .inline)
            .toolbar {
                // 日付データを消す(最初の状態に戻す)アイコン
                ToolbarItem(placement: .navigationBarTrailing){
                    Button(action: {
                        self.ary = nil
                    }) {
                        Image(systemName: "xmark.circle")
                    }
                    .disabled(self.ary == nil)
                }
            }

        }
    }

    // 指定された日付の日報データを検索する関数
    func search() {
    }
}
ReportRowView.swift
検索結果の一覧表示用、1行データ用のViewです。表示されたタイミングで画像データをファイルストアからダウンロード、表示します。
struct ReportRowView: View {
    @State var report:NCMBObject // 表示する日報データ
    @State var imageData : Data = .init(capacity:0) // 日報に紐付いた画像データ

    var body: some View {
        // タップした際にの遷移
        NavigationLink(destination: DetailView(obj: report, imageData: $imageData)) {
            HStack(alignment: .top) {
                Spacer().frame(width: 10)
                VStack(alignment: .leading) {
                    HStack(alignment: .top) {
                        VStack {
                            // 画像データの有無を確認
                            if self.imageData.count == 0 {
                                // ないときにはダミー画像
                                Image(systemName: "photo")
                                    .resizable()
                                    .frame(width: 60, height: 60)
                                    .scaledToFit()
                            } else {
                                // 画像があれば表示
                                Image(uiImage: UIImage(data: self.imageData)!)
                                    .resizable()
                                    .aspectRatio(contentMode: .fit)
                                    .frame(width: 60, height: 60)
                            }
                        }
                        VStack(alignment: .leading) {
                            // 日報本文の一部を表示
                            Text((self.report["text"] ?? "") as! String)
                                .lineLimit(3)
                        }
                    }
                }
                Spacer()
            }
            .onAppear {
                // 画面が表示されたタイミングで画像を読み込む
                loadImage()
            }
        }
    }

    // 画像を読み込む関数
    func loadImage() {
    }
}
DetailView.swift
一覧でタップされた日報の詳細表示を行うViewです。一覧から渡されたデータストアオブジェクト、画像を表示します。
// 日報の詳細表示用View
struct DetailView: View {
    @State var obj: NCMBObject    // 日報用データストアのオブジェクト
    @Binding var imageData : Data // 日報に添付されていた画像データ

    var body: some View {
        VStack {
            // 画像データがあれば表示
            if self.imageData.count > 0 {
                Image(uiImage: UIImage(data: self.imageData)!)
                    .resizable()
                    .aspectRatio(contentMode: .fit)
                    .frame(width: 200, height: 200)
            }
            // 日報の本文
            Text((obj["text"] ?? "") as! String)
        }
        // タイトルに日付を表示
        .navigationBarTitle(dateTitle(), displayMode: .inline)
    }

    // タイトルに出す内容を作成する
    func dateTitle() -> String {
        // 日付フォーマットの作成
        let dateFormatter = DateFormatter()
        dateFormatter.locale = Locale(identifier: "ja_JP")
        dateFormatter.dateFormat = "M月d日の日報"
        // 日報データの日付を使ってタイトルを作成
        return dateFormatter.string(from: (obj["date"] ?? Date()) as! Date)
    }
}
Imagepicker
写真を撮影、またはフォトライブラリから写真を選択します。コードは【SwiftUI】カメラ機能の実装方法【撮影画像とライブラリー画像の利用】から拝借しています。
今回のプロジェクト
今回は言語がSwift、インタフェースがSwiftUI、ライフサイクルはSwiftUI Appとしています。
SDKのインストール
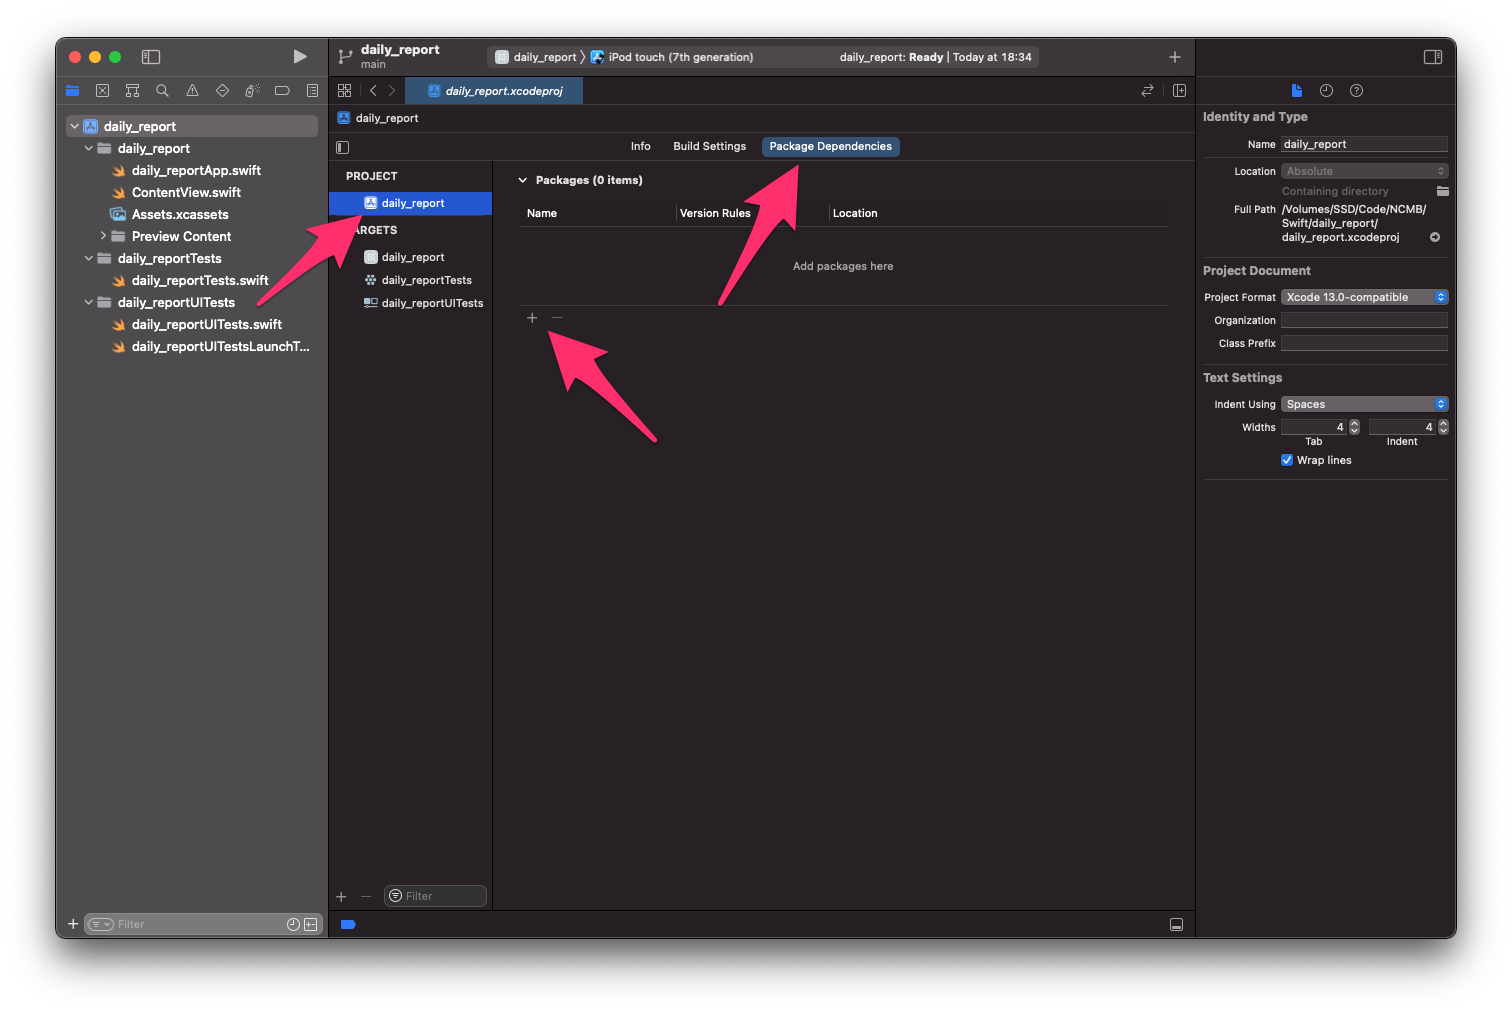
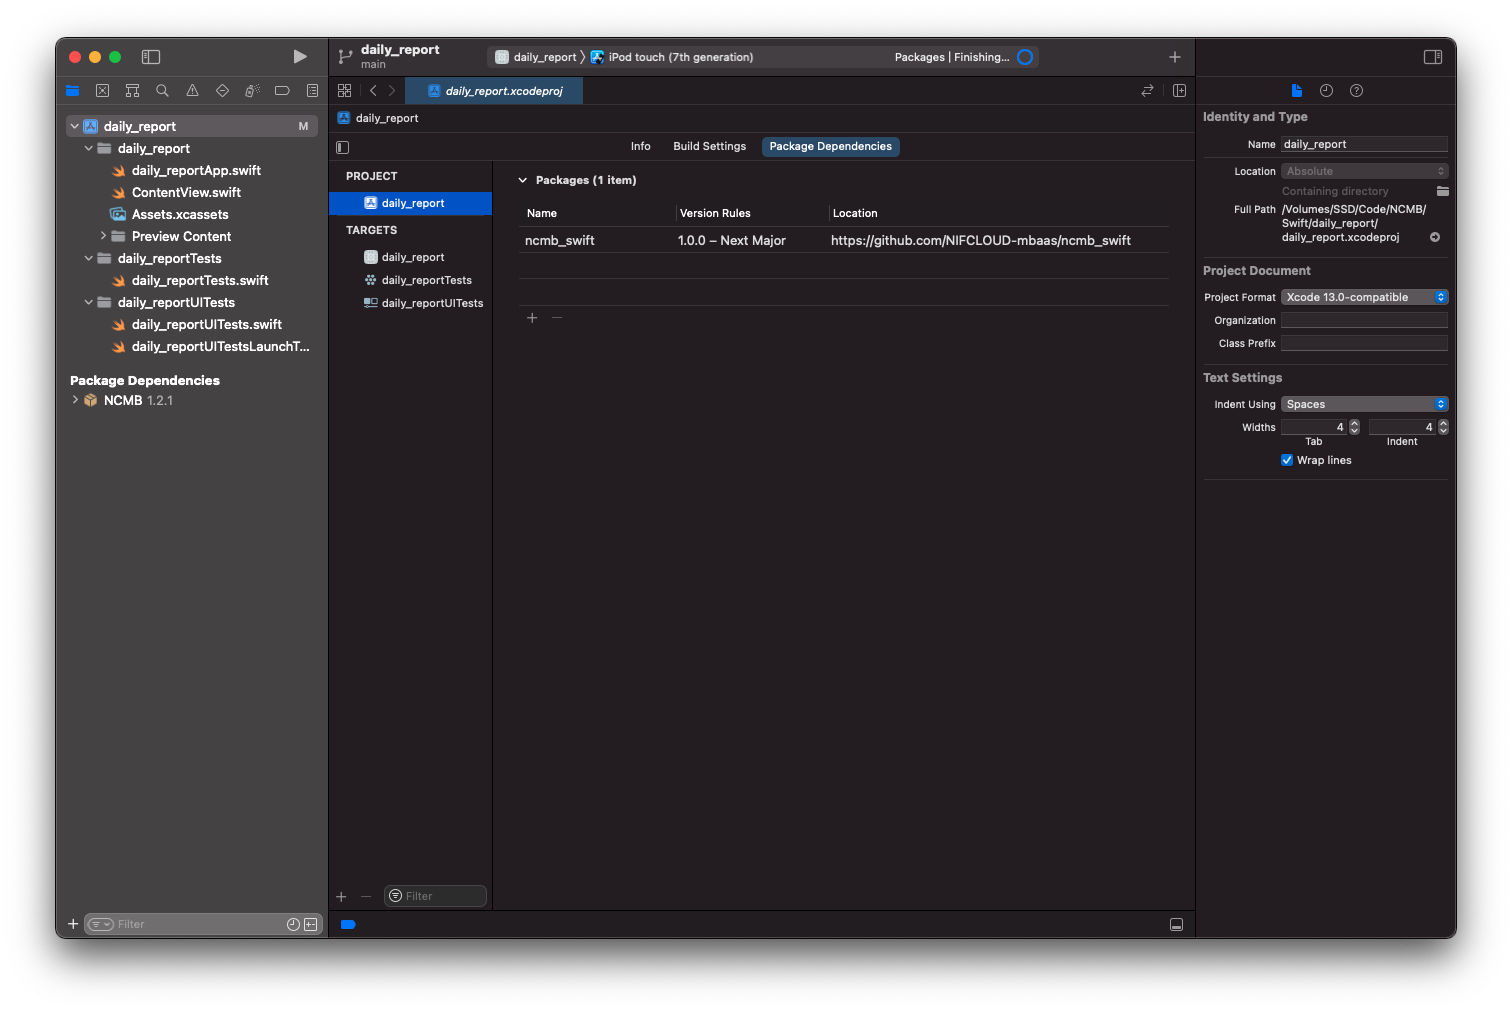
プロジェクトを開いて、Package Dependenciesの中にある + アイコンをクリックします。
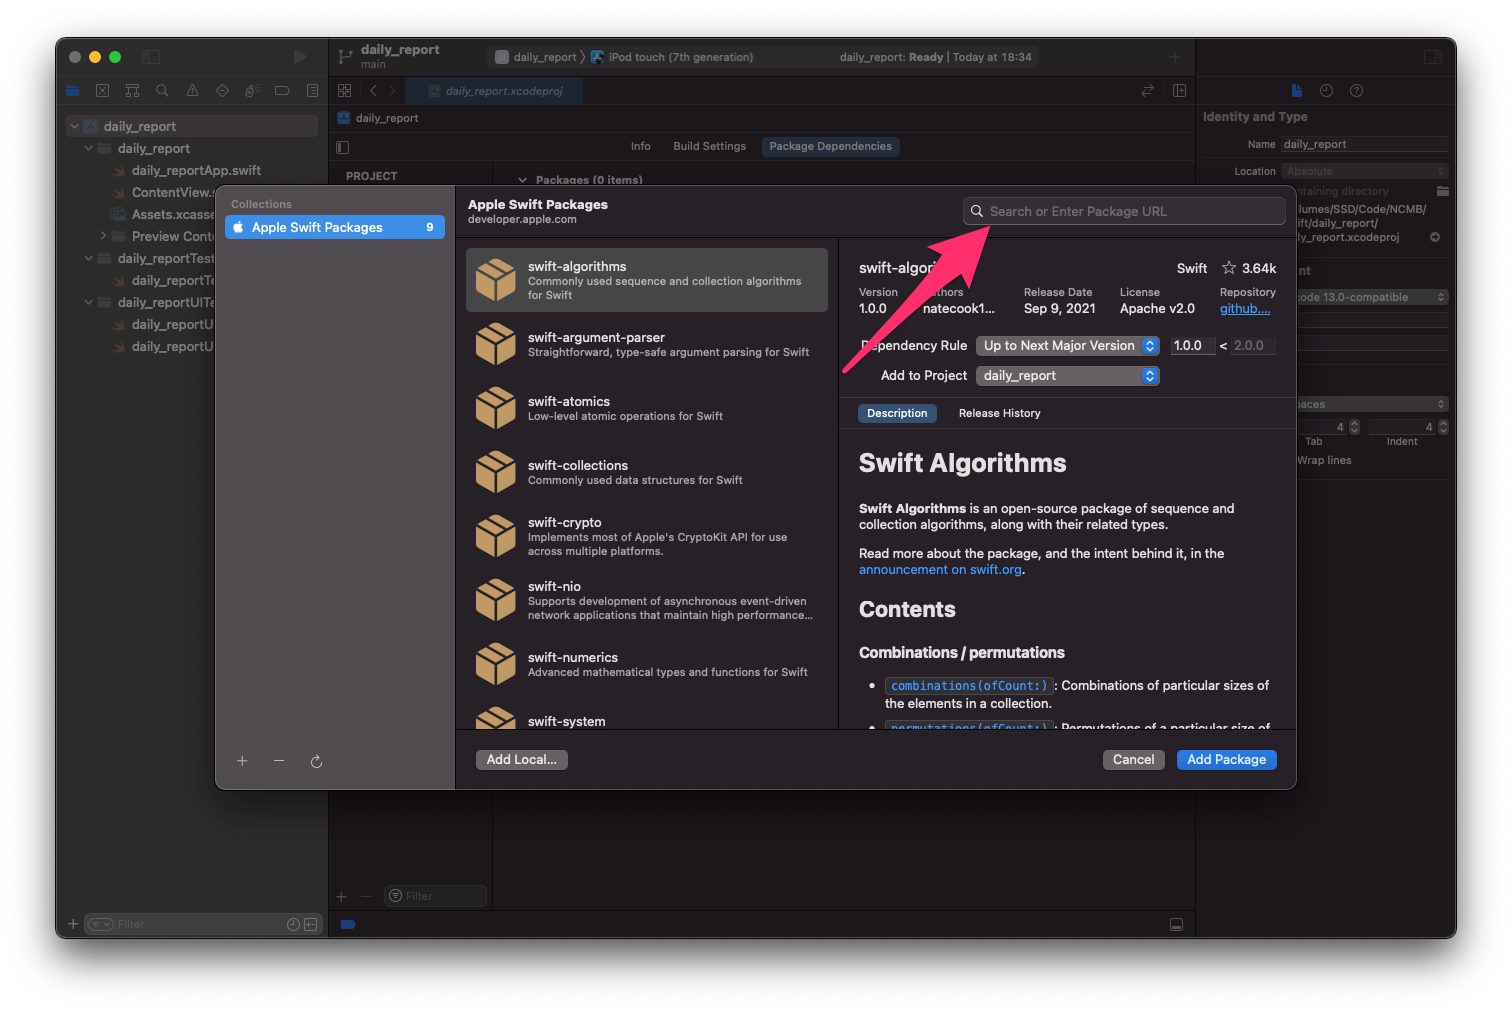
パッケージ名が色々と出てくるので、左上のURL入力欄にて下記のURLを入力します。
https://github.com/NIFCLOUD-mbaas/ncmb_swift
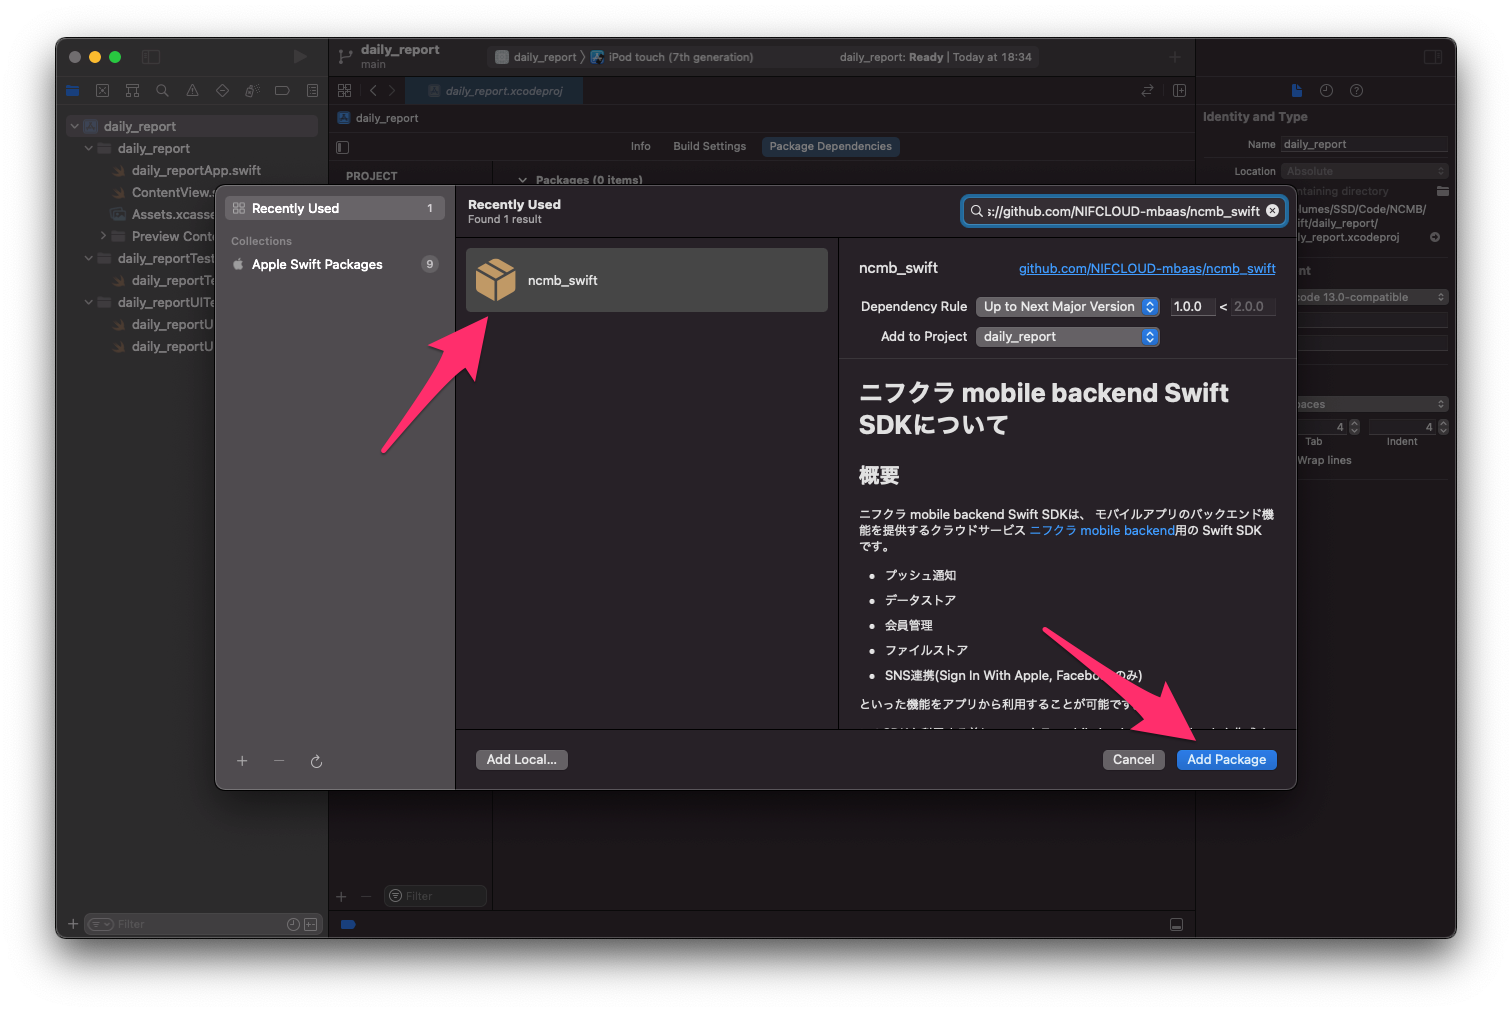
そうすると ncmb_swift が出てくるので、右下にある Add Package ボタンを押します。
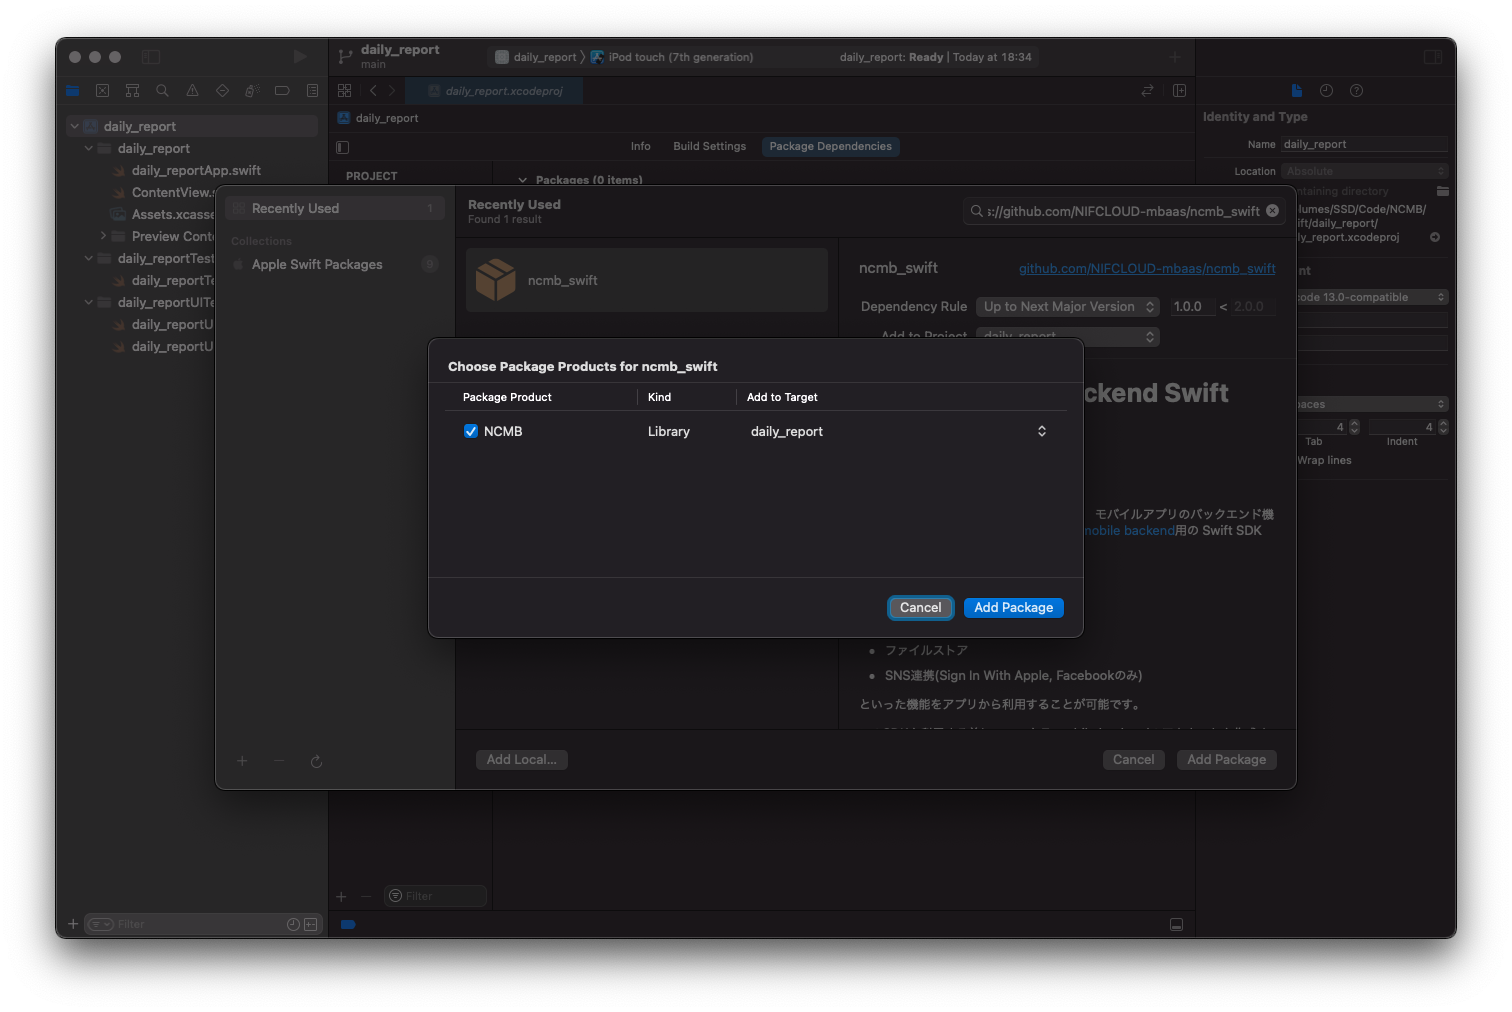
確認ダイアログはそのままで、Add Package ボタンを押します。
これでインストール完了です。
初期化
今回はSwiftUIを利用しています。ライフサイクルもSwiftUIです。
まずSDKをインポートします。
import SwiftUI
import NCMB
ContentViewをダミーのVStackでラップします。
VStack {
    ContentView()
}
そのVStackのonAppear内で、NCMBの初期化を行います。
var body: some Scene {
        WindowGroup {
            VStack {
                ContentView()
            }.onAppear() {
                // NCMBのアプリケーションキーとクライアントキーを設定
                let applicationKey = "YOUR_APPLICATION_KEY"
                let clientKey = "YOUR_CLIENT_KEY"
                // 初期化
                NCMB.initialize(applicationKey: applicationKey, clientKey: clientKey)
            }
        }
}
まとめ
今回は日報アプリの仕様と画面、NCMBの初期化までを解説しました。次は日報入力データの登録を解説します。


