はじめに
SwiftUIはこれまでのiOSアプリにおけるUI実装上の課題を解消する新技術として登場し、徐々にプロダクションでも利用されて来ていると思います。しかしまだ、UIKitでできていたことがすべて置き換えられる段階ではないというのも事実でしょう。一方で、UIKitの世界にもUICollectionViewのCompositionalLayoutやDiffableDataSourceといった便利で使いやすいAPIが登場しています。
このようなタイミングで既存のアプリに機能的にかなり独立した画面を新たに追加することになったので、ベースを UICollectionView + CompositionalLayout + DiffableDataSource (いわゆるModern Collection View)で実装し、セルの中身にSwiftUIを利用するという、UIKitとSwiftUIのいいところどりを目指した実装を試してみることにしました。
具体的な実装方法、はまったポイントとワークアラウンドなどをまとめて紹介します。
画面の仕様
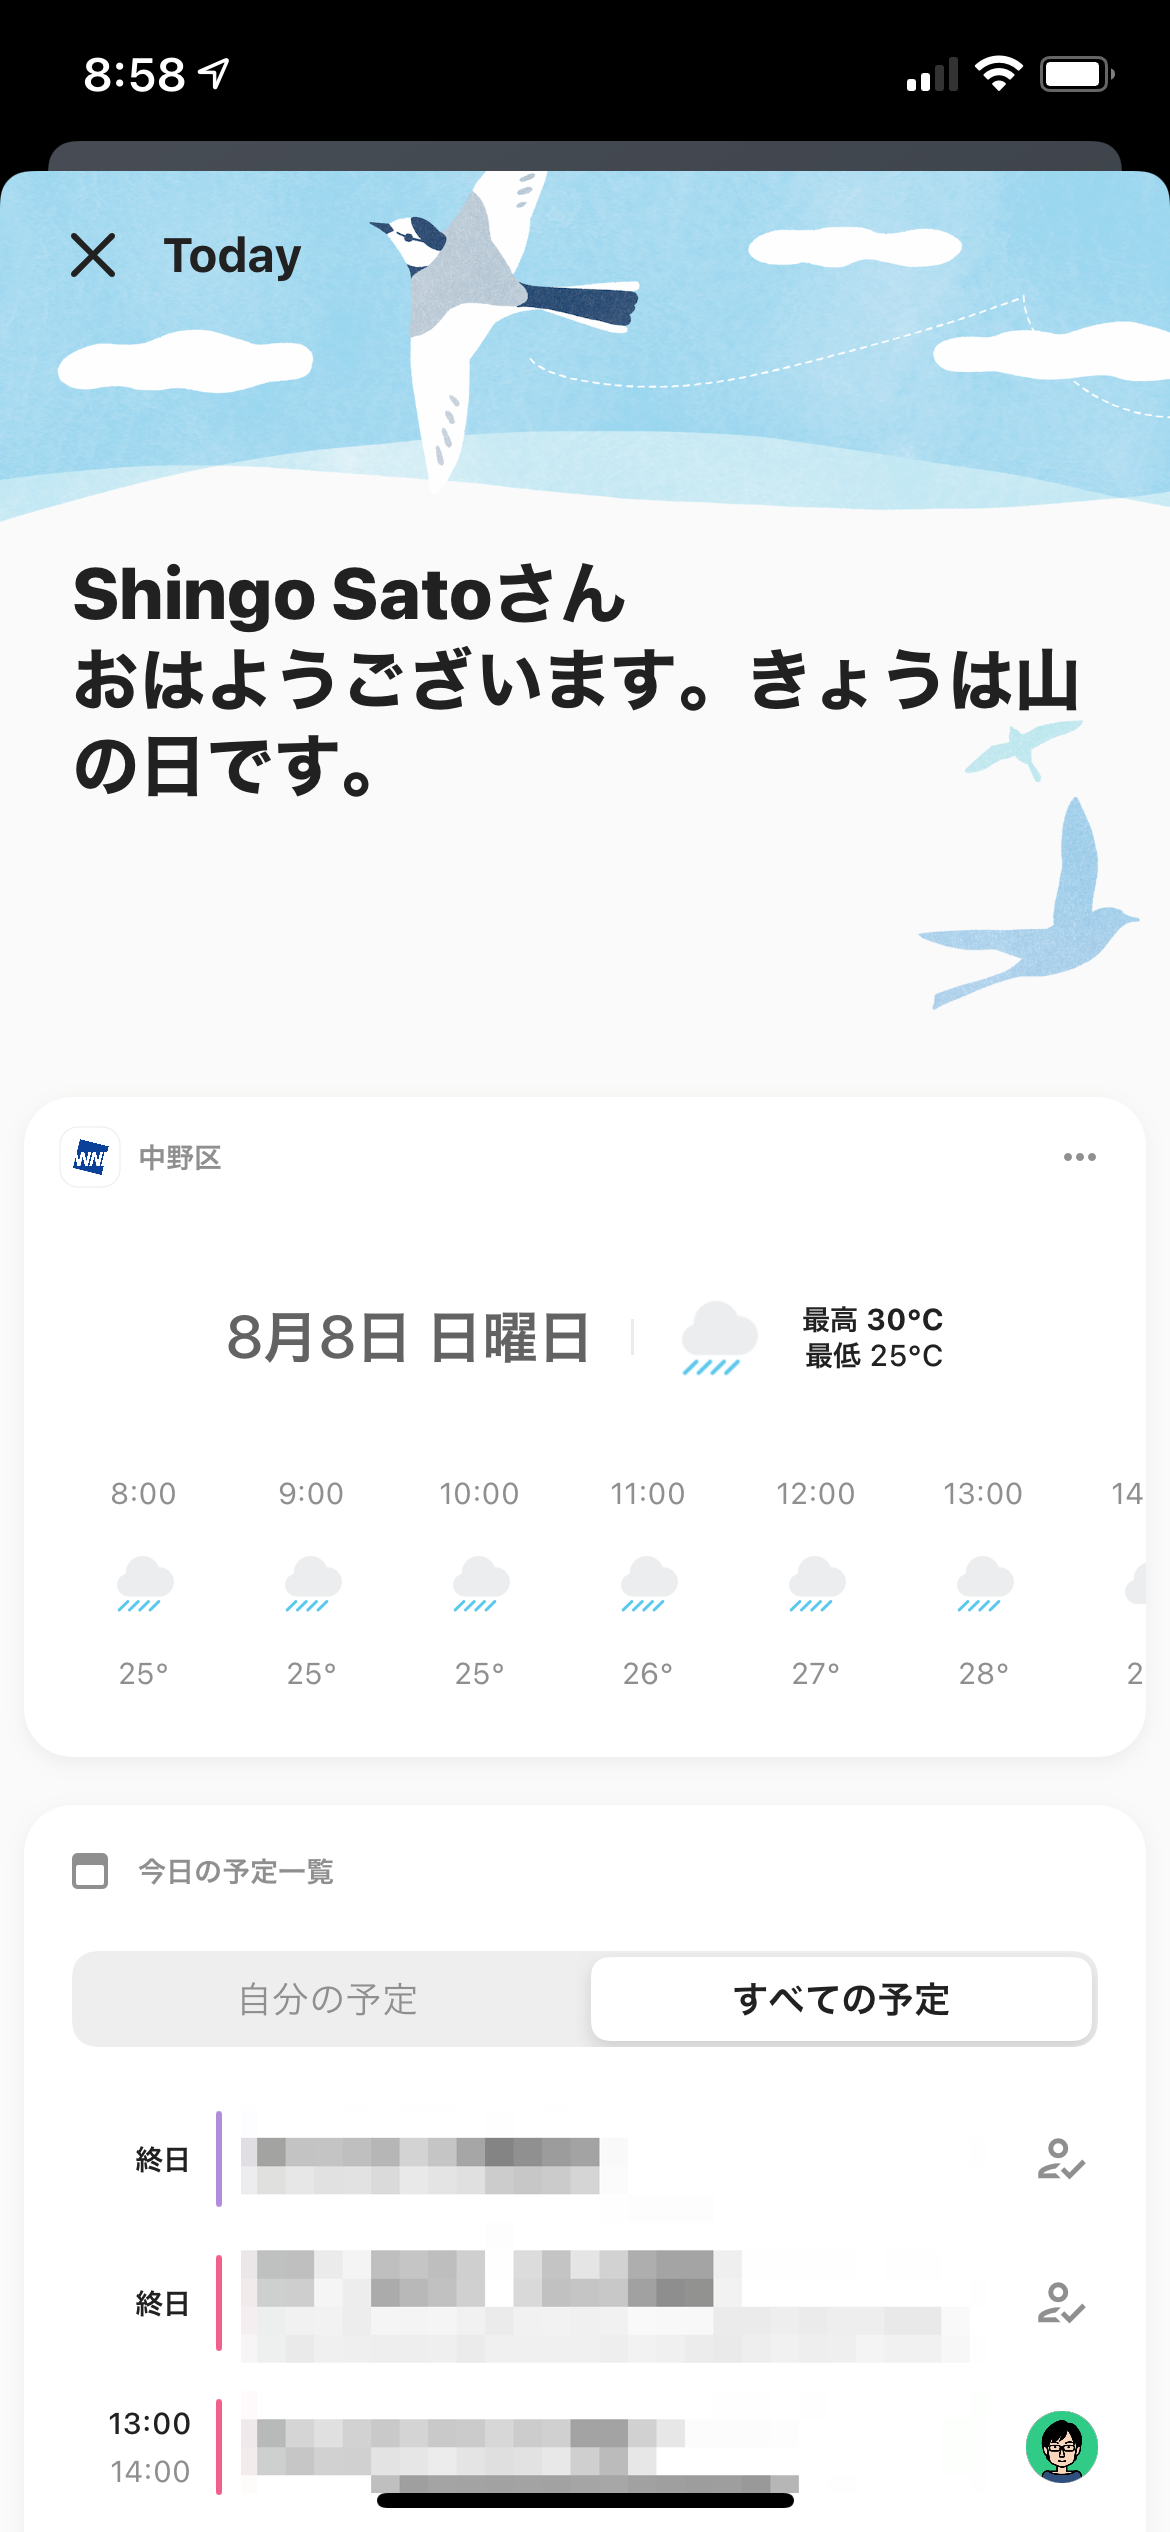
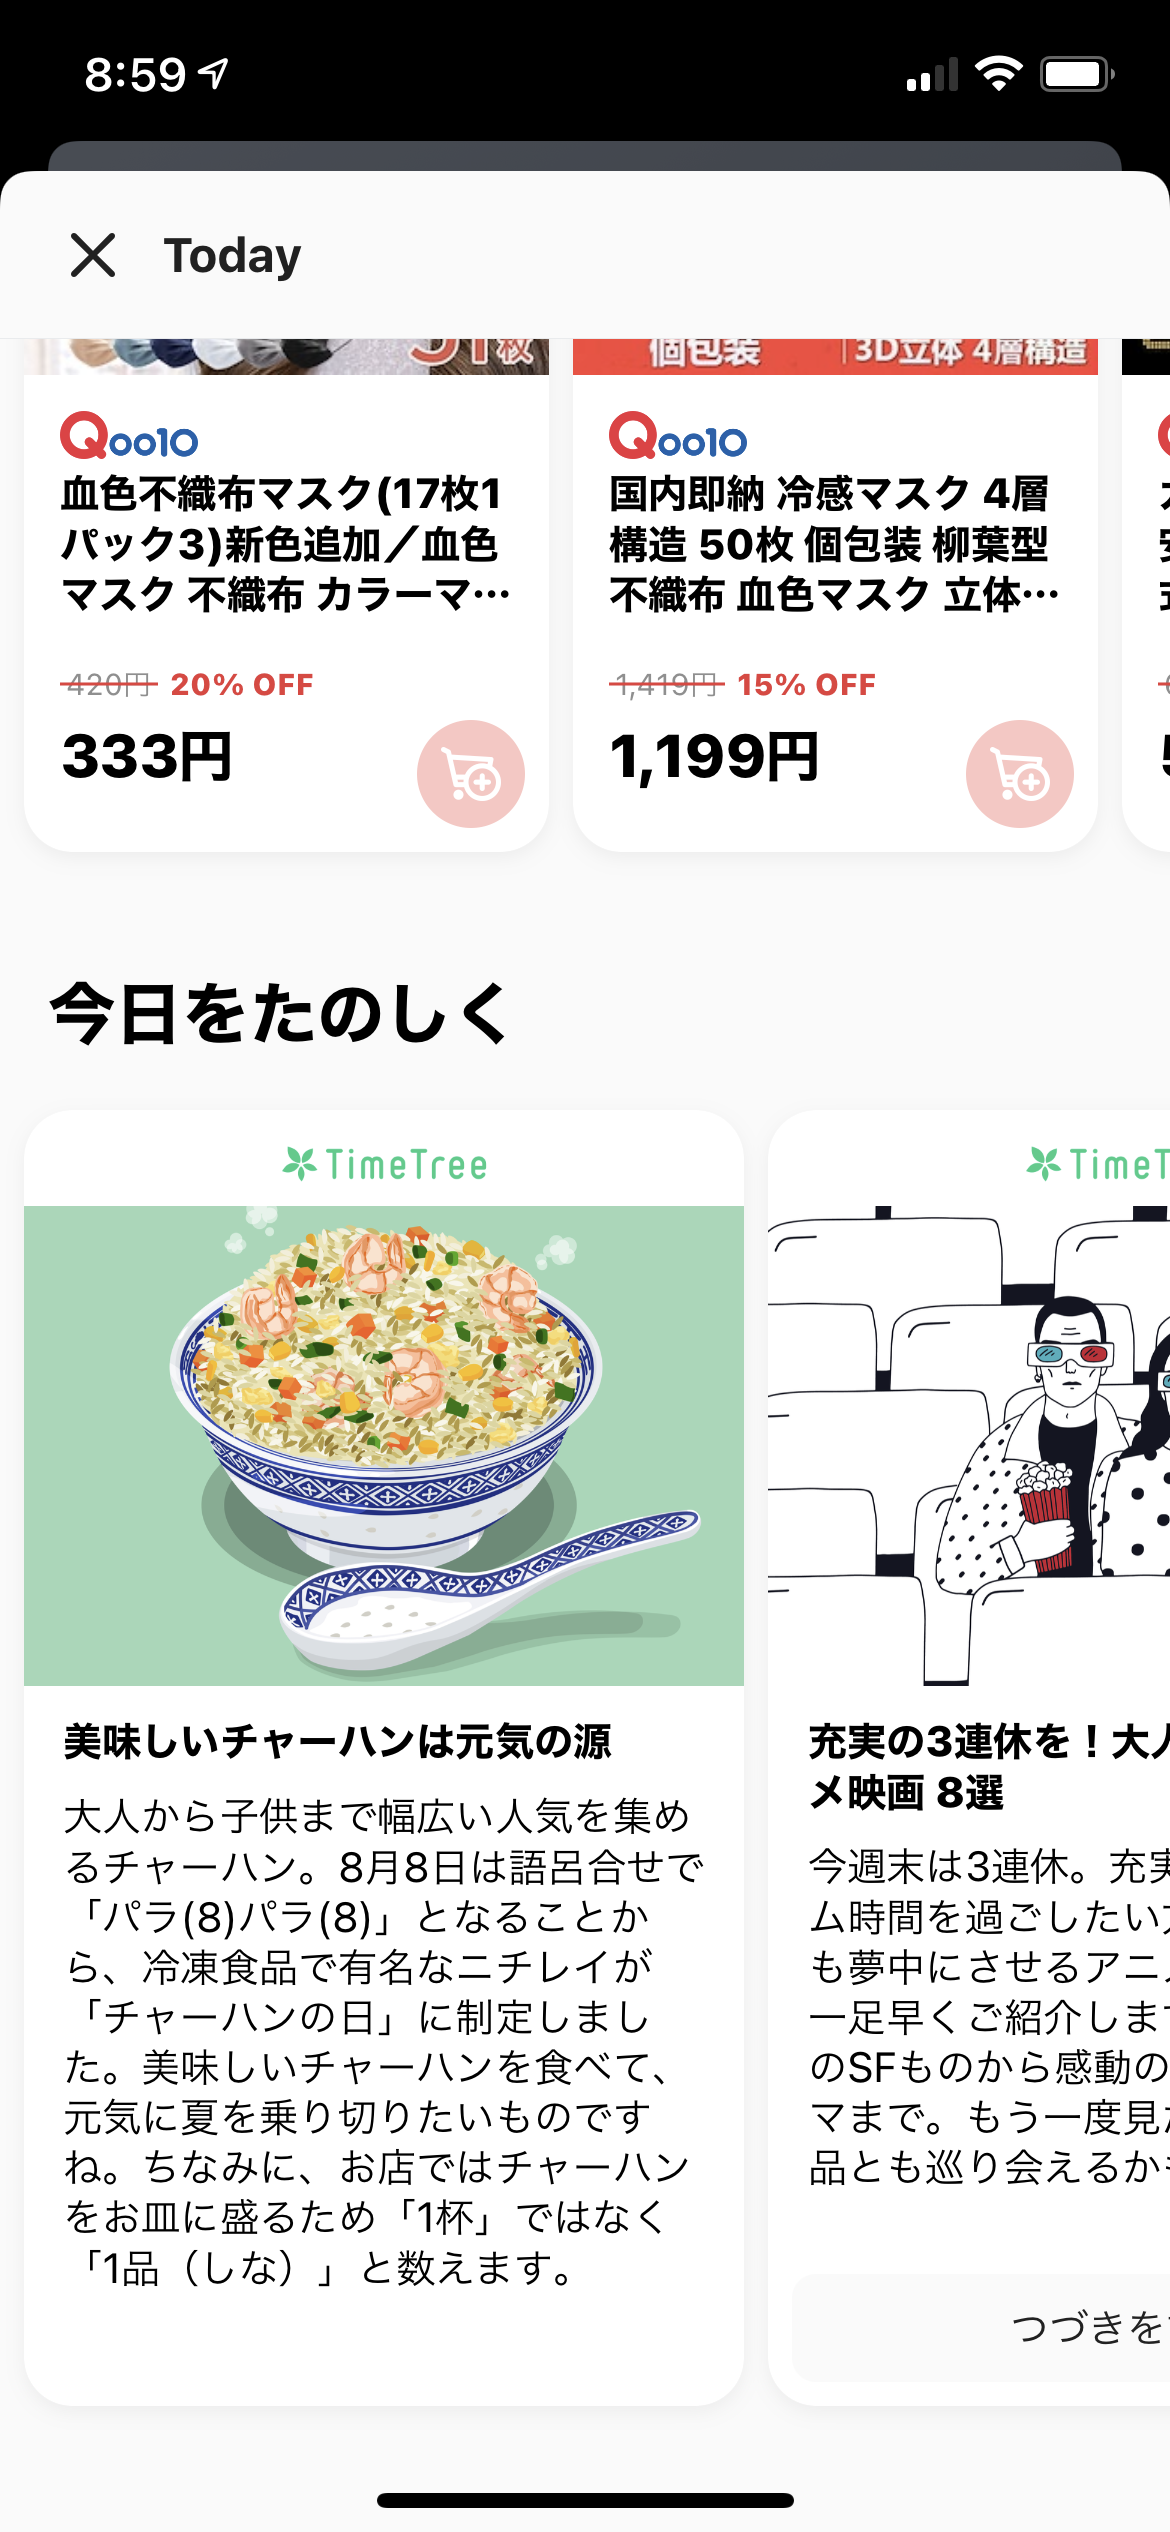
TimeTreeはこのたび「Today」という新機能をリリースしました。これは天気予報、予定、今日にまつわるコンテンツなどをまとめて確認できる画面です。
各モジュールはカードのようなUIになっていて、セクションによっては複数のカードが横スクロールで見れるようになっています。少し前までこのようなUIを実現するためには UICollectionView をネストして使う必要がありましたが、iOS 13からはCompositionalLayoutを利用することによって1つのCollectionViewで実現できます。
 |
 |
今回はサンプルとして「Today」を単純化した以下のような画面を作ります。
ひとつめのセクションはカードが1枚ずつ縦に並びます。中身のテキストに応じてセルの高さが変わります。ふたつめのセクションは固定サイズのカードが横に並び、横スクロールします。

以下のサンプルコードはiOS 14+を前提にしていますが、一部iOS 14+のAPIの利用を避ければiOS 13をサポートすることも可能です。
完成したサンプルプロジェクトもこちらに用意したので適宜ご活用ください。
SwiftUIで中身を実装できるUICollectionViewCell
UICollectionViewCell の contentView の上に UIHostingController を使ってSwiftUIの View を表示できるようにします。 UIHostingController は UIViewController なので、 addSubview するだけでなく ViewController の親子関係を設定するための addChild(_:), didMove(toParent:) を呼ぶ必要があります。
/// HostingCellのContentになるViewが準拠するプロトコル
protocol HostingCellContent: View {
    associatedtype Dependency
    init(_ dependency: Dependency)
}

class HostingCell<Content: HostingCellContent>: UICollectionViewCell {

    private let hostingController = UIHostingController<Content?>(rootView: nil)

    override public init(frame: CGRect) {
        super.init(frame: frame)
        hostingController.view.backgroundColor = .clear
        hostingController.view.translatesAutoresizingMaskIntoConstraints = false
    }

    @available(*, unavailable)
    public required init?(coder: NSCoder) {
        fatalError("init(coder:) has not been implemented")
    }

    public func configure(_ dependency: Content.Dependency, parent: UIViewController) {
        hostingController.rootView = Content(dependency)
        hostingController.view.invalidateIntrinsicContentSize()

        guard hostingController.parent == nil else { return }
        // 以下は初回のみ実行
        parent.addChild(hostingController)
        contentView.addSubview(hostingController.view)
        NSLayoutConstraint.activate([
            hostingController.view.leadingAnchor.constraint(equalTo: contentView.leadingAnchor),
            hostingController.view.topAnchor.constraint(equalTo: contentView.topAnchor),
            hostingController.view.trailingAnchor.constraint(equalTo: contentView.trailingAnchor),
            hostingController.view.bottomAnchor.constraint(equalTo: contentView.bottomAnchor),
        ])
        hostingController.didMove(toParent: parent)
    }

}
セルの中身をSwiftUIで実装する
HostingCellContent に準拠した SwiftUI.View を実装します。ここでは Dependency として文字列をひとつ持つ ViewModel を定義して、その文字列を Text に表示するシンプルなビューを作ります。
struct ItemView: HostingCellContent {

    typealias Dependency = ViewModel

    struct ViewModel {
        var text: String
    }

    var viewModel: ViewModel

    init(_ viewModel: ViewModel) {
        self.viewModel = viewModel
    }

    var body: some View {
        VStack(spacing: 0) {
            Text(viewModel.text)
                .font(.system(size: 24, weight: .bold))
                .frame(maxWidth: .infinity, alignment: .leading)
            Spacer(minLength: 0)
        }
        .padding(12)
    }

}
続いて上記で定義した ItemView をコンテンツとして持つ HostingCell のサブクラスを定義します。 init の中でやっているのは角丸と影をつけてカードの見た目を実装しているだけで、ここで大事なのはクラス宣言の部分です。
final class ItemCell: HostingCell<ItemView> {

    override init(frame: CGRect) {
        super.init(frame: frame)

        clipsToBounds = false
        backgroundColor = .clear
        layer.cornerRadius = 16
        layer.shadowColor = UIColor.black.cgColor
        layer.shadowOpacity = 0.05
        layer.shadowOffset = .init(width: 0, height: 2)
        layer.shadowRadius = 3

        contentView.clipsToBounds = true
        contentView.backgroundColor = .secondarySystemGroupedBackground
        contentView.layer.cornerRadius = 16
    }

}
CompositionalLayout
セルの準備ができたので、続いてViewControllerとCollectionViewを作っていきます。ふたつのセクションを表現する enum を以下のように定義します。
final class ViewController: UIViewController {

    enum Section: Int {
        case first
        case second
    }

}
CollectionViewとlayoutを以下のように実装します。
final class ViewController: UIViewController {

    // ...

    private lazy var collectionView: UICollectionView = {
        let collectionView = UICollectionView(frame: .zero, collectionViewLayout: layout)
        collectionView.backgroundColor = .systemGroupedBackground
        return collectionView
    }()

    private lazy var layout = UICollectionViewCompositionalLayout { section, _ in
        guard let section = Section(rawValue: section) else { return nil }
        switch section {
        case .first:
            let layoutSize = NSCollectionLayoutSize(
                widthDimension: .fractionalWidth(1.0),
                heightDimension: .estimated(100) // 高さは可変
            )
            let item = NSCollectionLayoutItem(layoutSize: layoutSize)
            let group = NSCollectionLayoutGroup.horizontal(layoutSize: layoutSize, subitem: item, count: 1)
            let section = NSCollectionLayoutSection(group: group)
            section.contentInsets = .init(top: 8, leading: 8, bottom: 8, trailing: 8)
            section.interGroupSpacing = 8
            return section
        case .second:
            let layoutSize = NSCollectionLayoutSize(
                widthDimension: .absolute(160),
                heightDimension: .absolute(240)
            )
            let item = NSCollectionLayoutItem(layoutSize: layoutSize)
            let group = NSCollectionLayoutGroup.horizontal(layoutSize: layoutSize, subitems: [item])
            let section = NSCollectionLayoutSection(group: group)
            section.orthogonalScrollingBehavior = .continuous // 要素を横スクロールさせる
            section.contentInsets = .init(top: 8, leading: 8, bottom: 8, trailing: 8)
            section.interGroupSpacing = 8
            return section
        }
    }

    override func loadView() {
        view = collectionView
    }

}
DiffableDataSource
まず、 UICollectionViewDiffableDataSource の ItemIdentifierType としてカード1枚を表現する Item を以下のように定義します。
final class ViewController: UIViewController {
    // ...
    enum Item: Hashable {
        case item(text: String)
    }
    // ...
}
これまで用意したものを利用してデータソースは以下のように実装できます。 CellRegistration のhandlerでは ItemCell に ViewModel を渡してSwiftUIのビューに表示するテキストを与えています。
    private lazy var dataSource: UICollectionViewDiffableDataSource<Section, Item> = {
        let cellRegistration = UICollectionView.CellRegistration<ItemCell, Item> { [weak self] cell, indexPath, item in
            guard let self = self,
                  case let .item(text) = item else { return }
            cell.configure(.init(text: text), parent: self)
        }
        let dataSource = UICollectionViewDiffableDataSource<Section, Item>(collectionView: collectionView) { collectionView, indexPath, item in
            switch item {
            case .item:
                return collectionView.dequeueConfiguredReusableCell(using: cellRegistration, for: indexPath, item: item)
            }
        }
        return dataSource
    }()
最後にデータを用意してスナップショットを生成し、データソースに apply します。
    private let data = [
        "Lorem ipsum dolor sit amet, consectetur adipiscing elit.\nNullam condimentum ante quis purus sagittis finibus.",
        "Aliquam vel libero vel metus consectetur laoreet.",
        "Nulla vehicula nibh et est laoreet accumsan.\nVestibulum aliquet diam sed ornare iaculis.",
        "Ut fringilla massa ac arcu gravida, sit amet hendrerit est iaculis.",
        "Vestibulum euismod purus quis justo consequat imperdiet.",
        "Vestibulum sed libero ultrices, ultricies magna non, pretium mi.",
        "Etiam ut metus eu lectus cursus luctus in et ligula.",
        "Nullam a dui vitae nisi cursus rhoncus.",
    ]

    override func viewDidLoad() {
        super.viewDidLoad()

        var snapshot = NSDiffableDataSourceSnapshot<Section, Item>()
        snapshot.appendSections([.first, .second])
        snapshot.appendItems(data[0..<3].map({ .item(text: $0) }), toSection: .first)
        snapshot.appendItems(data[3..<8].map({ .item(text: $0) }), toSection: .second)
        dataSource.apply(snapshot)
    }
以上で冒頭に示したサンプルの画面が表示できるようになったはずです。
発生した問題とワークアラウンド
上記のシンプルな例では素直な実装で実現できていますが、実際の複雑なレイアウトに適用しようとしたときにいくつかの問題が発生しました。
コンテンツがセーフエリアにかかるとレイアウトが崩れる
スクロールしてコンテンツが画面上部のセーフエリアにかかったときにSwiftUIで実装した部分のレイアウトが影響を受けてしまう問題がありました。 UIHostingController のバグっぽい挙動なのですが、きれいな回避策は見つけられず、 method swizzling を利用して無理やり safeAreaInsets をなくすという荒技を採用するしかありませんでした。こちらを参考にしています。
/// fixSafeAreaInsets を一度だけ実行するためのフラグ
private var fixSafeAreaInsetsHostingControllerIsFixed = false

/// UIHostingController の view のレイアウトが safe area の影響を受けてしまう問題のワークアラウンドのために利用する
public final class FixSafeAreaInsetsHostingController<Content: View>: UIHostingController<Content> {

    override public init(rootView: Content) {
        super.init(rootView: rootView)
        if !fixSafeAreaInsetsHostingControllerIsFixed {
            fixSafeAreaInsets()
            fixSafeAreaInsetsHostingControllerIsFixed = true
        }
    }

    @available(*, unavailable)
    @objc dynamic required init?(coder aDecoder: NSCoder) {
        fatalError("init(coder:) has not been implemented")
    }

    /// view の safe area を強制的になくす
    private func fixSafeAreaInsets() {
        let viewClass: AnyClass = view.classForCoder

        let safeAreaInsets: @convention(block) (AnyObject) -> UIEdgeInsets = { (_: AnyObject!) -> UIEdgeInsets in
            .zero
        }
        guard let safeAreaInsetsMethod = class_getInstanceMethod(viewClass.self, #selector(getter: UIView.safeAreaInsets)) else { return }
        class_replaceMethod(viewClass, #selector(getter: UIView.safeAreaInsets), imp_implementationWithBlock(safeAreaInsets), method_getTypeEncoding(safeAreaInsetsMethod))

        let safeAreaLayoutGuide: @convention(block) (AnyObject) -> UILayoutGuide? = { (_: AnyObject!) -> UILayoutGuide? in
            nil
        }
        guard let safeAreaLayoutGuideMethod = class_getInstanceMethod(viewClass.self, #selector(getter: UIView.safeAreaLayoutGuide)) else { return }
        class_replaceMethod(viewClass, #selector(getter: UIView.safeAreaLayoutGuide), imp_implementationWithBlock(safeAreaLayoutGuide), method_getTypeEncoding(safeAreaLayoutGuideMethod))
    }

}
HostingCell の内部で使う UIHostingController を上記のクラスに置き換えて使います。
method swizzling は UIHostingController の view のクラスに対して適用しているので、すべての UIHostingController に影響する点に注意が必要です。
open class HostingCell<Content: HostingViewContent>: UICollectionViewCell {

    private let hostingController = FixSafeAreaInsetsHostingController<Content?>(rootView: nil)

    // ...
}
レイアウトによってセルのself-sizingがうまくいかない
基本的には UIHostingController の rootView が自身のサイズを決めるので、CompositionalLayoutでアイテムのサイズに .estimated(100) のように指定しておけば、セルのサイズも自動的に調整されます。ただしSwiftUIのレイアウトによっては意図通りにサイズが決まらないケースがありました。
このようなケースでも以下のように sizeThatFits で計算すると正しいサイズを得ることができたので、この結果を利用する方法を取りました。
let height = hostingController.view.sizeThatFits(contentView.bounds.size).height
まず HostingCell の contentView にオートレイアウトで高さの制約を与えます。
    /// 高さの制約
    private lazy var heightConstraint: NSLayoutConstraint = {
        let constraint = contentView.heightAnchor.constraint(equalToConstant: 0)
        // 実行時のレイアウトエラー回避のため優先度を下げる
        constraint.priority = .init(rawValue: 999)
        constraint.isActive = true
        return constraint
    }()
configure の中で sizeThatFits の結果を制約にセットします。
   func configure(_ dependency: Content.Dependency, parent: UIViewController) {
        hostingController.rootView = Content(dependency)
        hostingController.view.invalidateIntrinsicContentSize()
        // hostingController の view 自身にサイズを決めて欲しいがうまくいかないケースがあるので
        // sizeThatFits の計算結果を使って高さの制約を与えている。
        let height = hostingController.view.sizeThatFits(contentView.bounds.size).height
        heightConstraint.constant = height

        // ...
    }
スクロール中にボタンが反応してしまう
SwiftUIのボタンは通常以下のように実装すると思います。
Button(action: {
    // ボタンアクション
}, label: {
    Text("Button")
})
しかし今回の実装では、SwiftUIの中で Button を配置したときにCollectionViewのスクロールとボタンタップのジェスチャーが競合してしまう問題が発生しました。ドラッグのジェスチャーを開始した位置にボタンがあった場合に、ドラッグを終了して指を離した瞬間にボタンのアクションが実行されてしまいます。
通常であればスクロールが発生した段階でボタンに対するタップジェスチャーはキャンセルされてアクションが実行されることはありません。実際に UIScrollView の中に UIButton を配置した場合や、SwiftUIの中で ScrollView と Button を使った場合には問題は発生しません。UIHostingController を介したハイブリッドな状況でのみ発生するようです。
こちらは試行錯誤した結果以下のように onTapGesture の中で実際の処理を行うようにすることで解消できました。
Button(action: {}, label: {
    Text("Button")
        .onTapGesture {
            // ボタンアクション
        }
})
まとめ
いくつかのかっこ悪いワークアラウンドを含んではいますが、モダンなCollectionViewとSwiftUIのハイブリッド実装を実現することができました。プロダクションに段階的にSwiftUIを導入していくひとつの選択肢になるのではと思います。
「Today」画面には多数のモジュールがあり、それぞれが複雑なレイアウトを持っていました。実際に上記の方法を適用して各モジュールにSwiftUIを利用できたことはかなりメリットがあったと感じます。
最後に、TimeTreeではエンジニア募集中です!興味があったらお気軽にご連絡いただけると嬉しいです。
参考リンク
既存アプリにSwiftUIを導入する事例
Modern Collection Viewの公式サンプルコード
TableViewでセルの中身をSwiftUIで実装する方法