はじめに
Rails でアプリケーションを作成した際に、学んだことの復習と、知識の整理のために投稿します。
開発環境
rails: 7.0.2
ruby: 3.0.1
マッチング機能の仕様
ユーザーは、自分以外のユーザーであれば、何人でもlikeとdislikeすることができますし、逆もまた然りです。
ER図
テーブルと関係性をわかりやすくするため、ER図を作成します。

likesテーブルのカラムについて
- from_user : 誰からの評価なのかを判別するためのカラム
- to_user : 誰に対しての評価なのかを判別するためのカラム
- status : 評価結果(like or dislike
準備
今回は、ユーザー認証機能については、gem のdeviseを使用しています。実装については、省略します。
参考:devise
1.ルーティングの設定
Rails.application.routes.draw do
  devise_for :users
  root "home#index"

  resources :users, only: [:index, :show]
end
2.UsersControllerの実装
実装は、いたってシンプルです。
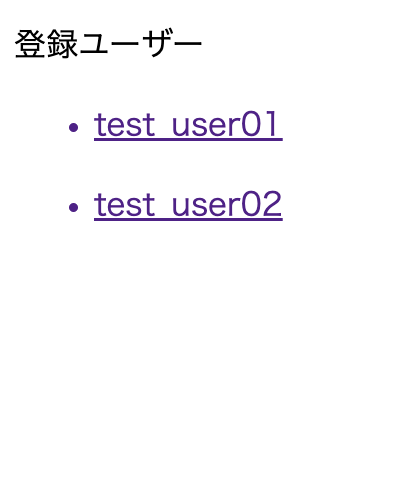
indexアクションで登録ユーザー情報を全件取得して、登録ユーザー画面を表示。
showアクションで特定のユーザーを抽出して、ユーザー詳細ページを表示。
class UsersController < ApplicationController
    def index
        @user=User.find(current_user.id)
        @users=User.all
    end

    def show
        @user=User.find(params[:id])
    end
end
3.viewの作成
<p>登録ユーザー</p>

<% @users.each do |user| %>
    <%= link_to user_path(user) do %>
        <ul>
           <li><%= user.username %></li>
        </ul>
    <% end %>
<% end %>

ユーザー名がハイパーリンクになっており、クリックすると対象ユーザーの詳細画面に遷移します。
<%= flash[:reaction] %>
 <hr>
<% if @user==current_user %>
    <p>あなたのページ</p>
    <%= @user.username %>
<% else %>
    <p>ユーザー詳細ページ</p>
    <%= @user.username %>
    <div>
    <%=link_to "お気に入り!", "#", data: { "turbo-method": :post} %>

    <%=link_to "微妙かも", "#", data: { "turbo-method": :post }  %>
    </div>

<% end %>

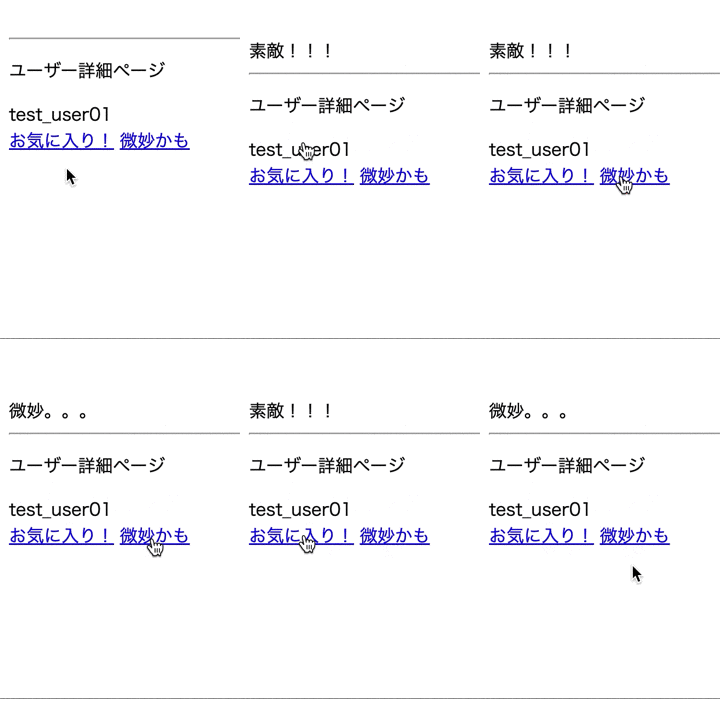
ログインユーザー以外のユーザー詳細ページに遷移すると、上記のように「お気に入り!」「微妙かも」ボタンが表示されます。押されたボタンによって、そのユーザーの評価が決定されます。link_toのurlは、後で設定します。
ユーザー同士が「お気に入り!」の評価をした場合、マッチング成功とします。
likes テーブルの作成
1.マイグレーションファイルを作成
$ rails g migration Like
class CreateLikes < ActiveRecord::Migration[7.0]
  def change
    create_table :likes do |t|

      t.timestamps
    end
  end
end
2.マイグレーションファイルの編集
作成されたマイグレーションファイルを編集します。
class CreateLikes < ActiveRecord::Migration[7.0]
  def change
    create_table :likes do |t|
      #ここから
      t.references :to_user, null: false, foreign_key: { to_table: :users }
      t.references :from_user, null: false, foreign_key: { to_table: :users }
      t.integer :status, null: fals
      #ここまで追記
      t.timestamps
    end
  end
end
t.references :to_user, null: false, foreign_key: { to_table: :users }
t.references :from_user, null: false, foreign_key: { to_table: :users }
この部分が外部キー制約の記述です。
マイグレーションの外部キーを記述する場合のお馴染みの形は、以下のようにforeign_keyオプションがtrueになっいるものだと思いますが、
t.references :user, null: false, foreign_key: true
今回は、Userモデルを自己結合させる必要があるため、架空の「to_user」モデルと「from_user」モデルを作成しています。このままだとrailsは、この架空のモデルをUserモデルとして認識できないため、
foreign_key: { to_table: :users }
と記述しています。
参考: 2.10 自己結合
4.マイグレーションの実行
$ rails db:migrate
ActiveRecord::Schema[7.0].define(version: 2022_04_18_065415) do
  create_table "likes", force: :cascade do |t|
    t.integer "to_user_id", null: false
    t.integer "from_user_id", null: false
    t.integer "status", null: false
    t.datetime "created_at", null: false
    t.datetime "updated_at", null: false
    t.index ["from_user_id"], name: "index_likes_on_from_user_id"
    t.index ["to_user_id"], name: "index_likes_on_to_user_id"
  end
add_foreign_key "likes", "users", column: "from_user_id"
add_foreign_key "likes", "users", column: "to_user_id"
ルーティングの編集
Rails.application.routes.draw do
  devise_for :users
  root "home#index"
  # Define your application routes per the DSL in https://guides.rubyonrails.org/routing.html

  resources :users, only: [:index, :show]

  #マッチング機能ように追加
  resources :likes, only: [:create]
  # ここまで
  # Defines the root path route ("/")
  # root "articles#index"
end
likesコントローラーの実装
$ rails g controller likes
class LikesController < ApplicationController
    def create
        likes=Like.find_or_initialize_by(to_user_id: params[:user_id], from_user_id: current_user.id)
        likes.update(status: params[:reaction])
        if params[:reaction] == "like"
            flash[:reaction]="素敵!!!"
        else
            flash[:reaction]="微妙。。。"
        end
        redirect_to("/users/#{params[:user_id]}")
    end
end
find_or_initialize_byメソッドで引数に一致するオブジェクトを検索し、見つからなければ、”Like.new”して、インスタンスオブジェクトを新規作成します。
参考:find_or_initialize_by
続いて、updateメソッドで引数の値でインスタンスを更新して保存します。
updateメソッドでは、引数に与えられた値でインスタンスを更新して、保存します。
参考:update
これで、未評価ユーザーについては、評価を作成し、評価済みのユーザーについては既存の評価を更新するように実装ができました。
Viewの編集
<%= flash[:reaction] %>
 <hr>
<% if @user==current_user %>
    <p>あなたのページ</p>
    <%= @user.username %>
<% else %>
    <p>ユーザー詳細ページ</p>
    <%= @user.username %>
    <div>
    <%=link_to "お気に入り!", likes_path({user_id:@user.id,reaction: "like"}), data: { "turbo-method": :post} %>

    <%=link_to "微妙かも", likes_path({user_id:@user.id,reaction: "dislike"}), data: { "turbo-method": :post }  %>
    </div>

<% end %>
link_to のpathヘルパーでは、パラメーターを持たせます。
参考:【Rails】link_toにparamsをもたせる方法
これにより、createアクションでパラメータの情報を使用して処理を行うことができます。
補足点
ここで、1点補足説明する部分があります。
実は、Rails7.0から、link_toのmethod:オプションの書き方が変わっています。
Rails5.1.0~Rails 6系まではデフォルトで「rails-ujs」が使用されていましたが、Rails7.0以降は、「Turbo」がデフォルトで使用されるようになりました。そのため、link_to のmethodオプションの書き方が変わっていました。
<!-- 従来の書き方(rails-ujsを使っている場合) -->
<%= link_to "お気に入り!", likes_path({user_id:@user.id,reaction: "like"}), method: :post %>

<!-- Turboを使っている場合 -->
<%= ink_to "お気に入り!", likes_path({user_id:@user.id,reaction: "like"}), data: { "turbo-method": :post} %>
参考:Rails 7.0 + Ruby 3.1でゼロからアプリを作ってみたときにハマったところあれこれ
参考:hotwired/turbo-rails
参考:Rails学習者にrails-ujsの動作説明したら感動された話
動作確認
フラッシュメッセージが表示されており、クリックのたびに評価の更新が行われています。
ユーザー同士が「お気に入り」と評価すればマッチング成功とします。
次回は、マッチング成功したユーザー同士のメッセージ機能についてまとめたいと思います。
参考
Railsガイド
find_or_initialize_by
update
【Rails】link_toにparamsをもたせる方法
hotwired/turbo-rails
Rails学習者にrails-ujsの動作説明したら感動された話


