はじめに
外出時に家電をリモコン制御してみたいと思い、Raspberry Piを買ってみました。
まずはお試しとして、AWSのIoT Coreと連動させ、GPIOの制御ができるか試してみました。
環境
Raspberry Pi
- Raspberry Pi 3 Mobile B+
- Raspbian 9.4
- Python 3.6
AWS
- IoT Core
Python PiでGPIOを制御する(動作確認)
PythonでRaspberry PiのGPIOを制御します。参考記事は下記となります。
実際のサンプルコードは下記となります。
import RPi.GPIO as GPIO
import time

def main():
    GPIO.setmode(GPIO.BOARD)
    #Use PIN 7 (GPIO 4)
    GPIO.setup(7, GPIO.OUT)

    GPIO.output(7, True)
    time.sleep(1)
    GPIO.output(7, False)
    time.sleep(1)

    GPIO.cleanup()


if __name__ == "__main__":
    main()
実行はroot権限で行います。
$ sudo python sample_gpio.py
RaspberryでAWS IoT Coreと接続する(動作確認)
AWSの準備
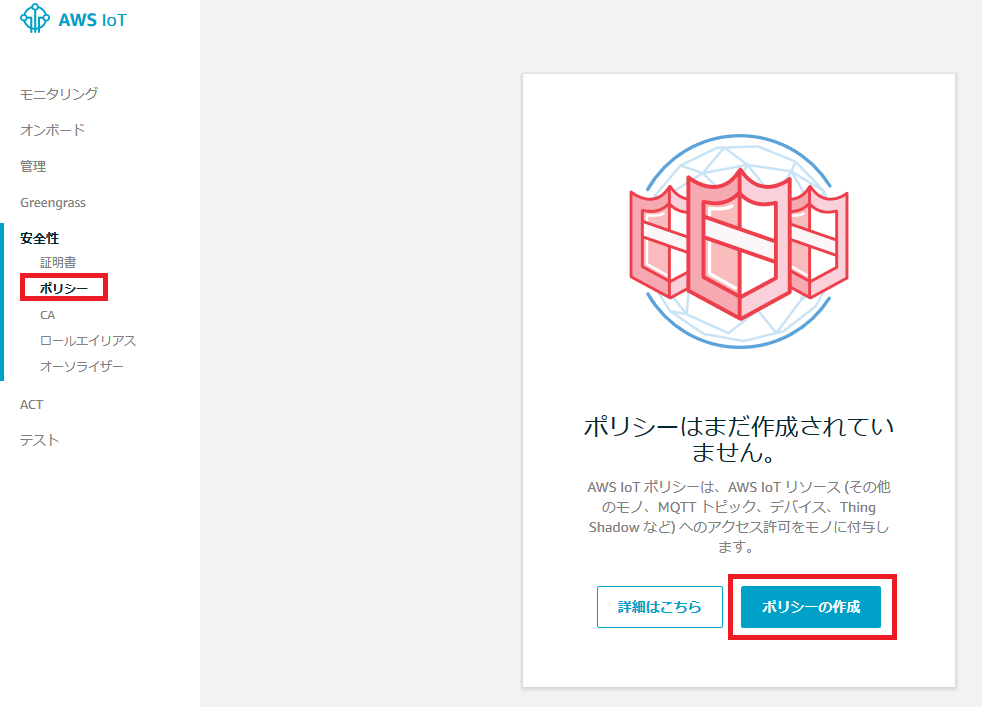
IoT Core(ポリシーの作成)
メニューにある「安全性」の「ポリシー」を選択し、「ポリシーの作成」を選択します。
下記を入力します。
- 名前: RaspberryPiPoricy
- アクション: iot:*
- リソースARN: *
- 効果: 許可
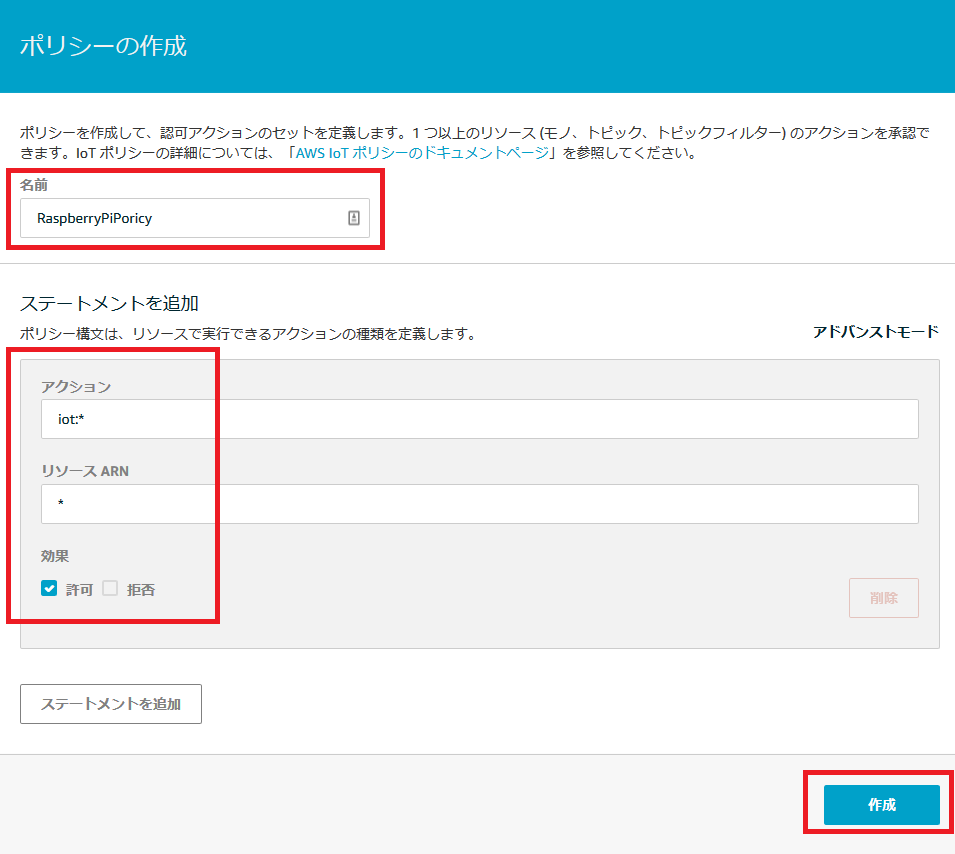
本来であれば、アクションやリソースで各種権限を設定しますが、ひとまず「全部許可」にしています。
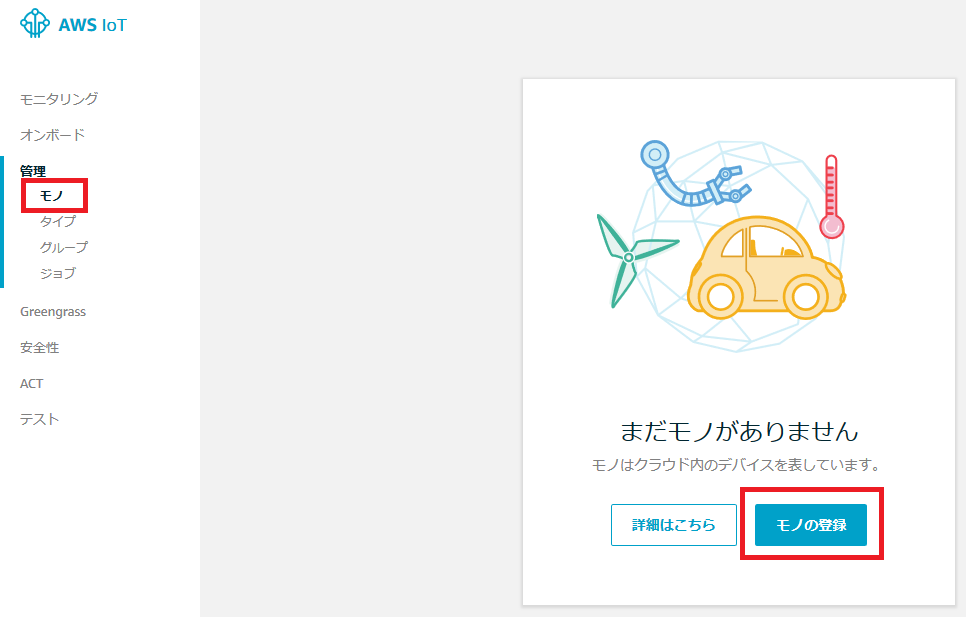
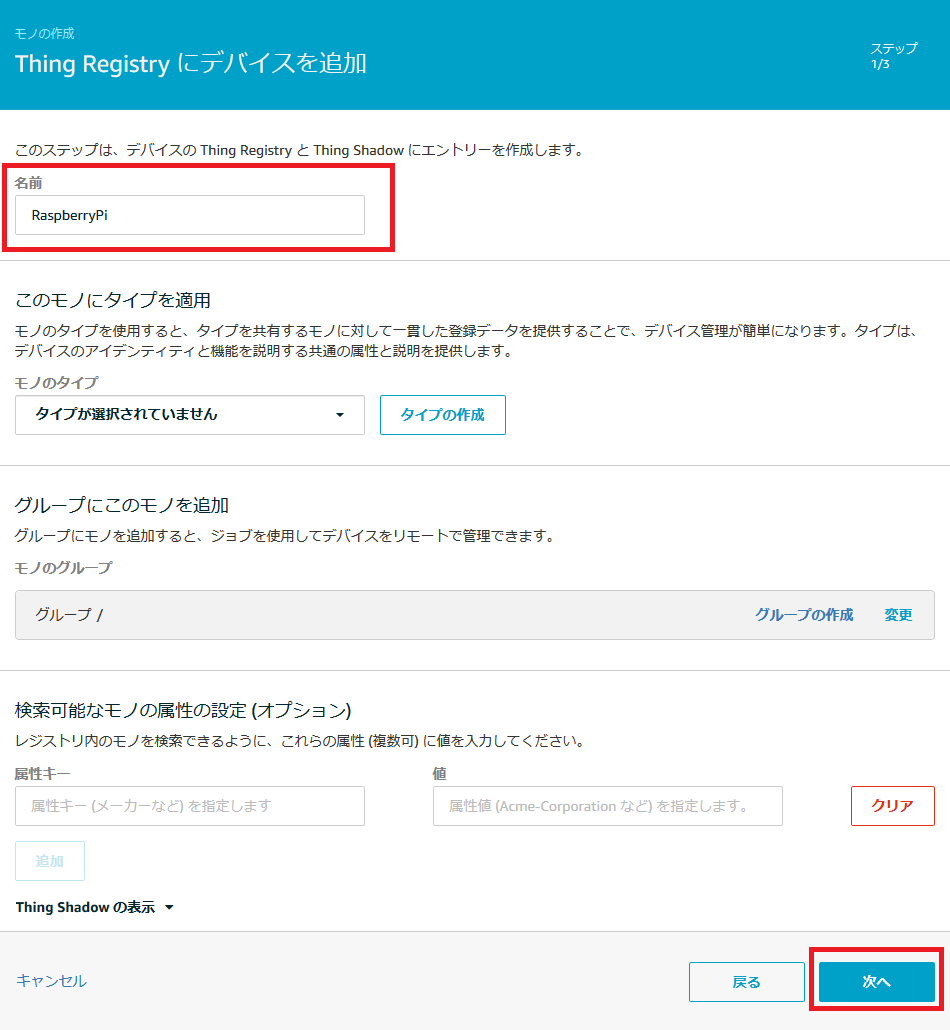
IoT Core(モノの作成)
メニューにある「管理」の「モノ」を選択し、「モノの登録」を選択します。
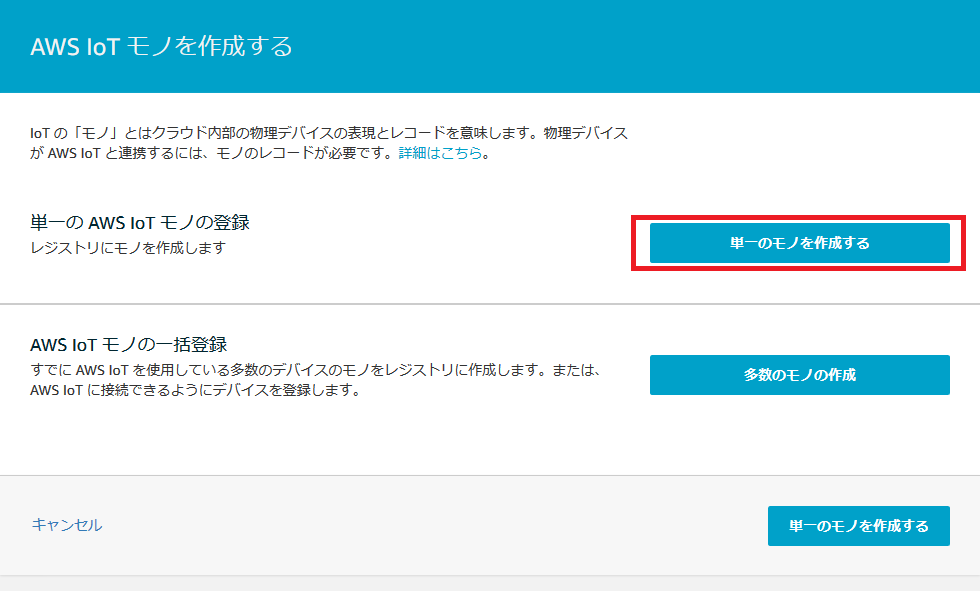
「単一のモノを作成する」を選択します。
下記を入力し、「次へ」を選択します。
- 名前: RaspberryPi
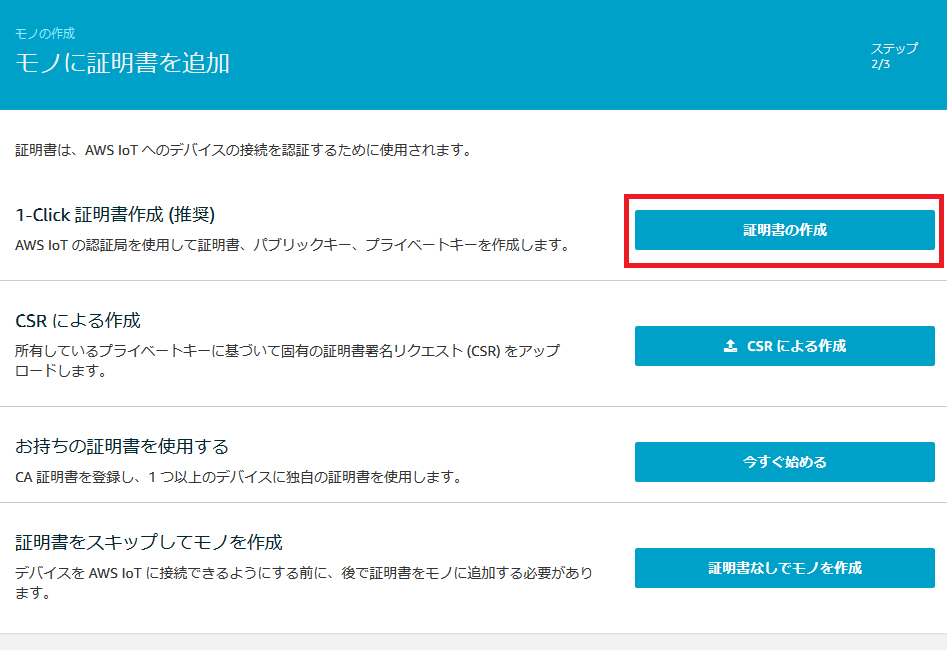
「1-Click 証明書作成 (推奨)」の「証明書の作成」を選択します。
下記をすべてダウンロードし、「有効化」を選択し、「ポリシーのアタッチ」を選択します。
- このモノの証明書
- パブリックキー
- プライベートキー
- AWS IoTのルートCA
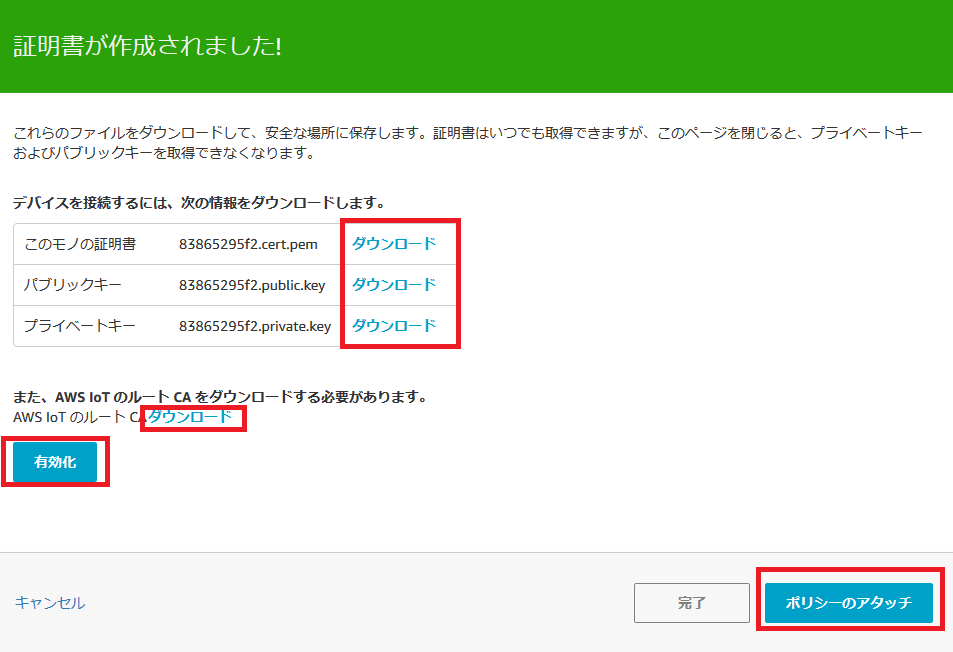
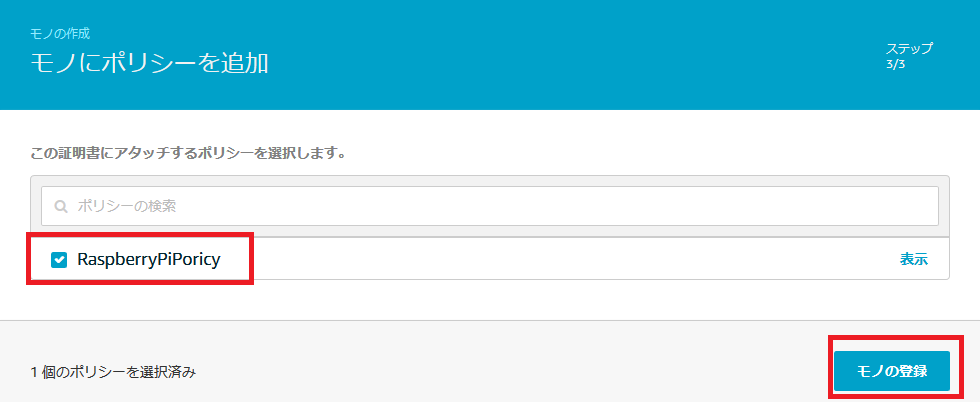
さきほど作成したポリシー(RaspberryPiPoricy)を選択し、「モノの登録」を選択します。
Raspberry Piの準備
SDKのインストール
pip install AWSIoTPythonSDK
サンプルコードの作成
Raspberry Piでは、AWSのIoT Coreと接続し、トピックをSubscribeします。下記が動作確認用のコードです。
import time
from AWSIoTPythonSDK.MQTTLib import AWSIoTMQTTClient

CLIENT_ID = "test_client_id"
ENDPOINT = "xxxxxxx.iot.ap-northeast-1.amazonaws.com"
PORT = 8883

ROOT_CA = "./cert/root_ca.pem"
PRIVATE_KEY = "./cert/private.pem.key"
CERTIFICATE = "./cert/certificate.pem.crt.txt"

TOPIC = "raspberry_pi/test"

def main():
    # https://s3.amazonaws.com/aws-iot-device-sdk-python-docs/sphinx/html/index.html
    client = AWSIoTMQTTClient(CLIENT_ID)
    client.configureEndpoint(ENDPOINT, PORT)
    client.configureCredentials(ROOT_CA, PRIVATE_KEY, CERTIFICATE)

    client.configureAutoReconnectBackoffTime(1, 32, 20)
    client.configureOfflinePublishQueueing(-1)
    client.configureDrainingFrequency(2)
    client.configureConnectDisconnectTimeout(10)
    client.configureMQTTOperationTimeout(5)

    client.connect()
    client.subscribe(TOPIC, 1, subscribe_callback)

    while True:
        time.sleep(5)

def subscribe_callback(client, userdata, message):
    print("Received a new message: ")
    print(message.payload)
    print("from topic: ")
    print(message.topic)
    print("--------------\n\n")


if __name__ == "__main__":
    main()
なお、各自で下記の対応を行ってください。
- ENDPOINTの設定
- モノ作成時に作成した証明書を実行環境に配置
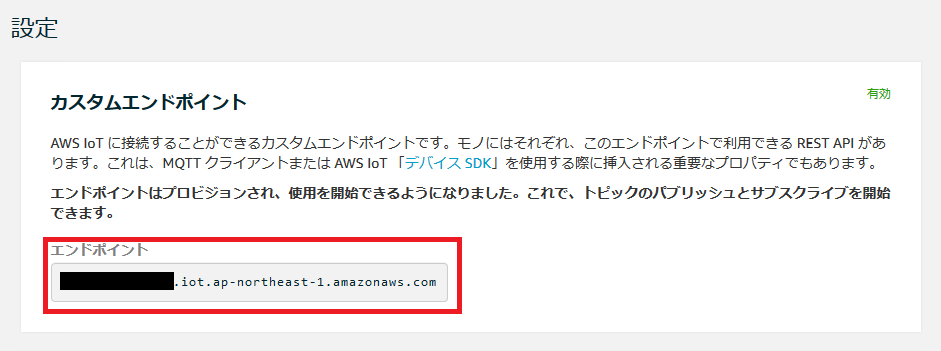
エンドポイントの確認
AWS IoT Coreの画面から、エンドポイントの確認ができます。
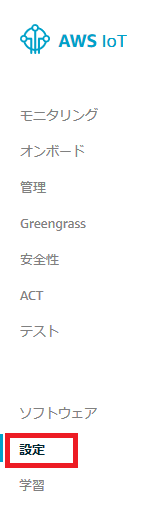
「設定」を選択すると表示されます。
実際に動かしてみよう!!!
コード実行
Raspberry Piで上記のコードを実行します。エンドポイントの設定、および、証明書の配置を忘れずに行ってください。
$ python sample_iot.py
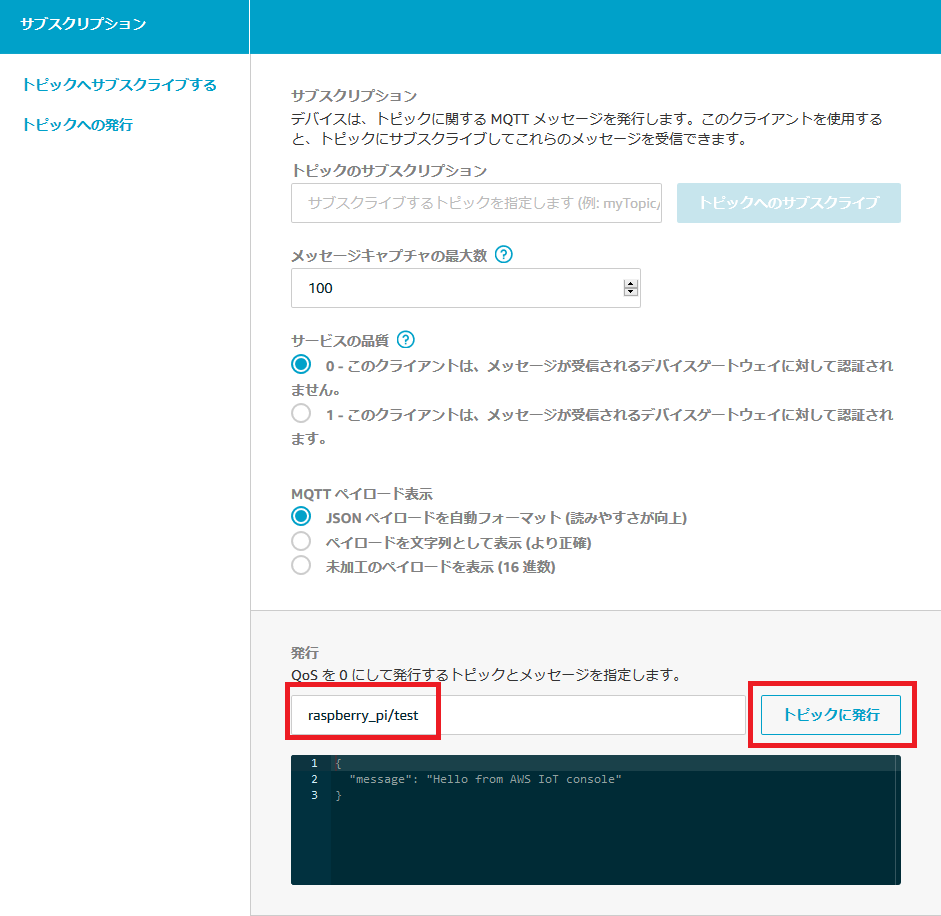
Publish
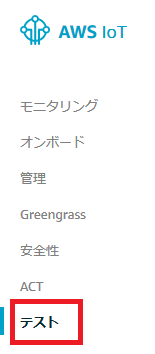
AWS IoT Coreの画面から、テストができます。
「テスト」を選択し、トピックを入力し、「トピックに発行」を選択します。
動作結果
pi@raspberrypi:~/app/sample$ python sample_iot.py
Received a new message:
b'{\n  "message": "Hello from AWS IoT console"\n}'
from topic:
raspberry_pi/test
--------------
pi@raspberrypi:~/app/sample$
Raspberry PiでメッセージをSubscribeできました!!!
これで、AWS IoT CoreとRaspberry Piを接続し、GPIO制御ができるようになりました!!!(←これのサンプルコードはありませんが、組み合わせればOK!)
サンプルコード
Githubに置いてます。