この記事を読んで出来る事
「多分これが一番簡単だと思います。 WindowsでPython仮想環境構築 2019年」の続き。具体的にライブラリをインストールして簡単なWebアプリを作成、実行する。
必要な環境
- Windows10
- Python3.7
- Visual Studio Code
- Python Extension Pack(VS Code拡張機能)
- pipenv
新規にインストールされるパッケージ
- Flask (Pythonライブラリ) と関連ライブラリ
仮想環境の作成
Powershell を開いて以下のコマンドを実行
PS> mkdir flask-py3
PS> cd flask-py3
PS> pipenv install --python 3.7
PS> pipenv install flask
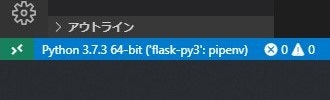
仮想環境の切り替え
VS Codeの左下のステータスバーから上で作成した仮想環境を選択する
「Hello World!」プログラム作成
hello.py
from flask import Flask

app = Flask(__name__)

@app.route('/')
def index():
    return 'こんにちは!'


if __name__ == '__main__':
    app.run()
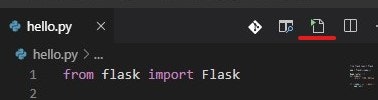
Webアプリの実行と動作確認
VS Code のタブの右にあるアイコンをクリックして実行
ターミナルに出力されたURLにアクセスして動作確認
クエリパラメータを受け取る
クライアントから名前のデータを受け取り表示する
hello_name.py
from flask import Flask, request, redirect, url_for

app = Flask(__name__)

@app.route('/')
def index():
    return 'こんにちは!'

# /post にアクセスしたときの処理
@app.route('/post', methods=['POST'])
def post():
    name = request.form.get('name')
    if name is None:
        return redirect(url_for('index'))
    return '{name}さん、こんにちは'.format(name=name)

# /get にアクセスしたときの処理
@app.route('/get', methods=['GET'])
def get():
    name = request.args.get('name', 'NO NAME')
    return '{name}さん、こんにちは'.format(name=name)

if __name__ == '__main__':
    app.run()
スクリプトを実行後、ブラウザに以下のURLを入力
http://127.0.0.1:5000/get?name=Mike
POSTの動作確認はPowershelから確認するのがお手軽
PowershellからPOST
PS> Invoke-WebRequest -Method POST http://localhost:5000/post
PS> Invoke-WebRequest -Method POST -Body "name=Mike" http://localhost:5000/post
テンプレートを使う
hello_with_template.py
from flask import Flask, render_template, request, redirect, url_for

app = Flask(__name__)

@app.route('/')
def index():
    return render_template('index.html')

# /post にアクセスしたときの処理
@app.route('/post', methods=['POST'])
def post():
    name = request.form.get('name')
    if name is None:
        return redirect(url_for('index'))
    return render_template('index.html', name=name)

# /get にアクセスしたときの処理
@app.route('/get', methods=['GET'])
def get():
    name = request.args.get('name', 'NO NAME')
    return render_template('index.html', name=name)

if __name__ == '__main__':
    app.run()
Python2.7環境で文字コード関係のエラーが出る場合
SyntaxError: Non-ASCII character ..., but no encoding declared; see http://python.org/dev/peps/pep-0263/ for details
プログラムの先頭行に以下の行を追加
# -*- coding: utf-8 -*-
UnicodeDecodeError: 'ascii' codec can't decode byte 0xe3 in position 0: ordinal not in range(128
app = Flask(__name__)の前に以下の行を追加
import sys

reload(sys)
sys.setdefaultencoding('utf-8')
毎回、行を追加するのが面倒なのとPython3環境にとっては無関係なコードを書くのもアレなので、上記プログラムを書いたファイルを作成して.venv\Lib\site-packages\sitecustomize.pyとして保存するのがオススメ