Qiitaに山ほどあるのに何で書いたの?馬鹿なの?
ぼくが読みやすいのがなかった。それだけ。
前提条件
- 環境はCloud9
- 別プロジェクトでgithubにSSH鍵が登録済みとする
- ここらへんはググれば出てくるので調べてみてね!
cloud9でrails newする
以下のコマンドでrailsのプロジェクトを作成します。
「<your_project-name>」に作りたいプロジェクト名を入れてね!
rails new <your-project-name>
「tsundoke」というプロジェクトを作成する際の例は以下です。
以降の手順はこのプロジェクトをgithubにぶち込むまでをたどります。
ec2-user:~/environment (master) $ rails new tsundoke
      create
      create  README.md
      create  Rakefile
      create  .ruby-version
      create  config.ru
      create  .gitignore
      create  Gemfile
         run  git init from "."
      :
      (このあとずらずらと続くので省略)
      :
ec2-user:~/environment (master) $
cloud9側でリモートに上げる準備をする
- 作成したプロジェクトに入り、
- git initし、
- rails newで作成したファイルを全部addし、
- 「initial commit」というコメントを付けてコミットします。
それぞれのコマンドの意味は調べてください。ぶっちゃけ思考停止で叩いてます。
4のコメントは自分がわかれば何でも良いです。
「initialじゃねぇfirstだ!」とか「create new projectだ!」とか、そこらへんの感覚は自分のプロジェクトや自分の感性に合わせてください。
ec2-user:~/environment (master) $ cd tsundoke/
ec2-user:~/environment/tsundoke (master) $ git init
ec2-user:~/environment/tsundoke (master) $ git add .
ec2-user:~/environment/tsundoke (master) $ git commit -m "initial commit"
github側で受け側になるrepositoryを作る
githubにログインして、トップページ左側の「Repositories」ペインの右上にある「New」ボタンを押下します。

「Repository name」にリポジトリ名を入力し、「Create Repository」ボタンを押下します。
途中の「Public/Private」はお好きにどうぞ。
ぼくはポートフォリオ的なノリで作ってるので公開プレイです

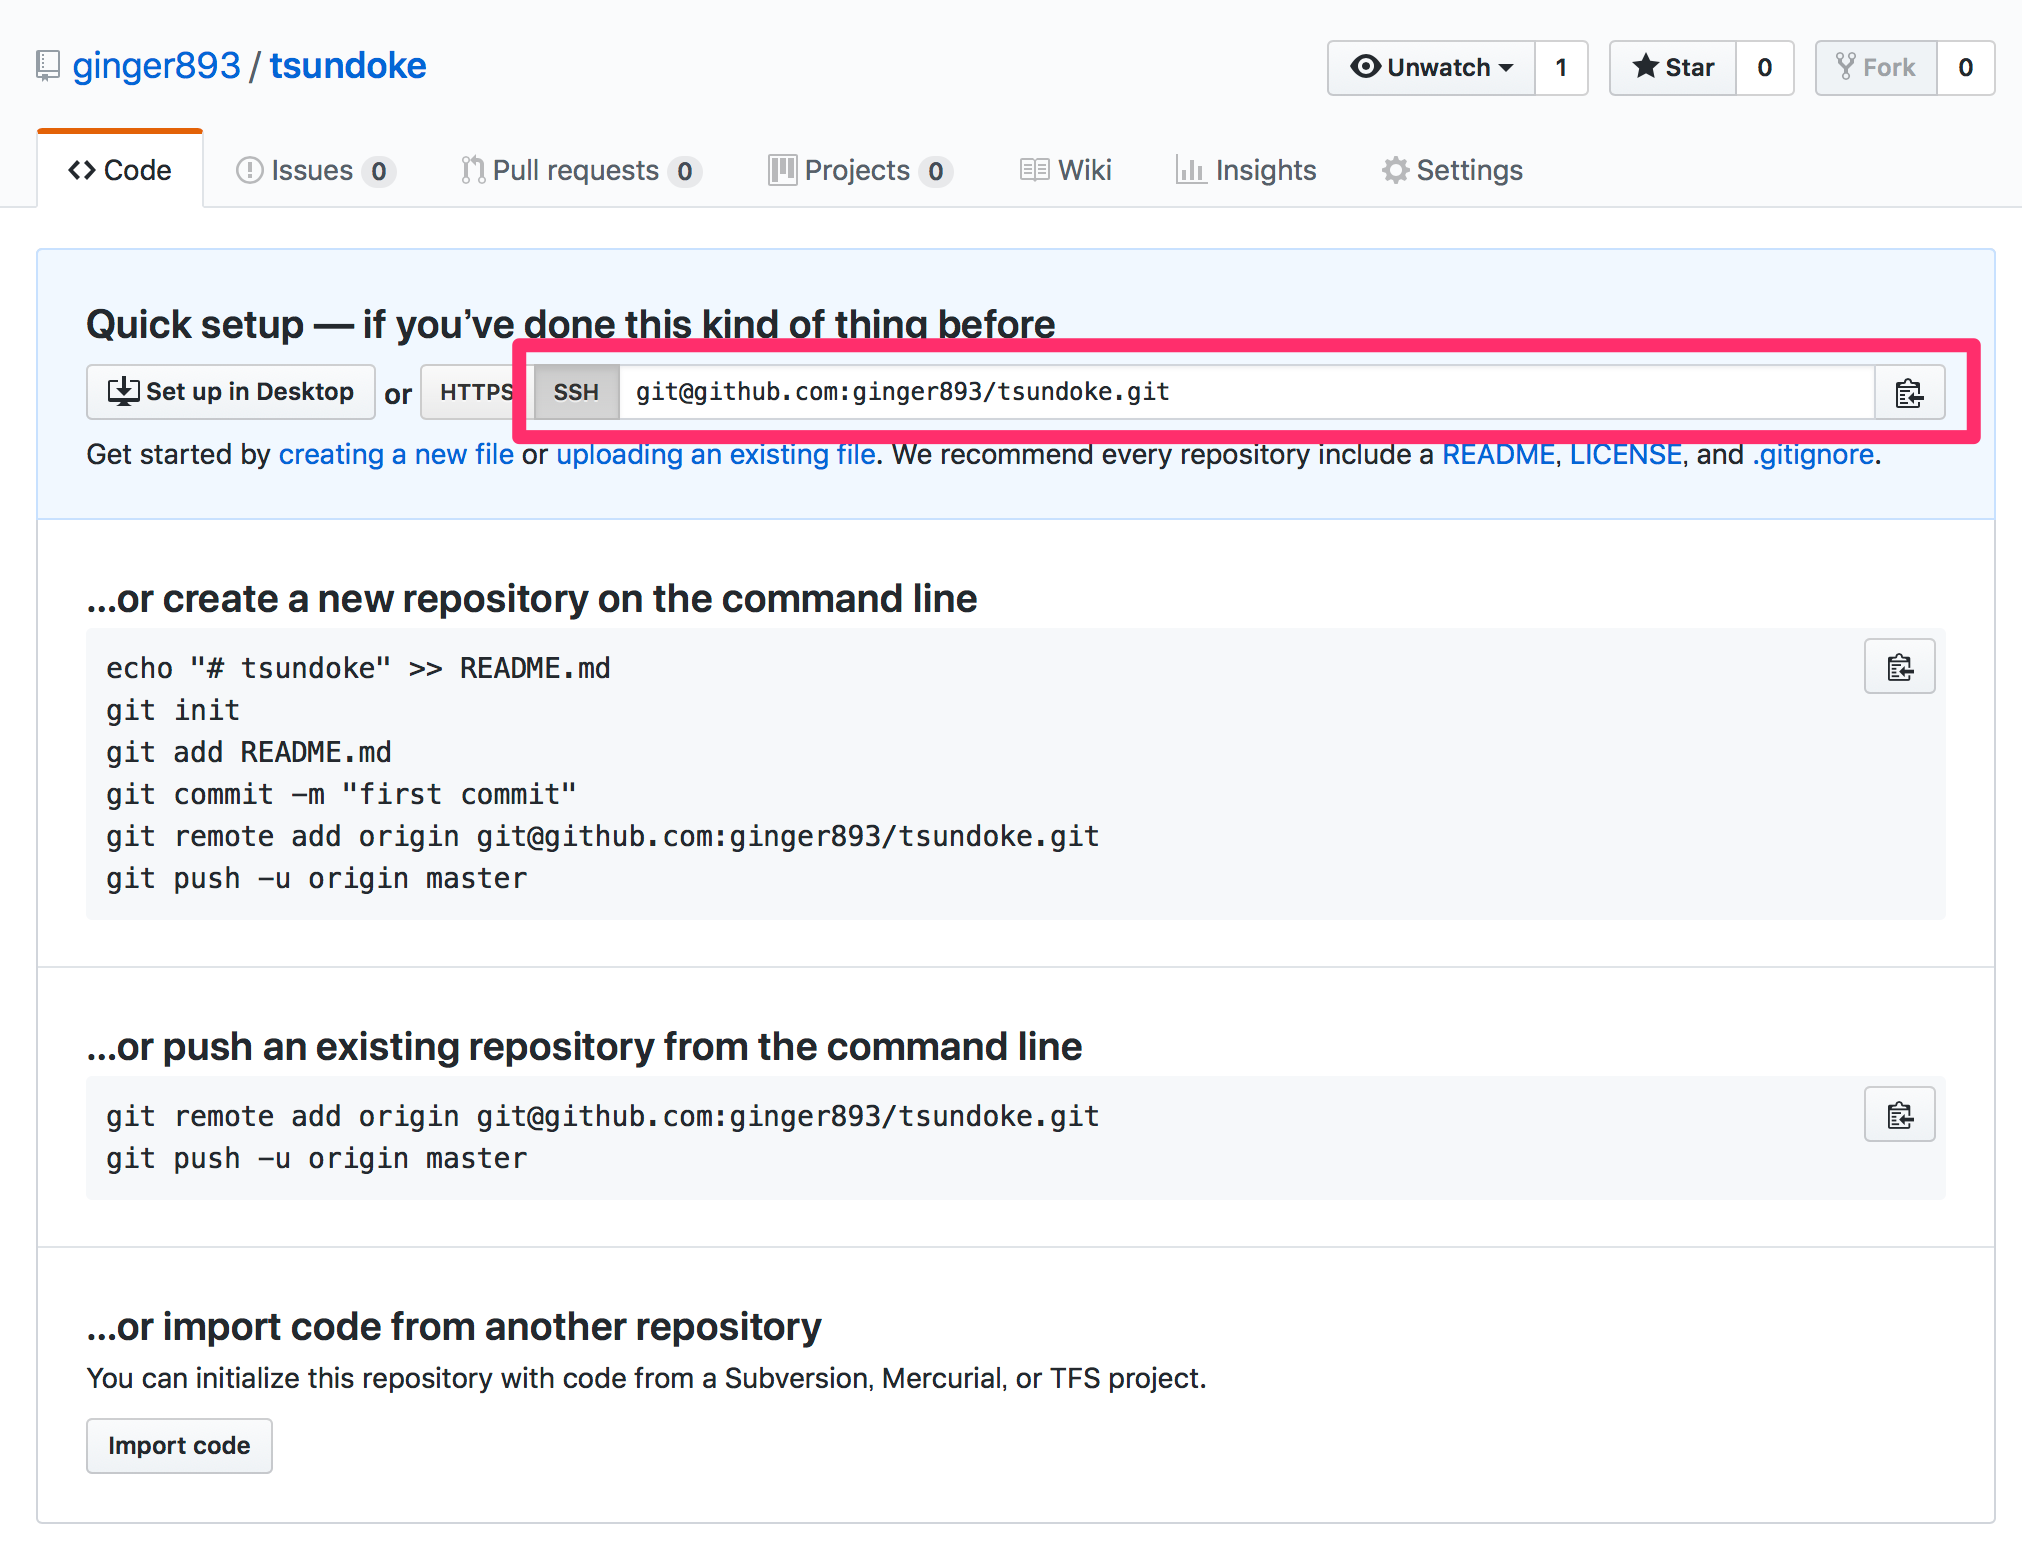
無事リポジトリが生成されると以下のような画面になります。
「SSH」を押して、表示されたURLをコピーします。
githubに投げ込む
cloud9側のリポジトリとgithubのリポジトリを接続します。
ここで躓いた方は下の方にあるおまけを見てね!ぼくは躓いたよ!!
ec2-user:~/environment/tsundoke (master) $ git remote add origin <コピーしたURL>
エラーにならなかったらいよいよgithub側にpushしていきましょう。
ec2-user:~/environment/tsundoke (master) $ git push origin master
Counting objects: 87, done.
Compressing objects: 100% (72/72), done.
Writing objects: 100% (87/87), 21.64 KiB | 1.20 MiB/s, done.
Total 87 (delta 2), reused 0 (delta 0)
remote: Resolving deltas: 100% (2/2), done.
To github.com:ginger893/tsundoke.git
 * [new branch]      master -> master
ec2-user:~/environment/tsundoke (master) $
終わったらgithub側にソースが反映されていることを確認して、作業終了。おつかれさまでした。

おまけ:git remote add originで「remote origin already exists.」な場合
コマンド叩いた瞬間以下のエラーが返ってきたのだ。
ec2-user:~/environment/tsundoke (master) $ git remote add origin git@github.com:ginger893/tsundoke.git
fatal: remote origin already exists.
個人開発で聞く人もいないので、とりあえず開発進める方向に舵をきっていこう。
addで足すなら、deleteとかremoveとかで消せるでしょ?とググったらそのとおりでした。まーじーでー?
ec2-user:~/environment/tsundoke (master) $ git remote remove origin
この後でaddすればOK。