この記事について
SwiftUIで
UIを作成する際にあるUIパーツのleadingと揃えて15間隔を開けるときどうやるんだろう?と考えた際
色々試してみたまだ理解がたりてないところがありますが一旦記事にしてみた感じです。
Storyboardで表現する場合
imageのLeading, Bottomに揃えて15間隔を開ける感じで表現できます。
SwiftUIで表現する場合
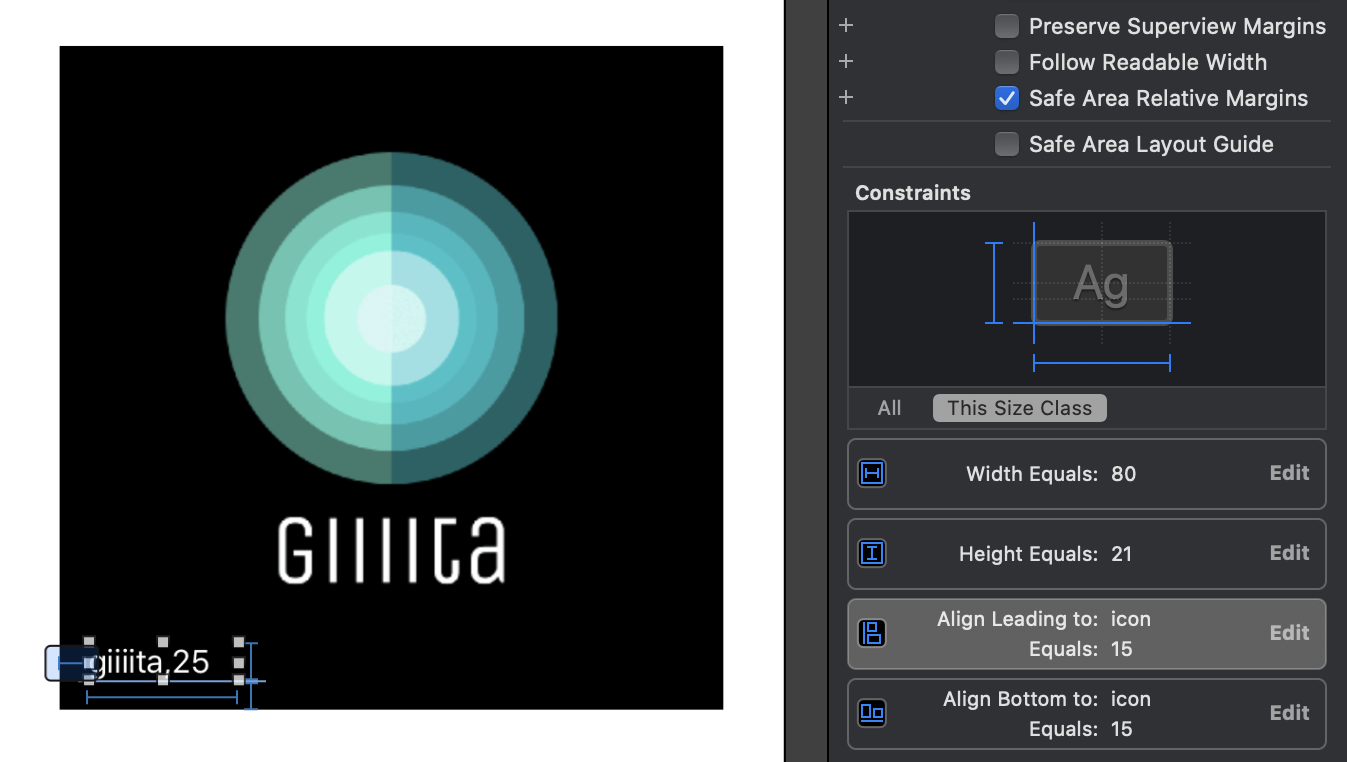
Align Leading to: icon Equals: 15
Align Bottom to: icon Equals: 15
をSwiftUIで表現してみた際の重要箇所については以下になります。
Align Leading to: icon Equals: 15
ZStack(alignment: .leading)
padding([.leading], 15)
Align Bottom to: icon Equals: 15
VStack { }
Spacer()
.padding([.bottom], 15)
import SwiftUI

struct SampleView: View {
    var body: some View {
        ZStack(alignment: .leading){
            Image("icon")
                .resizable()
            VStack {
                Spacer()
                Text("giiiita,25")
                    .foregroundColor(Color.white)
                    .padding([.leading, .bottom], 15)
            }
        }.frame(width: 352, height: 368)
    }
}

struct SampleView_Previews: PreviewProvider {
    static var previews: some View {
        SampleView()
    }
}
ZStackのalignmentを指定しないで表現する方法
こちらの場合
Align Leading to: icon Equals: 15をZStack(alignment: .leading)に変わり表現しているのは以下になります
HStack { }
Spacer()
.padding([.leading], 15)
import SwiftUI

struct SampleView: View {
    var body: some View {
        ZStack {
            Image("icon")
                .resizable()
            HStack {
                VStack {
                    Spacer()
                    Text("giiiita,25")
                        .foregroundColor(Color.white)
                        .padding([.leading, .bottom], 15)
                }
                Spacer()
            }
        }.frame(width: 352, height: 368)
    }
}

struct SampleView_Previews: PreviewProvider {
    static var previews: some View {
        SampleView()
    }
}
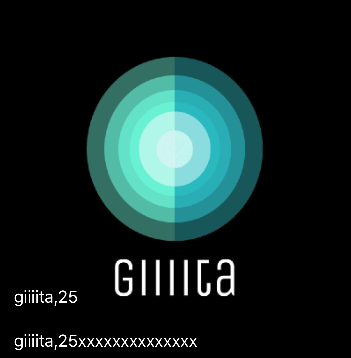
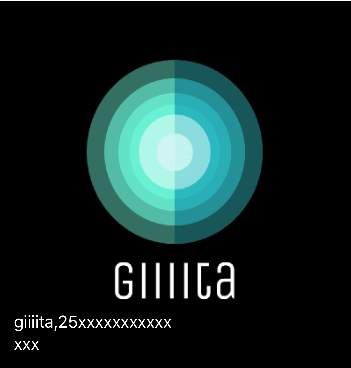
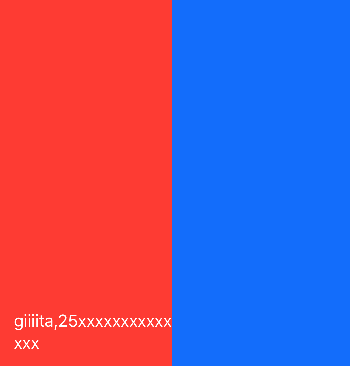
テキストの長さが増えた場合どうなる?
Text("giiiita,25")
Text("giiiita,25xxxxxxxxxxxxxx")
改行が入っている。。。
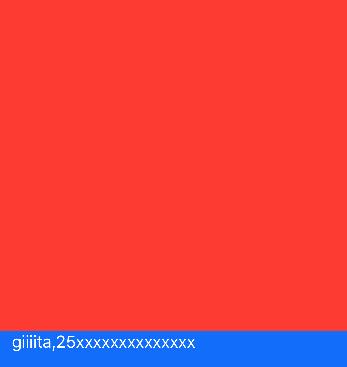
HStack, VStackに色を付けてみた
HStack: 青
VStack: 赤
HStack内のSpacerが効いてる分VStackの表示領域が赤のframe内になってそう
改行が入らないようにするには?
VStack, HStackの順にする
struct SampleView: View {
    var body: some View {
        ZStack {
            Image("icon")
                .resizable()
            VStack {
                Spacer()
                HStack {
                    Text("giiiita,25xxxxxxxxxxxxxx")
                        .foregroundColor(Color.white)
                        .padding([.leading, .bottom], 15)
                    Spacer()
                }.background(Color.blue)
            }.background(Color.red)
        }.frame(width: 352, height: 368)
    }
}

struct SampleView_Previews: PreviewProvider {
    static var previews: some View {
        SampleView()
    }
}
HStack: 青
VStack: 赤
文字の長さに対応し縦に揃えたい場合は?
文字の長さに対応した際TextはHStackの中に含まれておりました。
HStack {
   Text("giiiita,25xxxxxxxxxxxxxx")
}
この場合単純にTextを増やしてもHStackのため縦に揃えることはできません
HStack {
   Text("giiiita,25xxxxxxxxxxxxxx")
   Text("giiiita,25xxxxxxxxxxxxxx")
}
この場合は一番最初のZ,VStackの組み合わせを使用してみると良さそう
import SwiftUI

struct SampleView: View {
    var body: some View {
        ZStack(alignment: .leading){
            Image("icon")
                .resizable()
            VStack (alignment: .leading){
                Spacer()
                Group {
                    Text("giiiita,25")
                    Text("giiiita,25xxxxxxxxxxxxxx")
                }
                    .foregroundColor(Color.white)
                    .padding([.leading, .bottom], 15)
            }
        }.frame(width: 352, height: 368)
    }
}

struct SampleView_Previews: PreviewProvider {
    static var previews: some View {
        SampleView()
    }
}