Google Colaboratory上でOpenAI Whisperモデルを使って音声から文字起こし、会議議事録を作成する方法です。
準備
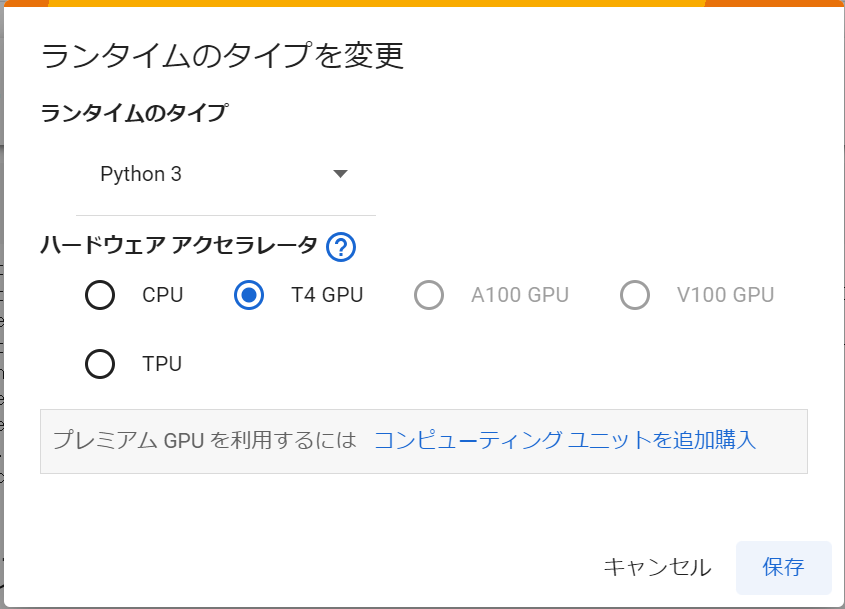
ランタイムタイプの変更
Google Colaboratory上で、[ランタイム]_[ランタイムタイプの変更]メニューを選択し、ハードウェアアクセラレータをCPUからGPUに変更します。
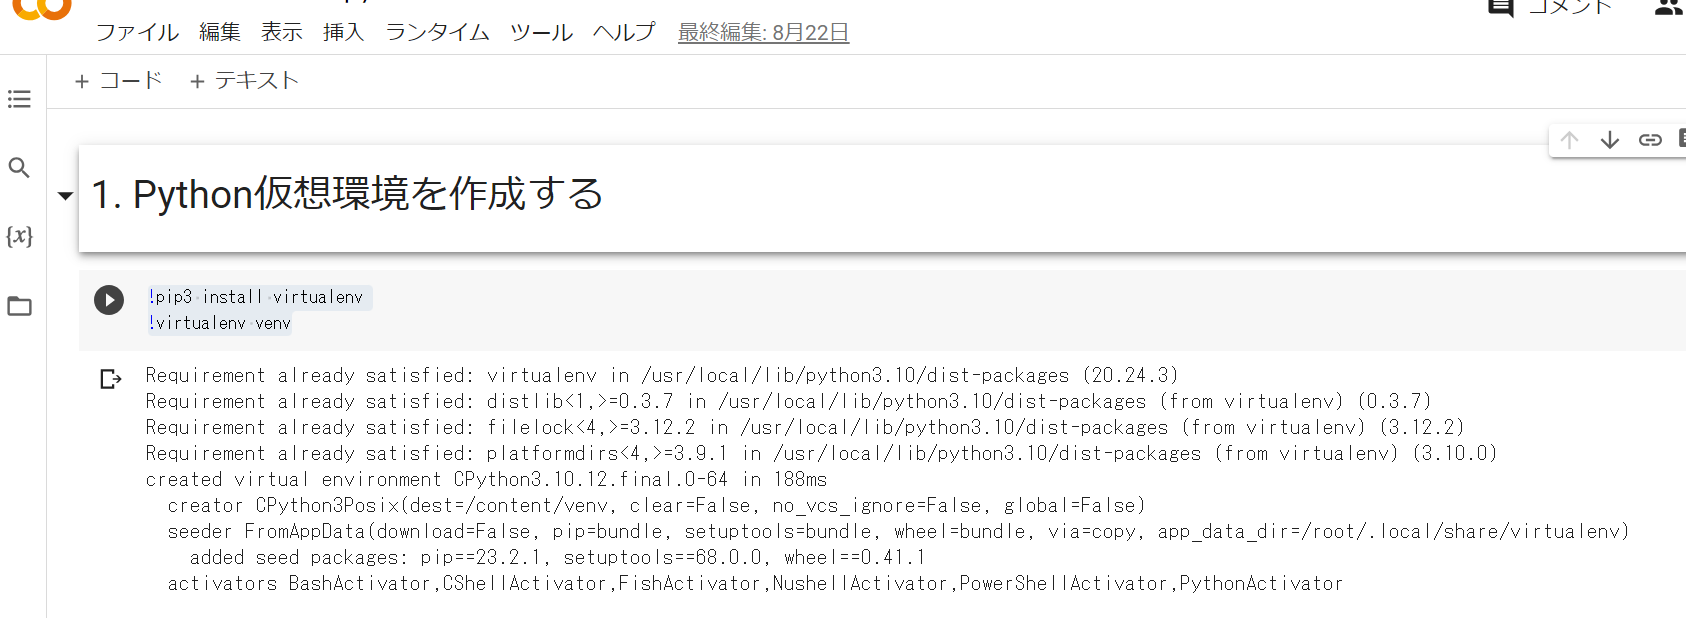
Python仮想環境を作成する
使用するPyannoteのインストールで、Colab環境そのままやると、依存関係のエラーが発生したので、仮想環境上で実施したいと思います。
!pip3 install virtualenv
!virtualenv venv
所要パッケージのインストール
今回は、音声ファイル処理にPydub、話者の切り分けにPyannote.audio、音声から文字起こしにOpenAIのAPIを使用するため、下記コマンドで、必要なパッケージをインストールします。
!source /content/venv/bin/activate; pip install pydub pyannote.audio openai
FFmpegのインストール
音声処理の内部ではFFmpegを使用するため、インストールしておきます。Google Colabでコード実行してください。
inst-ffmpeg.py
import os, uuid, re, IPython
import ipywidgets as widgets
import time

from glob import glob
from google.colab import output, drive

from IPython.display import clear_output
import os, sys, urllib.request
HOME = os.path.expanduser("~")
pathDoneCMD = f'{HOME}/doneCMD.sh'
if not os.path.exists(f"{HOME}/.ipython/ttmg.py"):
    hCode = "https://raw.githubusercontent.com/yunooooo/gcct/master/res/ttmg.py"
    urllib.request.urlretrieve(hCode, f"{HOME}/.ipython/ttmg.py")

from ttmg import (
    loadingAn,
    textAn,
)

loadingAn(name="lds")
textAn("Cloning Repositories...", ty='twg')
!git clone https://github.com/XniceCraft/ffmpeg-colab.git
!chmod 755 ./ffmpeg-colab/install
textAn("Installing FFmpeg...", ty='twg')
!./ffmpeg-colab/install
clear_output()
print('Installation finished!')
!rm -fr /content/ffmpeg-colab
!ffmpeg -version
Googleドライブのマウント
今回、議事録作成の元となる音声ファイルは、Googleドライブのマイドライブ上にあることを前提に進めています。ここでは、Googleドライブをマウントします。
from google.colab import drive
drive.mount('/content/drive')
音声書き起こしPythonプログラムの実行
OpenAIのAPIキーとPyannoteのAPIキーが必要になりますので、事前に取得しておいてください。今回は、ソースコード上にそのままコピペしていますが。
whisp.py
from pydub import AudioSegment
from pydub.silence import split_on_silence
from pyannote.audio import Pipeline, Audio
import tempfile
import openai
import soundfile as sf
import datetime
import os
import shutil
import time
import traceback

def transcript(filename):
  with open(filename, "rb") as f:
    # OpenAIのWhisperAPIを使って音声をテキストに変換
    response = openai.Audio.transcribe(
        "whisper-1",
        f,
        prompt="",
        language="ja"
    )
    # 変換結果を文字列に変換
    transcription = str(response["text"])
    return transcription

openai.api_key = "sh-xxx"

# 一時フォルダ
colab_folder = r"/content/drive/MyDrive"
tmp_folder = r"/content/drive/MyDrive/tmp"

if not os.path.exists(colab_folder):
  os.mkdir(colab_folder)

if os.path.exists(tmp_folder):
  shutil.rmtree(tmp_folder)
os.mkdir(tmp_folder)

# 入力音声ファイルのパス
wav_file = os.path.join(colab_folder, 'meeting.wav')

# 話者分離用のモデルを読み込み、実行
pipeline = Pipeline.from_pretrained("pyannote/speaker-diarization@2.1", use_auth_token="hf_xxx")
diarization = pipeline(wav_file, num_speakers=10)

# 音声ファイルの設定
audio = Audio(sample_rate=16000, mono=True)

for segment, _, speaker in diarization.itertracks(yield_label=True):

  # 音声ファイルから話者のセグメントを切り出す
  waveform, sample_rate = audio.crop(wav_file, segment)

  # 切り出した音声を一時ファイルに保存
  cropped_file = os.path.join(tmp_folder, os.path.basename(tempfile.NamedTemporaryFile(delete=False, suffix=".wav").name))

  sf.write(cropped_file, waveform.squeeze().numpy(), sample_rate)

  duration_in_seconds = len(AudioSegment.from_file(cropped_file)) / 1000.0
  # 一時ファイルから音声データを読み込む
  if duration_in_seconds < 0.1:
    print("The audio file is too short")
  else:
    for _ in range(5):
      try:
        transcription = transcript(cropped_file)
      except Exceptin as e:
        print("retry", _)
        print(traceback.format_exc()) #例外の内容表示
        time.sleep(1)
      else:
        print("success")
        break
    else:
      print('stop')
      raise ValueError('最大試行回数に達しました。処理を中断します')

    # テキスト起こしファイル
    f = open(wav_file + '.txt', 'a')
    f.writelines(f"[{segment.start:03.1f}s - {segment.end:03.1f}s] {speaker}: {transcription}\n")
    f.close()
