概要
API Platformを使ってJWT認証をできるようにするまでの手順まとめです。
手順
プロジェクト作成
まず、Symfonyのプロジェクトの作成と、API Platformのインストールを行います。
symfony/maker-bundleはEntityなどのリソースの作成を容易にするための開発ツールです。手でゴリゴリ書くぜ!って人はなくても大丈夫です。
$ symfony new my_project
$ cd my_project

$ composer req symfony/maker-bundle --dev
$ composer req api
インストールが終わったら、.envファイルのDATABASE_URLの項目を自分の環境に合わせて書き換えてから以下のコマンドを実行し、DBを作成します。
DATABASE_URL=mysql://db_user:db_password@127.0.0.1:3306/db_name?serverVersion=5.7
$ bin/console d:d:c
Created database `my_db` for connection named default
最後にサーバーを立ち上げておきます。
$ symfony server:start
User作成
続いてUserクラスを作成します。いくつか聞かれる質問は全てデフォルトでOKです。
bin/console make:user
上記コマンドを実行すると、src/Entity/User.phpが作成されるので、アノテーションを追加し、UserクラスをAPI Platformの管理下におきます。
user:readが設定されたプロパティはAPIのレスポンスとして含める事を示し、user:writeが設定されたプロパティはPOSTやPUTなどでデータを更新できることを示しています。
以下の例では、idは読み取り専用、emailは読み書き可能、rolesは読み書き不可、passwordは書き込み専用となっています。
<?php

namespace App\Entity;

use ApiPlatform\Core\Annotation\ApiResource;
use App\Repository\UserRepository;
use Doctrine\ORM\Mapping as ORM;
use Symfony\Component\Security\Core\User\UserInterface;
use Symfony\Component\Serializer\Annotation\Groups;

/**
 * @ApiResource(
 *     normalizationContext={"groups"={"user:read"}},
 *     denormalizationContext={"groups"={"user:write"}}
 * )
 * @ORM\Entity(repositoryClass=UserRepository::class)
 */
class User implements UserInterface
{
    /**
     * @ORM\Id
     * @ORM\GeneratedValue
     * @ORM\Column(type="integer")
     * @Groups({"user:read"})
     */
    private $id;

    /**
     * @ORM\Column(type="string", length=180, unique=true)
     * @Groups({"user:read", "user:write"})
     */
    private $email;

    /**
     * @ORM\Column(type="json")
     */
    private $roles = [];

    /**
     * @var string The hashed password
     * @ORM\Column(type="string")
     * @Groups({"user:write"})
     */
    private $password;
...
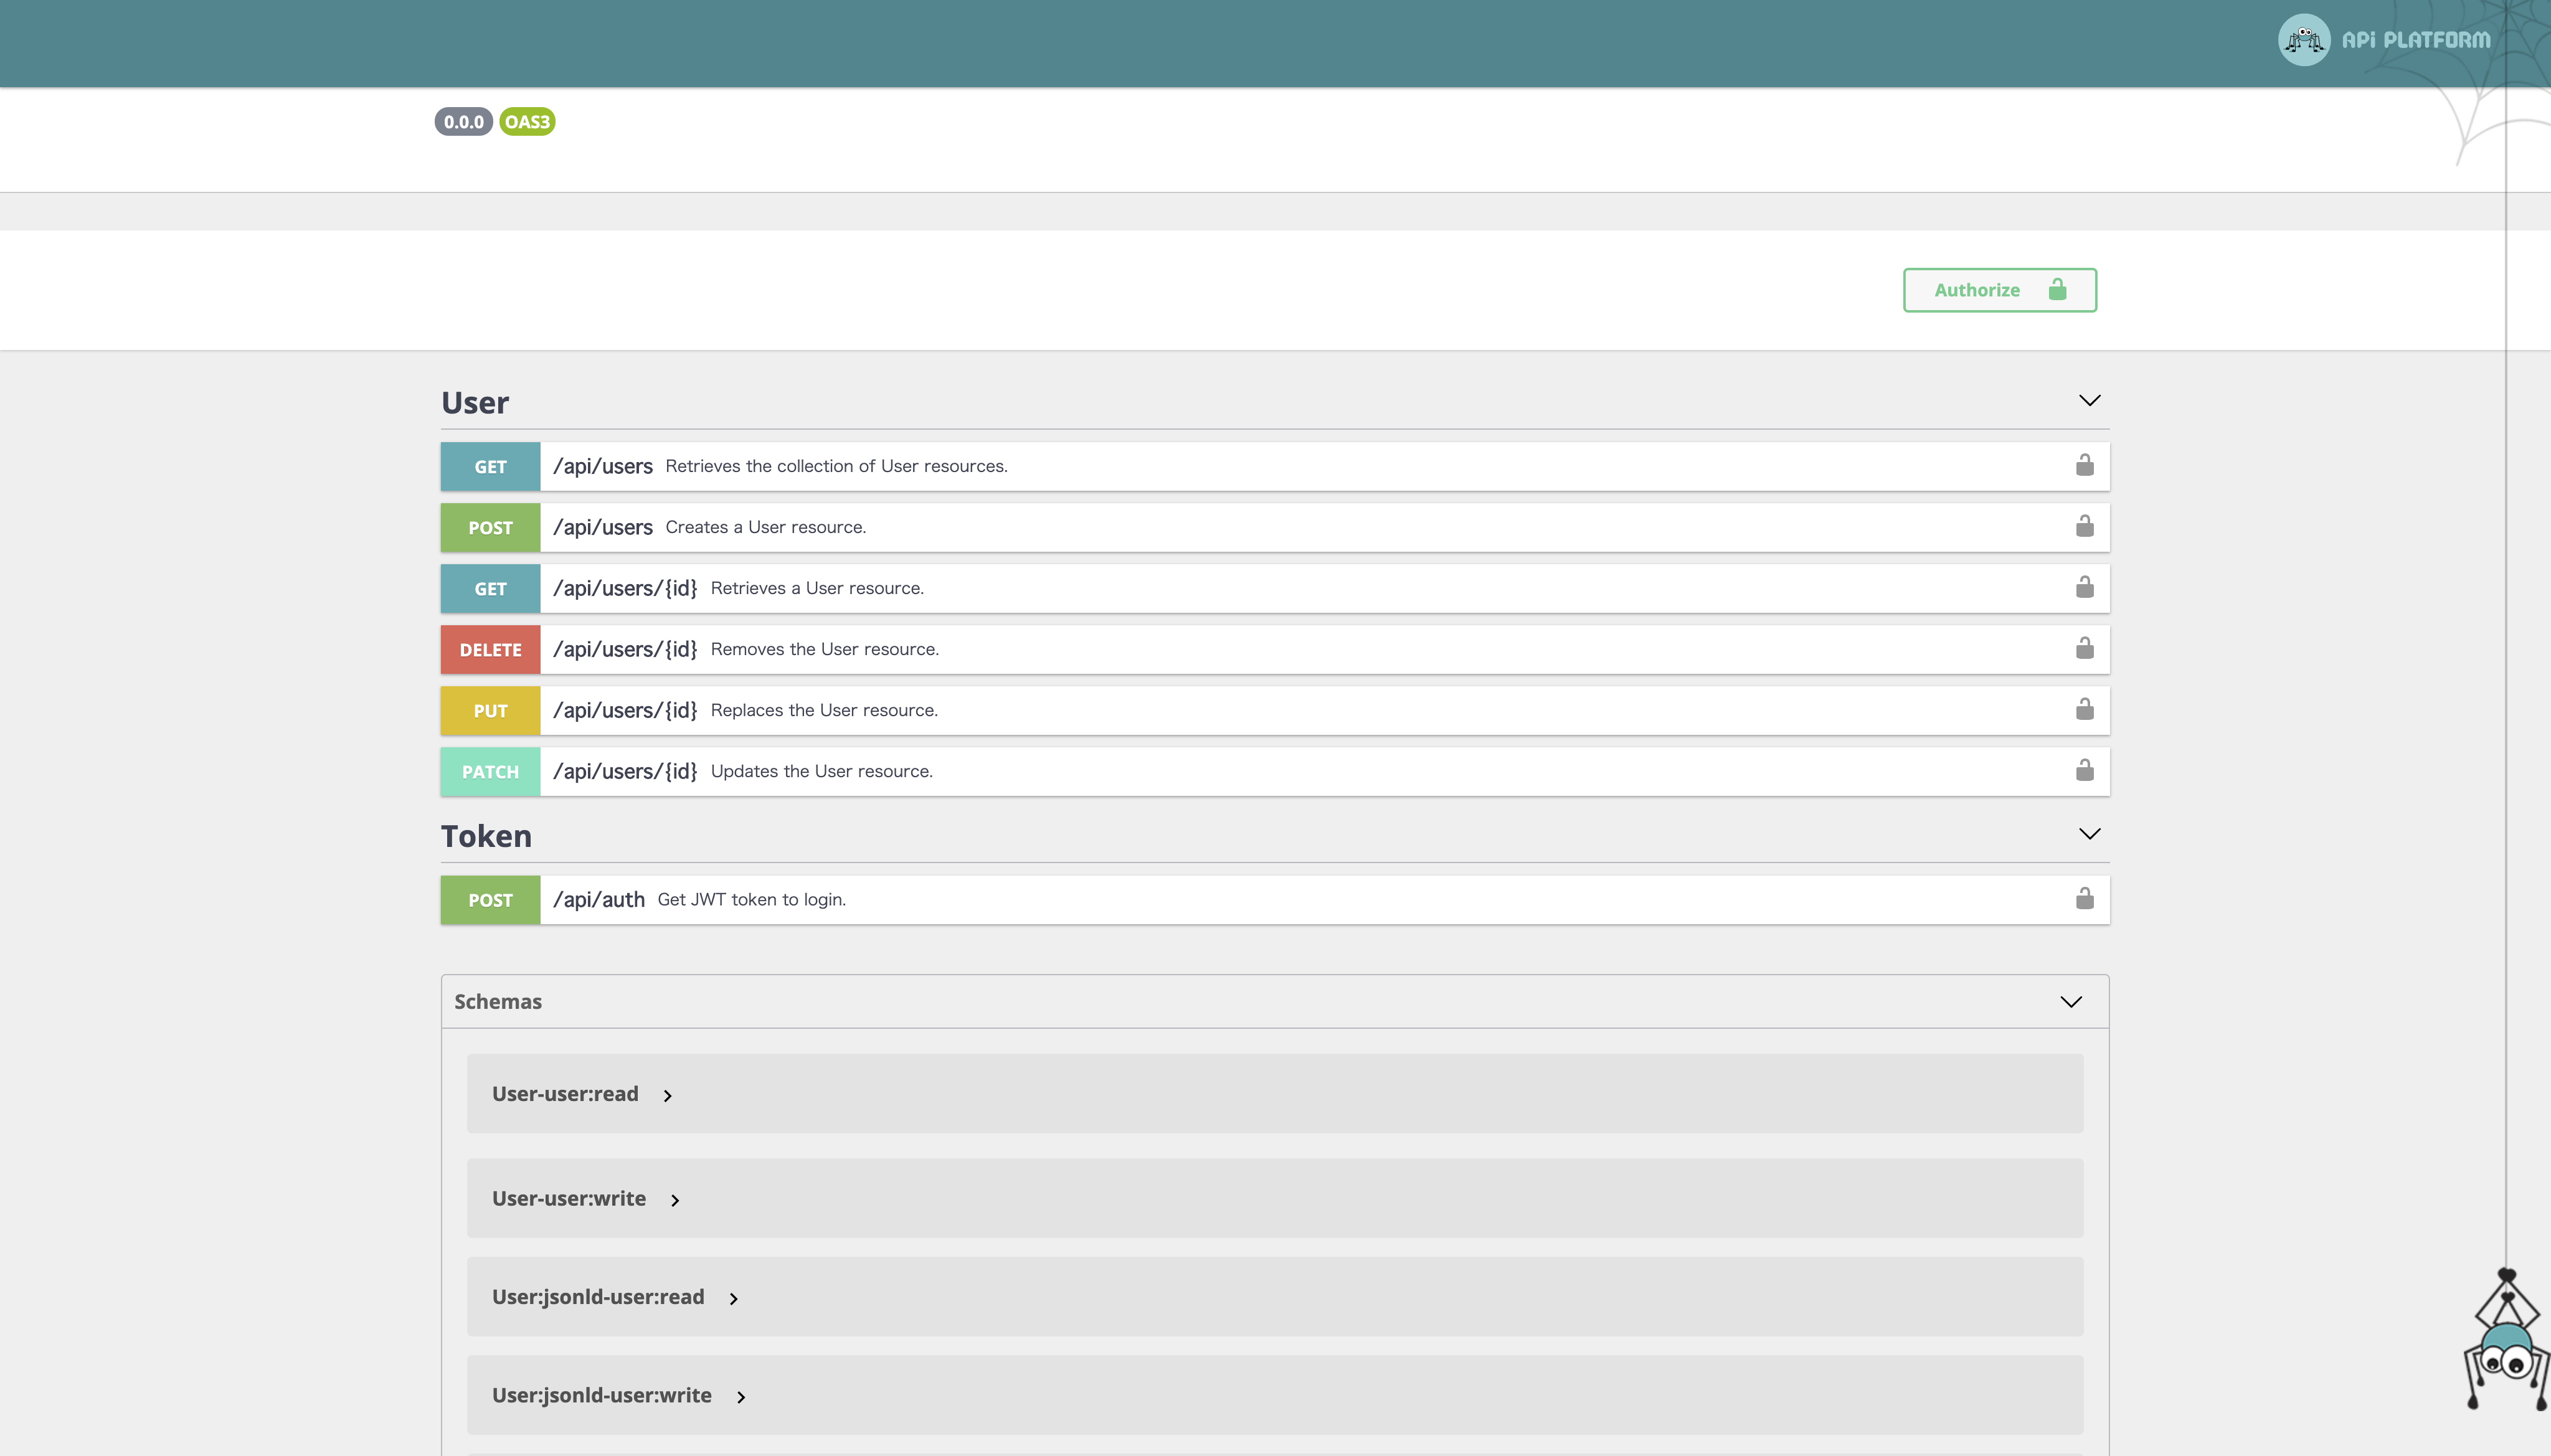
以下のコマンドでDBを更新します。https://127.0.0.1:8000/api/docs にアクセスすると、以下のようなページが作成されていると思います。
各項目の右上の「Try it out」を押すことで実際にAPIを叩くことができます。
$ bin/console d:s:u -f

パスワードのハッシュ化
現在の実装だと、APIから送られてきたパスワードがそのままDBに保存されてしまいます。なので、DBに保存する前にハッシュ化する処理を行います。
まず、UserにplanPasswordというフィールドを追加します。APIで送られてきたデータをこのフィールドにバインドするため、passwordフィールドはuser:writeから除外します。
...
    /**
     * @Groups({"user:write"})
     */
    private $plainPassword;

    /**
     * @var string The hashed password
     * @ORM\Column(type="string")
     */
    private $password;
...
続いて、src/DataPersister/UserDataPersister.phpというファイルを作成します。このクラスのpersistメソッドが実際にDBへデータを保存する処理になります。
entityManagerでデータを登録する直前に、encoderを用いて、planPasswordをハッシュ化しpasswordフィールドへセットしています。
何故わざわざpasswordの他にplainPasswordを用意するのかと言うと、PUTメソッドなどで情報を更新する際、パスワードを変更していない場合ハッシュ化されたパスワードを再度ハッシュ化してしまうと言うことが起こりうるからです。
<?php

namespace App\DataPersister;

use ApiPlatform\Core\DataPersister\ContextAwareDataPersisterInterface;
use App\Entity\User;
use Doctrine\ORM\EntityManagerInterface;
use Symfony\Component\Security\Core\Encoder\UserPasswordEncoderInterface;

class UserPersister implements ContextAwareDataPersisterInterface
{
    private $encoder;

    private $entityManager;

    /**
     * UserPersister constructor.
     * @param UserPasswordEncoderInterface $encoder
     * @param EntityManagerInterface $entityManager
     */
    public function __construct(
        UserPasswordEncoderInterface $encoder,
        EntityManagerInterface $entityManager
    ) {
        $this->encoder = $encoder;
        $this->entityManager = $entityManager;
    }

    public function supports($data, array $context = []): bool
    {
        return $data instanceof User;
    }

    public function persist($data, array $context = [])
    {
        if (!$data instanceof User) {
            return $data;
        }

      if ($data->getPlainPassword()) {
            $data->setPassword($this->encoder->encodePassword($data, $data->getPlainPassword()));
        }
        $this->entityManager->persist($data);
        $this->entityManager->flush();
        return $data;
    }

    public function remove($data, array $context = [])
    {
        return $data;
    }
}
JWTの設定
続いて、JWTの設定を行います。まずはライブラリのインストール。
composer req jwt-auth
次にドキュメント1に習い、鍵ファイルを作成します。
鍵の作成途中にパスフレーズの入力を求められますので、この時設定したパスフレーズを.envファイルに記述します。
$ mkdir -p config/jwt
$ openssl genpkey -out config/jwt/private.pem -aes256 -algorithm rsa -pkeyopt rsa_keygen_bits:4096
$ openssl pkey -in config/jwt/private.pem -out config/jwt/public.pem -pubout
### > lexik/jwt-authentication-bundle ###
JWT_SECRET_KEY=%kernel.project_dir%/config/jwt/private.pem
JWT_PUBLIC_KEY=%kernel.project_dir%/config/jwt/public.pem
JWT_PASSPHRASE=<パスフレーズ>
### < lexik/jwt-authentication-bundle ###
そして、認証を行うためのRouteをconfig/routes.yamlに追加します。
api_auth:
  path: /api/auth
  methods: ['POST']
最後に、セキュリティの設定を行います。
firewall以下の項目に書いてあるpatternにURLがマッチするかどうかが順番に検証され、一番最初にマッチした設定が適用されます。
以下の例では、/api/docsはセキュリティがOFF、/api/authではライブラリを用いて認証を行い、/api/usersのPOSTメソッドはセキュリティがOFFです。その他/apiから始まるURLについてはログインが必要となっています。
security:
    encoders:
        App\Entity\User:
            algorithm: auto

    providers:
        app_user_provider:
            entity:
                class: App\Entity\User
                property: email
    firewalls:
        dev:
            pattern: ^/_(profiler|wdt)
            security: false
        docs:
            pattern: ^/api/docs
            security: false
        api_auth:
            pattern: ^/api/auth
            anonymous: true
            json_login:
                check_path: /api/auth
                username_path: username
                password_path: password
                success_handler: lexik_jwt_authentication.handler.authentication_success
                failure_handler: lexik_jwt_authentication.handler.authentication_failure
        create_user:
            pattern: ^/api/users
            methods:  [POST]
            security: false
        api:
            pattern: ^/api
            stateless: true
            provider: app_user_provider
            guard:
                authenticators:
                    - lexik_jwt_authentication.jwt_token_authenticator

    access_control:
        - { path: ^/api/docs,   roles: IS_AUTHENTICATED_ANONYMOUSLY }
        - { path: ^/api/auth,   roles: IS_AUTHENTICATED_ANONYMOUSLY }
        - { path: ^/api/users,  roles: IS_AUTHENTICATED_ANONYMOUSLY, methods: [POST] }
        - { path: ^/api,        roles: ROLE_USER }
https://127.0.0.1:8000/api/docs にアクセスし、/api/usersのPOST以外のapiを叩こうとすると、"JWT Token not found"というエラーが返ってくると思います。
docsの更新
このままapiが叩けないのでは、せっかくのswaggerが台無しです。が、安心してください。swaggerをカスタマイズしJWT認証を行う方法が用意されています。
まず、src/Swagger/SwaggerDecorator.phpを作成し、config/services.yamlで作成したデコレータを登録します。
<?php

namespace App\Swagger;

use Symfony\Component\HttpFoundation\Response;
use Symfony\Component\Serializer\Normalizer\NormalizerInterface;

final class SwaggerDecorator implements NormalizerInterface
{
    private NormalizerInterface $decorated;

    public function __construct(NormalizerInterface $decorated)
    {
        $this->decorated = $decorated;
    }

    public function supportsNormalization($data, string $format = null): bool
    {
        return $this->decorated->supportsNormalization($data, $format);
    }

    public function normalize($object, string $format = null, array $context = [])
    {
        $docs = $this->decorated->normalize($object, $format, $context);

        $docs['components']['schemas']['Token'] = [
            'type' => 'object',
            'properties' => [
                'token' => [
                    'type' => 'string',
                    'readOnly' => true,
                ],
            ],
        ];

        $docs['components']['schemas']['Credentials'] = [
            'type' => 'object',
            'properties' => [
                'username' => [
                    'type' => 'string',
                    'example' => 'string',
                ],
                'password' => [
                    'type' => 'string',
                    'example' => 'string',
                ],
            ],
        ];

        $tokenDocumentation = [
            'paths' => [
                '/api/auth' => [
                    'post' => [
                        'tags' => ['Token'],
                        'operationId' => 'postCredentialsItem',
                        'summary' => 'Get JWT token to login.',
                        'requestBody' => [
                            'description' => 'Create new JWT Token',
                            'content' => [
                                'application/json' => [
                                    'schema' => [
                                        '$ref' => '#/components/schemas/Credentials',
                                    ],
                                ],
                            ],
                        ],
                        'responses' => [
                            Response::HTTP_OK => [
                                'description' => 'Get JWT token',
                                'content' => [
                                    'application/json' => [
                                        'schema' => [
                                            '$ref' => '#/components/schemas/Token',
                                        ],
                                    ],
                                ],
                            ],
                        ],
                    ],
                ],
            ],
        ];

        return array_merge_recursive($docs, $tokenDocumentation);
    }
}
    # add more service definitions when explicit configuration is needed
    # please note that last definitions always *replace* previous ones
    App\Swagger\SwaggerDecorator:
        decorates: 'api_platform.swagger.normalizer.documentation'
        arguments: ['@App\Swagger\SwaggerDecorator.inner']
        autoconfigure: false
続いて、config/packages/api_platform.yamlに以下を追記します。
...
    swagger:
        versions: [3]
        api_keys:
            apiKey:
                name: Authorization
                type: header
すると、「Token」というJWTを取得するAPIの項目が増え、ヘッダーには「Authorize」ボタンが追加されます。
userの作成APIとtokenの取得APIはパブリックであるため、APIを通じてUserを作成、JWTの取得が行えます。そして、Authorizeボタンを押して出てきたモーダルにBearer <トークン>とすることで他のAPIを叩いた時に自動的にヘッダーにJWTを含めてくれるようになります!
今回のソースコード