※この記事は、MacとiOSで実行して動作確認しています。Windowsの場合どうなのかまだ確認してません。
Unityで画面をキャプチャする方法
Unityで描画してる部分をキャプチャしてPNGに保存したいことがあります。
その時に、稀ですが、Alphaの値を保持させて保存したいことがあります。
まず、良く検索して出てくる方法を書きます。
using System.Collections;
using System.Collections.Generic;
using UnityEngine;
using System.IO;

public class ScreenCapture : MonoBehaviour
{
    void Update()
    {
        if (Input.GetKeyDown(KeyCode.Space))
        {
            StartCoroutine(captureScreen("test.png"));
        }
    }

    IEnumerator captureScreen(string filename)
    {
        yield return new WaitForEndOfFrame();

        //  キャプチャ用Texture2Dを作る
        var captureTex = new Texture2D(Screen.width, Screen.height, TextureFormat.ARGB32, false);

        //  ReadPixel
        captureTex.ReadPixels(new Rect(0, 0, Screen.width, Screen.height), 0, 0);
        captureTex.Apply();

        //  pngデータ取得
        byte[] pngData = captureTex.EncodeToPNG();

        //  破棄
        Destroy(captureTex);

        //  ファイルに保存
        var filePath = Path.Combine(Application.persistentDataPath, filename);
        File.WriteAllBytes(filePath, pngData);
        Debug.Log("captured : " + filePath);
    }
}
このスクリプトをカメラについかして、スペースキーで撮影できます。
Alphaの値を生かすので、カメラの背景は透明にしておきます。
カメラが一つだけなら、SolidColorにして塗りつぶし色のalphaを0とかにします。
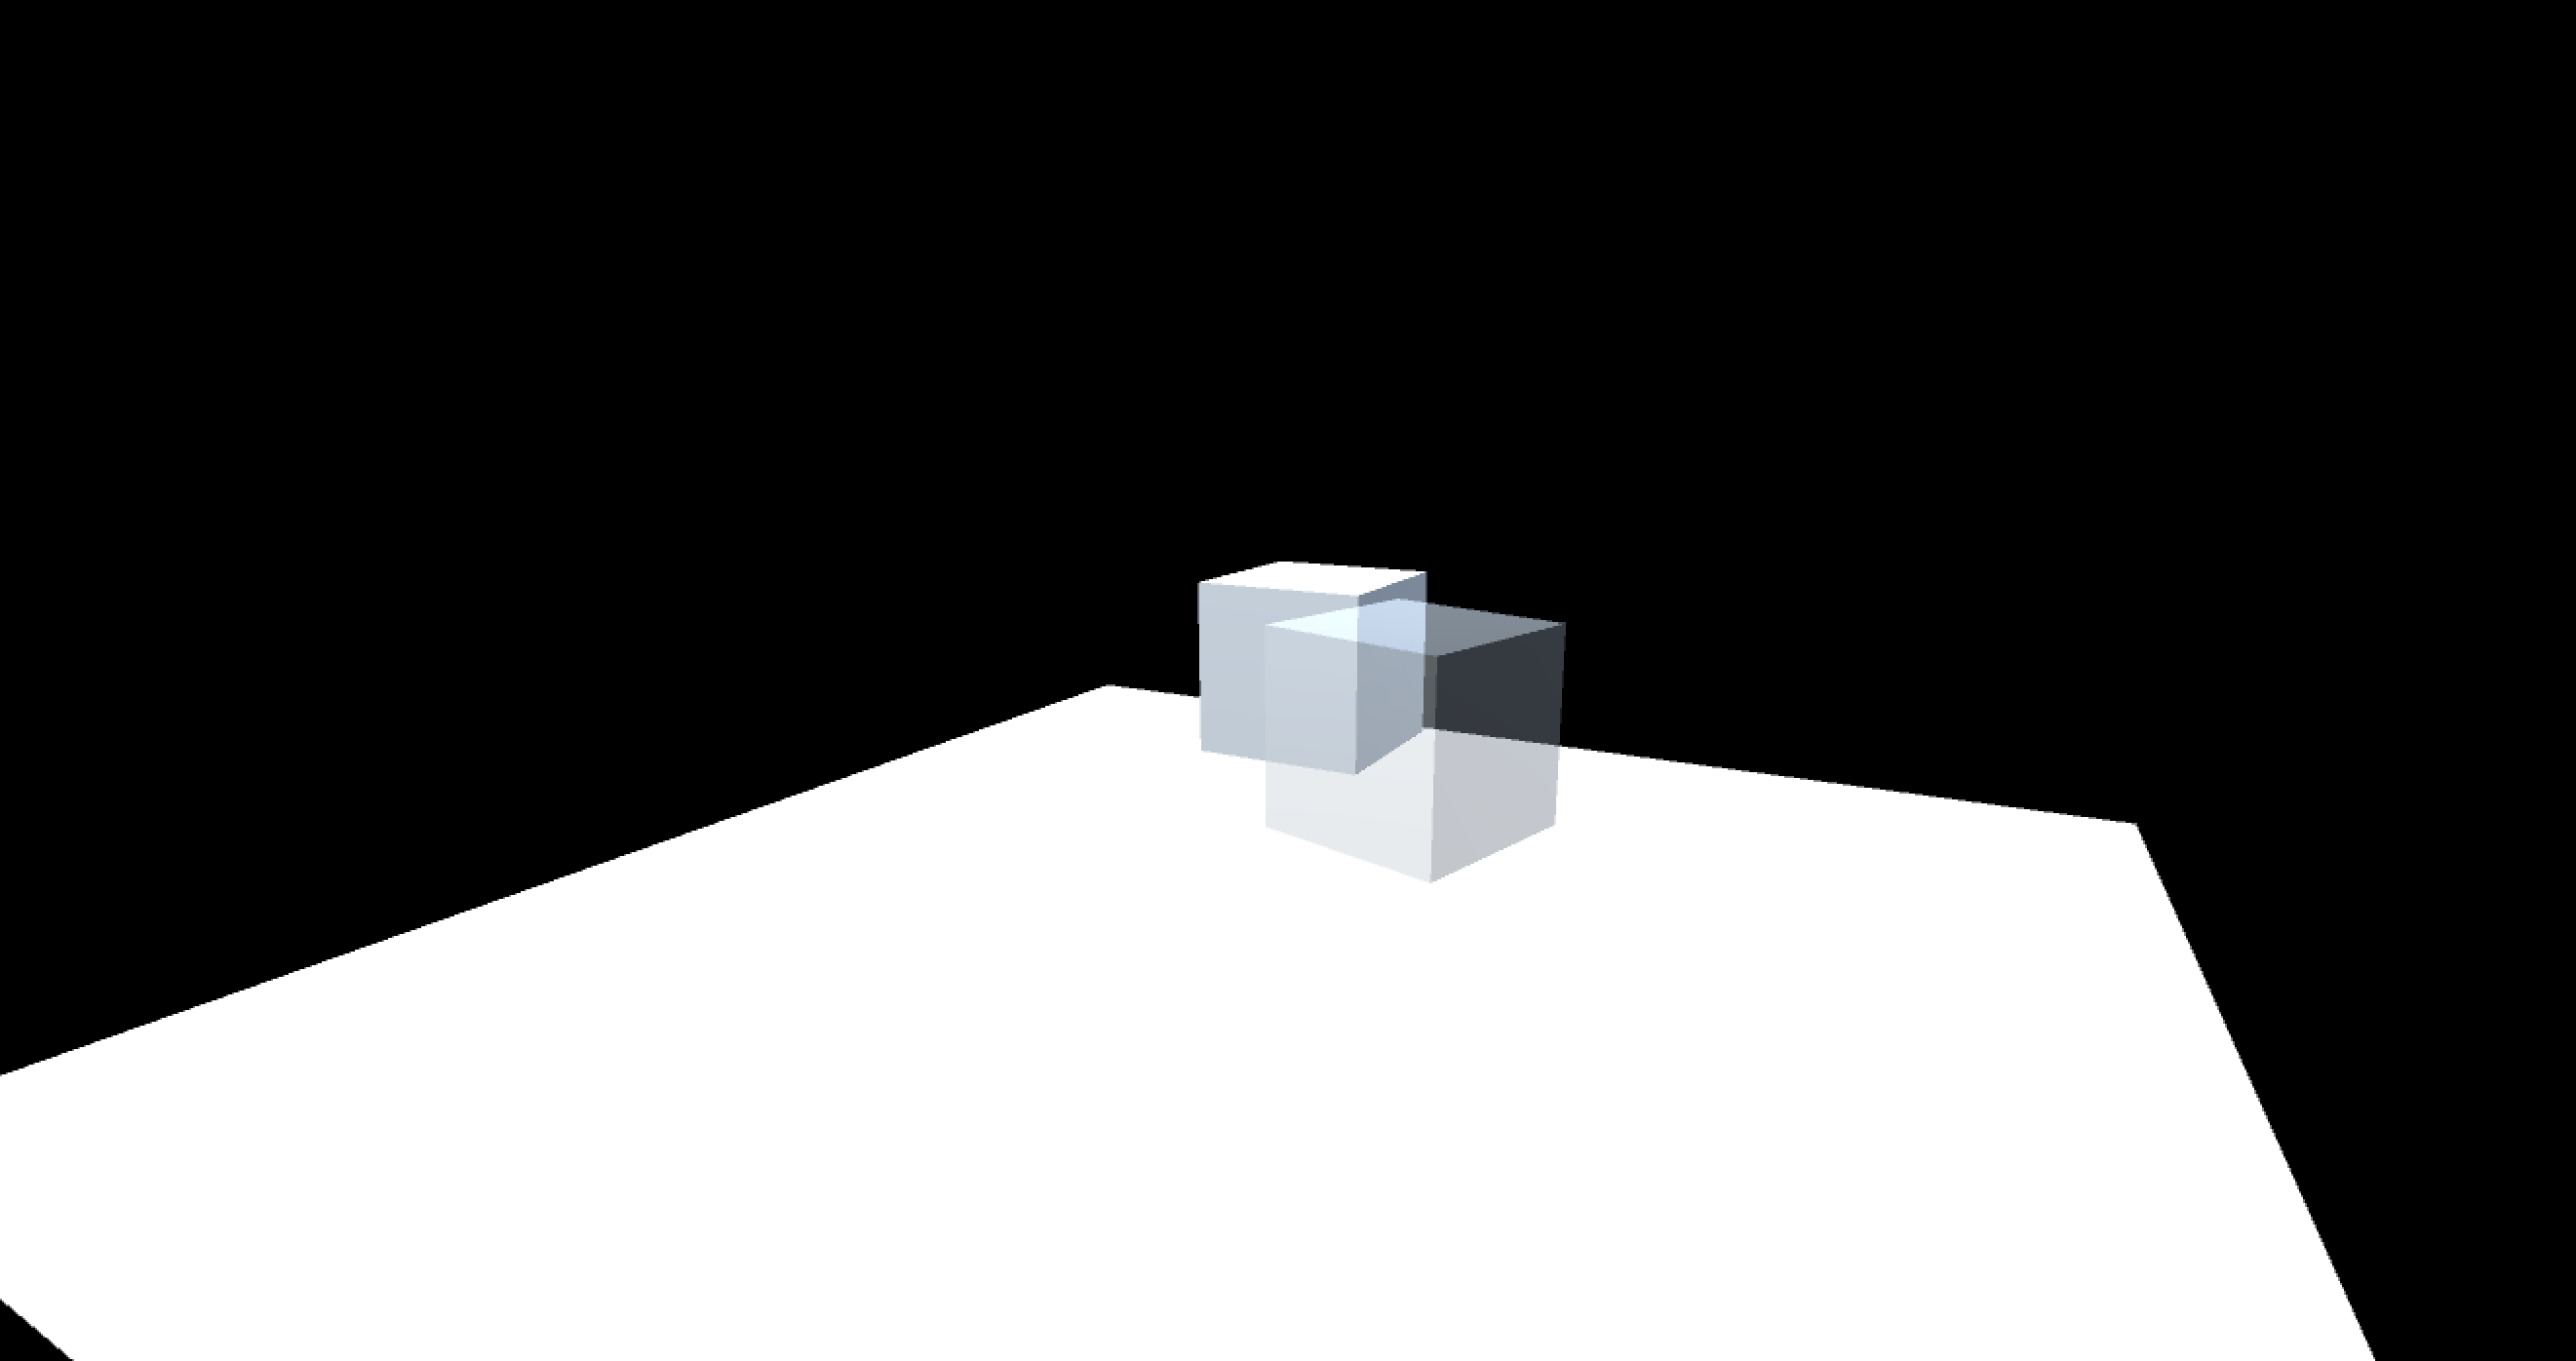
キャプチャテストをしますが、まず状況がわかるように、UnityEditorの画面をOSのキャプチャで撮ったものもアップしておきます。

黒い部分はSolidColorでRGBAすべて0の状態です。
下の白いplaneはunlit/colorで白にしていますので、完全な白です。
上に乗ってるcubeの奥側は不透明で、手前側は半透明です。
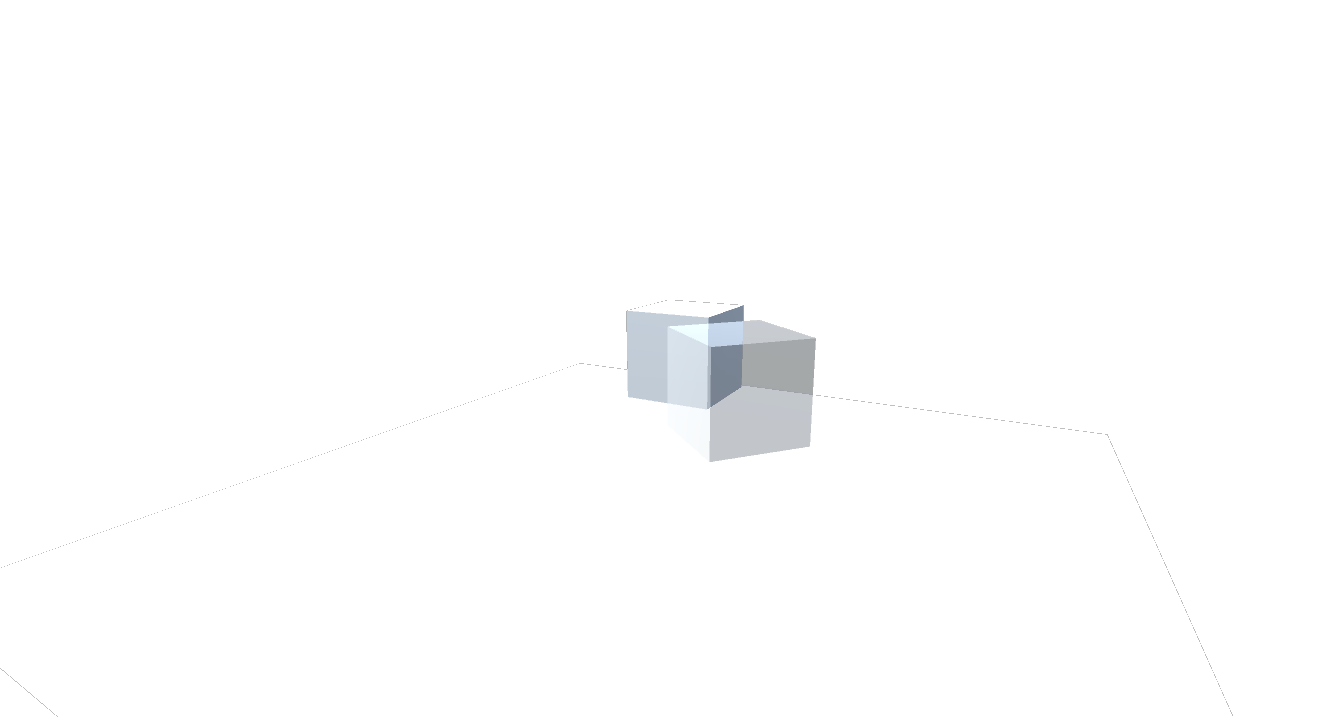
上記プログラムでキャプチャした結果がこれです。
※ちなみに保存したファイルは、Macの場合は、 ~/Library/Caches/<PlayerSettingsのCompanyName>/<Project名>/ です。

背景黒がうまくalpha0になっているようですが、おかしなところがあります。
エッジが黒く落ちています。これはアンチエイリアスによってアルファがかかっているのですが、その部分がうまくいってないようです。
キューブの半透明の部分も、背景が白の部分に重ねたときに暗くなってしまっているのがわかります。
原因と解決方法
これは、おそらくOpenGL(Metal?)でReadPixelを呼ぶとPremultipliedAlphaの色情報が返ってくるからと思われます。(たぶん、Windowsの場合とかどうなんだろ?)
Premultipliedってことなので、RGBの値に事前にalpha値をかけてしまっています。事前にかけてあるので処理が軽くなるとかそういうやつですが、これをそのままPNGに保存すると、alphaが1より小さい場所では色が暗くなっている状態になってしまうというわけです。
なので、保存する前にalpha値で割ればいいと考えました。
コードです。
IEnumerator captureScreen(string filename)
{
    yield return new WaitForEndOfFrame();

    //  キャプチャ用Texture2Dを作る
    var captureTex = new Texture2D(Screen.width, Screen.height, TextureFormat.ARGB32, false);

    //  ReadPixel
    captureTex.ReadPixels(new Rect(0, 0, Screen.width, Screen.height), 0, 0);
    captureTex.Apply();

    //  色を直す(PremultipliedAlphaなので戻す)
    var colors = captureTex.GetPixels(0, 0, captureTex.width, captureTex.height);
    for (int y = 0; y < captureTex.height; y++)
    {
        for (int x = 0; x < captureTex.width; x++)
        {
            Color c = colors[captureTex.width * y + x];
            if(c.a > 0.0f)
            {
                c.r /= c.a;
                c.g /= c.a;
                c.b /= c.a;
                colors[captureTex.width * y + x] = c;
            }
        }
    }
    captureTex.SetPixels(colors);
    captureTex.Apply();

    //  pngデータ取得
    byte[] pngData = captureTex.EncodeToPNG();

    //  破棄
    Destroy(captureTex);

    //  ファイルに保存
    var filePath = Path.Combine(Application.persistentDataPath, filename);
    File.WriteAllBytes(filePath, pngData);
    Debug.Log("captured : " + filePath);
}
保存する前にGetPixelsで色を取得し、各ピクセルの色を変更後、SetPixelsで戻してます。
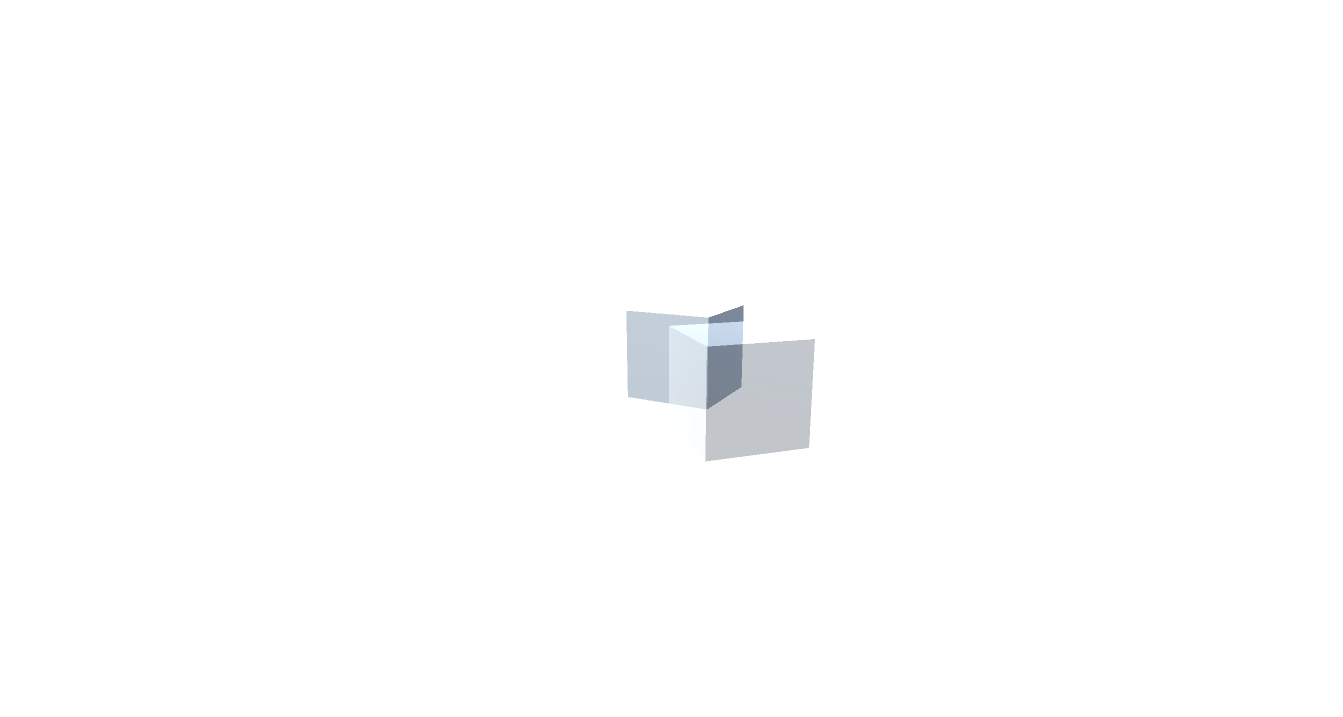
このコードで撮影した結果が以下です。
エッジの黒いのもなくなり、背景の白とplaneの白との差もなくなりました!
ということで、検索してもあまり情報がなかったので書いておきます。
