概要
Nuxt + Laravel構成で複数ファイルをアップロードを行えるようにしたい
構成
Laravel 5.8
Nuxt 2.4
参考資料
Vue + Vue Router + Vuex + Laravelで写真共有アプリを作ろう (9) 写真投稿API
Vue + Vue Router + Vuex + Laravelで写真共有アプリを作ろう (10) 写真投稿フォーム
仕様方針
- 写真の実態はS3に保存し、ファイルパスのみをDBに保存する処理方式にする。
- 今回は最大4枚まで保存できるようにする
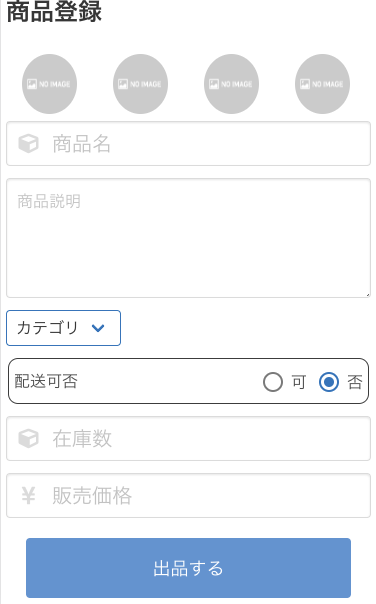
フロント(Nuxt)の実装
今回は最大で4枚まで画像を登録できるデザインにしています。
画像表示
      <!-- 商品画像 -->
      <div class="field image-area">
        <div v-for="(file, index) in files" :key="index" class="product-image">
          <img :src="file" @click="selectProductImage(index)" />
          <input
            :id="`product_image_` + index"
            type="file"
            accept="image/png,image/jpeg,image/gif"
            @change="uploadProductImage($event, index)"
          />
        </div>
      </div>
画像選択した際に、選択した画像をプレビューさせ、登録画像を取得する
// inputタグは非表示にしており、画像イメージをクリック時にinputタグのクリックイベントを発火させる
    selectProductImage(index) {
      const input = document.querySelector('#product_image_' + index)

      // 既に画像が選択されているかチェックする
      if (input.value !== '') {
        // 既に画像が選択されている場合は削除する
        if (window.confirm('画像を削除してよろしいですか?')) {
          input.value = ''

          // 表示用の変数は指定場所の画像情報を削除して削除したところをNoImageで末尾に追加する
          this.files.splice(index, 1, require('@/assets/img/NoImage.png'))

          // 登録用の画像データは削除する
          this.form.images.splice(index, 1, null)
        }
      } else {
        // 画像選択されていない場合、選択ダイアログを表示させる
        input.click()
      }
    },
    uploadProductImage(event, index) {
      // nothing to do when 'files' is empty
      if (event.target.files.length === 0) {
        return null
      }

      // ファイルのオブジェクトURLを生成する
      const productImageUrl = (window.URL || window.webkitURL).createObjectURL(
        event.target.files[0]
      )

      // $setを利用する、Vueが監視出来る配列のメソッドを使う
      // https://jp.vuejs.org/v2/guide/list.html#%E9%85%8D%E5%88%97%E3%81%AE%E5%A4%89%E5%8C%96%E3%82%92%E6%A4%9C%E5%87%BA
      this.$set(this.files, index, productImageUrl)
      this.$set(this.form.images, index, event.target.files[0])
    }
画像を登録APIを呼び出す
  async register() {
      this.form.shop_id = this.$auth.user.id

      // ファイル送信
      const formData = new FormData()

      formData.append('shop_id', this.form.shop_id)
      formData.append('product_name', this.form.product_name)
      formData.append('category_id', this.form.category_id)
      formData.append('description_product', this.form.description_product)
      formData.append('price', this.form.price)
      formData.append('stock', this.form.stock)
      formData.append('shipping', this.form.shipping)
      formData.append('shipping_method', this.form.shipping_method)
      formData.append('shipping_origin', this.form.shipping_origin)
      formData.append('shipping_estimated', this.form.shipping_estimated)
      formData.append('shipping_cost', this.form.shipping_cost)

      // ファイル情報を取得する
      for (let index = 0; index < 4; index++) {
        // inputタグにファイルが設定されているかチェックを行う
        if (this.form.images[index] === null) {
          continue
        }

        // 存在すればファイル情報を登録情報に追加する
        formData.append('images[]', this.form.images[index])
        formData.append('order[]', index + 1)
      }

      await this.$axios
        .$post('/api/shop/product', formData)
        .then(data => {
          this.$router.push('/shop')
        })
        .catch(errors => {})
    },
バックエンド(Laravel)の実装
- 画像保存用のS3 バケットを作成し、LaravelからS3にアップロードするためのIAMユーザを作成
- envファイルに IAM ユーザーおよび S3 バケットの接続情報を記述する
- APIの実装
1. 画像保存用のS3 バケットを作成し、LaravelからS3にアップロードするためのIAMユーザを作成
Vue + Vue Router + Vuex + Laravelで写真共有アプリを作ろう (9) 写真投稿API
上記を参考に、バケット作成とIAMユーザの作成を行う
Storage::cloud()のデフォルトをS3に設定する
filesystems.php
'cloud' => env('FILESYSTEM_CLOUD', 's3'),
S3 にアクセスするために必要なライブラリをインストール
composer require league/flysystem-aws-s3-v3
2. envファイルに IAM ユーザーおよび S3 バケットの接続情報を記述する
AWS_ACCESS_KEY_ID=アクセスキーID
AWS_SECRET_ACCESS_KEY=シークレットアクセスキー
AWS_DEFAULT_REGION=ap-northeast-1
AWS_BUCKET=バケット名
AWS_URL=https://s3-ap-northeast-1.amazonaws.com/バケット名/
3. APIの実装
基本的には、下記のサイトを参考に実装しました。
Vue + Vue Router + Vuex + Laravelで写真共有アプリを作ろう (9) 写真投稿API
サムネイルの作成は書きを参考
LaravelでIntervention Imageを使って加工した画像をS3へ保存する
サムネイルの作成
サムネイルを作成するために
画像処理のライブラリであるIntervention Imageをサーバへインストール
$ composer require intervention/image
Laravelの設定ファイルの下記を追加する
return [
    ......
    'providers' => [
        ......
        ......,
        Intervention\Image\ImageServiceProvider::class,
    ],

    'aliases' => [
        .....
        .....,
        'Image' => Intervention\Image\Facades\Image::class,
    ]
]
キャッシュをクリアする
$ php artisan config:clear
コントローラの実装
バリデーションの実装部分
<?php

namespace App\Http\Requests;

use Illuminate\Contracts\Validation\Validator;
use Illuminate\Foundation\Http\FormRequest;
use Illuminate\Http\Exceptions\HttpResponseException;

class StoreProductRequest extends FormRequest
{
    /**
     * Determine if the user is authorized to make this request.
     *
     * @return bool
     */
    public function authorize()
    {
        return true;
    }

    /**
     * Get the validation rules that apply to the request.
     *
     * @return array
     */
    public function rules()
    {
        return [
            'shop_id' => ['required', 'numeric'],
            'product_name' => ['required', 'string', 'max:255'],
            'category_id' => ['required', 'numeric'],
            'description_product' => ['required', 'string', 'max:1000'],
            'price' => ['required', 'numeric'],
            'stock' => ['required', 'numeric'],
            'shipping' => ['required', 'boolean'],
            'shipping_method' => ['required_if:shipping,1', 'numeric', 'nullable'],
            'shipping_origin' => ['required_if:shipping,1', 'numeric', 'nullable'],
            'shipping_estimated' => ['required_if:shipping,1', 'numeric', 'nullable'],
            'shipping_cost' => ['required_if:shipping,1', 'numeric', 'nullable'],
            'images.*' => ['file', 'mimes:jpg,jpeg,png,gif', 'max:10240']
        ];
    }

    /**
     * [Override] バリデーション失敗時
     *
     * @param Validator $validator
     * @throw HttpResponseException
     */
    protected function failedValidation( Validator $validator )
    {
        $response['success'] = false;
        $response['errors']  = $validator->errors()->toArray();

        throw new HttpResponseException(
            response()->json( $response, 422 )
        );
    }
}
画像のアップロードAPIの実装
    /**
     * 商品登録
     * @param Request $request
     * @return \Illuminate\Http\Response
     */
    public function create(StoreProductRequest $request)
    {

        // データベースエラー時にファイル削除を行うため
        // トランザクションを利用する
        DB::beginTransaction();

        $imagePaths[] = null;

//        dd($request['images']);

        // 画像情報を取得する
        $images = $request['images'];
        $order = $request['order'];


        try {
            // 商品情報を登録する
            $product = Product::create([
                'shop_id' => $request['shop_id'],
                'product_name' => $request['product_name'],
                'category_id' => $request['category_id'],
                'description_product' => $request['description_product'],
                'price' => $request['price'],
                'stock' => $request['stock'],
                'shipping' => $request['shipping'],
                'shipping_method' => $request['shipping_method'],
                'shipping_origin' => $request['shipping_origin'],
                'shipping_estimated' => $request['shipping_estimated'],
                'shipping_cost' => $request['shipping_cost'],
            ]);

            // 並び順の要素数を初期化する
            $index = 0;

            // 対象画像が存在する場合、画像登録処理を行う
            if($images != null) {

                foreach ($images as $image) {

                    // 投稿写真の拡張子を取得する
                    $extension = $image->extension();

                    $productImage = new ProductImage();

                    // インスタンス生成時に割り振られたランダムなID値と
                    // 本来の拡張子を組み合わせてファイル名とする
                    $fileName = $product->id . $product->shop_id . $this->getRandomFileName() . '.' . $extension;

                    // S3にファイルを保存する
                    // 第三引数の'public'はファイルを公開状態で保存するため
                    Storage::cloud()->putFileAs('', $image, $fileName, 'public');

                    // S3にアップロードしたファイルのURLをDBに保存する
                    $productImage->product_image = Storage::cloud()->url($fileName);
                    $imagePaths[] = $productImage->product_image;

                    // 一時保存するためのファイル名とファイルパスを生成する
                    $now = date_format(Carbon::now(), 'YmdHis');
                    $tmpFile = $now . '.' . $extension;
                    $tmpPath = storage_path('app/tmp/') . $tmpFile;

                    // 画像を横幅300px・縦幅アスペクト比維持の自動サイズへリサイズ
                    $image = Image::make($image)
                        ->resize(300, null, function ($constraint) {
                            $constraint->aspectRatio();
                        })
                        ->save($tmpPath);

                    // サムネイルを作成し、S3を保存する
                    $thumbnailFileName = 'thumbnail_' . $fileName;

                    // configファイルに定義したS3のパスへ指定したファイル名で画像をアップロード
                    Storage::cloud()->putFileAs('', new File($tmpPath), $thumbnailFileName, 'public');

                    // S3にアップロードしたファイルのURLをDBに保存する
                    $productImage->product_thumbnail_image = Storage::cloud()->url($thumbnailFileName);
                    $imagePaths[] = $productImage->product_thumbnail_image;

                    // 一時ファイルを削除
                    Storage::disk('local')->delete('tmp/' . $tmpFile);

                    // 商品IDと表示順を設定する
                    $productImage->product_id = $product->id;
                    $productImage->order_number = $order[$index];
                    $productImage->save();

                    $index++;

                }

            }

            DB::commit();

        } catch (\Exception $exception) {
            DB::rollBack();

            foreach ($imagePaths as $imagePath) {
                // DBとの不整合を避けるためアップロードしたファイルを削除
                Storage::cloud()->delete($imagePath);
            }

            throw $exception;
        }

        return response()->json([
            'success' => true,
            'data' => $product,
            'message' => '商品の登録が完了しました。',
        ], 201);


    }