はじめに
本記事はFirebaseのプロジェクトが作成済みでアプリにすでにFirebaseを導入していることを前提とした内容となっています。また、iOSアプリを対象にしています。
Firebase Cloud Messaging(以降FCM)とは公式ドキュメントによると
Firebase Cloud Messaging(FCM)は、メッセージを無料で確実に送信するためのクロスプラットフォーム メッセージング ソリューションです。
ということです。通常アプリにプッシュ通知を送るにはアプリの設定以外にもAPNs(GCM)に通知送信をするためのアプリケーションサーバーを用意しないといけません。(Pusherなどのアプリで代用も可能)FCMであればAPNsに通知を送るための設定をFirebaseのコンソールから簡単に行うことができます。
プロジェクトの設定
Cloud Messagingに必要なライブラリのインストール
// Podfile
pod 'Firebase/Messaging'
// install
$ pod install
プッシュ通知に必要なCapabilityを設定
- TARGETS -> Signing & Capability -> + を押下
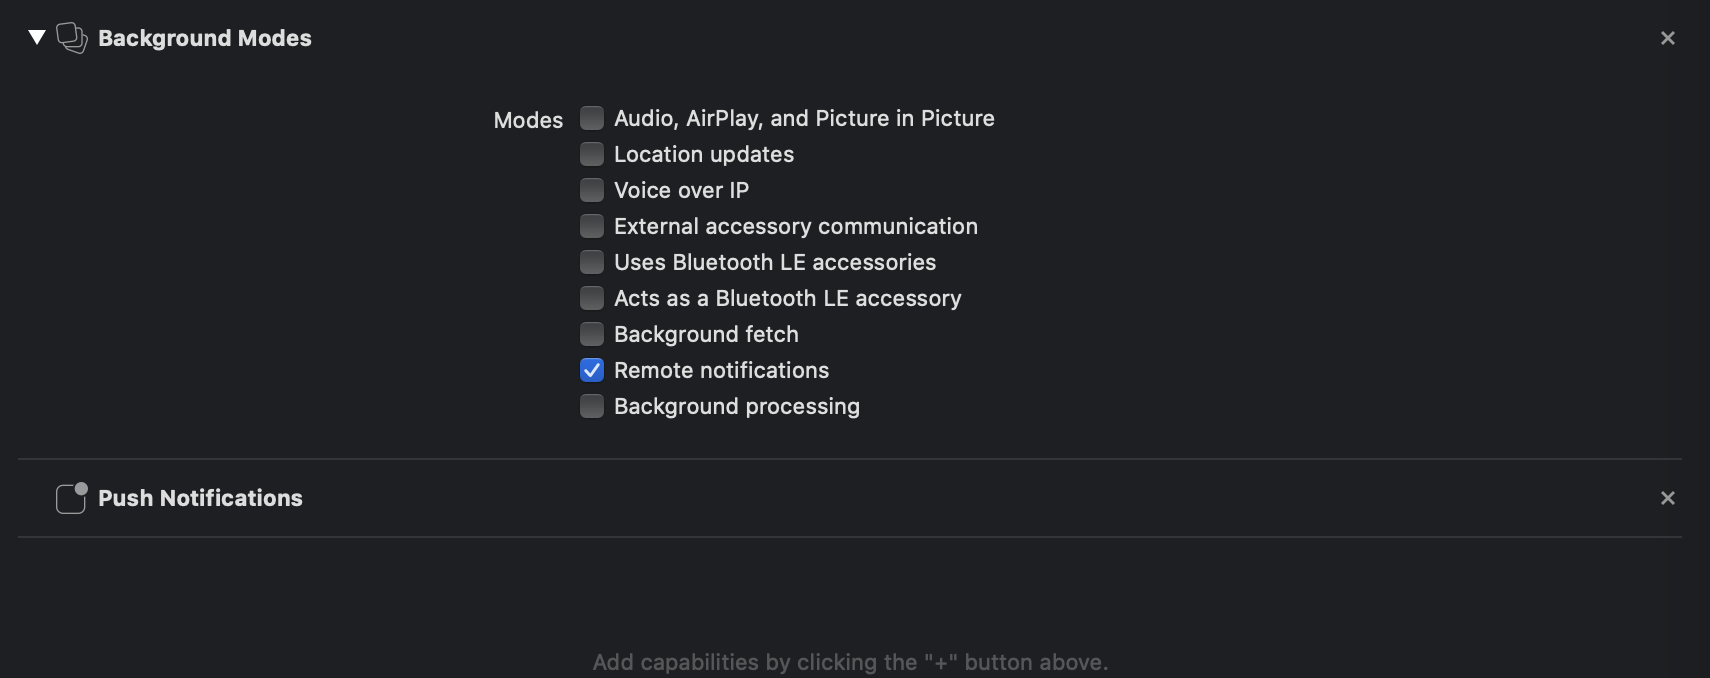
- その中からBackground ModesとPush Notificationsをダブルクリックで追加
- Background ModesのRemote notifiationsにチェック

この時点でプロジェクト名.entitlementsが追加されます。
中身を見ると

development用が追加されています。他の記事を見るとこれをコピーして本番用を用意してたりしたのですが、根拠となるソースが見つからなかったのでAppleのドキュメントを漁ったところ
Xcode sets the value of the entitlement based on your app's current
provisioning profile. For example, if you're using a development provisioning
profile, Xcode sets the value to development.
プロジェクトに設定されているProvisioning Profileによって自動的に変更されるようです。
試しにProvisoning ProfileをDistributionに変えたんですが、書き換わることはありませんでした。
どうやらArchiveするときに自動的に値をセットしてくれる仕様のようです。
https://stackoverflow.com/questions/42292363/aps-environment-is-always-development
試しにアーカイブした中身を確認したところ

変更されていました。
また、AppStoreConnectにアップロードしたバイナリも確認しましたが、productionになっていました。

Push用のCertificateを作成
すでにアプリのIdentifiersが用意されている前提の説明となります。はじめから作る場合はこちらが参考になるかと思います。
-
キーチェーンアクセスより証明書を発行(本番・開発用の計2つ)
-
Identifiersをクリック
-
先程作った証明書を使ってCertificateを作成
-
本番も同様に作成
-
これら2つをダウンロード
-
~.cerをダブルクリックし、キーチェーンに登録
-
それぞれ右クリックし、「〜を書き出す」
FirebaseのCloud MessagingにAPNs証明書を登録
Firebaseコンソールの歯車を押して「プロジェクトを設定」

Settings -> Cloud MessagingからAPNs証明書の項目までスクロールし、先程作った証明書をアップロードします

AppDelegate.swiftに通知を受け取るための処理を追加
AppDelegate.swiftに以下を追加
import Firebase
import FirebaseMessaging

class AppDelegate: UIResponder, UIApplicationDelegate {
...
    func application(_ application: UIApplication, didFinishLaunchingWithOptions launchOptions: [UIApplication.LaunchOptionsKey: Any]?) -> Bool {
        // Override point for customization after application launch.
        FirebaseApp.configure()
        // Optional
        Messaging.messaging().delegate = self

        UNUserNotificationCenter.current().delegate = self
        // 通知の許可をユーザーに要求する
        UNUserNotificationCenter.current().requestAuthorization(options: [.alert, .badge, .sound],completionHandler: { granted, error in
            guard error == nil else { return }
            if granted {
                // registerForRemoteNotificationsは必ずメインスレッドで実行しなければならない
                DispatchQueue.main.async {
                    // Appleプッシュ通知サービスを介してリモート通知を受信するための登録を行う
                    application.registerForRemoteNotifications()
                }
            }
        })

        return true
    }
...

}

// Optional
extension AppDelegate: MessagingDelegate {
    func messaging(_ messaging: Messaging, didReceiveRegistrationToken fcmToken: String) {
        // テスト送信用のトークン取得
        print("Firebase registration token: \(fcmToken)")
    }
}

extension AppDelegate : UNUserNotificationCenterDelegate {
    // アプリがフォアグラウンドで通知を受け取ったとき
    func userNotificationCenter(_ center: UNUserNotificationCenter, willPresent notification: UNNotification, withCompletionHandler completionHandler: @escaping (UNNotificationPresentationOptions) -> Void) {
        let userInfo = notification.request.content.userInfo
        // Print full message.
        print(userInfo)

        // Change this to your preferred presentation option
        completionHandler([[.alert, .sound]])
    }

    // ユーザーが通知バナーをタップしたとき
    func userNotificationCenter(_ center: UNUserNotificationCenter, didReceive response: UNNotificationResponse, withCompletionHandler completionHandler: @escaping () -> Void) {
        let userInfo = response.notification.request.content.userInfo
        // Print full message.
        print(userInfo)

        completionHandler()
    }
}
実装する上で何点か注意点があります。
まず一つ目として、iOS10未満を対象とするかで通知を受信したときのデリゲートメソッドの実装が異なります。
今回iOS10未満を対象としないため上記実装となります。もし、iOS10未満も対象にする場合は公式ドキュメントを参考に場合分けが必要です。
二つ目の注意点として、registerForRemoteNotificationsを実行する際はメインスレッドで行う必要があるということです。メインスレッドでの実行を明示しない場合は以下警告がでます。

三つ目はMessagingDelegateの実装です。こちらは実装しなくても通知は受け取れます。
ただ、Firebaseコンソール上での通知送信は開発・本番の区別なく送信されるため、テスト送信をしたい場合にはFCMトークンを指定してテスト送信をする必要がありました。
そのため、本番に送る前に手元で通知内容を確認したい場合にはFCMトークンを取得すると便利です。
FirebaseコンソールからPushを送る
FirebaseコンソールのCloud Messaging -> 通知の作成から新たな通知を発行できます。

ここの「テストメッセージを送信」を選ぶと特定の端末に通知を送ることができます。

先程のAppdelegate内のデリゲートでプリントしたFCMトークンをここに追加して「テスト」を押せば通知を受け取れます。
テスト送信ができればあとは通知設定をしていき、最後に「公開」を押せば本送信されます。


