データベース、ひいてはMySQLの学習を手軽に行いたいと思い、Dockerで環境を構築しようと考えた。
docker-compose.ymlを作成
今回やりたいこととしては、
mysqlのコンテナを作成して、ローカルにインストールしたDBMS(DBeaver)からアクセスするだけ。
なので作るコンテナは一つだけ=Dockerfileで行けるのではないかと考えていた。
しかし、公式ではdocker-composeを推奨しているようだった。
https://hub.docker.com/_/mysql
何故かと色々調べてみた結果、Dockerfileでは色々めんどくさいからのようだ。
Dockerfileはひとつのコンテナに対して色々設定できるという点は、間違いないのだが、
docker-composeではもっと楽に設定できる模様。
(例えば、volumesだったり)
なのでdocker-composeを使うことにした。
以下は公式ページより。
# Use root/example as user/password credentials
version: '3.1'

services:

  db:
    image: mysql
    restart: always
    environment:
      MYSQL_ROOT_PASSWORD: example
    # (this is just an example, not intended to be a production configuration)
こちらに色々変更を加えたのが以下。
# Use root/example as user/password credentials
version: '3.8'

services:

  db:
    image: mysql
    restart: always
    environment:
      MYSQL_ROOT_PASSWORD: root
      MYSQL_DATABASE: mysql_tr
      MYSQL_USER: tr_user
      MYSQL_PASSWORD: tr_pass
    ports:
      - "13306:3306"
    volumes:
      - ./mysql:/var/lib/mysql # 前がローカル。後ろがコンテナの中。この二つのディレクトリを同期する
    # (this is just an example, not intended to be a production configuration)
version
注:現在は廃止されている模様。
現在は3.8という最新バージョンが出ているみたいなのでそちらを利用してみる。
できることが多いようなのでこちらを採用する。
https://docs.docker.jp/compose/compose-file/compose-versioning.html#compose-file-version-3
Docke Engineのバージョンが特定以上かを調べる必要あり
docker --version
environment
MYSQL_ROOT_PASSWORD
必須設定。これだけは必須。
rootユーザのパスワード設定。
MYSQL_ROOT_PASSWORD
This variable is mandatory and specifies the password that will be set for the MySQL root superuser account. In the above example, it was set to my-secret-pw.
MYSQL_DATABASE
コンテナ作成時に作成するデータベース名。
MYSQL_DATABASE
This variable is optional and allows you to specify the name of a database to be created on image startup. If a user/password was supplied (see below) then that user will be granted superuser access (corresponding to GRANT ALL) to this database.
MYSQL_USER, MYSQL_PASSWORD
セットで指定。rootじゃないユーザで接続したいので、こちらを設定。(rootは何でもできてしまい、権限的に良くない・事故につながるのを防ぎたいので。)
MYSQL_USER, MYSQL_PASSWORD
These variables are optional, used in conjunction to create a new user and to set that user's password. This user will be granted superuser permissions (see above) for the database specified by the MYSQL_DATABASE variable. Both variables are required for a user to be created.
Do note that there is no need to use this mechanism to create the root superuser, that user gets created by default with the password specified by the MYSQL_ROOT_PASSWORD variable.
ports
ポートフォワーディング設定。
あるポートにパケットが来たら、指定したポートにパケットを転送する。
今回はローカルのDBMSからコンテナに接続したかったので設定。
13306としているのは、ローカルの3306との競合を防ぐため。
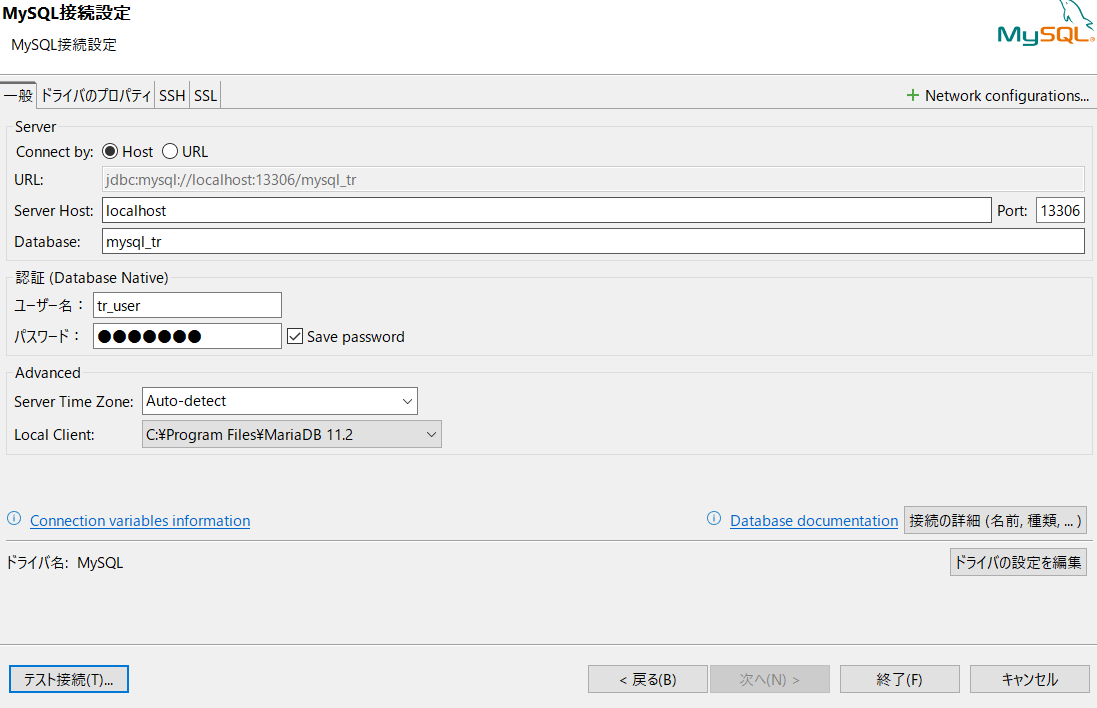
DBMSで接続
以下のようなエラーが出た。
Public Key Retrieval is not allowed
以下のようにドライバのプロパティを変更することでエラーは解消された。

何故このエラーが起きるのか?
原因は caching_sha2_password という認証方式のようだ。
https://okuyan-techdiary.com/mysql-dbeaver-error/
こちらはDB接続の際にパスワードを暗号化して送る方式。
ということは公開鍵を取得して、それで暗号化して、
相手方は秘密鍵で復号して、認証するという流れ。
その公開鍵を取得する設定が allowPublicKeyRetrieval
よって、これをTRUEにしてあげれば問題は解決した。
無事、接続を確認できた。
