こんにちは!gamubaruです!
今回も引き続きjsでTODOリストを作っていきます!
本日は更新機能を作成していきたいと思います!
よろしくお願いします!
1.クリックイベントをつけよう
更新ボタンクリックしたときに動く関数を作成してみようと思います。
その前に、各TODOにユニークな値を付けていきたいと思います。(このレベルならクリックした横の値とかでもできるけど、、練習ということで)
HTMLを生成するときに値を付与したいので、こちらの関数は分解したいと思います。
/**
 * HTMLを生成する
 * @param {string} tagName 生成するタグの名前
 * @param {string} text 名前
 * @returns {HTMLElement} 生成したタグ
 */
const createElement = (tagName,text) =>{
    const elm = document.createElement(tagName)
    if (text !== undefined){
        elm.textContent = text
    }
    return elm
}
こんな感じにしました。
生成したいタグの関数と、HTMLを作成する関数に分けました。
これによりタグごとに処理が今後とも追加できるかなって思います。
id付与はdata属性で対応してみました。id属性のほうがいいのかな?と思いつつ
/**
 * HTMLを生成する
 * @param {string} tagName 生成するタグの名前
 * @param {string} attributes attributes 属性をキーと値のペアで指定するオブジェクト
 * @returns {HTMLElement} 生成したタグ
 */
const createElement = (tagName,attributes) =>{
    const element = document.createElement(tagName)
    Object.keys(attributes).forEach(key => element.setAttribute(key,attributes[key]));
    return element
}

const createLiElement = (id) => {
    return createElement('li', {'data-id': id})
}

const createBtnElement = (text) => {
    const btn = createElement('button',0)
    btn.textContent = text;
    return btn
}
「Object.keys(attributes).forEach(key => element.setAttribute(key,attributes[key]));」
追加したのはこの処理で、
オブジェクト内の数だけ繰り返して、kyeとvalueのペアをセットする処理となります。
修正に伴い、呼び出し元も修正します
    // liの生成 ※todoCounterは任意の数値
    const liElm = createLiElement('li',todoCounter)
    liElm.textContent = todoValue
    // ボタンを作成
    const editBtnElm = createBtnElement('編集')
    const delBtnElm = createBtnElement('削除')
2.ボタンを押されたときの処理
編集ボタンがクリックするために、イベントリスナーを追加して、その中に処理を記載します。
     editBtnElm.addEventListener('click', (event) => {
        const clickedLiId = event.target.closest('li').dataset.id;
        const clickedLi = document.querySelector(`li[data-id="${clickedLiId}"]`)
        const originalText = clickedLi.firstChild.textContent.trim();
        const inputElement = document.createElement('input');
        inputElement.value = originalText;

    })
まず第2引数のeventオブジェクトのtargetプロパティ(クリックされた要素自身)から見て、一番近いli要素のdata属性のidを取得します。
closest
const clickedLiId = event.target.closest('li').dataset.id;
次に、data-id属性の値が clickedLiId であるli要素を取得します。
querySelector
const clickedLi = document.querySelector(`li[data-id="${clickedLiId}"]`)
先ほど取得した要素の最初のノードのテキストを取得します。
firstChild
const originalText = clickedLi.firstChild.textContent.trim();
最後にinputを生成して、現在表示されていたテキストをinputに反映させます。
 const inputElement = document.createElement('input');
inputElement.value = originalText;
3.更新ボタンの作成と処理
const putBtnElm = createBtnElement('更新')
clickedLi.textContent = '';
clickedLi.appendChild(inputElement);
clickedLi.appendChild(putBtnElm);

putBtnElm.addEventListener('click', ()=>{
    clickedLi.textContent = inputElement.value;
    clickedLi.appendChild(editBtnElm);
    clickedLi.appendChild(delBtnElm);
})
createBtnElement関数で更新ボタンを作成します。
「const clickedLi = document.querySelector(li[data-id="${clickedLiId}"])」こちらで取得したノードの末尾のノードにinputと更新ボタンを追加します。
更新ボタンをクリックされた際は、input内で入力された値を「clickedLi」変数のDOMに与えて、編集/更新ボタンを作成したものを追加します。
4.実装
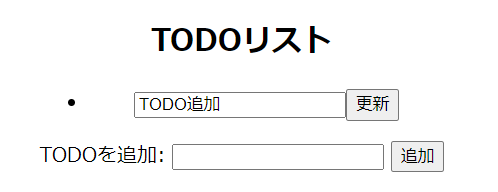
TODOを追加して

編集ボタンをクリックして

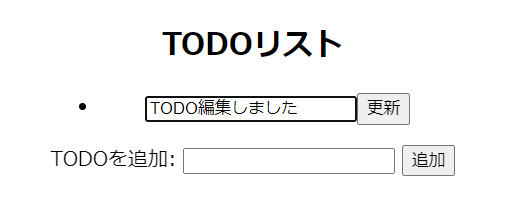
修正して

更新ボタンをクリックしました。

こちらで一旦編集機能の実装はOKとします。
更新時の処理に編集と削除ボタンをappendChildしたとことろうや、
編集ボタンの機能内に更新ボタンの機能を追加したところは今後の課題とします。
次は削除機能の追加をしたいと思います。
ありがとうございました