👋 はじめに
こんにちは!今回は、ローカル環境で動作するAIアシスタントのVSCode拡張機能を作成する方法をご紹介します。OllamaとDeepSeekを使用して、プライバシーを保ちながら高性能なAIチャット機能を実装していきましょう。
🚀 Ollamaのインストール
- 以下のリンクで簡単にインストールできます:
Ollamaダウンロード - 自分のオペレーティングシステムに合ったインストールファイルを入手
- インストール完了後、自動的にllama CLIツールが使用可能になります。
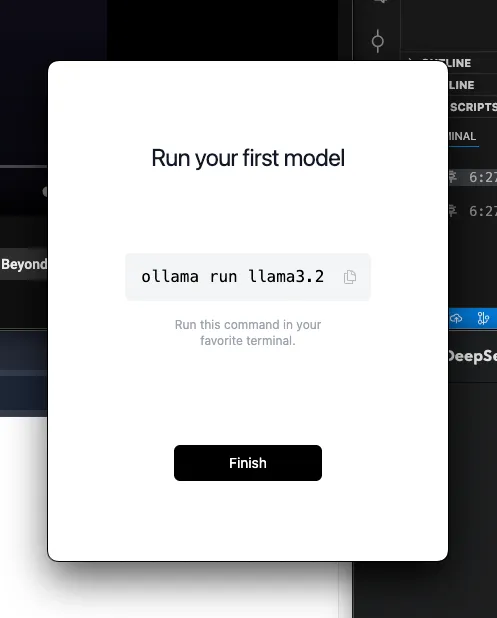
Ollamaで必要なAIモデルをプル
Link で欲しいモデルをダウンロードすることができます。
私はdeepseek-r1:7bモデルをダウンロードしました:
ollama run deepseek-r1
ダウンロードには時間がかかる場合がありますので、気長にお待ちください。

コマンドを入力すると、そのモデルをダウンロードした後、CLIでプロンプトが直接表示されます。
ここで直接質問、回答をすることもできますが、私たちの目的はVS Code Extensionをホストにして通信をやり取りすることなので、次のステップに進みます。
💻 VS Code Extension開発の初期設定
Yeomanを使用したプロジェクト生成
npx --package yo --package generator-code -- yo code
💡 Yeoman(yo)はプロジェクトテンプレートを自動生成してくれるツールです。

上記のようにインタラクティブなプロンプトが表示され、どのエクステンションを作成するかを順番に設定することができます。

セットアップが終わったら、私たちがよく見るnpmパッケージプロジェクトが生成されます。extension.tsがVS Code Extensionを実行した時、一番最初に到達する入り口になります。
🔧 拡張機能のコア実装
-
vscodeモジュール
import * as vscode from 'vscode';- 拡張機能が有効化されたときに呼び出される関数です。
- ユーザーが拡張に関連するコマンドを実行したり、特定の条件下で自動有効化されたときに呼び出されます。
- パラメータ:
-
context: 拡張の実行コンテキストを表すオブジェクトで、拡張の寿命の間に使用されるリソースを管理します。 -
context.subscriptions: 拡張終了時に一緒に整理すべきリソースを登録する配列です。
-
-
activate関数
export function activate(context: vscode.ExtensionContext) { console.log('Congratulations, your extension "ollama-deepseek-extention" is now active!'); }- ユーザーコマンドを登録する方法です。 登録されたコマンドはVS Codeコマンドパレット(Ctrl+Shift+P)で実行することができます。
- パラメータ:
-
'ollama-deepseek-extention.helloWorld': コマンドIDです。 package.jsonのcommandsセクションで定義されたコマンドと同じでなければなりません。 -
() => {}: コマンドの実行時に呼び出されるコールバック関数です。 - ここではvscode.window.showInformationMessage()でユーザーに通知を表示します。
-
-
vscode.commands.registerCommand
const disposable = vscode.commands.registerCommand( 'extension.helloWorld', () => { vscode.window.showInformationMessage('Hello World from extension.helloWorld!'); } );- VS Code の通知メッセージを表示するメソッドです。
- メッセージはエディタ上部に表示され、情報性メッセージを伝える際に便利です。
-
vscode.window.showInformationMessage
vscode.window.showInformationMessage('Hello World from extension.helloWorld!');- 登録されたリソース(disposable)を拡張の寿命の間管理します。
- 拡張が非活性化される時(deactivate呼び出し時)、自動的にリソースをクリーンアップしてメモリリークを防止します。
-
context.subscriptions.push(disposable)
context.subscriptions.push(disposable); -
deactivate 関数
export function deactivate() {}- 拡張機能が無効になったときに呼び出される関数です。
- ここで必要なクリーンアップ作業(例えば、リソースの解放)を行うことができます。
- 現在は特別な動作はなく、空の関数で書かれています。
🤖 ollama、TypeScript SDKを使用してローカルホストのDeepSeekとAPIを接続
ollamaではPythonとTypeScriptでollamaと通信できるSDKを提供しています。
VS Code Extensionが実行された時にllamaと通信できるようにSDKをインストールしてくれます。
npm install ollama
📝 ollamaではPythonとTypeScriptでollamaと通信できるSDKを提供しています。
次はregisterCommandコールバック関数の内部内容を用途に合わせて修正してみます。
// This method is called when your extension is activated
// Your extension is activated the very first time the command is executed
export function activate(context: vscode.ExtensionContext) {
  // Use the console to output diagnostic information (console.log) and errors (console.error)
  // This line of code will only be executed once when your extension is activated
  vscode.window.showInformationMessage(
    "ollama-deepseek-extention is now active!"
  );

  // The command has been defined in the package.json file
  // Now provide the implementation of the command with registerCommand
  // The commandId parameter must match the command field in package.json
  const disposable = vscode.commands.registerCommand(
    "ollama-deepseek-extention.chat",
    () => {
      // The code you place here will be executed every time your command is executed
      const panel = vscode.window.createWebviewPanel(
        "deepChat",
        "Deep Seek Chat",
        vscode.ViewColumn.One,
        { enableScripts: true }
      );

      panel.webview.html = getWebviewContent();

      panel.webview.onDidReceiveMessage(async (message: any) => {
        if (message.command === "chat") {
          console.log("Received chat message:", message.text);
          const userPrompt = `${message.text}\n\nPlease respond in English.`;
          let responseText = "";

          try {
            const streamResponse = await ollama.chat({
              model: "deepseek-r1:7b",
              messages: [
                {
                  role: "system",
                  content:
                    "You are a helpful assistant. Always respond in English, regardless of the input language.",
                },
                { role: "user", content: userPrompt },
              ],
              stream: true,
            });

            for await (const part of streamResponse) {
              responseText += part.message.content.replace(/\<\/?think\>/g, "");
              console.log("Sending response part:", responseText);
              panel.webview.postMessage({
                command: "chatResponse",
                text: responseText,
              });
            }
          } catch (error) {
            console.error("Chat error:", error);
            panel.webview.postMessage({
              command: "chatResponse",
              text: `Error: ${String(error)}`,
            });
          }
        }
      });
    }
  );

  context.subscriptions.push(disposable);
}
このコードはユーザーコマンド(wonkooklee-ext.helloWorld)実行時、WebViewウィンドウを表示し、ユーザーが入力した内容を基にOllamaのdeepseek-r1:7bモデルと相互作用して応答を表示する機能を提供します。主な部分を段階的に説明します。
- WebView 生成 (vscode.window.createWebviewPanel)
const panel = vscode.window.createWebviewPanel( "deepChat", "Deep Seek Chat", vscode.ViewColumn.One, { enableScripts: true } );- 新しいWebViewウィンドウを作成します。
- 「deepChat「はWebViewの内部識別子、」Deep Seek Chat"はウィンドウのタイトルです。
-
vscode.ViewColumn.OneはWebViewがVS Codeウィンドウの最初の列に表示されるように指定します。 -
{ enableScripts: true }でWebViewでJavaScriptの実行を許可します。
- WebView の HTML コンテンツを設定 (getWebviewContent)
panel.webview.html = getWebviewContent();-
getWebviewContent関数で生成されたHTMLコンテンツをWebViewにレンダリングします。 - WebViewのUIとユーザーインタラクションを定義します。
-
- WebView のメッセージを処理 (panel.webview.onDidReceiveMessage)
panel.webview.onDidReceiveMessage(async (message: any) => { ... });- WebViewから送信するメッセージを受信するイベントリスナーを設定します。
- メッセージが「chat」コマンドの場合、ユーザー入力(
message.text)を処理してOllamaモデルと対話します。
- Ollama との通信 (ollama.chat)
const streamResponse = await ollama.chat({ model: "deepseek-r1:7b", messages: [{ role: "user", content: userPrompt }], stream: true, });- Ollamaのdeepseek-r1:7bモデルと対話し、ユーザー入力(userPrompt)に対する応答をストリーミング方式で受け取ります。
- messages配列には、ユーザーの入力内容に関連する会話が含まれます。
- ストリームリスポンスの処理 (for await)
for await (const part of streamResponse) {
   responseText += part.message.content.replace(/\<\/?think\>/g, "");
   panel.webview.postMessage({
     command: "chatResponse",
     text: responseText,
   });
 }
- ストリーミング方式で応答を受け取り、応答で
<think>と</think>タグを削除してresponseTextに追加します。 - WebViewで処理された応答をメッセージ(chatResponseコマンド)で送信して画面に表示します。
-
拡張機能のコンテキストにリソースを追加 (context.subscriptions.push(disposable))
context.subscriptions.push(disposable);- disposableオブジェクトをcontext.subscriptionsに追加して、拡張機能が非アクティブ化された時、リソースを自動でクリーンアップするようにします。
-
🎨 WebView画面の実装
ユーザーとインタラクションをするためのウェブビュー画面を簡単にインラインHTMLでマークアップします。
各要素にインタラクションイベントをバインドする作業もスクリプトタグの中に入れてくれます。
 function getWebviewContent(): string {
   return /*html*/ `
     <!DOCTYPE html>
     <html>
       <head>
         <meta charset="UTF-8" />
         <style>
           :root {
             --background-color: var(--vscode-editor-background);
             --text-color: var(--vscode-editor-foreground);
             --border-color: var(--vscode-input-border);
             --button-bg: var(--vscode-button-background);
             --button-fg: var(--vscode-button-foreground);
             --button-hover-bg: var(--vscode-button-hoverBackground);
             --input-bg: var(--vscode-input-background);
           }

           * {
             margin: 0;
             padding: 0;
             box-sizing: border-box;
             font-family: -apple-system, BlinkMacSystemFont, 'Segoe UI', Roboto, Oxygen, Ubuntu, Cantarell, sans-serif;
           }

           body {
             background-color: var(--background-color);
             color: var(--text-color);
           }

           #container {
             width: 100%;
             max-width: 800px;
             margin: 0 auto;
             display: flex;
             flex-direction: column;
             padding: 24px;
             gap: 20px;
           }

           .header {
             display: flex;
             align-items: center;
             gap: 12px;
             margin-bottom: 20px;
           }

           .header h2 {
             font-size: 1.5rem;
             font-weight: 500;
             margin: 0;
           }

           .chat-container {
             display: flex;
             flex-direction: column;
             gap: 16px;
           }

           #prompt {
             padding: 16px;
             border-radius: 8px;
             border: 1px solid var(--border-color);
             background-color: var(--input-bg);
             color: var(--text-color);
             font-size: 16px;
             resize: vertical;
             min-height: 120px;
             width: 100%;
             transition: border-color 0.2s;
           }

           #prompt:focus {
             outline: none;
             border-color: var(--button-bg);
           }

           .button-container {
             display: flex;
             gap: 12px;
           }

           #askBtn {
             padding: 8px 24px;
             height: 40px;
             font-size: 14px;
             border-radius: 6px;
             border: none;
             background-color: var(--button-bg);
             color: var(--button-fg);
             cursor: pointer;
             transition: background-color 0.2s;
             display: flex;
             align-items: center;
             justify-content: center;
             font-weight: 500;
           }

           #askBtn:hover {
             background-color: var(--button-hover-bg);
           }

           #askBtn:disabled {
             opacity: 0.6;
             cursor: not-allowed;
           }

           .response-container {
             position: relative;
           }

           #response {
             padding: 20px;
             padding-right: 50px;
             line-height: 1.6;
             font-size: 16px;
             border-radius: 8px;
             background-color: var(--input-bg);
             border: 1px solid var(--border-color);
             white-space: pre-wrap;
           }

           .loading {
             display: inline-block;
             width: 20px;
             height: 20px;
             border: 2px solid #ffffff3d;
             border-radius: 50%;
             border-top-color: #fff;
             animation: spin 0.8s linear infinite;
             margin-right: 8px;
           }

           @keyframes spin {
             to {
               transform: rotate(360deg);
             }
           }
         </style>
       </head>
       <body>
         <div id="container">
           <div class="header">
             <h2>Local Deepseek Chat</h2>
           </div>

           <div class="chat-container">
             <textarea
               id="prompt"
               placeholder="Ask anything... (Shift + Enter for new line)"
             ></textarea>

             <div class="button-container">
               <button id="askBtn">Send Message</button>
             </div>
           </div>
         </div>

         <script>
           const vscode = acquireVsCodeApi();
           const askBtn = document.getElementById('askBtn');
           const promptInput = document.getElementById('prompt');
           const responseDiv = document.getElementById('response');

           function setLoading(isLoading) {
             if (isLoading) {
               askBtn.innerHTML = '<span class="loading"></span>Thinking...';
               askBtn.disabled = true;
               promptInput.disabled = true;
             } else {
               askBtn.innerHTML = 'Send Message';
               askBtn.disabled = false;
               promptInput.disabled = false;
             }
           }

           promptInput.addEventListener('keydown', (e) => {
             if (e.key === 'Enter' && !e.shiftKey) {
               e.preventDefault();
               if (promptInput.value.trim()) {
                 askBtn.click();
               }
             }
           });

           askBtn.addEventListener('click', () => {
             const text = promptInput.value.trim();
             if (!text) return;

             setLoading(true);
             responseDiv.textContent = '';
             vscode.postMessage({ command: 'chat', text });
           });

           window.addEventListener('message', event => {
             const {command, text} = event.data;
             if (command === 'chatResponse') {
               responseDiv.textContent = text;
               setLoading(false);
             }
           });
         </script>
       </body>
     </html>
   `;
 }
✨ 機能拡張
英語応答の強制
個人的にテストを行った時、自動応答が中国語で返ってきたので、システムプロンプトとユーザープロンプトを設定して、常に英語で応答するように設定しました。
システムプロンプトとユーザープロンプトを設定して、常に英語で応答するように設定:
const userPrompt = `${message.text}\n\nPlease respond in English.`;
コピー機能
モデルの回答をコピーする機能があれば便利かなと思い、WebViewのHTMLに以下のようなコピーボタンを追加しました。
WebViewのHTMLに以下のようなコピーボタンを追加:
<button class="copy-button" id="copyBtn" style="display: none;" title="Copy to clipboard">
  // ... existing code ...
</button>
コピー機能のTypeScript実装:
copyBtn.addEventListener('click', async () => {
  const text = responseDiv.textContent;
  await navigator.clipboard.writeText(text);

  const tooltip = copyBtn.querySelector('.copy-tooltip');
  tooltip.classList.add('show');

  setTimeout(() => {
    tooltip.classList.remove('show');
  }, 2000);
});
🎬 実行結果

これでローカル環境ですが、VS Code Extensionウィンドウを開いてLLMモデルと会話することができます。
📝 まとめ
この記事では、OllamaとDeepSeekを使用してVSCode拡張機能を作成する方法を紹介しました。ローカル環境で動作するAIアシスタントを実装することで、プライバシーを確保しながら効率的な開発支援ツールを作ることができます。
ソースコードの完全版はGitHubで確認できます。