1.アカウント作成と請求アラート設定
アカウントの作り方はこちらで確認して下さい。
https://blog.a-know.me/entry/2016/09/18/212947
アラートの設定方法はこちらを参照
https://cloud.google.com/billing/docs/how-to/budgets?hl=JA&visit_id=637476551099575377-3979620274&rd=1
2.Google Compute Engineを作ってwebサイトを見れるようにしよう!
GCEの簡単な使い方をyoutubeで確認できる。
https://www.youtube.com/watch?v=J2noxf_9crQ
1. GCEインスタンスの作成
(1-1)左サイドバーのConpute engineをクリック
(1-2)VMインスタンスの作成をクリック
以下のように設定して作成をクリック
名前:
test

リージョン:
アイオワ

マシンタイプ:
small

ブートディスク:
debian

ファイアウォール:
httpトラフィックを許可する
(1-3)ssh接続しターミナルで必要パッケージをインストールする
sudo apt-get update
sudo apt-get -y install apache2
sudo apt-get -y install php
php -v
sudo systemctl start apache2
ps -aux  | grep apache
(1-4)webページを作ってアクセス
# 素のアパッチページを別名に
sudo mv /var/www/html/index.html /var/www/html/index2.php

# 表示したいwebページを作る
sudo vim /var/www/html/index.php

以下のソースを挿入
<html>
  <head>
  </head>
  <body>
      <div>
      <?php
        echo  "Hello GCP!!";
      ?>
      </div>
  </body>
</html>
webページが表示される
3.Google Cloud Storageに入れた画像へGCEから接続しよう
1. バケットの作成
(1-1)左サイドバーのstorageをクリック
(1-2)バケットの作成をクリック
以下のように設定して作成をクリック
名前:
test20200129
# 名前がかぶると作れないので作成日などを入れる
リージョン:
マルチリージョン
2.バケットへ画像アップロード+公開
(2-1)以下の画像をバケットへアップロード
1.png

2.png

3.png

(2-2)アップロードした画像を公開設定にする。
3.バケットの画像をGCEで表示する
(3-1)前回のソースにイメージを公開するタグ挿入
# 素のアパッチページを別名に
sudo mv /var/www/html/index.html /var/www/html/index2.php

# 表示したいwebページを作る
sudo vim /var/www/html/index.php

以下のソースを挿入
<html>
  <head>
  </head>
  <body>
  <img src="<バケットで公開したurl>">
      <div>
      <?php
        echo  "Hello GCP!!";
      ?>
      </div>
  </body>
</html>
webページに画像が表示される
4.Cloud SQLを作ってGCEから接続しよう
CloudSQLの使い方はyoutubeでざっくり確認できる
https://www.youtube.com/watch?v=21wpjvV-uiY
1. データベースの作成
(1-1)左サイドバーのSQLをクリック
(1-2)CLOUD SQLの作成をクリック
(1-3)MYSQLを選択
(1-4)DBインスタンスの作成
インスタンスid:test

rootパスワード:任意

リージョン:アイオワ

ゾーン:任意

データベース:Mysql5.7

オプション:
接続:パブリックIP

マシンタイプ:small
※作成に時間がかかるので完成まで数分待つ
(1-5)データベースの作成
左サイドバーからデータベースの作成の作成をクリック
データベース作成:test

文字セット:utf8

照合:デフォルト照合
※作成に時間がかかるので完成まで数分待つ
(1-6)データベースへの接続
概要からインスタンスとの接続をクリックする。
cloudshellにログイン後、コマンド「gcloud sql connect test --user=root --quiet」
が最初から入力されている
コマンド入力後、DBへの接続が始まり先ほど設定したPWを入力すると接続が出来る。
エラー対策
gcloud sql connect test --user=root --quiet
ERROR: (gcloud.sql.connect) PERMISSION_DENIED: Cloud SQL Admin API has not been used in project xxxxxxxx before or it is disabled. Enable it by visiting https://console.developers.google.c
om/apis/api/sqladmin.googleapis.com/overview?project=xxxxxxxx then retry. If you enabled this API recently, wait a few minutes for the action to propagate to our systems and retry.


## 上記エラーの解決方法

API Manager -> ダッシュボード -> APIを有効にする -> 「cloud sql api」 で検索 -> 有効にするをクリック
(1-7)データベースの操作とテーブル作成
gcloud sql connect test --user=root --quiet
Allowlisting your IP for incoming connection for 5 minutes...done.
Connecting to database with SQL user [root].Enter password:
Welcome to the MySQL monitor.  Commands end with ; or \g.
Your MySQL connection id is 403
Server version: 5.7.25-google-log (Google)
Copyright (c) 2000, 2021, Oracle and/or its affiliates.
Oracle is a registered trademark of Oracle Corporation and/or its
affiliates. Other names may be trademarks of their respective
owners.
Type 'help;' or '\h' for help. Type '\c' to clear the current input statement.
mysql>
上記のログでログイン出来たらmysql操作コマンドを試す
# database一覧
mysql> show databases;
+--------------------+
| Database           |
+--------------------+
| information_schema |
| mysql              |
| performance_schema |
| sys                |
| test               |
+--------------------+
5 rows in set (0.16 sec)
# 使用するdb選択
mysql> use test;
Database changed

# test db内にテーブルを追加
mysql> use test;
Database changed

# test db内にテーブル(users)を追加
mysql> create table users (id int not null primary key auto_increment, name varchar(100));
Query OK, 0 rows affected (0.18 sec)


# テーブル(users)内にカラム「name=Taro」を追加
mysql> insert into users(name) values ('Taro');
Query OK, 1 row affected (0.16 sec)


# 作成したテーブル(users)を照会
mysql> select * from users;
+----+------+
| id | name |
+----+------+
|  1 | Taro |
+----+------+
1 row in set (0.15 sec)
2.GCEからSQLへの接続方法の種類
・パブリックIP ⇒設定が必要
・プライベートIP ⇒
・sql_ploxy ⇒APIの設定を許可が必要
今回はパブリックIPを使って接続するものとする
(2-1)接続許可の設定
作成しているGCEの外部ipをコピーし
SQL⇒作成DB⇒接続タブをクリック→ネットワークを追加をクリック
IPを入力して保存をクリック→完了
(2-2)DBのパブリックipアドレスをコピーしGCE側にsshログインする。
以降は以下の手順でクライアントをインストールする。
# mysqlクライアントインストール
sudo apt-get install default-mysql-client

# gceからCLOUDSQLへ接続
mysql -u root -h <DBのホストIP> -p


MySQL [(none)]> use test;
Reading table information for completion of table and column names
You can turn off this feature to get a quicker startup with -A
Database changed
MySQL [test]> select * from users;
+----+------+
| id | name |
+----+------+
|  1 | Taro |
+----+------+
1 row in set (0.003 sec)
MySQL [test]>
(2-3)GCEで作ったwebページにDBの値を表示する
以下の手順でインストールやソース編集を進める
sudo systemctl restart apache2
sudo vim /var/www/html/index.php
<html>
  </head>
  <body>
    <p>
    <?php
    try {
      $pdo = new PDO('mysql:host=<DBのホストIP>;dbname=test;charset=utf8','root','test',
      array(PDO::ATTR_EMULATE_PREPARES => false));
      echo "成功";
    } catch (PDOException $e) {
      echo "失敗";

    }
    ?>
    </p>
    <?php
      $stmt = $pdo->query("SELECT * FROM users");
      while($row = $stmt -> fetch(PDO::FETCH_ASSOC)) {
        echo "<p>";
        echo $row["name"];
        echo "</p>";
      }
    ?>

    <img src="./image/image2.jpg">
    <h1>
    <?php
      echo "Hello GCP!!";
    ?>
    </h1>
  </body>
</html>
ページが正しく表示される
5 VMインスタンスをManaged Instance Group化して冗長性を高めよう(MIG)
・インスタンスグループの数を自動で増減できる
・インスタンス数の最小最大を指定できる(スケールアウト)
手順
- GCEのイメージ作成
- インスタンステンプレート作成
- インスタンスグループ作成
1. GCEのイメージ作成
(1-1)
インスタンスを停止する。
(1-2)
イメージタグをクリック→イメージの作成をクリック
・名前
test-images
・ソース
ディスクを選択
・ソースディスク
止めたインスタンスを選択
2.インスタンステンプレート作成
GCE⇒インスタンステンプレート⇒作成
詳細確認の入力
・名前
test-template

・マシンタイプ
smallを選択

・カスタムイメージ
先ほど作ったイメージを選択
3.インスタンスグループ作成
3つのインスタンスが作成される。
6 MIG化したVMインスタンスへCloud Load Balancing経由でアクセスできるようにしよう
概要
cloud load balancingは高トラフィックにも対応できる負荷分散LBを提供
特徴
- 世界規模の自動スケーリングと負荷分散
- https 負荷分散
- tcp/ssl 負荷分散
- udp負荷分散
(1)cloud load balancingを作成する
(1-1)左メニューからネットワークサービス⇒負荷分散をクリック
(1-2)ロードバランサの作成⇒「http(s)の設定」をクリック
バックエンドサービス作成をクリック
画像のように設定
ヘルスチェックをクリック
(以上のあるインスタンスに割り振らないようにする)
画像のように設定

(2)負荷分散できてるか確認する
(gcsに違う画像を上げ各cgeの内容を変更する)
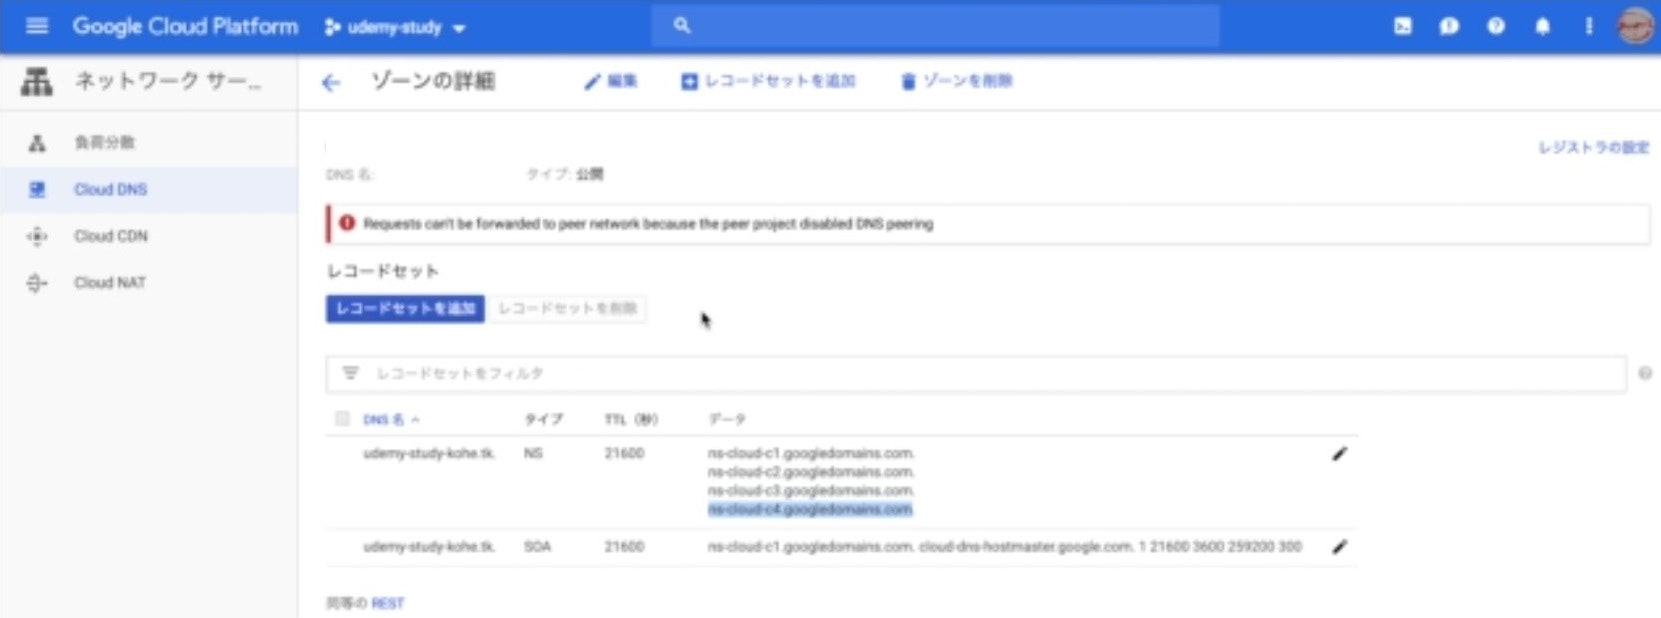
7 Cloud DNS
特徴
- GCPで生成したendpointをドメインに紐づけられる
(1)freenomでドメインを取得する
(2)cloud load balancingのipとドメインを紐づける
(2-2)LBのipをコピーしてレコードにセット


8 Cloud Functions
(1)cloudfunctionの作成
(1-1)左サイドバーのcloudfunctionsをクリック
(1-2)関数の作成をクリック
以下のように関数を作成
名前:
test

メモリ:
128m

トリガー:
http

ソースコード:
インラインエディタ

言語:
node.js8
ソース内容
(初期のソースではHelloworldが実行される)
/**
 * Responds to any HTTP request.
 *
 * @param {!express:Request} req HTTP request context.
 * @param {!express:Response} res HTTP response context.
 */
exports.helloWorld = (req, res) => {
  let message = req.query.message || req.body.message || 'Hello World!';
  res.status(200).send(message);
};
エラー
cloudfunctionを呼ぶと以下のエラーが出る。
Error: Forbidden
Your client does not have permission to get URL /function1GET from this server
対処法:
https://serverfault.com/questions/992839/endpoint-for-cloud-function-returns-403-forbidden
以下のメンバーを追加する。(セキュリティに注意!)
メンバー:
allUsers
権限:
Cloud Functions 管理者
9 Google App Engine
ここでハンズオンしてみよう。
https://cloud.google.com/appengine/docs/standard/python3/quickstart?hl=ja