はじめに
nagiosは監視するサーバーです。
nagiosの知識を深めるために、AWSでnagiosサーバーとnagiosクライアントの構築をしてみました。
過去に私がVirtualBoxで構築した以下2つの記事を参考に構築しました。
VirtualBox nagiosサーバー
https://qiita.com/gama1234/items/6869d23c5bc287403f78
VirtualBox nagios clientサーバー
https://qiita.com/gama1234/items/3854a8d547537983818c
前提条件
awsを使用
EC2「amazon linux2」は東京リージョンに起動している前提とする
料金がかかるため、ElasticIPではなくパブリックIP使用
TeraTermを使用
nagiosサーバーの構築手順
EC2を構築した

自宅の端末からEC2にSSH接続する設定
インターネットゲートウェイを作成すること
料金含めて公式サイトを参照
https://docs.aws.amazon.com/ja_jp/vpc/latest/userguide/VPC_Internet_Gateway.html
サービス >> VPC >> 左ペインのインターネットゲートウェイを選択する
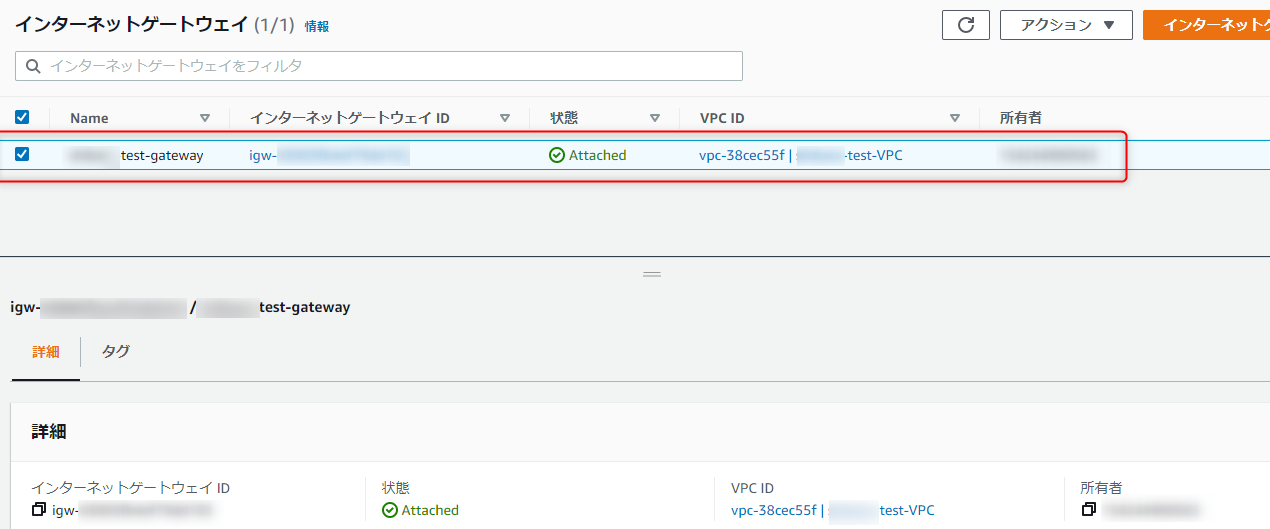
EC2のVPCにインターネットゲートウェイがアタッチされていること
インターネットゲートウェイのアクションを選択し、VPCにアタッチを選択する
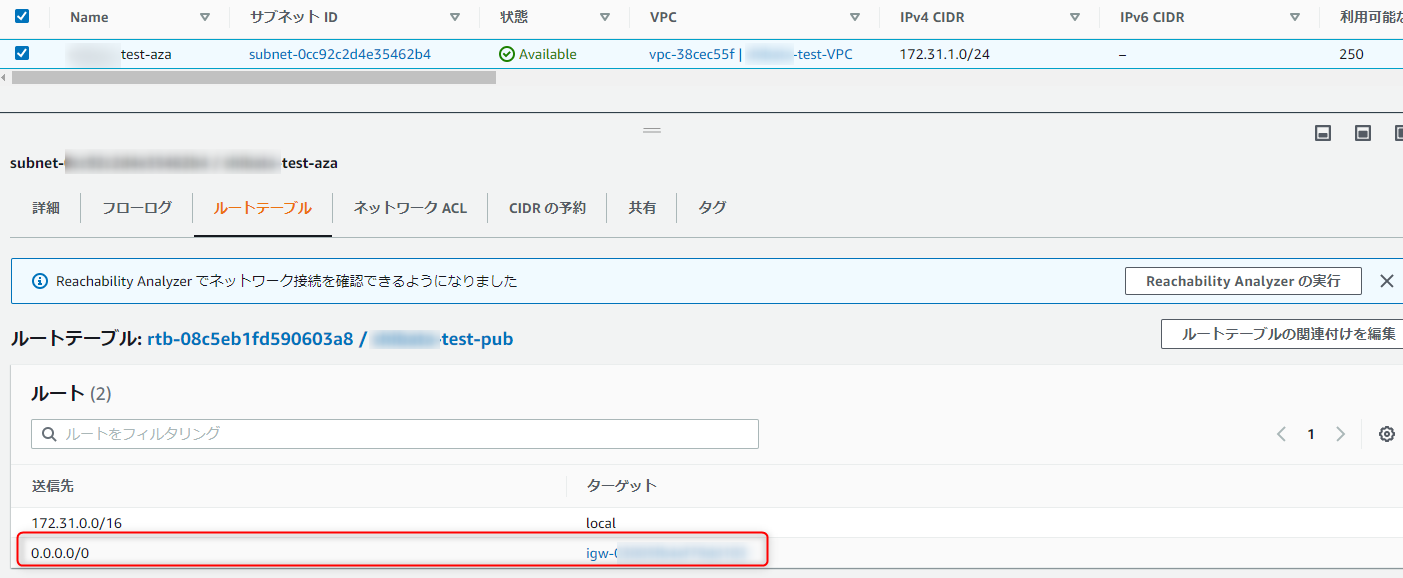
EC2のサブネットのルートテーブルに、VPCにアタッチしたインターネットゲートウェイの設定が入っていることを確認ください
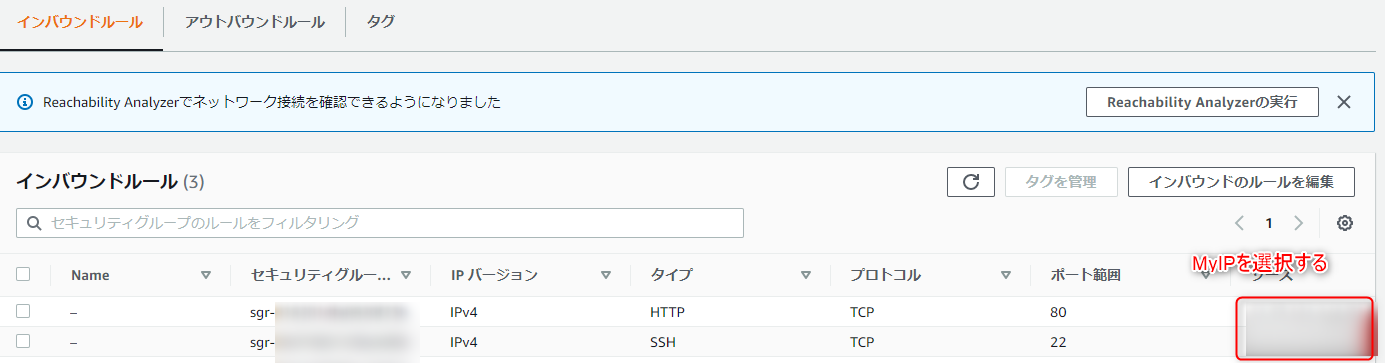
セキュリティグループの設定をする
自分自身のIPアドレスに対して、22番と80番を許可しました。
EC2にTeraTermからSSH接続した
SElinuxが無効化する。
ルートに昇格
# sudo su -
# getenforce
Disabled
日本時間に設定する
以下のサイトを参考にしました。
https://fullstacklife.net/aws/aws-ec2-set-japan-timezone/
# vi /etc/sysconfig/clock
ZONE="Asia/Tokyo"
UTC=False
シンボリックリンクを設定する
ln -sf /usr/share/zoneinfo/Japan /etc/localtime

Sat Dec 10 10:52:37 JST 2022
httpdインストールする
# yum install httpd

バージョンを確認
# httpd -v
Server version: Apache/2.4.54 ()
Server built:   Jun 30 2022 11:02:23
httpdを起動する
httpdサービスを自動起動設定する
# systemctl enable httpd
Created symlink from /etc/systemd/system/multi-user.target.wants/httpd.service to /usr/lib/systemd/system/httpd.service.
httpdサービスを起動する
[root@ip-172-31-1-231 ~]# systemctl start httpd
[root@ip-172-31-1-231 ~]#
[root@ip-172-31-1-231 ~]#
[root@ip-172-31-1-231 ~]# systemctl status httpd
● httpd.service - The Apache HTTP Server
   Loaded: loaded (/usr/lib/systemd/system/httpd.service; enabled; vendor preset: disabled)
   Active: active (running) since Sat 2022-12-10 11:15:13 JST; 4s ago
     Docs: man:httpd.service(8)
 Main PID: 3477 (httpd)
   Status: "Processing requests..."
   CGroup: /system.slice/httpd.service
           tq3477 /usr/sbin/httpd -DFOREGROUND
           tq3478 /usr/sbin/httpd -DFOREGROUND
           tq3479 /usr/sbin/httpd -DFOREGROUND
           tq3480 /usr/sbin/httpd -DFOREGROUND
           tq3481 /usr/sbin/httpd -DFOREGROUND
           mq3482 /usr/sbin/httpd -DFOREGROUND

Dec 10 11:15:13 ip-172-31-1-231.ap-northeast-1.compute.internal systemd[1]: Starting The Apache HTTP Server...
Dec 10 11:15:13 ip-172-31-1-231.ap-northeast-1.compute.internal systemd[1]: Started The Apache HTTP Server.
拡張リポジトリ追加
amazon linux2では、以下ではインストール出来ない。
yum -y install epel-release
Loaded plugins: extras_suggestions, langpacks, priorities, update-motd
No package epel-release available.
Error: Nothing to do


epel-release is available in Amazon Linux Extra topic "epel"

To use, run
# sudo amazon-linux-extras install epel

Learn more at
amazon linux2は以下のコマンドでepelをインストールした。
以下の公式サイトを参考にしてください
https://docs.aws.amazon.com/ja_jp/AWSEC2/latest/UserGuide/add-repositories.html
epelを有効化
[root@ip-172-31-1-79 ~]# yum-config-manager --enable epel
Loaded plugins: extras_suggestions, langpacks, priorities, update-motd

epelをインストール
[root@ip-172-31-1-79 ~]# yum install https://dl.fedoraproject.org/pub/epel/epel-release-latest-7.noarch.rpm
Loaded plugins: extras_suggestions, langpacks, priorities, update-motd
epel-release-latest-7.noarch.rpm                                                                                                                               |  15 kB  00:00:00
Examining /var/tmp/yum-root-m8WXvl/epel-release-latest-7.noarch.rpm: epel-release-7-14.noarch
Marking /var/tmp/yum-root-m8WXvl/epel-release-latest-7.noarch.rpm to be installed
Resolving Dependencies
--> Running transaction check
---> Package epel-release.noarch 0:7-14 will be installed
--> Finished Dependency Resolution
amzn2-core/2/x86_64                                                                                                                                            | 3.7 kB  00:00:00

Dependencies Resolved

======================================================================================================================================================================================
 Package                                    Arch                                 Version                            Repository                                                   Size
======================================================================================================================================================================================
Installing:
 epel-release                               noarch                               7-14                               /epel-release-latest-7.noarch                                25 k

Transaction Summary
======================================================================================================================================================================================
Install  1 Package

Total size: 25 k
Installed size: 25 k
Is this ok [y/d/N]: y
Downloading packages:
Running transaction check
Running transaction test
Transaction test succeeded
Running transaction
  Installing : epel-release-7-14.noarch                                                                                                                                           1/1
  Verifying  : epel-release-7-14.noarch                                                                                                                                           1/1

Installed:
  epel-release.noarch 0:7-14

Complete!
phpインストール
# yum install --enablerepo=remi,remi-php73 php php-devel php-mbstring php-pdo php-gd php-xml php-mcrypt

インストール確認
# rpm -qa | grep php
php-cli-5.4.16-46.amzn2.0.2.x86_64
php-gd-5.4.16-46.amzn2.0.2.x86_64
php-xml-5.4.16-46.amzn2.0.2.x86_64
php-common-5.4.16-46.amzn2.0.2.x86_64
php-mcrypt-5.4.16-9.el7.x86_64
php-5.4.16-46.amzn2.0.2.x86_64
php-pdo-5.4.16-46.amzn2.0.2.x86_64
php-devel-5.4.16-46.amzn2.0.2.x86_64
php-mbstring-5.4.16-46.amzn2.0.2.x86_64
phpの設定
/var/www/htmlはドキュメントルートでhttpdが外部に公開するサイトを設定する。
今回はphpのバージョンを外部に公開する。
# vi /var/www/html/index.php
<?php phpinfo(); ?>
PHPの設定ファイルでタイムゾーンを日本にする
# vi /etc/php.ini
date.timezone = "Asia/Tokyo"を設定する

# cat /etc/php.ini | grep "date.timezone"
; http://php.net/date.timezone
date.timezone = "Asia/Tokyo"
httpdを再起動
再起動前にhttpdのコンフィグファイルの文法チェックする
# httpd -t
Syntax OK
httpdサービスを再起動する。
# systemctl restart httpd

# systemctl status httpd
nagiosのインストールとnagiosのプラグインをインストールする
# yum --enablerepo=epel -y install nagios

# yum --enablerepo=epel -y install nagios-plugins-{ping,disk,users,procs,load,swap,ssh,http}
Loaded plugins: extras_suggestions, langpacks, priorities, update-motd
227 packages excluded due to repository priority protections
Package nagios-plugins-ping-2.3.3-2.el7.x86_64 already installed and latest version
Package nagios-plugins-disk-2.3.3-2.el7.x86_64 already installed and latest version
Package nagios-plugins-users-2.3.3-2.el7.x86_64 already installed and latest version
Package nagios-plugins-procs-2.3.3-2.el7.x86_64 already installed and latest version
Package nagios-plugins-load-2.3.3-2.el7.x86_64 already installed and latest version
Package nagios-plugins-swap-2.3.3-2.el7.x86_64 already installed and latest version
Package nagios-plugins-ssh-2.3.3-2.el7.x86_64 already installed and latest version
Package nagios-plugins-http-2.3.3-2.el7.x86_64 already installed and latest version
nagiosを起動させる
# systemctl start nagios
# systemctl status nagios
● nagios.service - Nagios Core 4.4.6
   Loaded: loaded (/usr/lib/systemd/system/nagios.service; disabled; vendor preset: disabled)
   Active: active (running) since Sat 2022-12-10 11:26:33 JST; 5s ago
     Docs: https://www.nagios.org/documentation
  Process: 3978 ExecStart=/usr/sbin/nagios -d /etc/nagios/nagios.cfg (code=exited, status=0/SUCCESS)
  Process: 3977 ExecStartPre=/usr/sbin/nagios -v /etc/nagios/nagios.cfg (code=exited, status=0/SUCCESS)
 Main PID: 3982 (nagios)
   CGroup: /system.slice/nagios.service
           tq3982 /usr/sbin/nagios -d /etc/nagios/nagios.cfg
           tq3983 /usr/sbin/nagios --worker /var/spool/nagios/cmd/nagios.qh
           tq3984 /usr/sbin/nagios --worker /var/spool/nagios/cmd/nagios.qh
           tq3985 /usr/sbin/nagios --worker /var/spool/nagios/cmd/nagios.qh
           tq3986 /usr/sbin/nagios --worker /var/spool/nagios/cmd/nagios.qh
           mq3987 /usr/sbin/nagios -d /etc/nagios/nagios.cfg

Dec 10 11:26:33 ip-172-31-1-231.ap-northeast-1.compute.internal nagios[3982]: qh: Socket '/var/spool/nagios/cmd/nagios.qh' successfully initialized
Dec 10 11:26:33 ip-172-31-1-231.ap-northeast-1.compute.internal nagios[3982]: qh: core query handler registered
Dec 10 11:26:33 ip-172-31-1-231.ap-northeast-1.compute.internal nagios[3982]: qh: echo service query handler registered
Dec 10 11:26:33 ip-172-31-1-231.ap-northeast-1.compute.internal nagios[3982]: qh: help for the query handler registered
Dec 10 11:26:33 ip-172-31-1-231.ap-northeast-1.compute.internal nagios[3982]: wproc: Successfully registered manager as @wproc with query handler
Dec 10 11:26:33 ip-172-31-1-231.ap-northeast-1.compute.internal nagios[3982]: wproc: Registry request: name=Core Worker 3986;pid=3986
Dec 10 11:26:33 ip-172-31-1-231.ap-northeast-1.compute.internal nagios[3982]: wproc: Registry request: name=Core Worker 3985;pid=3985
Dec 10 11:26:33 ip-172-31-1-231.ap-northeast-1.compute.internal nagios[3982]: wproc: Registry request: name=Core Worker 3984;pid=3984
Dec 10 11:26:33 ip-172-31-1-231.ap-northeast-1.compute.internal nagios[3982]: wproc: Registry request: name=Core Worker 3983;pid=3983
Dec 10 11:26:34 ip-172-31-1-231.ap-northeast-1.compute.internal nagios[3982]: Successfully launched command file worker with pid 3987
Basic認証用ユーザ作成
# htpasswd /etc/nagios/passwd nagiosadmin
New password:
Re-type new password:
Updating password for user nagiosadmin
nagiosサーバーの再起動
# systemctl restart nagios

# systemctl status nagios
httpdサーバーの再起動
# systemctl restart httpd
# systemctl status httpd
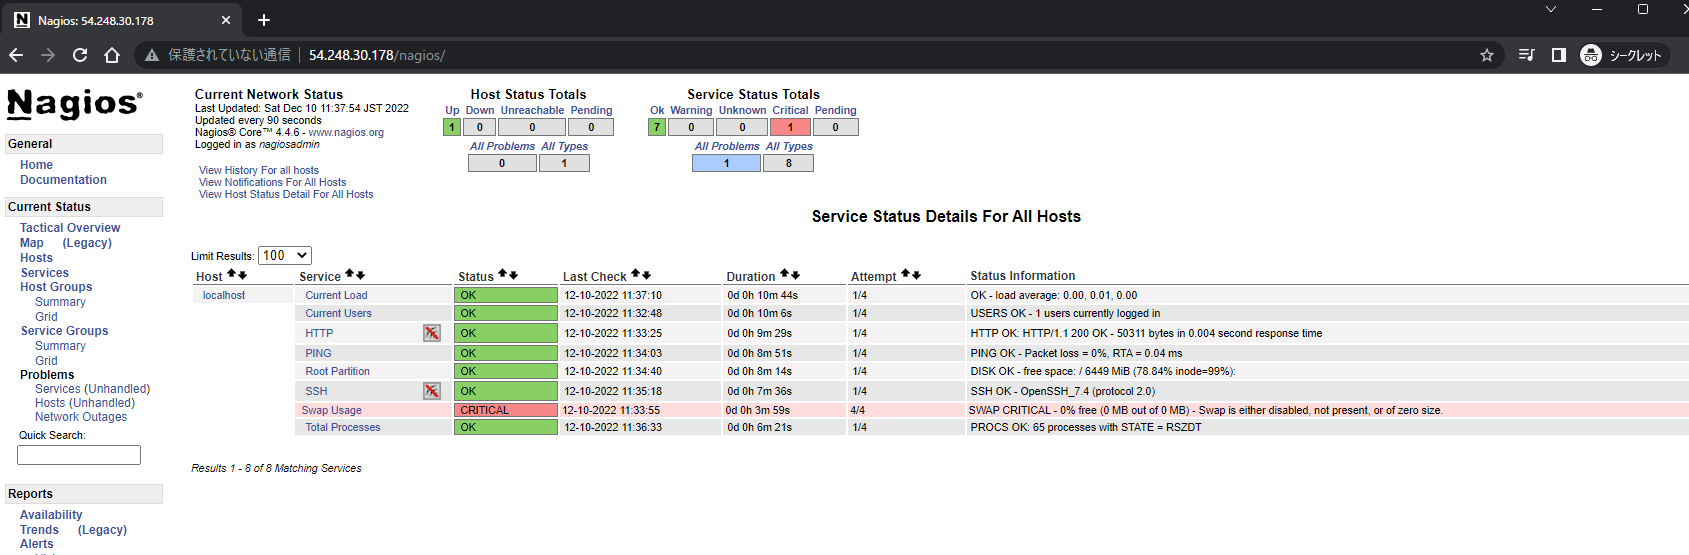
nagios ブラウザをアクセスする
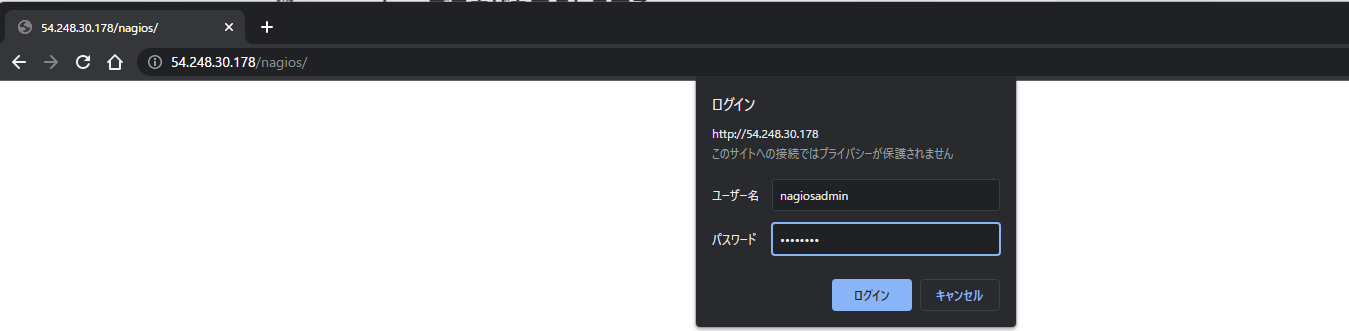
nagios構築完了
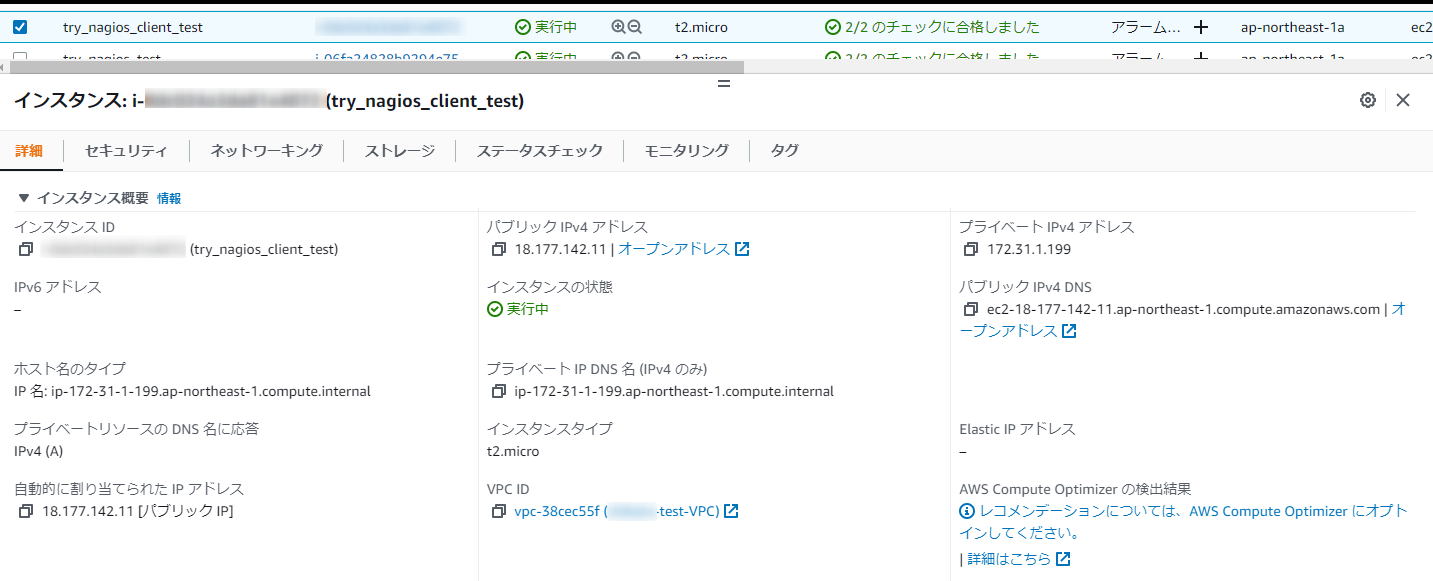
nagiosクライアントの構築
EC2を構築 amazon linux2
セキュリティグループの設定

拡張リポジトリのインストール
epelを有効化
# yum-config-manager --enable epel
Loaded plugins: extras_suggestions, langpacks, priorities, update-motd

epelをインストール
# yum install https://dl.fedoraproject.org/pub/epel/epel-release-latest-7.noarch.rpm

インストールすると以下のエラーが出力しました。
# yum install https://dl.fedoraproject.org/pub/epel/epel-release-latest-7.noarch.rpm
Loaded plugins: extras_suggestions, langpacks, priorities, update-motd
epel-release-latest-7.noarch.rpm                                                                             |  15 kB  00:00:00
Examining /var/tmp/yum-root-h4r9Eb/epel-release-latest-7.noarch.rpm: epel-release-7-14.noarch
/var/tmp/yum-root-h4r9Eb/epel-release-latest-7.noarch.rpm: does not update installed package.
Error: Nothing to do
以下でepelをインストールしました
wgetでインストールしました
[root@ip-172-31-1-199 ~]# wget https://dl.fedoraproject.org/pub/epel/epel-release-latest-7.noarch.rpm
--2022-12-10 03:02:27--  https://dl.fedoraproject.org/pub/epel/epel-release-latest-7.noarch.rpm
Resolving dl.fedoraproject.org (dl.fedoraproject.org)... 38.145.60.23, 38.145.60.24, 38.145.60.22
Connecting to dl.fedoraproject.org (dl.fedoraproject.org)|38.145.60.23|:443... connected.
HTTP request sent, awaiting response... 200 OK
Length: 15608 (15K) [application/x-rpm]
Saving to: ‘epel-release-latest-7.noarch.rpm’

100%[==========================================================================================>] 15,608      89.0KB/s   in 0.2s

2022-12-10 03:02:28 (89.0 KB/s) - ‘epel-release-latest-7.noarch.rpm’ saved [15608/15608]

rpmがダウンロードされたことを確認した
[root@ip-172-31-1-199 ~]# ls -tlr
total 16
-rw-r--r-- 1 root root 15608 Sep  4  2021 epel-release-latest-7.noarch.rpm
[
ダウンロードしたrpmをインストールした
[root@ip-172-31-1-199 ~]# rpm -ivh epel-release-latest-7.noarch.rpm
warning: epel-release-latest-7.noarch.rpm: Header V4 RSA/SHA256 Signature, key ID 352c64e5: NOKEY
Preparing...                          ################################# [100%]
        package epel-release-7-14.noarch is already installed
[root@ip-172-31-1-199 ~]#
nagiosのエージェントをインストールする
# yum --enablerepo=epel install nrpe

nrpeがインストールされたことを確認した
# rpm -qa | grep nrpe
nrpe-4.0.3-6.el7.x86_64
[root@ip-172-31-1-199 ~]#
nagiosエージェントの設定ファイルを一部修正する
修正前と修正後で比較するため、バックアップを取得する
# cd /etc/nagios
# cp -p nrpe.cfg nrpe.cfgbk
nagiosエージェントの設定ファイルを修正する
vi nrpe.cfg
#1.nagiosサーバーのIPアドレスを追加(nrpeが受け入れるIPアドレス設定)
allowed_hosts=127.0.0.1,::1,<nagiosサーバーのIPアドレス>
#2.nrpeの監視有効化
dont_blame_nrpe=1

#3.各プラグインの設定に引数は変数を設定
以下はコメントアウトした
#command[check_users]=/usr/lib64/nagios/plugins/check_users -w 5 -c 10
#command[check_load]=/usr/lib64/nagios/plugins/check_load -r -w .15,.10,.05 -c .30,.25,.20
#command[check_hda1]=/usr/lib64/nagios/plugins/check_disk -w 20% -c 10% -p /dev/hda1
#command[check_zombie_procs]=/usr/lib64/nagios/plugins/check_procs -w 5 -c 10 -s Z
#command[check_total_procs]=/usr/lib64/nagios/plugins/check_procs -w 150 -c 200
以下を追加
command[check_users]=/usr/lib64/nagios/plugins/check_users -w $ARG1$ -c $ARG2$
command[check_load]=/usr/lib64/nagios/plugins/check_load -w $ARG1$ -c $ARG2$
command[check_disk]=/usr/lib64/nagios/plugins/check_disk -w $ARG1$ -c $ARG2$ -p $ARG3$
command[check_procs]=/usr/lib64/nagios/plugins/check_procs -w $ARG1$ -c $ARG2$ -s $ARG3$
修正後、差分を比較しました。
[root@ip-172-31-1-199 nagios]# sdiff -s nrpe.cfg nrpe.cfgbk
allowed_hosts=127.0.0.1,::1,172.31.1.231                      | allowed_hosts=127.0.0.1,::1
dont_blame_nrpe=1                                             | dont_blame_nrpe=0
#command[check_users]=/usr/lib64/nagios/plugins/check_users - | command[check_users]=/usr/lib64/nagios/plugins/check_users -w
#command[check_load]=/usr/lib64/nagios/plugins/check_load -r  | command[check_load]=/usr/lib64/nagios/plugins/check_load -r -
#command[check_hda1]=/usr/lib64/nagios/plugins/check_disk -w  | command[check_hda1]=/usr/lib64/nagios/plugins/check_disk -w 2
#command[check_zombie_procs]=/usr/lib64/nagios/plugins/check_ | command[check_zombie_procs]=/usr/lib64/nagios/plugins/check_p
#command[check_total_procs]=/usr/lib64/nagios/plugins/check_p | command[check_total_procs]=/usr/lib64/nagios/plugins/check_pr
                                                              <
command[check_users]=/usr/lib64/nagios/plugins/check_users -w <
command[check_load]=/usr/lib64/nagios/plugins/check_load -w $ <
command[check_disk]=/usr/lib64/nagios/plugins/check_disk -w $ <
command[check_procs]=/usr/lib64/nagios/plugins/check_procs -w <
nagiosエージェントの再起動をする
#nrpeのサービスを再起動
# systemctl restart nrpe
# systemctl status nrpe
nagiosサーバー側のコンフィグファイルの設定
nagiosのコンフィグファイルのバックアップを作成
cd /etc/nagios
cp -p nagios.cfg nagios.cfgbk
修正後の差分を取得
# sdiff -s /etc/nagios/nagios.cfg /etc/nagios/nagios.cfgbk
cfg_dir=/etc/nagios/servers                                   | #cfg_dir=/etc/nagios/servers
監視対象のサーバの設定ファイルを入れるフォルダを作成する
mkdir /etc/nagios/servers
作成したフォルダの所有ユーザーとグループをnagiosに変更する
chown nagios.nagios /etc/nagios/servers/
権限を変更
chmod 750 /etc/nagios/servers
nagiosエージェントのコンフィグファイルを作成する
# vi /etc/nagios/servers/node01.cfg
define host{
    use                     linux-server
    host_name               node01
    alias                   node01
    address                 192.168.0.3 ※nagiosエージェントのIPアドレスを追加
}
define service{
    use                     generic-service
    host_name               node01
    service_description     PING
    check_command           check_ping!100.0,20%!500.0,60%
上記のコンフィグファイルの所有者の権限を変更
# chown nagios.nagios /etc/nagios/servers/node01.cfg
nagiosサーバーの再起動をする
# systemctl restart nagios
# systemctl status nagios
nagiosサーバー側のnrpe設定
# yum --enablerepo=epel -y install nagios-plugins-nrpe
フォルダへ移動する
# vi /etc/nagios/objects/commands.cfg

#nrpeを使用してリモート監視ホスト監視(linux)のプラグインを追加
以下を追加する
define command{
    command_name        check_nrpe
    command_line        $USER1$/check_nrpe -H $HOSTADDRESS$ -c $ARG1$
}
nagiosを再起動する
systemctl restart nagios
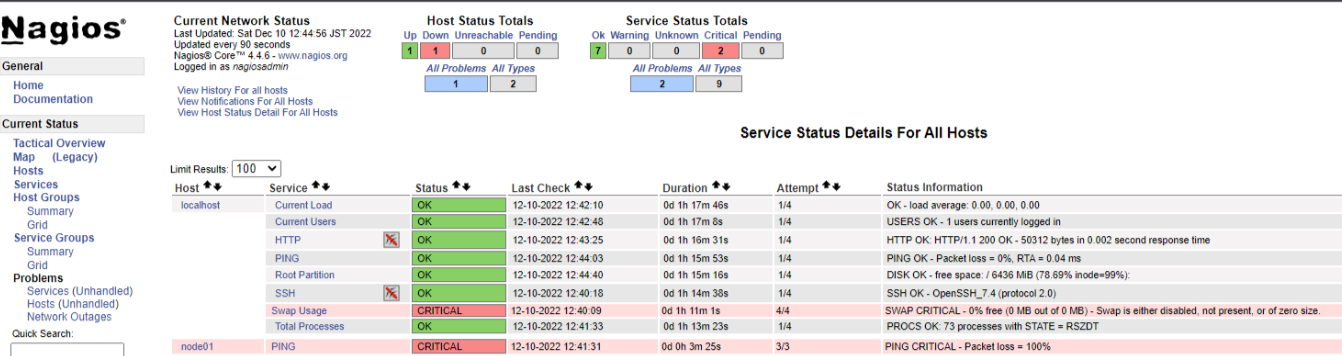
nagiosの画面を確認
nagiosエージェントのping疎通が失敗している
nagiosエージェントのping疎通を調査
念のため、nagiosサーバーからnagiosエージェントで5666ポートで通信するため、
以下で接続確認 接続が成功していることを確認
# nc -vz 172.31.1.199 5666
Ncat: Version 7.50 ( https://nmap.org/ncat )
Ncat: Connected to 172.31.1.199:5666.
Ncat: 0 bytes sent, 0 bytes received in 0.01 seconds.
nagiosサーバーからnagiosエージェントにpingを試してみた
通信に失敗した。
[root@ip-172-31-1-231 objects]# ping 172.31.1.199
PING 172.31.1.199 (172.31.1.199) 56(84) bytes of data.
^C
--- 172.31.1.199 ping statistics ---
5 packets transmitted, 0 received, 100% packet loss, time 4083ms
再度、nagiosエージェントにpingを試しました。 成功しました。
# ping 172.31.1.199
PING 172.31.1.199 (172.31.1.199) 56(84) bytes of data.
64 bytes from 172.31.1.199: icmp_seq=1 ttl=255 time=0.783 ms

64 bytes from 172.31.1.199: icmp_seq=2 ttl=255 time=0.499 ms

64 bytes from 172.31.1.199: icmp_seq=3 ttl=255 time=0.524 ms
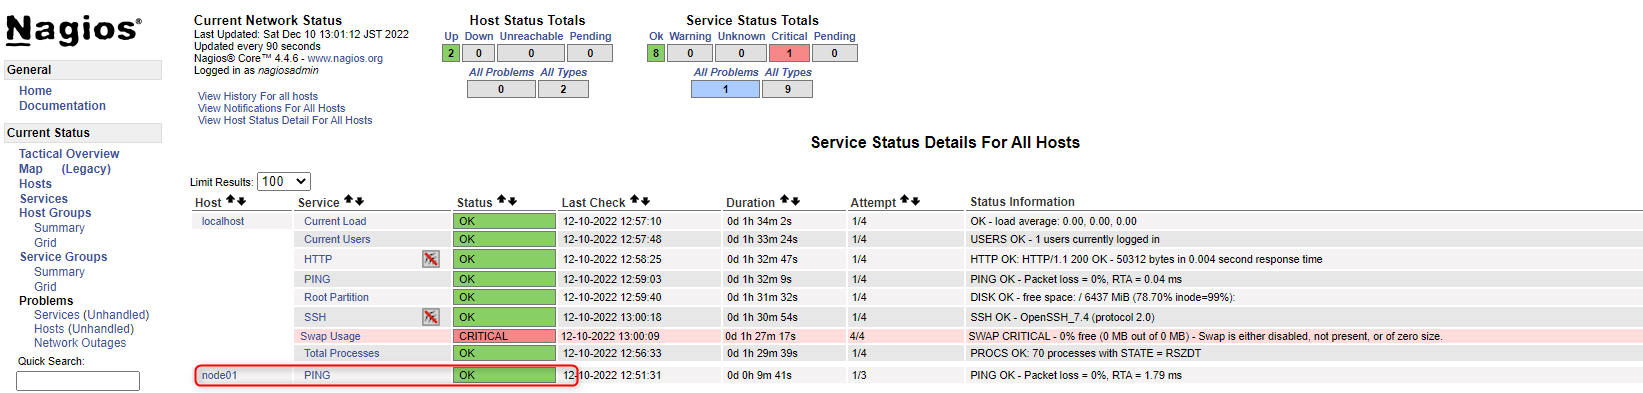
nagiosの画面を再度確認した
ping疎通結果がOKになりました。
翌日にAWS料金を確認した
AWSの料金は翌日に反映されてました。リアルタイムに料金が反映されないことを知りました。
EC2 t2.micro(無料利用枠) 2台を実行しました。 1台(約2時間) 1台(約4時間)で実行したままにしました。
VPC サブネット セキュリティグループ インターネットゲートウェイは料金がかかりません。
以下のサイトが参考になりました。
https://fu3ak1.hatenablog.com/entry/2020/07/02/233639
本記事の作業でかかった料金が12円でした。

Cost Explorerで毎日の料金を確認する方法
※Cost Explorerの表示は料金が発生しないため、日々料金を確認してみるのも良いと思います。
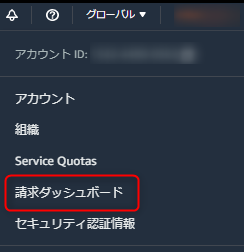
左ペインのCost explorerをクリックする
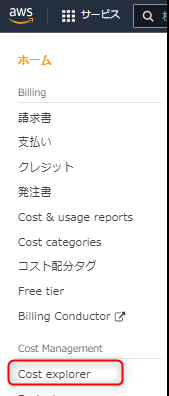
「Cost Explorerを起動」をクリックする

「Cost Explorerで表示」をクリックする

Cost Explorerで料金確認 0.09$です。

検証後のサービスの削除漏れを防ぐために、翌日以下の公式サイトを参照して
不要な現在使用中のサービスを確認した方が良いです。
AWSは個人アカウントで作業するのは勇気が入りますが、EC2を立ててWEBサーバーを立てるぐらいの
作業であれば高額な請求は来ないと思います。