一、Node.jsのインストール
以下のサイトからNodejsをダウンロードしローカルにインストールします。
https://nodejs.org/ja/
Nodejsを起動し先ず以下バージョンを確認します。
$ node -v
Node.jsと一緒にnpmもインストールされているのでそちらも確認しバージョンアップします。
$ node -v
$ npm update
二、Webpackのインストール
以下で、WebPackをインストルします。
$ npm install -g webpack
※-gオプション:グローバル領域にインストールされる
以下から、既存のWebpackのバージョンが確認できます。
$ npm view webpack version
三、Vue-cliインストール
Vueフレームワークを使うために、まずはvue-cli(コマンドラインインタフェース)をインストールすることが必要です。
古いバージョン(vue/cli)がインストールされていた場合は一旦アンインストールしてください。
Vueのコマンドラインインタフェースの最新版が「@vue/cli」になっていたので、最新版のほうをインストールします。
$ npm vue —version ※Vueバージョン確認
ローカルに既存なVue-CLIのバージョンを確認する
$ vue --version ※@vue/cliバージョン確認
古いバージョンをアンインストールしたい場合は以下のコマンドで行います。
$ npm uninstall -g vue-cli
最新バージョンをインストールする。
$ npm install -g @vue/cli
四、NODE動かしてみる
$ cd C:\src\nodetest(任意場所)
任意ファイルを作成します。例えばindex.js。
下記のコードをコピーします。
var http = require('http');
var server = http.createServer(function(request, response) {
    response.writeHead(200, {'Content-Type': 'text/html'});
    response.end('Hello Node.');
})
server.listen(8080);
ノード環境でjsを起動します。
$ node index.js
ブラウザでNODEの実行結果を確認します。

五、wwwプロジェクト作成
cd C:\src\www(任意場所)
vue環境を準備しましょう。vue/cliをインストールします。
$ npm i -g @vue/cli-init
以下では、「vuesample」という名前でプロジェクトを作成します。
$ vue init webpack vuesample
project name: 			→ sample
project description: 		→ sample
author: 			→ seikai.gaku
runtime + compiler: 		→ recommended for most user
install vue-router: 		→ y
use Eslinet to line your code: 	→ n
set up unit test: 		→ n
set up e2e tests of Nightwatch: → n
install:			→ Yes, use NPM
プロジェクトにNPMの初期化をします。
$ cd vuesample
$ npm install
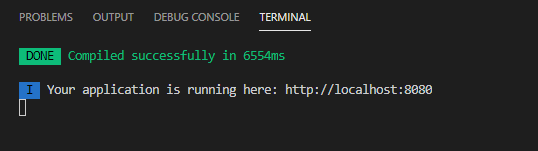
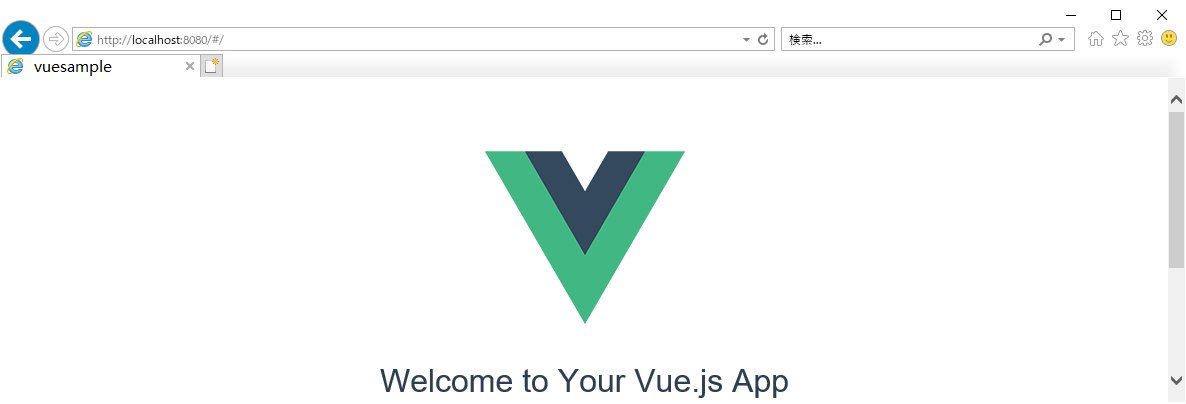
VSCodeでウェブサーバーを起動し、ブラウザでVUEの画面を確認します。
六、その他モジュール
■SweetAlert2
SweetAlert2を使ってキレイでリッチなJavaScriptダイアログ表示を実現する方法
$ npm install vue-sweetalert2
$ npm view vue-sweetalert2 version
■Bootstrap-Vue
Bootstrap-Vueをインストールします。
$ npm install vue bootstrap-vue bootstrap
$ npm view bootstrap-vue version
※違うバージョンがインストールされた場合の対処
$ npm uninstall phaser
$ npm install phaser@3.23.0
■axios
REST送信ためにインストールします
$ npm install  axios vue-axios
$ npm view axios version
■node-fetch
REST送信ためにインストールします
$ npm install node-fetch
$ npm view node-fetch version
七、プロジェクト内設定
よく扱っているファイルのやり方をサンプルとして説明してみましょう。
■vuesample/main.js
import Vue from 'vue'
import App from './App'
import router from './router'
import axios from 'axios'
import VueAxios from 'vue-axios'
import { BootstrapVue,BootstrapVueIcons } from "bootstrap-vue"
import 'bootstrap/dist/css/bootstrap.min.css'
import 'bootstrap-vue/dist/bootstrap-vue.css'
import '../static/assets/css/base.css'
import VueSweetalert2 from 'vue-sweetalert2';
import 'sweetalert2/dist/sweetalert2.min.css';

// sweatelert2オプションセット
const options = {
  confirmButtonColor: '#41b882',
  cancelButtonColor: '#ff7674',
};

// 開発環境・本番環境のURL切り替え
const axiosInstance = axios.create({
  baseURL: process.env.NODE_ENV,
});
export default axiosInstance;
axios.defaults.withCredentials = true;
axios.defaults.baseURL = 'https://localhost:3000';

axios.defaults.timeout = 3000;
const service = axios.create({});
service.interceptors.request.use(
  (config) => {
    return config;
  }
),
(error) => {
  return Promise.reject(error);
}
Vue.use(VueAxios, axios)
Vue.use(VueSweetalert2, options);
Vue.use(BootstrapVue)
Vue.use(BootstrapVueIcons)
Vue.config.productionTip = false
Vue.config.ignoredElements = ['xml', 'category', 'variable', 'field', 'value', 'comment', 'mutation', 'statement', 'variables', 'next']
// 子コンポーネント内でも扱えている
Vue.prototype.glob = new Vue;
new Vue({
  el: '#app',
  router,
  components: { App },
  template: '<App/>'
})
■vuesample/App.vue
  <div id="app">
    <router-view :key="$route.fullPath"></router-view>
    <loading></loading>
  </div>
</template>

<script>
import loading from '@/components/CompLoading'
export default {
  name: 'app',
  components: {
    loading,
  },
  mounted() {},
  methods: {
    windowResize: function() {
      this.windowWidth = window.innerWidth;
      this.windowHeight = window.innerHeight - 100;
      this.setWindowHeight();
    },
    setWindowHeight() {
      document.documentElement.style.setProperty('--window-height', this.windowHeight);
    }
  },
  mounted: function () {
    window.addEventListener('resize', this.windowResize)
    this.setWindowHeight();
  },
}
</script>
<style>
# app {
  font-family: 'Hiragino Kaku Gothic Pro', 'ヒラギノ角ゴ Pro W3', Meiryo, メイリオ, Osaka, 'MS PGothic', arial, helvetica, sans-serif;
  -webkit-font-smoothing: antialiased;
  -moz-osx-font-smoothing: grayscale;
  text-align: center;
  color: #2c3e50;
}
</style>
■vuesample/router/index.js
import Vue from 'vue'
import Router from 'vue-router'
import Home from '@/views/home/Home'
import Dashboard from '@/views/Dashboard'
import Mail from '@/views/static/Mail'
Vue.use(Router)
export default new Router({
  mode: 'history',
  routes: [
    {
      path: '/',
      name: 'dashboard',
      component: Dashboard
    },
    {
      path: '/home',
      name: 'home',
      component: Home
    },
    {
      path: '/mail',
      name: 'mail',
      component: Mail
    },
  ]
})