こんにちは!プログラミングコミュニティGeekSalon所属メンターのガッキーと申します!今回は、何かとGameコースで質問の多いステージ無限生成の実装の仕方を書いていきます。今回初めての記事執筆になるので分かりづらい点などありましたら、言ってくださるとありがたいです🙇♂️
また、この無限生成の方法は複数のパターンのステージを生成したい方にオススメになっています。シンプルな無限生成は他の記事を参考にすると、やりやすいかなと感じます!
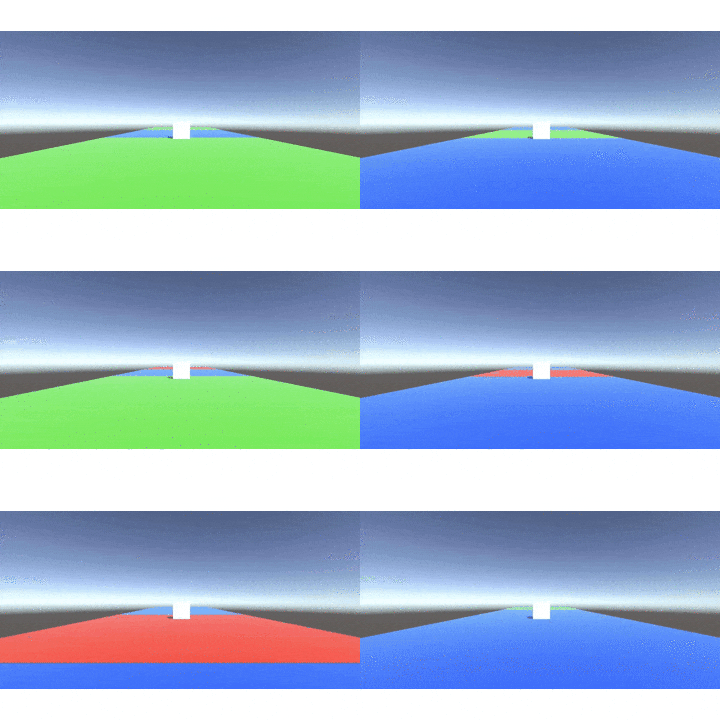
完成イメージこんな感じ!!
1. ステージ無限生成実装の手順
- プレイヤーの準備
- ステージの準備
- ステージ無限生成のスクリプトを書く
- Unityで少しいじる
- ステージ上に敵などのオブジェクトを設置する場合
1.1プレイヤーの準備
- Hierarchyにて3D objectの
Playerを生成する - Projectにて
PlyaerScriptを生成する
using System.Collections;
using System.Collections.Generic;
using UnityEngine;

public class PlayerScript : MonoBehaviour
{
    // Start is called before the first frame update
    float speed =5.0f; //speedの変数宣言
    void Start()
    {

    }

    // Update is called once per frame
    void Update()
    {
        this.transform.position += new Vector3(0,0,speed*Time.deltaTime);//移動するコード
    }
}
1.2ステージの準備
- Hierarchyにて3D objectの
Planeを3つ生成する - 3つのPlaneを見分けやすくするためにMaterialで色をつける
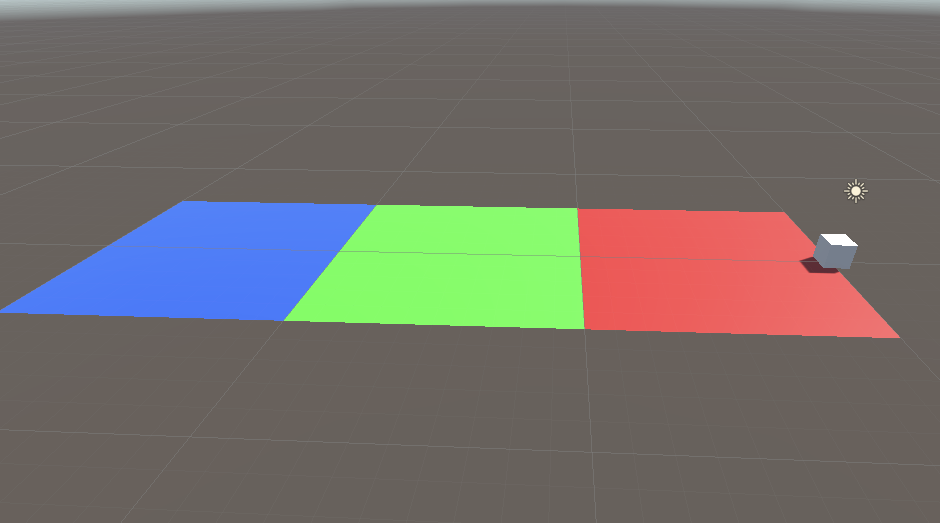
- 以下の写真の形で3つ並べる

1個目の赤いPlaneの座標は(0,0,5)、2個目の緑のPlaneの座標は(0,0,15)、3個目の青のPlaneの座標は(0,0,25)とする。Planeの大きさはdefaltで縦の長さ10,横の長さ10である。
1.3ステージ無限生成のスクリプトを書く
- Hierarchyにて
Create Emptyを選択しGameManagerという名前の空objectを生成する。 - Projectにて
GroundGeneratorというスクリプトを生成する。
using System.Collections;
using System.Collections.Generic;
using UnityEngine;

public class GroundGenerator : MonoBehaviour
{
    // Start is called before the first frame update
public GameObject player;//UnityからPlayerを格納
	public GameObject[] grounds = new GameObject[3];//Unityから生成するGroundのPrefabをアタッチ

	float border = 15;
	float playerStartPosZ;//Playerの初期x座標
	float playerNowPosZ;//Playerの現在x座標


	void Start () {
		player = GameObject.Find("Player");//Hierarcyの中から名前が"Player"のものを探して来て取得→変数playerに格納

		playerStartPosZ = player.transform.position.z;//最初の基準値となるPlayerの
	}

	void Update () {
		GenerateGround();//Groundを一定の間隔で生成
	}

    //Groundを一定の間隔で生成
	void GenerateGround()
	{
		playerNowPosZ = player.transform.position.z;//Playerの現在x座標を変数playerNowPosXに格納
        float playerDistance = playerNowPosZ - playerStartPosZ;//Playerの移動距離(playerNowPosXとplayerStartPosXの差分)を変数playerDistanceに格納
        if (playerDistance > border)
        {
            //ステージ生成
            Debug.Log("ステージ生成");
			Instantiate(grounds[Random.Range(0, 3)], new Vector3(0, 0, player.transform.position.z + 20), Quaternion.identity);//Playerの一定距離だけ先にステージ生成(-5.5fはステージ生成の位置補正の為)
            playerDistance = 0;//playerDistanceのリセット
            border = 10;//borderの再設定
            playerStartPosZ = playerNowPosZ;//playerStartPosの再設定
        }
	}
}
3.1個ずつ解説
public class GroundGenerator : MonoBehaviour
{
    // Start is called before the first frame update
    public GameObject player;//UnityからPlayerを格納
	public GameObject[] grounds = new GameObject[3];//Unityから生成するGroundのPrefabをアタッチ

	float border = 15;
	float playerStartPosZ;//Playerの初期x座標
	float playerNowPosZ;//Playerの現在x座標
}
まずは変数宣言をする。
- playerはUnityにては紐付け可能にするためにpublicを付ける。
- ステージは何パターン用意するかによって数字を変える必要がある。今回はステージを3パターン用意するので、3と書く。
- 今回使う
borderという変数は、「ここを超えたら次のステージが先に生成される」と覚えてください。 -
playerStartPosZは最初のplayerのz座標 -
playerNowPosZは更新し続けられるplayerのz座標
public class GroundGenerator : MonoBehaviour
{
void Start () {
		player = GameObject.Find("Player");//Hierarcyの中から名前が"Player"のものを探して来て取得→変数playerに格納

		playerStartPosZ = player.transform.position.z;//最初の基準値となるPlayerの
	}}
- Hierarcyの中から名前が
Playerのものを探して来て取得→変数playerに格納する。 - 最初の基準値をとなる最初のplayerのz座標を設定
public class GroundGenerator : MonoBehaviour
{
	void Update () {
		GenerateGround();//Groundを一定の間隔で生成
}
    //Groundを一定の間隔で生成
	void GenerateGround()
	{
		playerNowPosZ = player.transform.position.z;//Playerの現在x座標を変数playerNowPosXに格納
        float playerDistance = playerNowPosZ - playerStartPosZ;//Playerの移動距離(playerNowPosXとplayerStartPosXの差分)を変数playerDistanceに格納
        if (playerDistance > border)
        {
            //ステージ生成
            Debug.Log("ステージ生成");
			Instantiate(grounds[Random.Range(0, 3)], new Vector3(0, 0, player.transform.position.z + 20), Quaternion.identity);//Playerの一定距離だけ先にステージ生成(-5.5fはステージ生成の位置補正の為)
            playerDistance = 0;//playerDistanceのリセット
            border = 10;//borderの再設定
            playerStartPosZ = playerNowPosZ;//playerStartPosの再設定
        }
	}
-
void UpdateにてGenerateGroundメソッドを定義 -
playerNowPosZはplayerが進んだ先でのz座標 -
playerDistanceはplayerの移動距離(playerNowPosXとplayerStartPosXの差分) - if文でボーダーを超えた時に新しいステージを1つ生成するコードを書く
- ボーダーを超えた時点で〇〇z座標先に生成(今回の場合はz座標の20先に生成)
- 一度playerDistanceをリセット
- borderの再設定をする(※理由は後ほど下で書きます)
- 最初のplayerStartPosZも座標が0のままではダメなので、更新しなければならない。
- イメージこんな感じ!!

1.4 Unityで少しいじる
- 最終的にこのように紐付け出来ていればOK

- 注意点で、Groundsに紐付けるステージはprojectの中にある物を使い、必ずpositionを(0,0,0)に設定する。これをやらないと生成される場所がズレる。
- 初期設定の3つのPlaneは、Hierarchy内にprefabの状態で置いといてはならないので、必ずproject内に移動した後にUnpackしPrefab化を解除する。
1.5 ステージ上に敵などのオブジェクトを設置する場合
ランゲームなどでステージを生成する際に、敵を同時に生成するパターンが多い。
その時は、planeと敵オブジェクトなどを同時にprefab化する必要がある。
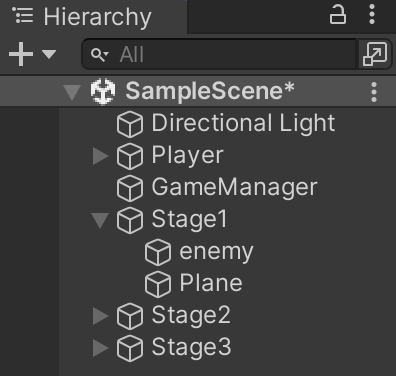
しかし、ステージ(スケールが(1,1,2)のもの)の中に敵を入れて親子関係にしたとしたら、敵の大きさが親のスケールに依存するので形が変形してしまいます💦
手順としては、こう
-
CreateEmptyで空オブジェクト「staga]という名前を生成する。『スケール(1,1,1)、座標(0,0,0)』
-
これをprefab化してGamaManagerのGroundsに紐付ける。
-
子オブジェクトのz座標は全部修正しなければならない
planeの場合は全部z座標は0,enemyはそのplaneに合わせて位置を調整する。
以上がステージ無限生成の手順でした!
終わりに
今回の記事はここまでになります。
最後まで読んでくださりありがとうございました。
参考にした記事はこちらになります!
https://github.com/Ryo-Nakano/YokoScrollMugen/blob/master/Assets/Scripts/GroundGenerator.cs

