注意(2020/01/15)
投稿編集まで対応させた記事を書いたので、
こっちを参考にして頂けますと幸いです。
画像の複数枚投稿と編集とプレビューと私
〇〇エキスパートにて
どうも、pirikaraです。
チーム開発にて某メルカリのクローンサイトを作成中、商品出品の画像投稿で詰まりました。
プレビューは表示されるのにデータが入ってない・・・・・・
プレビュー消したのにデータが残っている・・・・・・
など散々格闘したので、参考になればと思って書きました。
10月からプログラミング学習を開始した弱々エンジニアですので、お手柔らかによろしくお願い致します。
仕様
- 画像を10枚投稿できる
- 投稿した画像は1枚ずつプレビューされる
- 5枚目以降は2段目にプレビュー表示される
- 削除を押すとプレビューから消える
- 追加・削除したプレビューとfile_fieldの中身が同期している
やってみよう
まずはrails newで適当なアプリケーションを立ち上げます。
今回は適当にsample_appとしました。
databaseはmySQLを使用します。
今回は商品出品なので、ItemモデルとImageモデルを作成。
CarrierWaveとminimagickのgemをインストールして、
アソシエーションを組みます。
class Item < ApplicationRecord
  has_many :images, dependent: :destroy
  accepts_nested_attributes_for :images, allow_destroy: true
end
class Image < ApplicationRecord
  belongs_to :animal, optional: true
  mount_uploader :image_url, ImageUploader
end
※accepts_nested_attributes_forは以下の記事を参考にしました
Rails ネストした関連先のテーブルもまとめて保存する (accepts_nested_attributes_for、fields_for)
databaseのカラムを作成します。
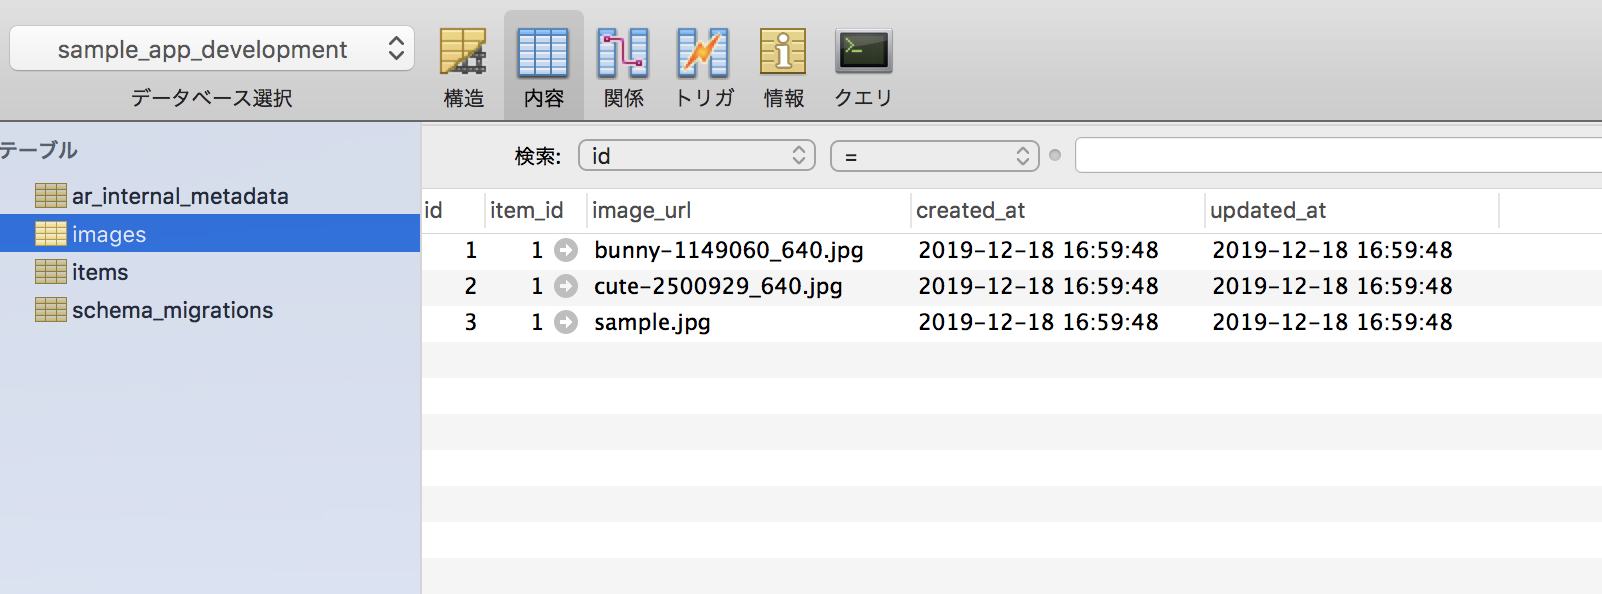
今回はitemはnameのみ、imageはitem_idでitemと紐付けて、image_urlカラムに画像ファイル名が保存されるようにしました。


フォームを作るよ
できました。
.main
  %section.main__block
    = form_with model:@item, local:true do |f|
      %h2.sell__block__head
        商品の情報を入力
      .sell__block__form
        .sell__block__form__upload
          %h3.sell__block__form__upload__head
            出品画像
            %span.require 必須
          %p 最大10枚までアップロードできます
          #image-box-1
            .item-num-0#image-box__container
              = f.fields_for :images do |i|
                .input-area
                  = i.file_field :image, type: 'file', name: "item[images_attributes][][image_url]", value:"", style: "display:none", id:"img-file"
                  %label{for: "img-file"}
                    %i.fas.fa-camera

        .sell__block__form__name
          .form-group__name
            %label
              商品名
              %span.require 必須
            %div
              = f.text_field :name, placeholder:"商品名(必須 40文字まで)",class: "form__group__name"

        .sell__block__form__btn
          %div
            = f.submit "出品する",class: "btn-default__btn-red"
コードはこんな感じ。
# image-box-1
  .item-num-0#image-box__container
この間にプレビューのコードがJavaScriptで挿入される感じで実装していきます。
JQueryを書くよ
まず、作業を以下の4つに分けました。
- プレビューの表示
- プレビューの削除
- プレビューの複数表示
- ドラッグ&ドロップへの対応
順番に作業していきます。
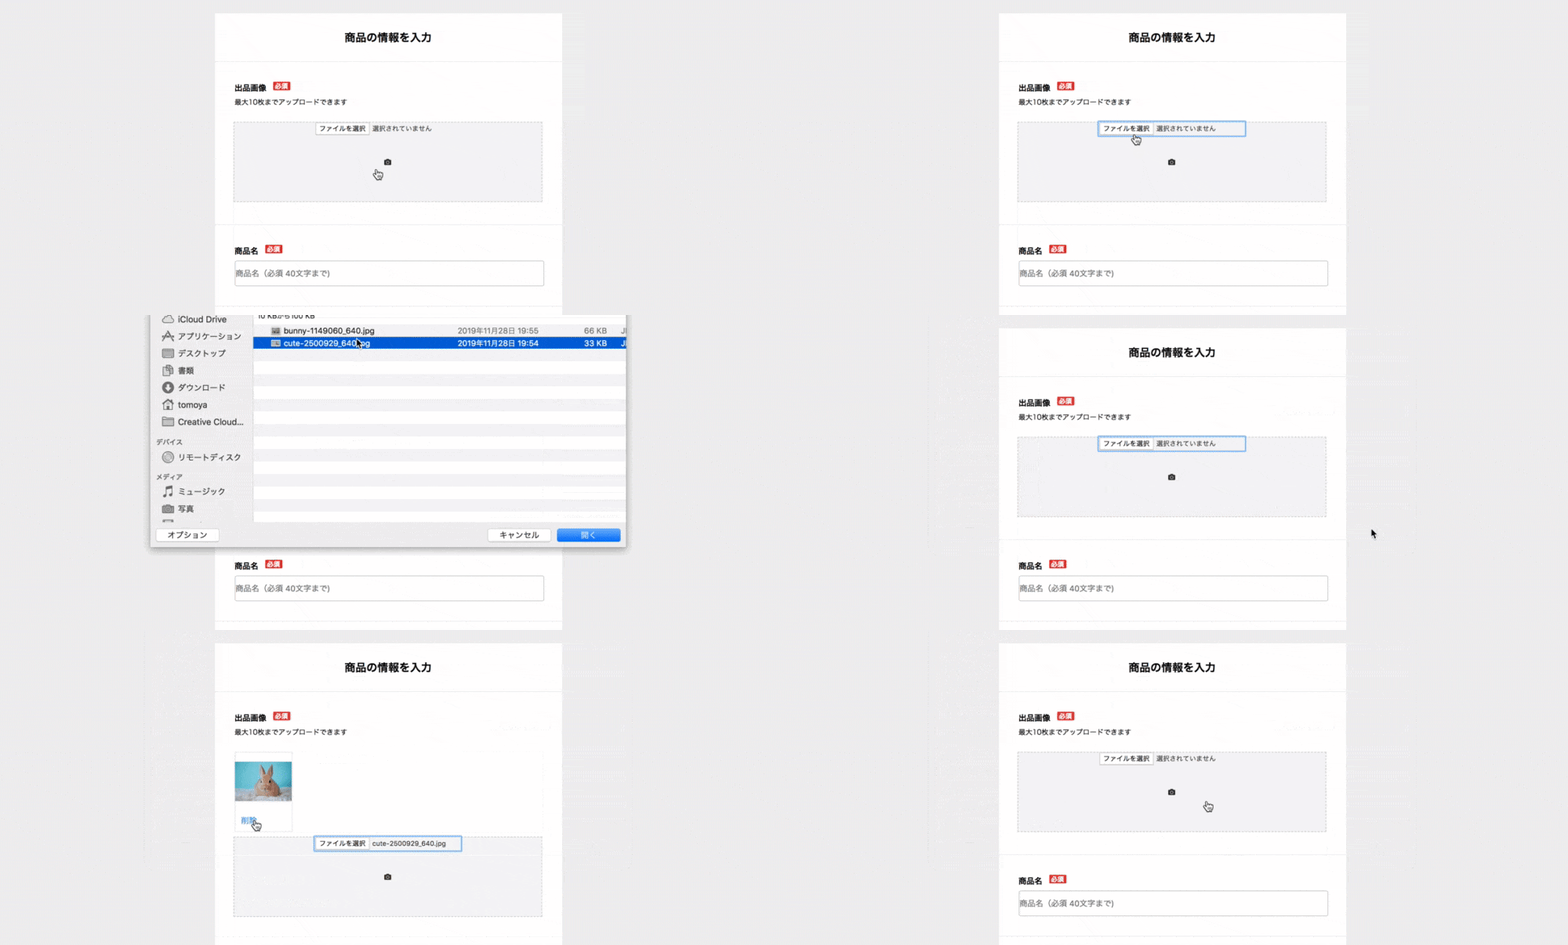
1. プレビューの表示
できました。
コードは以下の通りです。
$(function(){
  //querySelectorでfile_fieldを取得
  var file_field = document.querySelector('input[type=file]')
  //fileが選択された時に発火するイベント
  $('#img-file').change(function(){
    //選択したfileのオブジェクトをpropで取得
    var file = $('input[type="file"]').prop('files')[0];
    //FileReaderのreadAsDataURLで指定したFileオブジェクトを読み込む
    var fileReader = new FileReader();
    //読み込みが完了すると、srcにfileのURLを格納
    fileReader.onloadend = function() {
      var src = fileReader.result
      var html= `<img src="${src}" width="114" height="80">`
      //image_box__container要素の前にhtmlを差し込む
      $('#image-box__container').before(html);
    }
    fileReader.readAsDataURL(file);
  });
});
今の状態ではプレビューが削除できないため、削除できるようにします。
2. プレビューの削除
まずはhtml部に削除ボタンを追加します。
var html= `<div class='item-image' data-image="${file.name}">
             <div class=' item-image__content'>
               <div class='item-image__content--icon'>
                 <img src=${src} width="114" height="80" >
               </div>
             </div>
             <div class='item-image__operetion'>
               <div class='item-image__operetion--delete'>削除</div>
             </div>
           </div>`
削除ボタンを押すと発火するイベントを作成し、プレビューが削除できるようにします。
$(document).on("click", '.item-image__operetion--delete', function(){
  //プレビュー要素を取得
  var target_image = $(this).parent().parent()
  //プレビューを削除
  target_image.remove();
  //inputタグに入ったファイルを削除
  file_field.val("")
})
file_fieldに画像が入ったと同時にプレビューが出て、プレビュー削除と同時にfile_fieldに入った画像が消えました。
3. プレビューの複数表示
ここからが本番です。
大まかな流れとしては、
①DataTransferオブジェクトを作成し、データを格納する箱とする
②each文を用いて、DataTransferオブジェクトの箱にfileを追加していく。
③箱の中身をfile_fieldに代入して、複数データを持たせる
④ついでeach文の中でプレビューを追加していく。
って感じです。
DataTransferオブジェクトに関しては、下記のサイトを参考にしました。
Javascriptプログラミング講座

画像を挿入すると、DataTransferオブジェクト内のfiles: FileListにデータが追加されていきます。
それではコードを書いていきましょう。
$(function(){
  //DataTransferオブジェクトで、データを格納する箱を作る
  var dataBox = new DataTransfer();
  //querySelectorでfile_fieldを取得
  var file_field = document.querySelector('input[type=file]')
  //fileが選択された時に発火するイベント
  $('#img-file').change(function(){
    //選択したfileのオブジェクトをpropで取得
    var files = $('input[type="file"]').prop('files')[0];
    $.each(this.files, function(i, file){
      //FileReaderのreadAsDataURLで指定したFileオブジェクトを読み込む
      var fileReader = new FileReader();

      //DataTransferオブジェクトに対して、fileを追加
      dataBox.items.add(file)
      //DataTransferオブジェクトに入ったfile一覧をfile_fieldの中に代入
      file_field.files = dataBox.files

      var num = $('.item-image').length + 1 + i
      fileReader.readAsDataURL(file);
    //画像が10枚になったら超えたらドロップボックスを削除する
      if (num == 10){
        $('#image-box__container').css('display', 'none')
      }
      //読み込みが完了すると、srcにfileのURLを格納
      fileReader.onloadend = function() {
        var src = fileReader.result
        var html= `<div class='item-image' data-image="${file.name}">
                    <div class=' item-image__content'>
                      <div class='item-image__content--icon'>
                        <img src=${src} width="114" height="80" >
                      </div>
                    </div>
                    <div class='item-image__operetion'>
                      <div class='item-image__operetion--delete'>削除</div>
                    </div>
                  </div>`
        //image_box__container要素の前にhtmlを差し込む
        $('#image-box__container').before(html);
      };
      //image-box__containerのクラスを変更し、CSSでドロップボックスの大きさを変えてやる。
      $('#image-box__container').attr('class', `item-num-${num}`)
    });
  });
  //削除ボタンをクリックすると発火するイベント
  $(document).on("click", '.item-image__operetion--delete', function(){
    //プレビュー要素を取得
    var target_image = $(this).parent().parent()
    //プレビューを削除
    target_image.remove();
    //inputタグに入ったファイルを削除
    file_field.val("")
  })
});
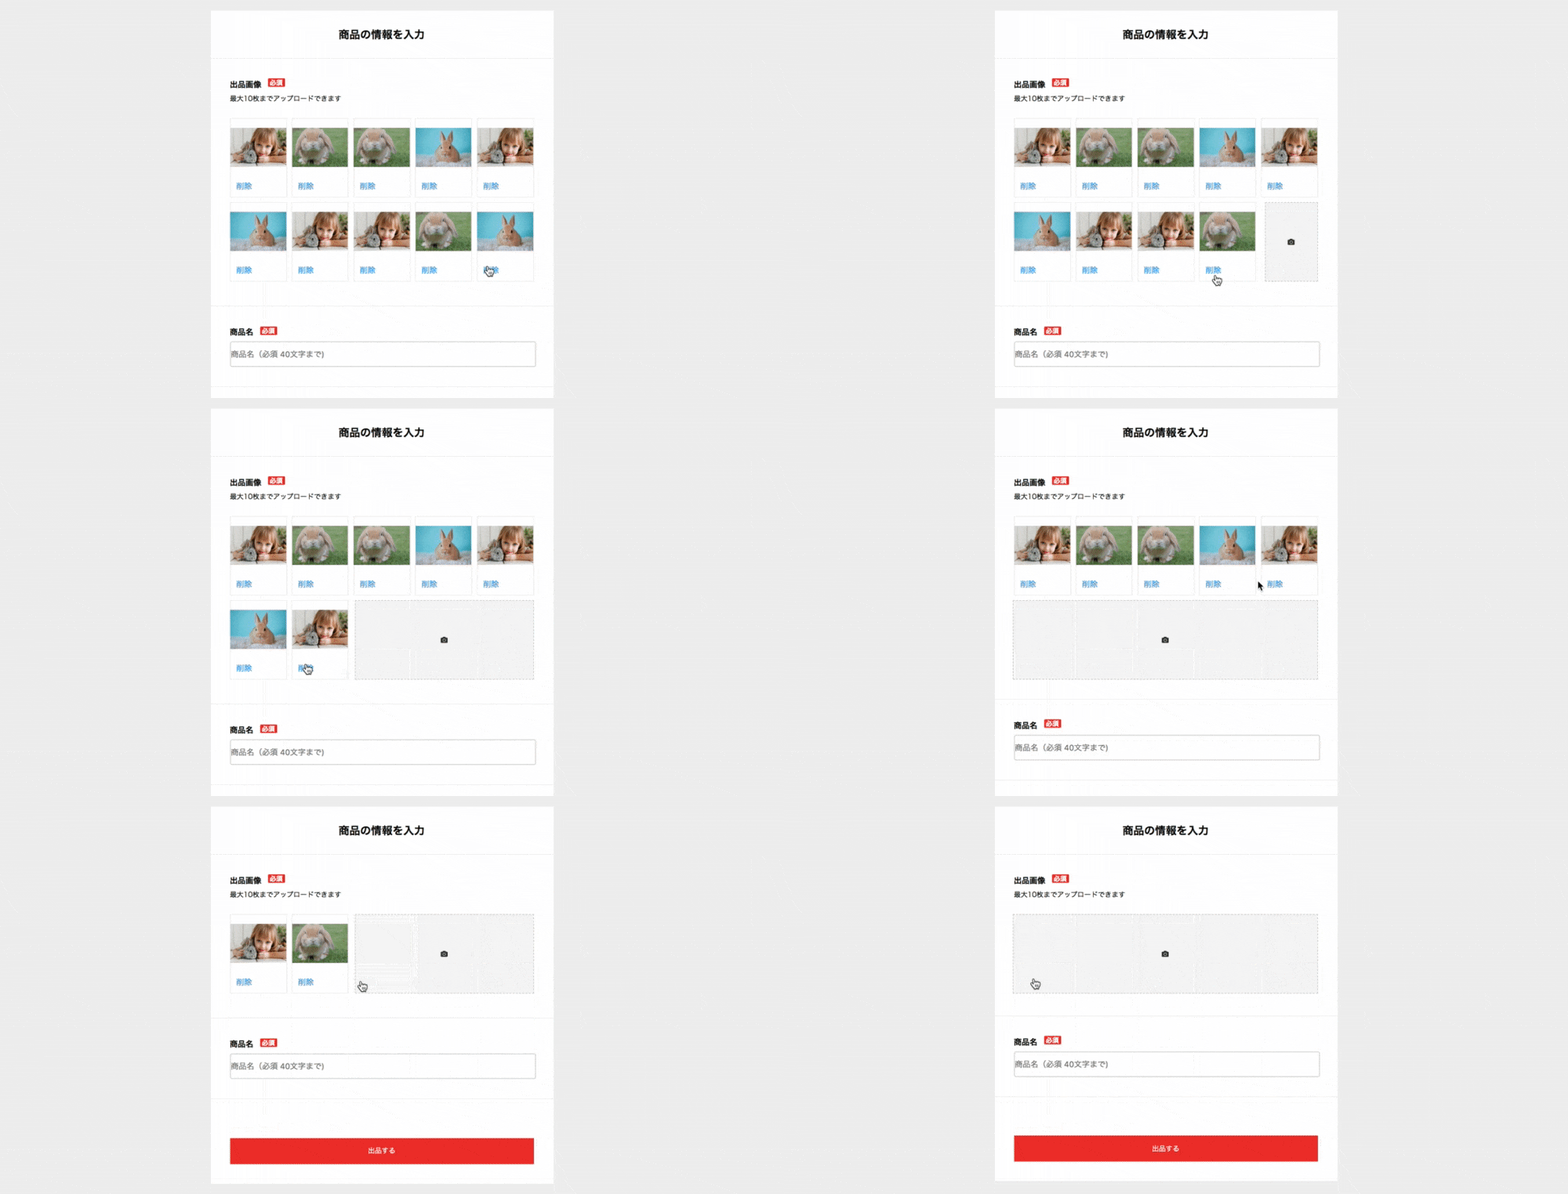
image-box__containerクラスを持つdivタグのクラスをプレビューBOXの数に応じて変更し、
CSSをによってドロップボックスが小さくなるようにしました。
画像が5枚になったら、cssの指定でドロップボックスのwidthを100%に戻します。
するとドロップボックスが2行目に落ちてきます。
10枚になったらドロップボックスを消してあげます。
.item-num-0#image-box__container
  .item-num-0{
    width: 100%;
  }
  .item-num-1{
    width: 491px;
  }
  .item-num-2{
    width: 363px;
  }
  .item-num-3{
    width: 234px;
  }
  .item-num-4{
    width: 106px;
  }
  //下段のfile_field
  .item-num-5{
    width: 100%;
  }
  .item-num-6{
    width: 491px;
  }
  .item-num-7{
    width: 363px;
  }
  .item-num-8{
    width: 234px;
  }
  .item-num-9{
    width: 106px;
  }
}
できました。

プレビューの追加に応じて、「ファイルを選択」欄のファイル数が増えていくようになりました。
しかしこのままでは以下のコードによって、削除ボタンを押すとfile_fieldに格納されている全てのデータが消えてしまう状態です。
なのでコードを書き換えていきます。
//変更前

$(document).on("click", '.item-image__operetion--delete', function(){
  //プレビュー要素を取得
  var target_image = $(this).parent().parent()
  //プレビューを削除
  target_image.remove();
  //inputタグに入ったファイルを削除
  file_field.val("")
})
//変更後

//削除ボタンをクリックすると発火するイベント
$(document).on("click", '.item-image__operetion--delete', function(){
  //削除を押されたプレビュー要素を取得
  var target_image = $(this).parent().parent()
  //削除を押されたプレビューimageのfile名を取得
  var target_name = $(target_image).data('image')
  //プレビューがひとつだけの場合、file_fieldをクリア
  if(file_field.files.length==1){
    //inputタグに入ったファイルを削除
    $('input[type=file]').val(null)
    dataBox.clearData();
    console.log(dataBox)
  }else{
    //プレビューが複数の場合
    $.each(file_field.files, function(i,input){
      //削除を押された要素と一致した時、index番号に基づいてdataBoxに格納された要素を削除する
      if(input.name==target_name){
        dataBox.items.remove(i)
      }
    })
    //DataTransferオブジェクトに入ったfile一覧をfile_fieldの中に再度代入
    file_field.files = dataBox.files
  }
  //プレビューを削除
  target_image.remove()
  //image-box__containerクラスをもつdivタグのクラスを削除のたびに変更
  var num = $('.item-image').length
  $('#image-box__container').show()
  $('#image-box__container').attr('class', `item-num-${num}`)
})
ドラッグ&ドロップへの対応
ドロップエリアをクリックした時にファイルが入る&プレビューが表示される実装が完了したので、ドラッグ&ドロップでも画像が投稿できるようにコードを追加します。
ドラッグ時にドロップエリアに影がつくようにしてみました。
プレビュー表示、file_fieldへのfile追加に関してはクリックによるものとほとんど同じです。
var dropArea = document.getElementById("image-box-1");

//loadイベント発生時に発火するイベント
window.onload = function(e){
  //ドラッグした要素がドロップターゲットの上にある時にイベントが発火
  dropArea.addEventListener("dragover", function(e){
    e.preventDefault();
    //ドロップエリアに影がつく
    $(this).children('#image-box__container').css({'border': '1px solid rgb(204, 204, 204)','box-shadow': '0px 0px 4px'})
  },false);
  //ドラッグした要素がドロップターゲットから離れた時に発火するイベント
  dropArea.addEventListener("dragleave", function(e){
    e.preventDefault();
   //ドロップエリアの影が消える
    $(this).children('#image-box__container').css({'border': '1px dashed rgb(204, 204, 204)','box-shadow': '0px 0px 0px'})
  },false);
  //ドラッグした要素をドロップした時に発火するイベント
  dropArea.addEventListener("drop", function(e) {
    e.preventDefault();
    $(this).children('#image-box__container').css({'border': '1px dashed rgb(204, 204, 204)','box-shadow': '0px 0px 0px'});
    var files = e.dataTransfer.files;
    //ドラッグアンドドロップで取得したデータについて、プレビューを表示
    $.each(files, function(i,file){
      //アップロードされた画像を元に新しくfilereaderオブジェクトを生成
      var fileReader = new FileReader();
      //dataTransferオブジェクトに値を追加
      dataBox.items.add(file)
      file_field.files = dataBox.files
      //lengthで要素の数を取得
      var num = $('.item-image').length + i + 1
      //指定されたファイルを読み込む
      fileReader.readAsDataURL(file);
      // 10枚プレビューを出したらドロップボックスが消える
      if (num==10){
        $('#image-box__container').css('display', 'none')
      }
      //image fileがロードされた時に発火するイベント
      fileReader.onload = function() {
        //変数srcにresultで取得したfileの内容を代入
        var src = fileReader.result
        var html =`<div class='item-image' data-image="${file.name}">
                    <div class=' item-image__content'>
                      <div class='item-image__content--icon'>
                        <img src=${src} width="114" height="80" >
                      </div>
                    </div>
                    <div class='item-image__operetion'>
                      <div class='item-image__operetion--delete'>削除</div>
                    </div>
                  </div>`
      //image-box__containerの前にhtmlオブジェクトを追加
      $('#image-box__container').before(html);
      };
      //image-box__containerにitem-num-(変数)という名前のクラスを追加する
      $('#image-box__container').attr('class', `item-num-${num}`)
    })
  })
}
databaseにも無事保存されましたね。めでたしめでたし。

終わりに
上記のコードを参考にして、ご自身のアプリで挙動を確かめてみてください。
無事に動くと良いですね。
問題点としては
『同じ画像を貼り付けた場合に、削除を押すと複数同時に消えてしまう』
というエラーを抱えていることでしょうか・・・・・・(大問題)
直したら追記します。
直せる強強エンジニアのかたいらっしゃいましたら教えてください。
以上、初投稿でした。
お目通しいただきありがとうございました。


