はじめに
今まで私は Python で discord.py というライブラリを使って Discord Bot を開発していたのですが discord.py の開発が終了してしまったためもう一つの有名なライブラリである discord.js を使ってみようと思い、今まで触ってこなかった Node.js を勉強しはじめました。そして discord.js はスラッシュコマンドに対応しているということで、これで色々遊んでみようと思います。
追記(2022/5/4):
想像以上の反響に私も驚いています.私は JavaScript 初心者な上に今は Pycord を使って Bot 開発をしているので Discord.js の方は追えていません.予めご了承ください.
前提
- 基本的な JavaScript の文法を知っている
- discord.js を少しでも触ったことがある
- Node.js の環境がある
- Discord の Bot のトークンを持っている
著者の環境
- macOS Big Sur 11.5.2
- Node.js v16.10.0
- discord.js v13.1.0
スラッシュコマンドを使うには discord.js v13 以上が必要です。そしてそれには Node.js v16 以上が必要です。
本題
スラッシュコマンドの登録
スラッシュコマンドにはギルドコマンドとグローバルコマンドの二種類があります。ギルドコマンドは指定したサーバーでしか使うことができませんがグローバルコマンドは登録にちょっと時間がかかるので今回はギルドコマンドを使います。
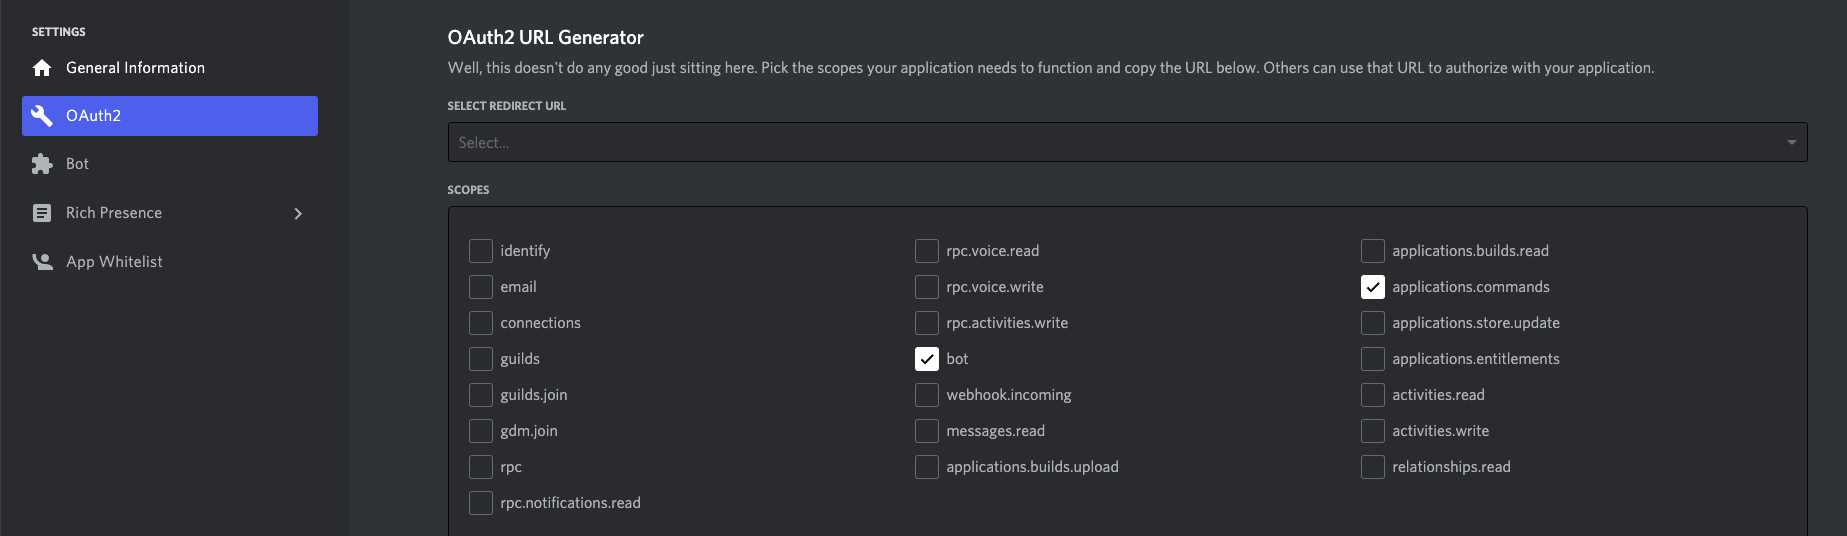
ギルドコマンドを登録するためには Bot をサーバーに追加する際、application.commands にチェックを入れる必要があります。すでにサーバーに入っている場合は脱退させずにもう一度この URL を踏めばいいらしいです。
Bot の起動時に登録したいため以下のようにします。
./index.js
./.env
というファイルを作ってそれぞれ
const { Client, Intents } = require('discord.js');
const dotenv = require('dotenv');

dotenv.config();

const client = new Client({ intents: [Intents.FLAGS.GUILDS] });

client.once("ready", async () => {
    const data = [{
        name: "ping",
        description: "Replies with Pong!",
    }];
    await client.application.commands.set(data, 'server_id');
    console.log("Ready!");
});

client.login(process.env.DISCORD_TOKEN);
DISCORD_TOKEN="Your_Discord_Bot_Token"
にします。
server_id はスラッシュコマンドを追加したいサーバーの ID、Your_Discord_Bot_Token は Bot のトークンに書き換えてください。 'server_id' という引数をなくせばグローバルコマンドになります。実行するたびにすべてのコマンドは上書きされるので気楽に登録して大丈夫です。
これで実行すると
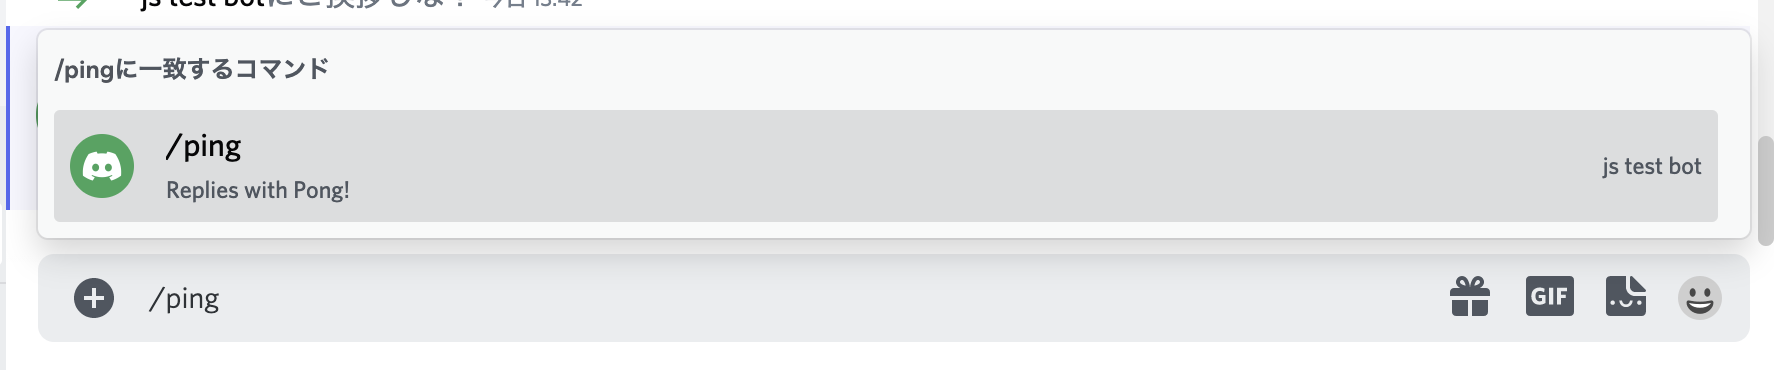
このように今追加したコマンドが出てきますが
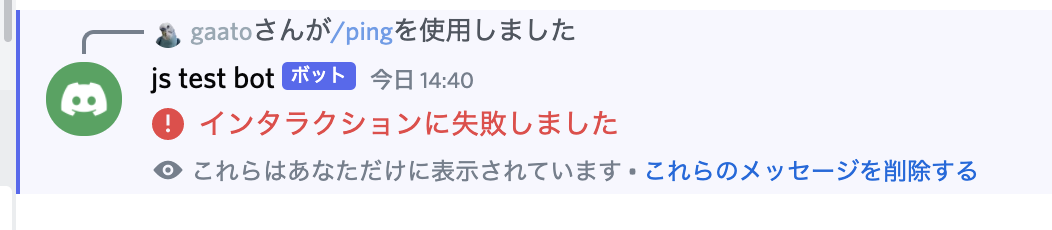
まだ反応する処理を書いていないのでこのようになります。ではそれを書いていきましょう。(ちなみに背景が白いのは Discord のテーマをライトにしているだけです。)
スラッシュコマンドに反応する処理を書く
説明するよりコードを見たほうが早いと思うのでコードを貼ります。
client.on("interactionCreate", async (interaction) => {
    if (!interaction.isCommand()) {
        return;
    }
    if (interaction.commandName === 'ping') {
        await interaction.reply('Pong!');
    }
});
コードを読めば多分なんとなく分かると思うのですが、この interaction を使って色々できます。console.log(interaction) とかすれば色々見れます。
これをさっきのコードに追加して実行すれば
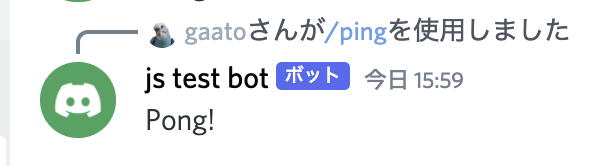
できました!
エフェメラルレスポンス
Ephemeral responses の日本語訳はエフェメラルレスポンスでいいのか不安になりながら書いていきます。これは実行した人にしか見えないようにするというものです。
client.on("interactionCreate", async (interaction) => {
    if (!interaction.isCommand()) {
        return;
    }
    if (interaction.commandName === 'ping') {
        await interaction.reply({ content: 'Pong!', ephemeral: true });
    }
});

どうでもいいですが夜になったら Discord のテーマがダークになるようにしています。
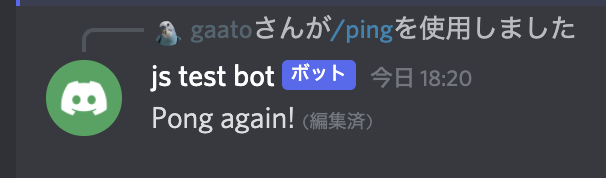
レスポンスの編集
最初のレスポンスから15分間編集できます。
const wait = require('util').promisify(setTimeout);

client.on("interactionCreate", async (interaction) => {
    if (!interaction.isCommand()) {
        return;
    }
    if (interaction.commandName === 'ping') {
        await interaction.reply('Pong!');
        await wait(2000);
        await interaction.editReply('Pong again!');
    }
});
2秒後に編集されます。
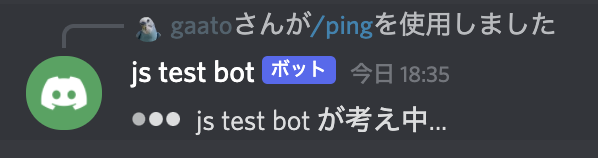
遅れた反応
通常3秒間反応がないとインタラクションに失敗しましたとなってしまうのですが deferReply を使うと3秒以上遅れて反応することができます。
const wait = require('util').promisify(setTimeout);

client.on("interactionCreate", async (interaction) => {
    if (!interaction.isCommand()) {
        return;
    }
    if (interaction.commandName === 'ping') {
        await interaction.deferReply();
        await wait(4000);
        await interaction.editReply('Pong!');
    }
});
フォローアップ
続けて反応する事ができます。これも最初の反応から15分間できます。語彙力がないのでコードと画像を見てください。
client.on("interactionCreate", async (interaction) => {
    if (!interaction.isCommand()) {
        return;
    }
    if (interaction.commandName === 'ping') {
        await interaction.reply('Pong!');
        await interaction.followUp('Pong again!');
    }
});

レスポンスの削除
レスポンスを消すこともできます。エフェメラルレスポンスは削除できません。
const wait = require('util').promisify(setTimeout);

client.on("interactionCreate", async (interaction) => {
    if (!interaction.isCommand()) {
        return;
    }
    if (interaction.commandName === 'ping') {
        await interaction.reply('Pong!');
        await wait(2000);
        await interaction.deleteReply();
    }

});
上のコードではレスポンスしてから2秒後に削除しています。
レスポンスの Message オブジェクトの取得
レスポンスの Message オブジェクトを取得したい場合は fetchReply を使います。
client.on("interactionCreate", async (interaction) => {
    if (!interaction.isCommand()) {
        return;
    }
    if (interaction.commandName === 'ping') {
        await interaction.reply('Pong!');
        const message = await interaction.fetchReply();
        console.log(message);
    }
});
簡単なフレームワークを作る
このままコマンドを追加していってもいいのですがコマンドが増えるとごちゃごちゃしてしまうのでコマンドひとつひとつ別のファイルに書けるようにします。
./index.js
./.env
./commands/ping.js
として、
const fs = require('fs')
const { Client, Intents } = require('discord.js');
const dotenv = require('dotenv');

dotenv.config();

const client = new Client({ intents: [Intents.FLAGS.GUILDS] });

const commands = {}
const commandFiles = fs.readdirSync('./commands').filter(file => file.endsWith('.js'))

for (const file of commandFiles) {
    const command = require(`./commands/${file}`);
    commands[command.data.name] = command
}

client.once("ready", async () => {
    const data = []
    for (const commandName in commands) {
        data.push(commands[commandName].data)
    }
    await client.application.commands.set(data, 'server_id');
    console.log("Ready!");
});

client.on("interactionCreate", async (interaction) => {
    if (!interaction.isCommand()) {
        return;
    }
    const command = commands[interaction.commandName];
    try {
        await command.execute(interaction);
    } catch (error) {
        console.error(error);
        await interaction.reply({
            content: 'There was an error while executing this command!',
            ephemeral: true,
        })
    }
});

client.login(process.env.DISCORD_TOKEN);
.env は変更なし。
module.exports = {
	data: {
        name: "ping",
        description: "Replies with Pong!",
    },
	async execute(interaction) {
		await interaction.reply('Pong!');
	}
}
JavaScript 初心者とはいえ我ながらクソコードを書いたと思います。もっと良い実装があったらぜひ編集リクエストしてください。これで ./commands 以下に ping.js のようなファイルを作ることでコマンドを追加することができます。
様々なオプション
新しいファイルを作ります。
module.exports = {
    data: {
        name: "echo",
        description: "Replies with your input!",
        options: [{
            type: "STRING",
            name: "input",
            description: "The input to echo back",
            required: true
        }],
    },
    async execute(interaction) {
        await interaction.reply(interaction.options.getString('input'))
	}
}
こんな感じでオプションを追加することができます。options の value は配列なので中身を複数にすれば複数のオプションを作ることができます。
type の value は
SUB_COMMANDSUB_COMMAND_GROUPSTRINGINTEGERBOOLEANUSERCHANNELROLEMENTIONABLE-
NUMBER
から選べます。
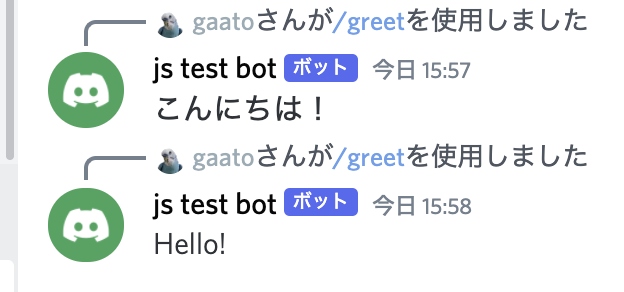
選択肢を作る
module.exports = {
    data: {
        name: "greet",
        description: "Greets!",
        options: [{
            type: "STRING",
            name: "language",
            description: "Choice your language",
            required: true,
            choices: [
                { name: "Japanese", value: "japanese" },
                { name: "English", value: "english" },
            ]
        }],
    },
    async execute(interaction) {
        if (interaction.options.getString('language') === 'japanese') {
			await interaction.reply('こんにちは!');
        } else {
            await interaction.reply('Hello!');
        }
    }
}
こんな感じで選べて

こんな感じで返事できます。
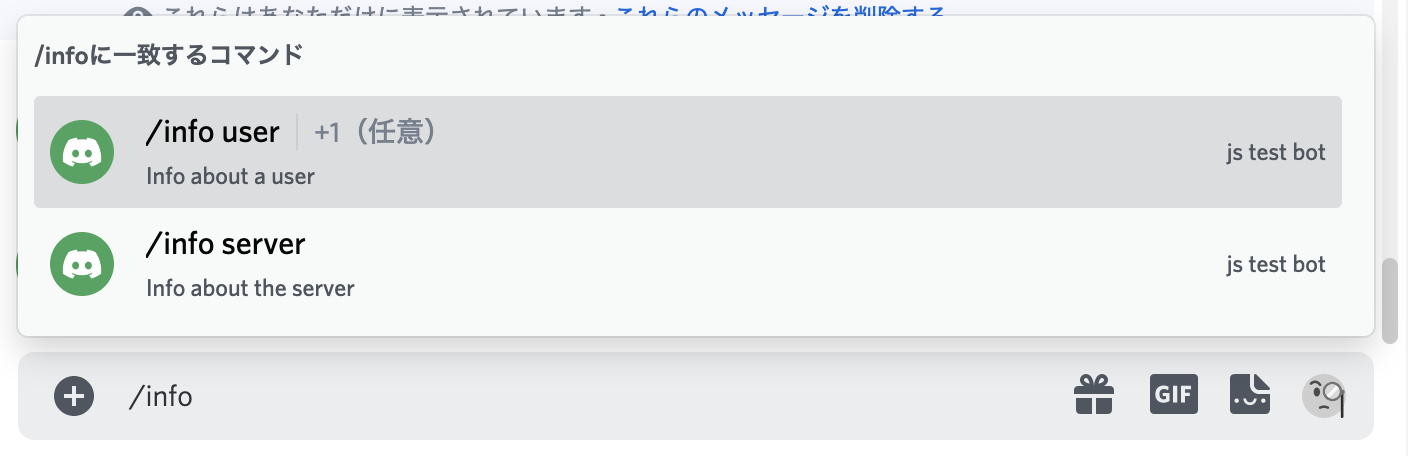
サブコマンド
module.exports = {
    data: {
        name: "info",
        description: "Get info about a user or a server!",
        options: [
            {
                type: "SUB_COMMAND",
                name: "user",
                description: "Info about a user",
                options: [{
                    type: "USER",
                    name: "target",
                    description: "The user",
                }],
            },
            {
                type: "SUB_COMMAND",
                name: "server",
                description: "Info about the server",
            },
        ],
    },
    async execute(interaction) {
        if (interaction.commandName === 'info') {
            if (interaction.options.getSubcommand() === 'user') {
                const user = interaction.options.getUser('target');

                if (user) {
                    await interaction.reply(`Username: ${user.username}\nID: ${user.id}`);
                } else {
                    await interaction.reply(`Your username: ${interaction.user.username}\nYour ID: ${interaction.user.id}`);
                }
            } else if (interaction.options.getSubcommand() === 'server') {
                await interaction.reply(`Server name: ${interaction.guild.name}\nTotal members: ${interaction.guild.memberCount}`);
            }
        }
    }
}
参考にさせていただいたサイト
discord.js 公式ドキュメント
Discord.js Guide
【discord.js】v13でbotを作ってみる
Node.jsでDiscordBotを作るのに苦戦した話
この記事のライセンス

この記事はCC BY 4.0(クリエイティブ・コモンズ 表示 4.0 国際 ライセンス)の元で公開します。