SCNView の描画結果を PIP で表示する
SCNView の描画結果を AVPictureInPictureController を使って PIP で表示させる方法です
アプリがバックグラウンドの時に更新されないので有用性は未知数ですが、、、(止まるの忘れてました)
SCNViewの描画結果をpipに描画できた!
— ふじき (@fzkqi) December 11, 2021
アプリをバックグラウンドにすると更新止まるけど… pic.twitter.com/MAD4laqHit
ソースコードはこちらです
SCNView の描画結果を取得する
SCNView は CAMetalLayer で描画しています
SCNSceneRendererDelegate の didRenderScene で描画されたことを検出して、CAMetalLayer で描画された内容を取得します
method swizzling して、一番最後に使った nextDrawable の texture にアクセスできるようにしておきます
extension CAMetalLayer {
    private struct AssociatedObjectKeyList {
        static var lastNextDrawableTextureKey = "lastNextDrawableTextureKey"
    }
    public static func swizzling() {
        let cls = CAMetalLayer.self
        let original = class_getInstanceMethod(cls, #selector(nextDrawable))!
        let swizzling = class_getInstanceMethod(cls, #selector(swizzled_nextDrawable))!
        method_exchangeImplementations(original, swizzling)
    }
    public var lastNextDrawableTexture: MTLTexture? {
        get {
            return objc_getAssociatedObject(self, &AssociatedObjectKeyList.lastNextDrawableTextureKey) as? MTLTexture
        }
        set {
            objc_setAssociatedObject(self, &AssociatedObjectKeyList.lastNextDrawableTextureKey, newValue, .OBJC_ASSOCIATION_RETAIN)
        }
    }
    @objc private func swizzled_nextDrawable() -> CAMetalDrawable? {
        let swizzled = swizzled_nextDrawable()
        lastNextDrawableTexture = swizzled?.texture
        return swizzled
    }
}
SCNView.layer.lastNextDrawableTexture を PIP で表示させます
MTLTexture を PIP で表示する
CIImage の作成
取得した MTLTexture は上下反転しているので、transform させます
let ci = CIImage(mtlTexture: texture, options: nil)!
let flippedCi = ci.transformed(by: .init(scaleX: 1, y: -1))
                .transformed(by: .init(translationX: 0, y: CGFloat(texture.height)))
CMTime と CIImage から CMSampleBuffer を作成します
func make(time: CMTime, ci: CIImage) -> CMSampleBuffer? {
    let buff: CVPixelBuffer = makePixelBuffer(width: Int(ci.extent.size.width), height: Int(ci.extent.size.height))
    let desc: CMVideoFormatDescription?
    CMVideoFormatDescriptionCreateForImageBuffer(allocator: kCFAllocatorDefault,
                                                 imageBuffer: buff,
                                                 formatDescriptionOut: &desc)
    CVPixelBufferLockBaseAddress(buff, CVPixelBufferLockFlags(rawValue: 0))
    context.render(ci, to: buff)
    var tmp: CMSampleBuffer?
    var sampleTiming = CMSampleTimingInfo()
    sampleTiming.presentationTimeStamp = time
    _ = CMSampleBufferCreateForImageBuffer(allocator: kCFAllocatorDefault,
                                           imageBuffer: buff,
                                           dataReady: true,
                                           makeDataReadyCallback: nil,
                                           refcon: nil,
                                           formatDescription: desc!,
                                           sampleTiming: &sampleTiming,
                                           sampleBufferOut: &tmp)
    CVPixelBufferUnlockBaseAddress(buff, CVPixelBufferLockFlags(rawValue: 0))
    return tmp
}
AVSampleBufferDisplayLayer を使って frame を表示する
AVSampleBufferDisplayLayer を持つ、SampleBufferDisplayView を作ります
class SampleBufferDisplayView: UIView {
    override class var layerClass: AnyClass {
        get { return AVSampleBufferDisplayLayer.self }
    }

    var sampleBufferDisplayLayer: AVSampleBufferDisplayLayer {
        return layer as! AVSampleBufferDisplayLayer
    }
}
AVSampleBufferDisplayLayer.enqueue を使って、MTLTexture から作成した CMSampleBuffer を表示させます
self.sampleBufferDisplayView.sampleBufferDisplayLayer.enqueue(cm)
AVPictureInPictureController で PIP する
AVAudioSession の category を .playback に設定しておきます
AVSampleBufferDisplayLayer を使って ContentSource を作成します
作成した ContentSource から AVPictureInPictureController を用意します
isPictureInPicturePossible が true になるのを待ってから、PIP を開始できるようにすると良いようです
try! AVAudioSession.sharedInstance().setCategory(.playback)
let pipContentSource = AVPictureInPictureController.ContentSource(sampleBufferDisplayLayer: sampleBufferDisplayView.sampleBufferDisplayLayer,
                                                                  playbackDelegate: self)
pipController = AVPictureInPictureController(contentSource: pipContentSource)
pipController
    .publisher(for: \.isPictureInPicturePossible, options: [.initial, .new])
    .sink { possible in
        print("isPictureInPicturePossible: \(possible)")
    }
    .store(in: &cancellables)
PIP の開始、終了
ボタンのタップで開始、終了します
@IBAction func onTapButton(_ sender: Any) {
    if pipController.isPictureInPictureActive {
        pipController.stopPictureInPicture()
    } else {
        pipController.startPictureInPicture()
    }
}
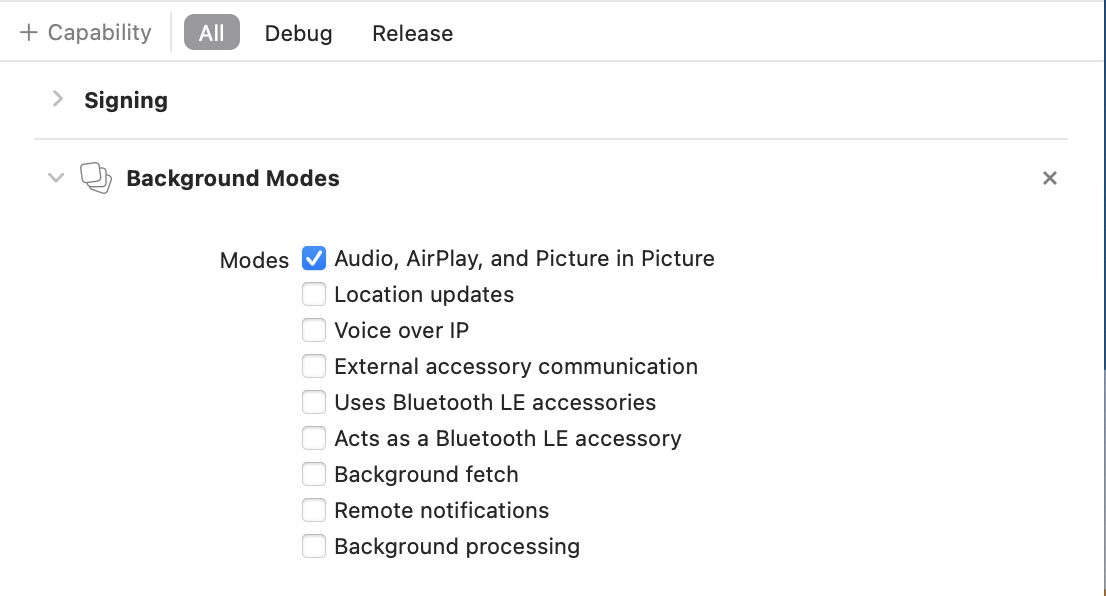
プロジェクトの設定
Capability から Background Modes を追加して、Picture in Picture を有効にします
まとめ
SCNView の描画結果を PIP で表示する方法でした
AVPictureInPictureController は自由に表示できるので、夢が広がります