前回の続き
前回の記事(https://qiita.com/futo_creid/items/82a4c25ccb7a55f6c514)で
SAMを使用して、ローカルで簡単なWEBAPIを作成しました。
ただこれだと、決まった結果しか返すことしかできないので、DBからデータを持ってきたいと思います。
なので今回はDB構築したいと思います。
構築するDBはサーバーレスアプリケーションでよくセットで使われるDynamoDBです。
1:実施環境
・Windows10 Home
・Docker Toolbox OR Docker for Windows
・Python
・AWS SAM CLI
2:構成
DynamoDB local
3:環境準備
1.APIGATEWAY&Lambda
前回の記事(https://qiita.com/futo_creid/items/82a4c25ccb7a55f6c514)
参照です。
以下の作業は
C:\Users\ユーザ名\samtest
フォルダ内で実施します。(ユーザ名はログインユーザ名で)
2.AWS設定
以下を実施し、AWSの初期設定を行います。
ローカルでの実施なので適当な値です。(東京リージョンにはしていますが)
aws configure
AWS Access Key ID [None]: ZipID
AWS Secret Access Key [None]: ZipSecret
Default region name [None]: ap-northeast-1
Default output format [None]: json
4:実装
DynamoDBを構築していきます!
1.コンテナ作成
PowerShellを開きます。
以下を実行して、DynamoDBを落としてきます。
docker pull amazon/dynamodb-local
以下を実行して、ネットワークを作成します。
docker network create api-network
以下を実行して、Dockerのコンテナを作成します。
docker run --network api-network --name dynamodb -p 8000:8000 amazon/dynamodb-local -jar DynamoDBLocal.jar -sharedDb
docker run --network api-network --name dynamodb -d -p 8000:8000 amazon/dynamodb-local -jar DynamoDBLocal.jar -inMemory -sharedDb
実行して以下の表示が出たら作成が終わっているので、ctrl+cで実行から離脱します。

・DynamoDBを起動する
再起動など、一度コンテナを停止した場合は以下でDynamoDBを起動します。
docker start dynamodb
2.テーブル作成
http://192.168.99.100:8000/shell/
にアクセスするとDynamoDBを操作できる画面が表示されます。

そこで1行目から以下を入力します。
var params = {
    TableName: 'ZipData',
    KeySchema: [ // The type of of schema.  Must start with a HASH type, with an optional second RANGE.
        { // Required HASH type attribute
            AttributeName: 'Zip',
            KeyType: 'HASH',
        }
    ],
    AttributeDefinitions: [ // The names and types of all primary and index key attributes only
        {
            AttributeName: 'Zip',
            AttributeType: 'S', // (S | N | B) for string, number, binary
        }
    ],
    ProvisionedThroughput: { // required provisioned throughput for the table
        ReadCapacityUnits: 1,
        WriteCapacityUnits: 1,
    },
};
dynamodb.createTable(params, function(err, data) {
    if (err) ppJson(err); // an error occurred
    else ppJson(data); // successful response
});
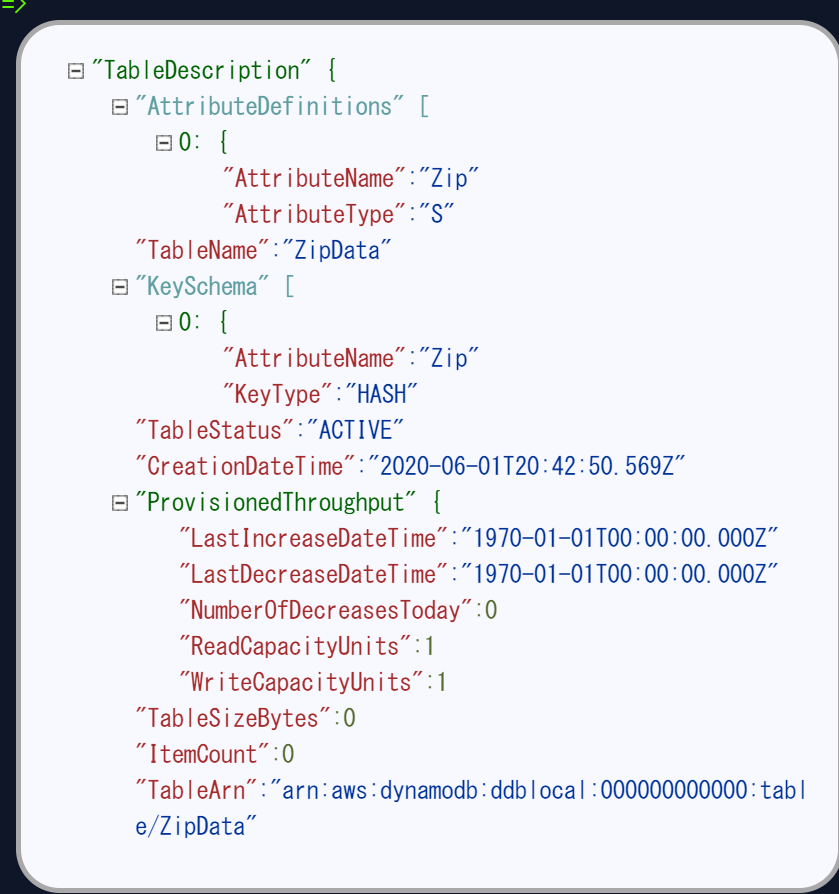
すると画面右側にこんな画面が表示され、テーブルの作成が完了します!

3.データ追加
次は以下のコマンドを入力してデータを作成します。
var params = {
    TableName: 'ZipData',
    Item: {
        Zip: '1000006',
        Data: '東京都千代田区有楽町',
    },
	ReturnValues: 'NONE', // optional (NONE | ALL_OLD)
    ReturnConsumedCapacity: 'NONE', // optional (NONE | TOTAL | INDEXES)
    ReturnItemCollectionMetrics: 'NONE', // optional (NONE | SIZE)
};
docClient.put(params, function(err, data) {
    if (err) ppJson(err); // an error occurred
    else ppJson(data); // successful response
});
4.データ参照
データが追加されているはずなので、以下のコマンドで確認します。
var params = {
    TableName: 'ZipData',
};
docClient.scan(params, function(err, data) {
    if (err) ppJson(err); // an error occurred
    else ppJson(data); // successful response
});
また、これだとデータすべてが返ってきてしまうので、
単体を指定する場合は以下を実行します。
var params = {
    TableName: 'ZipData',
    Key:{
         Zip: '1000006'
    }
};
docClient.get(params, function(err, data){
    if(err){
        console.log(err);
    }else{
        console.log(data.Item.Data);
    }
});
終わりに
今回でDynamoDBがローカルに構築でき、また、データが操作できるようになりました。
次回はAPIからこのデータを操作したいと思います。


