mainframer(gojuno/mainframer)とは
リポジトリのReadmeには下記のように書いてあります。
Tool that allows you to move build process from a local machine to a remote one.
ビルドプロセスをローカルマシーンからリモートマシーンへ移動させるツールです。
更にこう続いています。
Remote machine ought to be much faster than a laptop.
With mainframer you can free up your local machine for better things
— like editing source code in your IDE without lags and freezes, being able to actually use your computer when the build is happening.
リモートマシーンはラップトップよりも高速でなければいけません。
mainframerを使うことでローカルマシンをより重要なことをさせるために開放することができます。
例えばコードの編集をラグやフリーズなしにIDEで行うことを、実際にビルドが行われている時に可能にします。
(和訳には全く自身がありません)
つまり、ビルドは他のマシンにまかせてローカルでもっと重要なことにマシンリソースを使おう的な内容だと理解しています。
mainframerがサポートしているもの
基本的にコマンドラインでできることは全てがサポート可能です。
現状は下記のサンプルアプリケーションが用意されているので、Android以外でも使うことが可能です。
- Gradle
- Gradle Android
- Rust
- Clang
- GCC
- Maven
- Buck
- Go
今回はGradle Androidのサンプルアプリケーションを見ながら、GCEをリモートマシーンとして使う方法を試してみました。
リモートビルドする
GCE(Google Compute Engine)のインスタンスを用意する
こちらの記事を参考にしました。 AndroidアプリケーションをGoogle Compute Engineのインスタンスでビルドする
上記記事を参考にしていただければ特に問題は無いと思うのですが、備忘録も兼ねてこちらでも手順を書いておきたいと思います。
プロジェクトを作成する
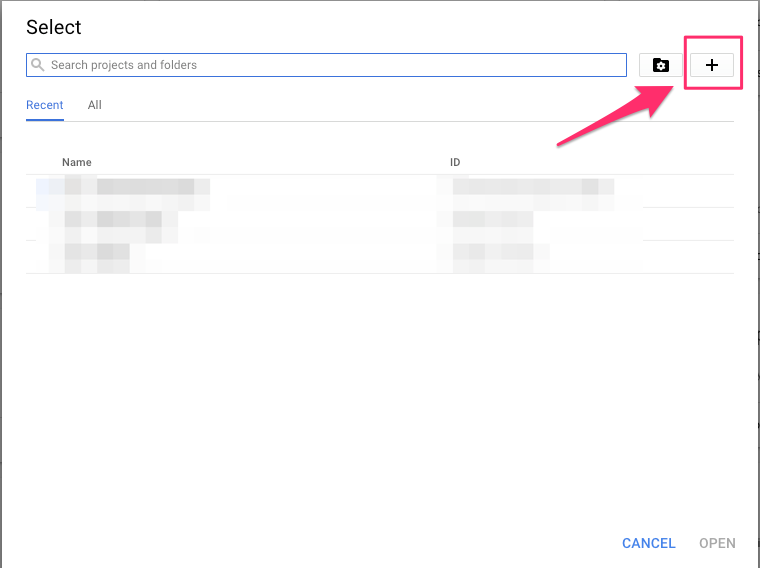
Google Cloud Platformの管理画面を開くとプロジェクトの選択が可能です。
キャプチャでは既にremote-build-androidとうプロジェクトの選択状態になっていますが、ここをクリックすると新しくプロジェクトの作成を行うか、別のプロジェクトを選択するダイアログが開きます。

インスタンスを作成する
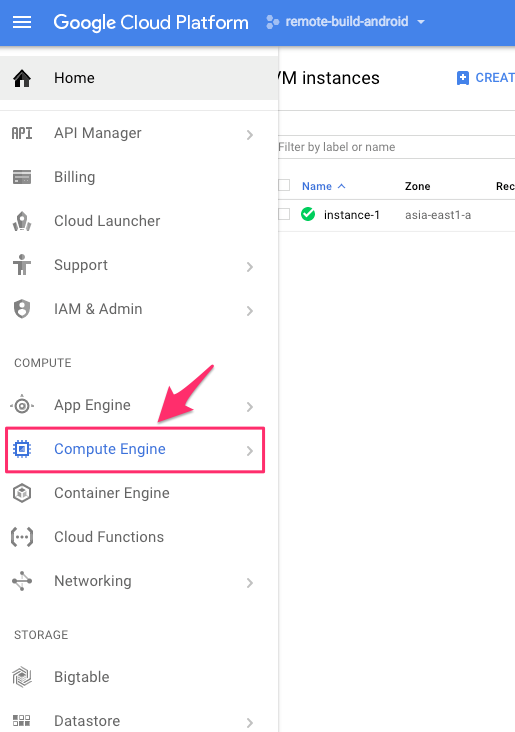
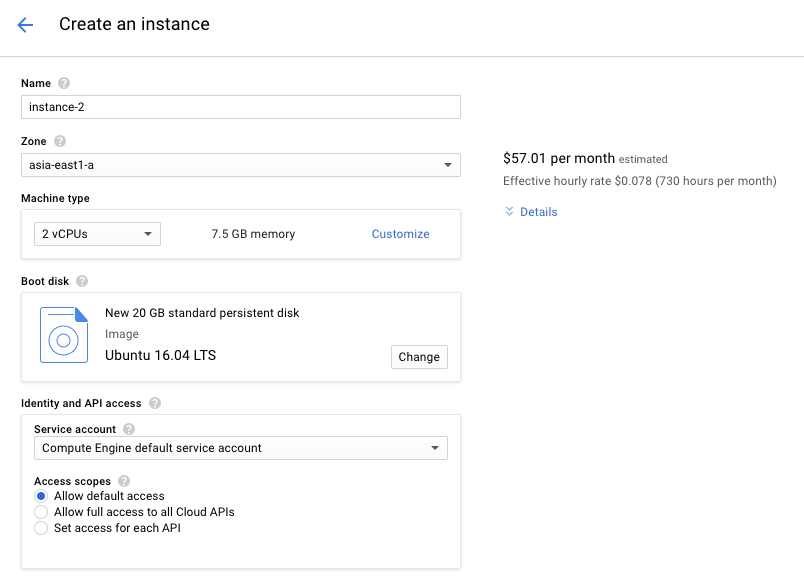
今作ったプロジェクトの中で新しくGCE(Google Compute Engine)のインスタンスを作成します。
ゾーン、マシンタイプ、ディスクなどは参考にした記事と同じにしています。
静的IPを設定する
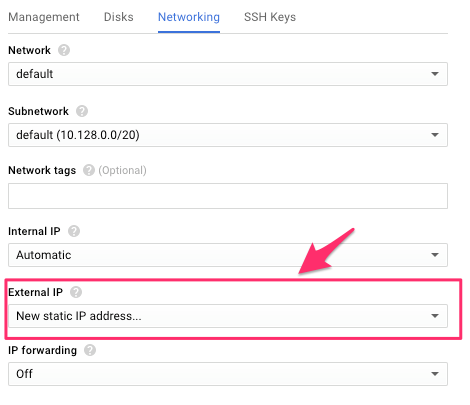
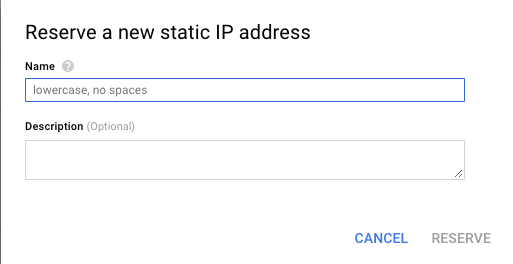
インスタンス作成時の画面で静的IPを使うように設定します。
IP addressっぽいやつが1個目の画面のExternal IPで表示されるようになってると思います。
これは後で使います。
SSHのための公開鍵を登録する
インスタンス作成時に追加することも可能ですが、後から追加する方法で説明します。
Metadataを選択しSSH Keysを選択下画面でEditを押すと鍵の登録ができます。
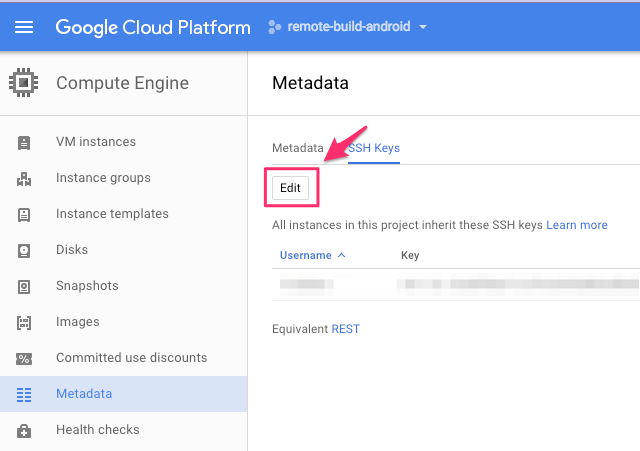
Add itemを押すと新しく入力することができるようになるので、手元で作成した公開鍵を登録します。

公開鍵の作成や登録はこちらの公式ドキュメントを参考にしてください。
Generating a new SSH key-pair
ここまでやるとsshで接続できることが確認できるはずです。
$ssh -i ~/.ssh/my-ssh-key [ssh-keyge時に指定したusername]@[GCEの静的IP]
Androidのビルドが可能な状態にする
先程作ったインスタンスがAndroidのビルドが可能な状態にします。
手順はだいたいここに書いてあります。
Establishing a Build Environment
sshで接続してコマンドを打っていきます。
(このあたり毎回やるのはめんどいので、DockerなりAnsibleなりで用意するのが筋は良いと思います。Google Contener Engine使った方法もためしたい。)
sshでログインしておく。
# 必要になるパッケージをまとめてインストール
$sudo apt-get install -y git-core gnupg flex bison gperf build-essential \
  zip curl zlib1g-dev gcc-multilib g++-multilib libc6-dev-i386 \
  lib32ncurses5-dev x11proto-core-dev libx11-dev lib32z-dev ccache \
  libgl1-mesa-dev libxml2-utils xsltproc unzip

# java8のインストール
$ sudo apt-get update
$ sudo apt-get install openjdk-8-jdk-headless

# Android SDKのインストール
$ wget https://dl.google.com/android/android-sdk_r24.4.1-linux.tgz
$ tar xvf android-sdk_r24.4.1-linux.tgz

# ANDROID_HOMEを設定する
$ vim ~/.bashrc
# If not running interactively, don't do anythingの行よりも上に追記しないとANDROID_HOMEが無いって言われるエラーに見舞われるので、注意が必要です。
# この2行を.bashrcに追加する
export ANDROID_HOME=~/android-sdk-linux
PATH=$PATH:$ANDROID_HOME/tools

# If not running interactively, don't do anything
case $- in
    *i*) ;;
      *) return;;
esac
# サポートライブラリーとかをアップデート
# 数字は `$android list sdk` で確認できます
$ android update sdk -u -t 1,2,3,4,21,23

# ライセンスファイルをコピーしておく
# ローカルの`$ANDROID_HOME/licenses/android-sdk-license`の内容をコピーして貼り付ける感じです
# 参考 http://qiita.com/Nkzn/items/b9a0ddd1345fb78d7d44
$vim $ANDROID_HOME/licenses/android-sdk-license
これでAndroidのビルドができる状態になりました。
localの環境を整える
mainframerを使ったリモートビルドができるようにするためのローカルマシンの設定こちらの手順を見ながら実行していきます。
gojuno/mainframer/SETUP_LOCAL.md
~/.ssh/configに先程作成したリモートマシンへの接続を行う設定を追加する
Host {REMOTE_MACHINE_ALIAS} # 適当に、僕はgcp-remote-buildにしてあります
  User {REMOTE_MACHINE_USERNAME} # ssh key作成時のusernameを記入
  HostName {REMOTE_MACHINE_IP_OR_HOSTNAME} # GCEの静的IPを記入
  Port 22
  IdentityFile ~/.ssh/{SSH_KEY_NAME}
  PreferredAuthentications publickey
  ControlMaster auto
  ControlPath /tmp/%r@%h:%p
  ControlPersist 1h
プロジェクトをリモートビルドに対応させる
mainflamer.shの最新版を下記リンクから取得してプロジェクトのルートに配置します。
https://github.com/gojuno/mainframer/releases/latest
プロジェクトのルートに.mainframerフォルダを作成し、下記のように4つのファイルを作成します。
.mainframer/
├── config
├── ignore
├── localignore
└── remoteignore
# config
# ~/.ssh/configに記入したHost名
remote_machine={REMOTE_MACHINE_ALIAS}
# ignore
# .gradle folder contains machine specific loc and bin files, no need to sync it between machines.
.gradle

# Synching .git or other VCS folders is very bad idea, they are usually very heavy and not required for the build.
.git

# Synching IDE specific folders is really not needed for remote build.
/.idea

# Synching local.properties usually very bad idea because they contain machine specific properties like paths to SDKs and so on.
/local.properties

# Syncing captures from Android Studio is usually not required.
/captures
# localignore
# Usually you don't need to sync build folder to remote machine since it will have one as result of build.
build
# remoteignore
# Usually you don't need to sync sources back from remote to local machine.
# Btw, this syntax supports multimodule Gradle projects.
src
設定はこちらのサンプル通りにやりました。
https://github.com/gojuno/mainframer/tree/development/samples/gradle-android/.mainframer
ここまでやるとコマンドでのリモートビルドができるようになっているはずです。
$bash ./mainframer.sh ./gradlew assembleDebug
Android Studioからリモートビルドを使えるようにする
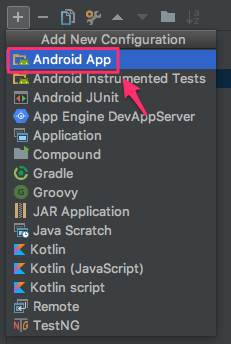
新しいConfigrationを追加するので下記の部分をクリックして、Edit Configrationsを選択します。

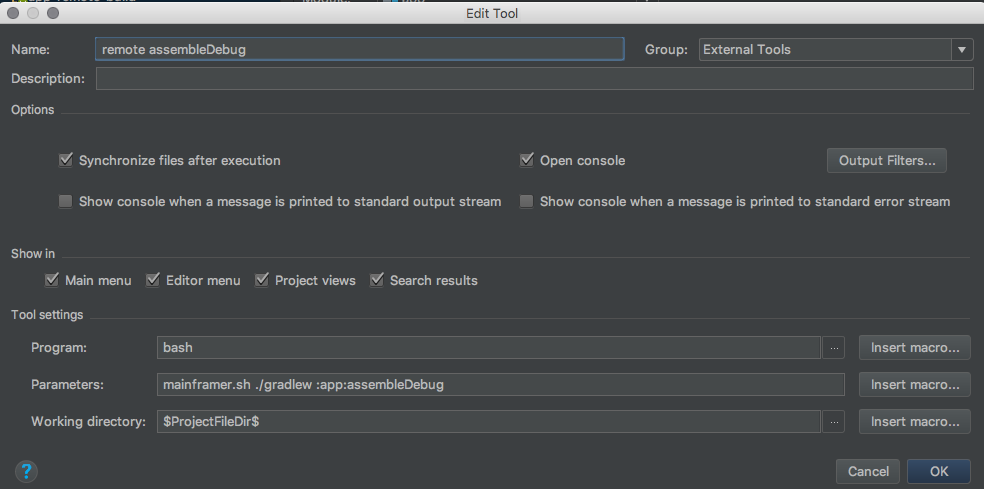
Nameはremote-buildとか分かるように、Moduleはappを選択、もともと書かれているGradle-aware Makeを削除して新しく次のキャプチャの内容を追加します。
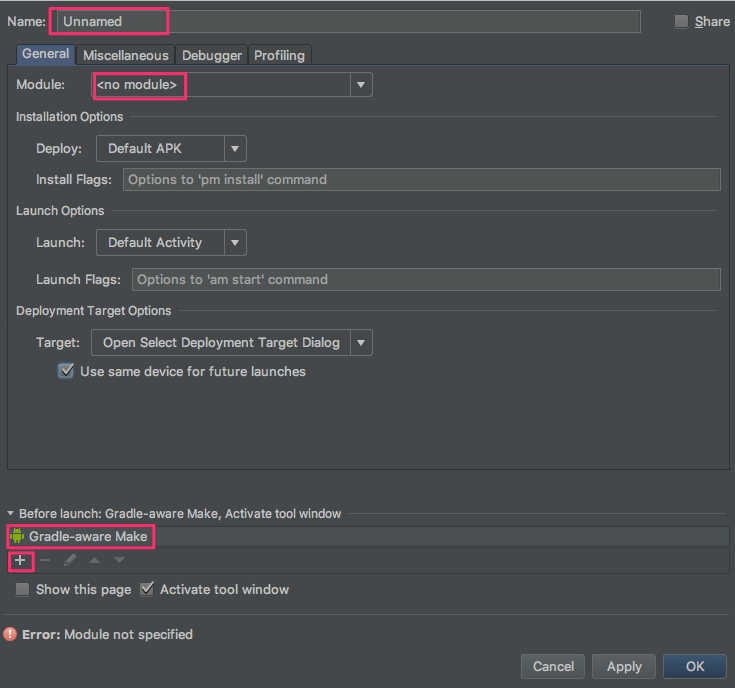
これでAndroidStudio上からリモートビルドを使って端末で実行できるようになります。
さいごに
技術的にはよくある、sshとrsyncを使っているものですが、gradleのコマンドがそのまま使える感じになるのでおすすめです。
自分はまだできていませんが、Dockerを使って用意する場合にはこちらの記事が参考になると思います。
Speed-up Android builds with Mainframer (Docker container in a powerful remote machine)
最後のAndroidStudioの設定はintellij向けのプラグインもあるので、そちらを使うのもありかもしれません。
elpassion/mainframer-intellij-plugin
mainflamerの参考URL
https://github.com/gojuno/mainframer/tree/development/samples/gradle-android
https://github.com/gojuno/mainframer/blob/development/docs/SETUP_LOCAL.md
https://github.com/gojuno/mainframer/blob/development/docs/SETUP_REMOTE.md
https://github.com/gojuno/mainframer/blob/development/docs/CONFIGURATION.md
